


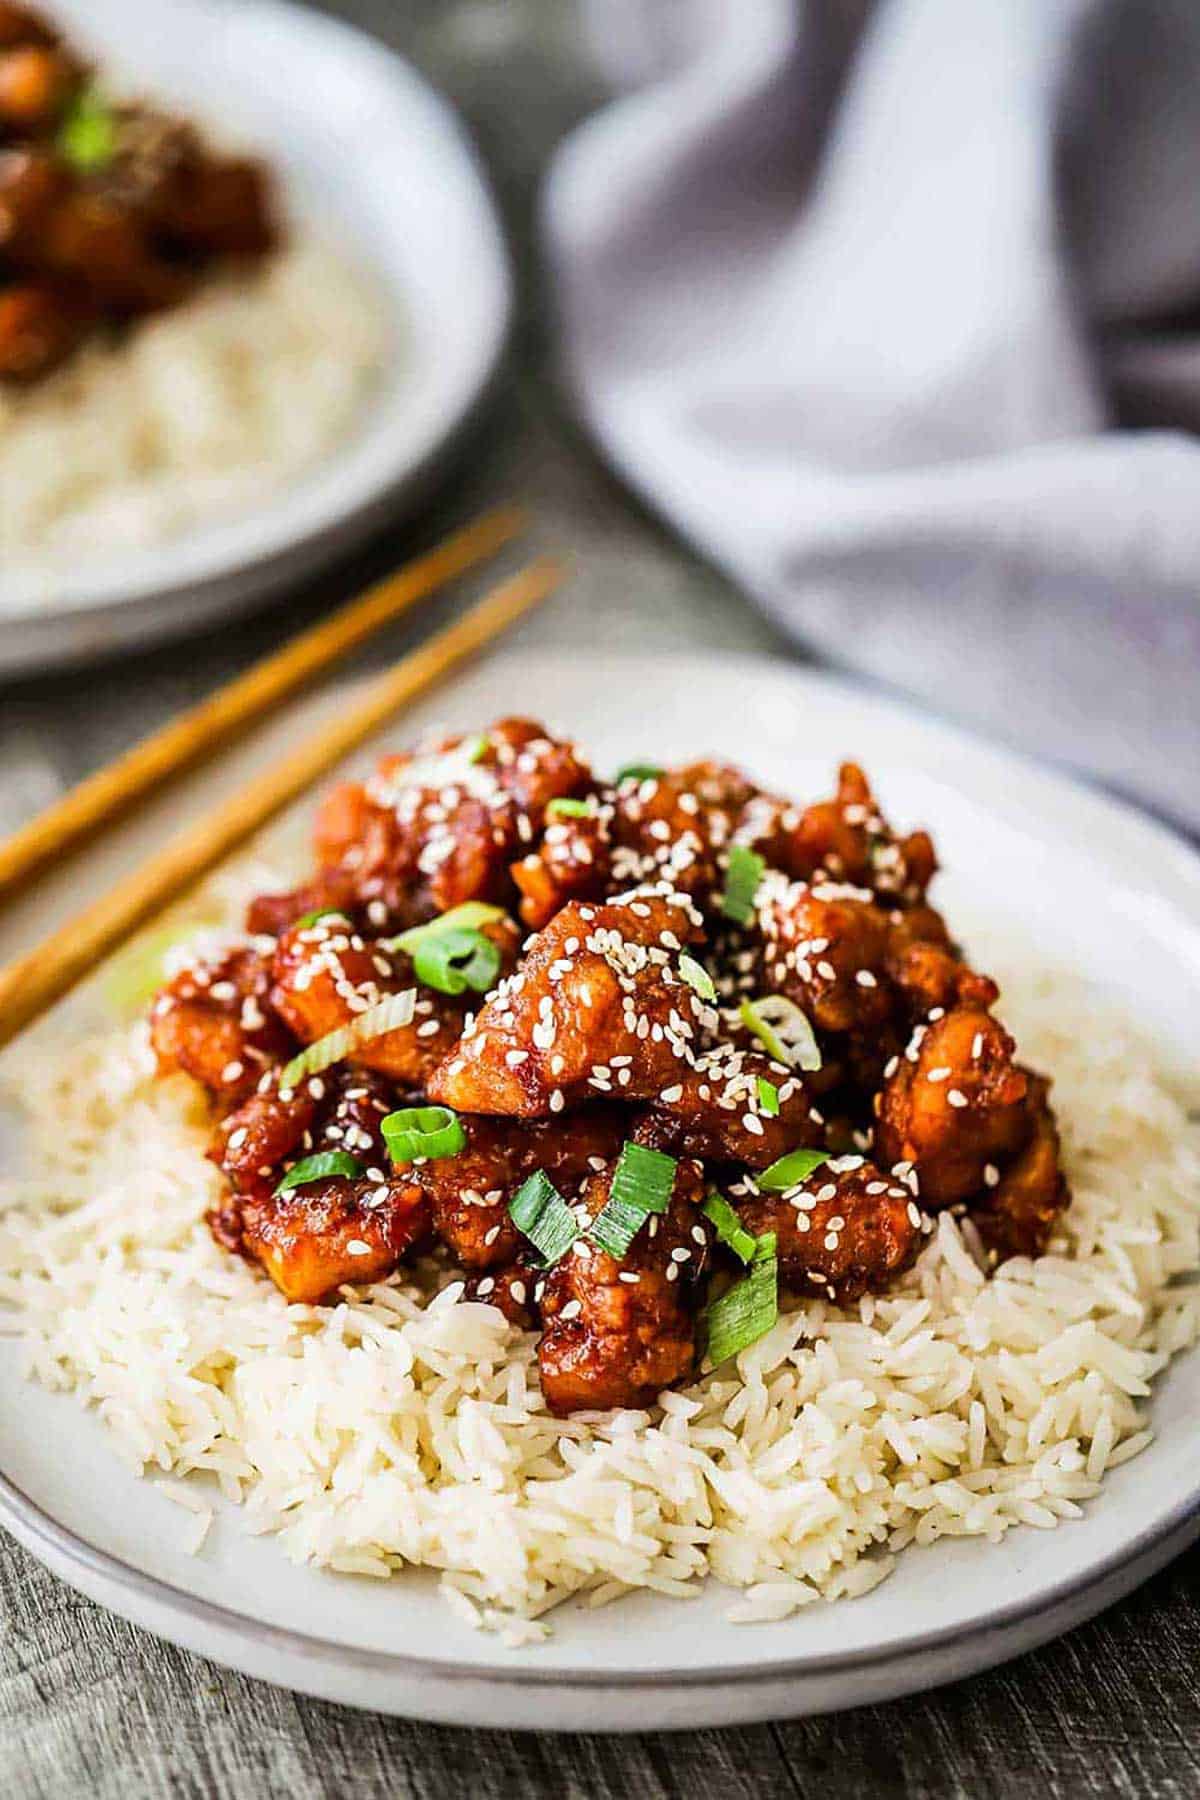
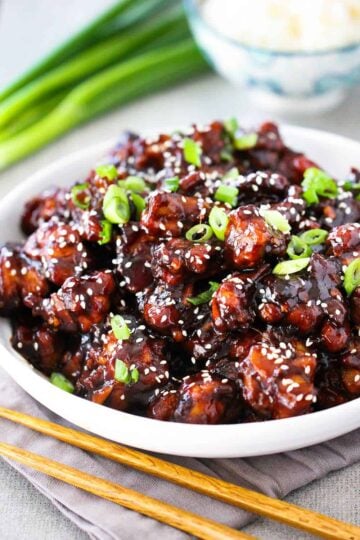
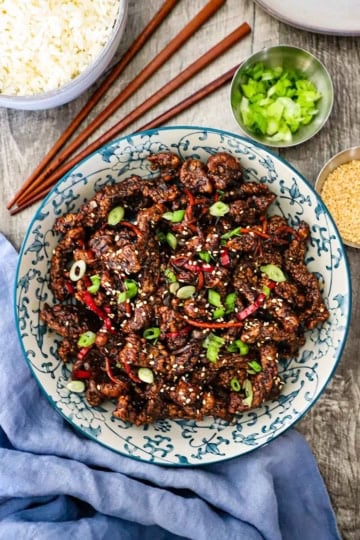
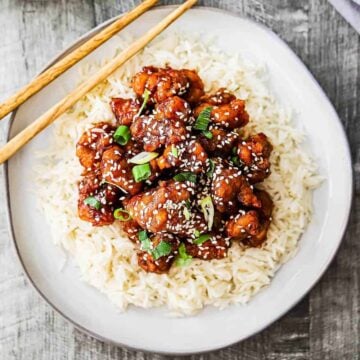
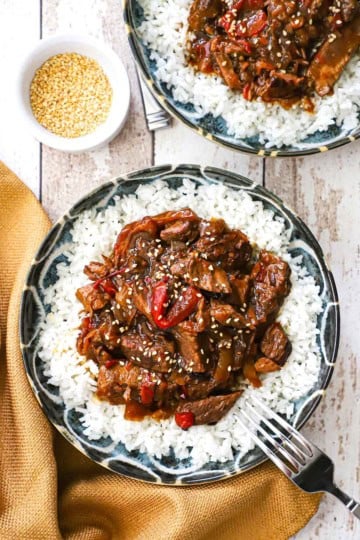
Skip the takeout and treat yourself to this homemade sesame chicken, featuring tender, crispy chicken thighs tossed in a luscious honey-soy glaze infused with ginger and garlic. This recipe perfectly balances sweet and savory flavors with a hint of toasted sesame, creating a restaurant-quality meal right in your own kitchen. Serve it over a bed of fluffy white rice and top with fresh scallions for the ultimate comfort food experience.
Jump to:
🍛 The Ingredients
This recipe relies on a perfect harmony of savory pantry staples, sweet glazes, and fresh aromatics to achieve its signature depth of flavor and irresistible crunch. Find ingredient notes (including substitutions and variations) below.
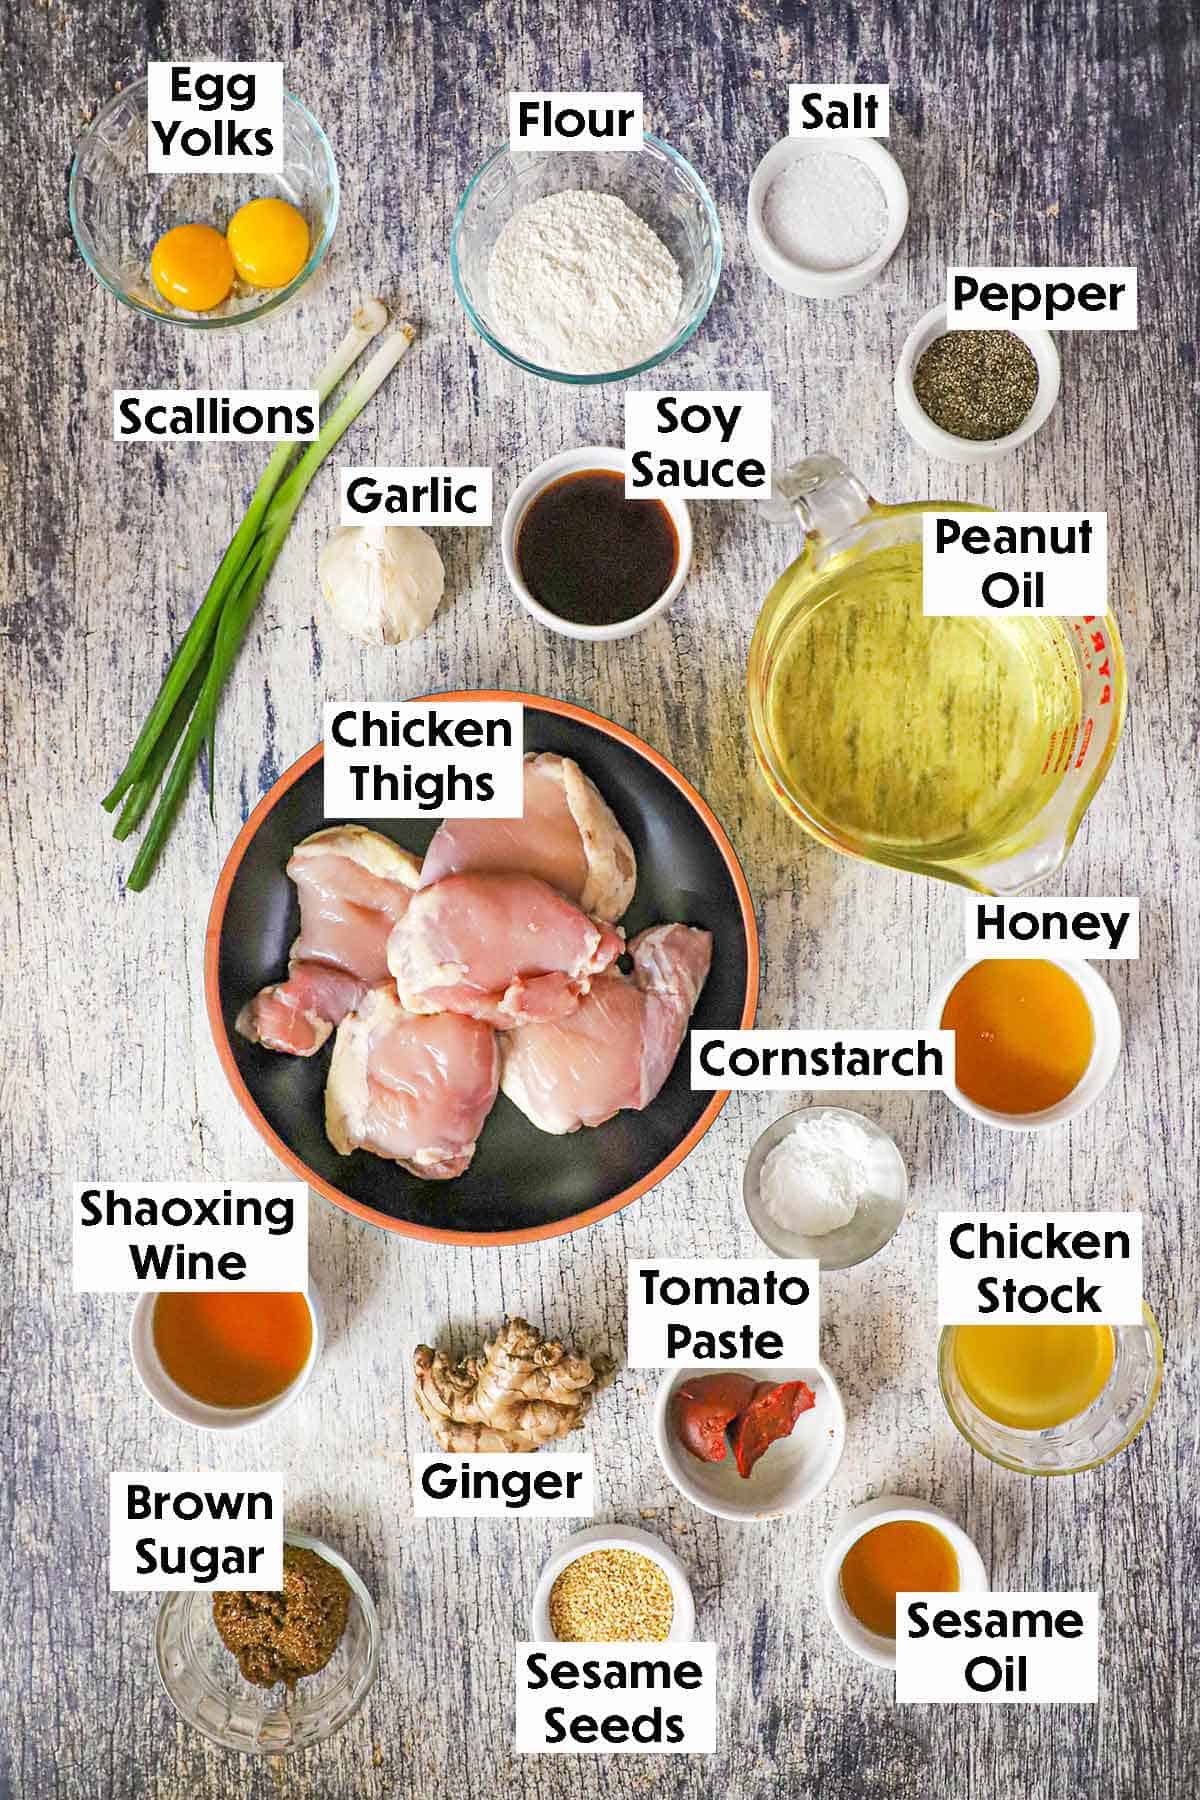
📝 Ingredient Notes and Substitutions
- Chicken Thighs: Using boneless, skinless thighs ensures the meat stays juicy and tender during frying, but you can substitute with chicken breasts if you prefer a leaner cut.
- Chinese Cooking Wine (Shaoxing): This adds a traditional, nutty depth of flavor; if you can’t find it, dry sherry is the best substitute, or you can use extra chicken stock for an alcohol-free version.
- Peanut Oil: This is ideal for frying due to its high smoke point, but any neutral oil with a high smoke point—such as canola, vegetable, or grapeseed oil—will work perfectly.
- Honey and Brown Sugar: This combination creates the classic sticky texture and rich sweetness; if necessary, you can use all of one or the other, or swap them for agave nectar.
- Cornstarch and Flour: Using a mix of both for the breading is the secret to achieving a coating that is both light and exceptionally crispy.
- Soy Sauce: To better control the salt levels, use low-sodium soy sauce, or swap it for tamari or liquid aminos if you need a gluten-free alternative.
Refer to the recipe card (with video) below for a full list of ingredients and measurements.
🔥 Tips and Tricks for Authentic Sesame Chicken
- Don’t Crowd the Pan: When frying the chicken, work in batches. Adding too much chicken at once will drop the oil temperature, resulting in soggy breading rather than a crisp, golden crust.
- The “Slurry” Secret: Always whisk your cornstarch into the cold chicken stock or sauce mixture before adding it to the heat. This prevents lumps and ensures a smooth, glossy glaze that clings perfectly to the chicken.
- Uniform Cutting: Cut your chicken thighs into uniform, bite-sized pieces. This ensures they all cook through at the same rate, preventing some pieces from drying out while others are undercooked.
- Fresh Aromatics are Key: Use fresh ginger and garlic rather than the powdered versions. Sautéing them in the oil for just 30 seconds before adding the sauce liquids unlocks a depth of flavor that makes the dish pop.
- Toast Your Sesame Seeds: If your sesame seeds aren’t already toasted, toss them in a dry pan over medium heat for 2–3 minutes until they are fragrant and golden. This small step significantly enhances the nutty aroma of the final dish.
- Serve Immediately: To maintain the perfect contrast between the crispy chicken and the sticky sauce, toss the chicken in the glaze right before serving. The longer it sits in the sauce, the softer the breading will become.
How To Make Sesame Chicken
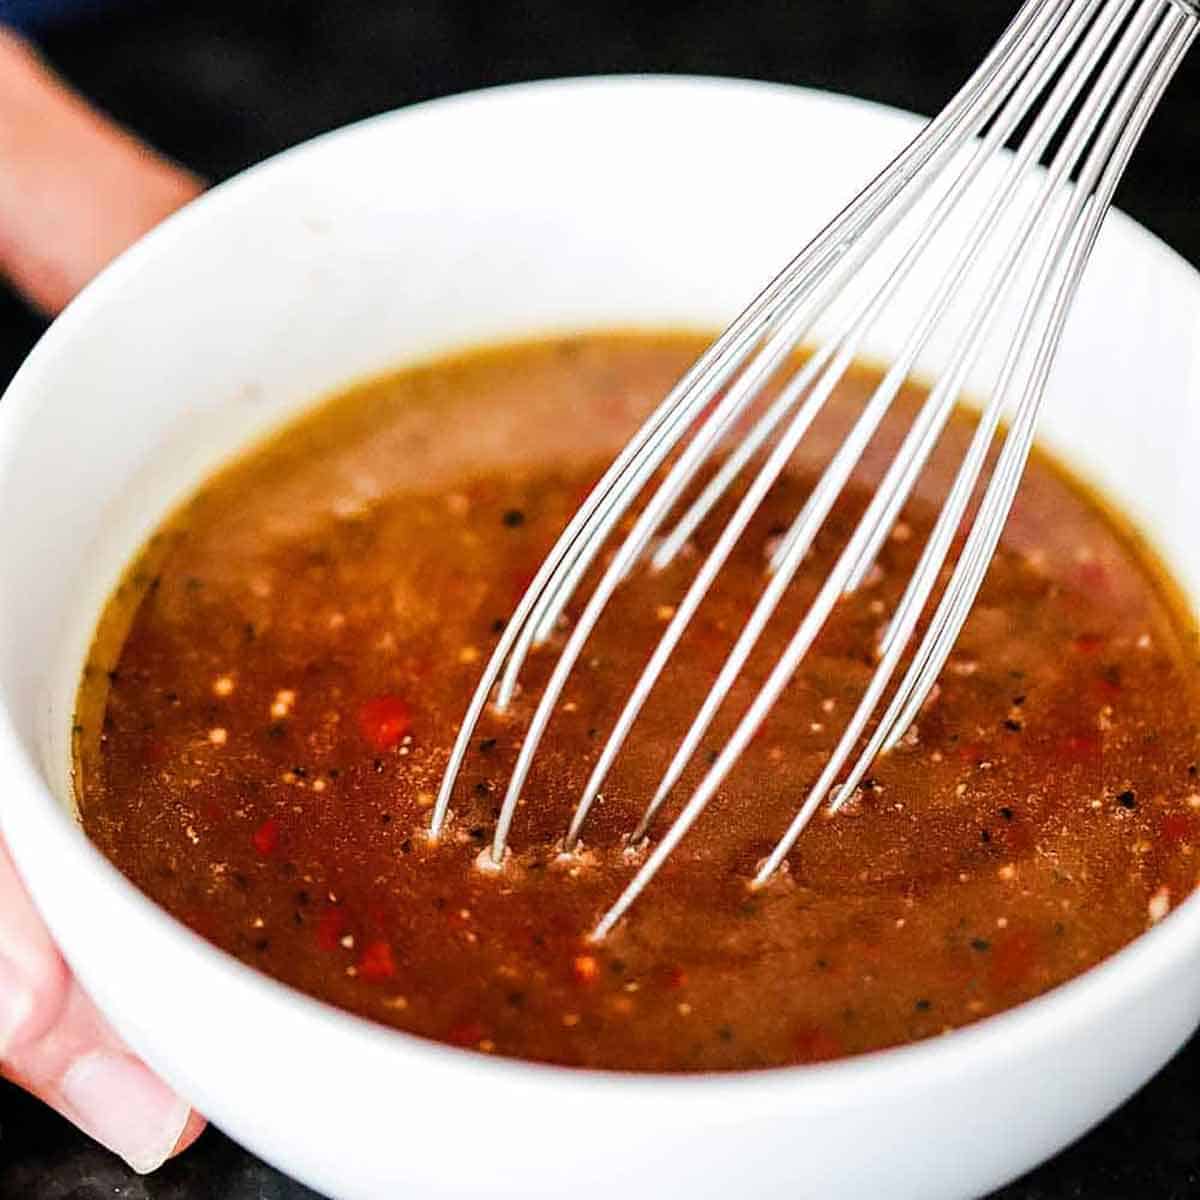
- Step 1: Place all of the sauce ingredients into a small bowl and whisk to combine.

- Step 2: Coat the chicken with a mixture of cornstarch, flour, and a mixture of egg yolks, soy sauce, Chinese wine, salt, and pepper.

- Step 3: Working in batches, deep-fry the coated chicken in hot oil until golden and crispy.

- Step 4: Remove the oil and then stir-fry the garlic and ginger in peanut oil over high heat for about 1 to 2 minutes

- Step 5: Add the sauce and stir-fry until completely coated.

- Step 6: Serve at once over steamed white rice and garnished with toasted sesame seeds and chopped scallions
Expert Tip: Let the Breading Set
For a professional-grade crust that won’t flake off in the pan, let your breaded chicken pieces rest on a wire rack for 10 to 15 minutes before frying. This brief resting period allows the moisture from the egg and chicken to hydrate the flour and cornstarch, creating a “glue” that ensures the coating adheres perfectly to the meat and stays ultra-crispy even after it’s tossed in the sauce.
🍽️ How To Serve Sesame Chicken
- Over a Fluffy Base: Serve the chicken immediately over a generous bed of steamed white rice or jasmine rice to soak up the extra honey-soy glaze.
- The Signature Garnish: Sprinkle a liberal amount of toasted sesame seeds and thinly sliced scallions over the top just before serving for a pop of color and a fresh, crunchy finish.
- Add a Green Vegetable: For a balanced plate, pair the dish with roasted broccoli florets, stir-fried snap peas, or sautéed bok choy.
- Low-Carb Options: If you want to skip the white rice, this chicken tastes excellent served over cauliflower rice or tucked into crisp lettuce cups.
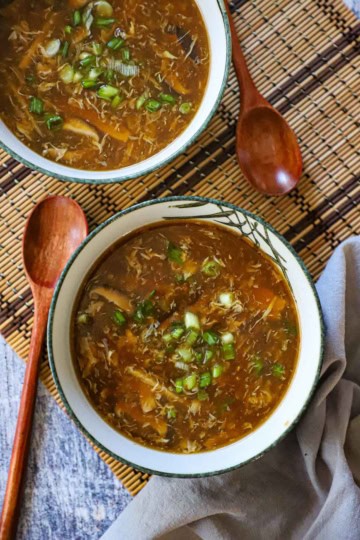
- Family Style: Transfer the chicken to a large warmed platter and serve it alongside other favorite dishes like homemade egg rolls or authentic hot and sour soup for a full restaurant-style spread.
- Drizzle Extra Sauce: If you have leftover glaze in the pan, drizzle it directly over the rice so every bite is packed with flavor.
🙋🏽♂️ Frequently Asked Questions
You can prep the sauce and chop the aromatics in advance, but for the best texture, it is recommended to fry and toss the protein right before serving to ensure the coating stays crisp.
Keep any remaining portions in an airtight container in the refrigerator for up to three days. To regain the signature crunch, reheat the pieces in an air fryer or oven at 350°F rather than using the microwave.
While frying provides the most authentic texture, you can toss the coated pieces in a bit of oil and bake them at 400°F (200°C) on a parchment-lined tray until golden and cooked through.
As written, this recipe is mild and family-friendly. If you prefer some heat, feel free to add red pepper flakes or a teaspoon of chili paste to the aromatics while sautéing.
Simply substitute the soy sauce with tamari or liquid aminos and ensure your flour blend is a certified gluten-free 1:1 replacement.

🥡 More Chinese Takeout Classic Recipes

Ready to make the best take-out dish in town…at home? Go for it!
And when you do, be sure to take a photo of it, post it on Instagram, and tag @HowToFeedaLoon and hashtag @HowToFeedaLoon!
Homemade Sesame Chicken
Video
Equipment
- Wok, or large sturdy skillet
Ingredients
For the Sauce
- 1 tablespoon sesame oil
- 2 tablespoon honey
- 2 tablespoon Chinese cooking wine Shaoxing
- 2 tablespoon tomato paste
- ¼ cup brown sugar light
- 3 tablespoon soy sauce
- ¼ cup chicken stock or broth
- 2 teaspoon corn starch
For the Chicken
- peanut oil for frying, about 4 cups
- 1½ lbs chicken thighs boneless, skinless, cut into bite-sized pieces
- 2 egg yolks
- 1 teaspoon soy sauce
- 1 teaspoon Chinese cooking wine Shaoxing
- ½ teaspoon salt
- ½ teaspoon black pepper
- ⅓ cup corn starch
- ⅓ cup all-purpose flour
For Stir-Frying
- 3 tablespoon peanut oil
- 1 teaspoon garlic minced
- 1 teaspoon ginger fresh, chopped
For Serving
- 2 tablespoon sesame seeds
- 4 scallions chopped
- Steamed rice
Instructions
Make the Sauce
- Place all of the sauce ingredients in a medium-sized bowl and whisk until the corn starch has dissolved. Set aside.1 tablespoon sesame oil, 2 tablespoon honey, 2 tablespoon Chinese cooking wine, 2 tablespoon tomato paste, ¼ cup brown sugar, 3 tablespoon soy sauce, ¼ cup chicken stock, 2 teaspoon corn starch
Fry the Chicken
- Heat the peanut oil in the wok to 365°F. A candy thermometer works well.peanut oil
- Meanwhile, place the chicken pieces into a large bowl.1½ lbs chicken thighs
- In a small bowl, add the 2 egg yolks, soy sauce, wine, salt, and pepper. Whisk until fully combined.2 egg yolks, 1 teaspoon soy sauce, 1 teaspoon Chinese cooking wine, ½ teaspoon salt, ½ teaspoon black pepper
- Add the corn starch, flour, and egg yolk mixture to the chicken. Use a large wooden spoon to stir and fully coat the chicken. There may still be some flour and corn starch at the bottom of the bowl; this is okay.⅓ cup corn starch, ⅓ cup all-purpose flour
- Working in a couple of batches, carefully add the chicken to the hot oil, shaking off excess flour before dropping it in. Use a spider, or metal tongs to move the chicken around in the oil, to prevent the pieces from sticking to each other. Fry until golden and cooked through, about 2 to 3 minutes. Remove from the oil and place on a platter lined with paper towels.
Finish Off the Dish
- After the oil has cooled somewhat, safely discard it. Wipe the wok out with a paper towel.
- Heat the oil over medium-high heat. Add the garlic and ginger and stir-fry for about 30 seconds, careful to not burn the garlic.3 tablespoon peanut oil, 1 teaspoon garlic, 1 teaspoon ginger
- Pour in the sauce and stir frequently until slightly thickened, about 2 to 4 minutes.
- Add the fried chicken and stir to coat and heat through, about 2 more minutes.
- Remove from heat and stir in 1 tablespoon more of sesame oil.
- Serve at once with steamed rice and garnished with sesame seeds and chopped scallions.2 tablespoon sesame seeds, Steamed rice, 4 scallions

Susan says
Looking forward to making this. The printed recipe for the sauce does not list the chicken stock. I like the new format for the video.
Kris Longwell says
Thank you so much, Susan! We updated the recipe to include the stock. Thanks so much for the heads up and please let us know if you make the dish! We think you’ll love it! Best, Kris & Wesley
Cathy Boenig says
I made the sesame chicken! OMG! I love your recipes. Thanks again for another great recipe!
Vivian says
This looks delicious!
Kris Longwell says
Thank you, Vivian!! We really love this sesame so much! We hope you give it a try and if you do, be sure to let us know what you think! All the best, Kris & Wesley
Tarre says
THANK YOU! There are no peppers in this! With the onslaught of cayenne or other hot peppers in literally everything we eat nowadays, and it seems to be getting worse … I’ve develped an extreme sensitivity to them. It started with cayenne, now even mild bells make my hair fall out. 🙁 Thank you for this beautiful recipe, I’ll make it often. Yum.
Kris Longwell says
Hi Tarre! Sorry for the delayed response! We are SO THRILLED you love the looks of this recipe!! It’s not spicy at all but still loaded with so much flavor! Please let us know when you make the dish and what you think!! All the very best, Kris & Wesley