• About Us
  • Recipe Index
    • Appetizers
    • Asian
    • Breads and Doughs
    • Cajun / Creole / Louisiana
    • Breakfast / Brunch
    • Comfort Food
    • Delectable Desserts
    • Entrees / Mains
    • Instant Pot
    • Italian
    • Pizza
    • Rubs, Spices and Sauces
    • Soups & Salads
    • Sides
    • Seafood
    • Southern
    • Mexican / Tex-Mex / Cal-Mex
    • Thanksgiving
    • Vegetarian
  • Videos
    • Recipe Videos
    • Web Stories
  • Work With Us
  • Contact
  • **Premium Access**
  • Recipes
menu icon
go to homepage
  • Thanksgiving
  • Recipes
  • About Us
  • Work With Us
  • Premium
subscribe
search icon
Homepage link
  • Thanksgiving
  • Recipes
  • About Us
  • Work With Us
  • Premium
×
Home » Recipe Index

Cilantro Lime Rice

June 30, 2020 by Kris Longwell 12 Comments

An overhead view of a large white bowl filled with Cilantro Lime Rice next to scallions and a bunch of cilantro, with a silver spoon in the bowl.

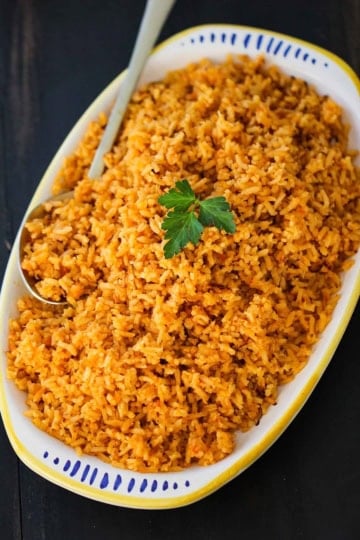
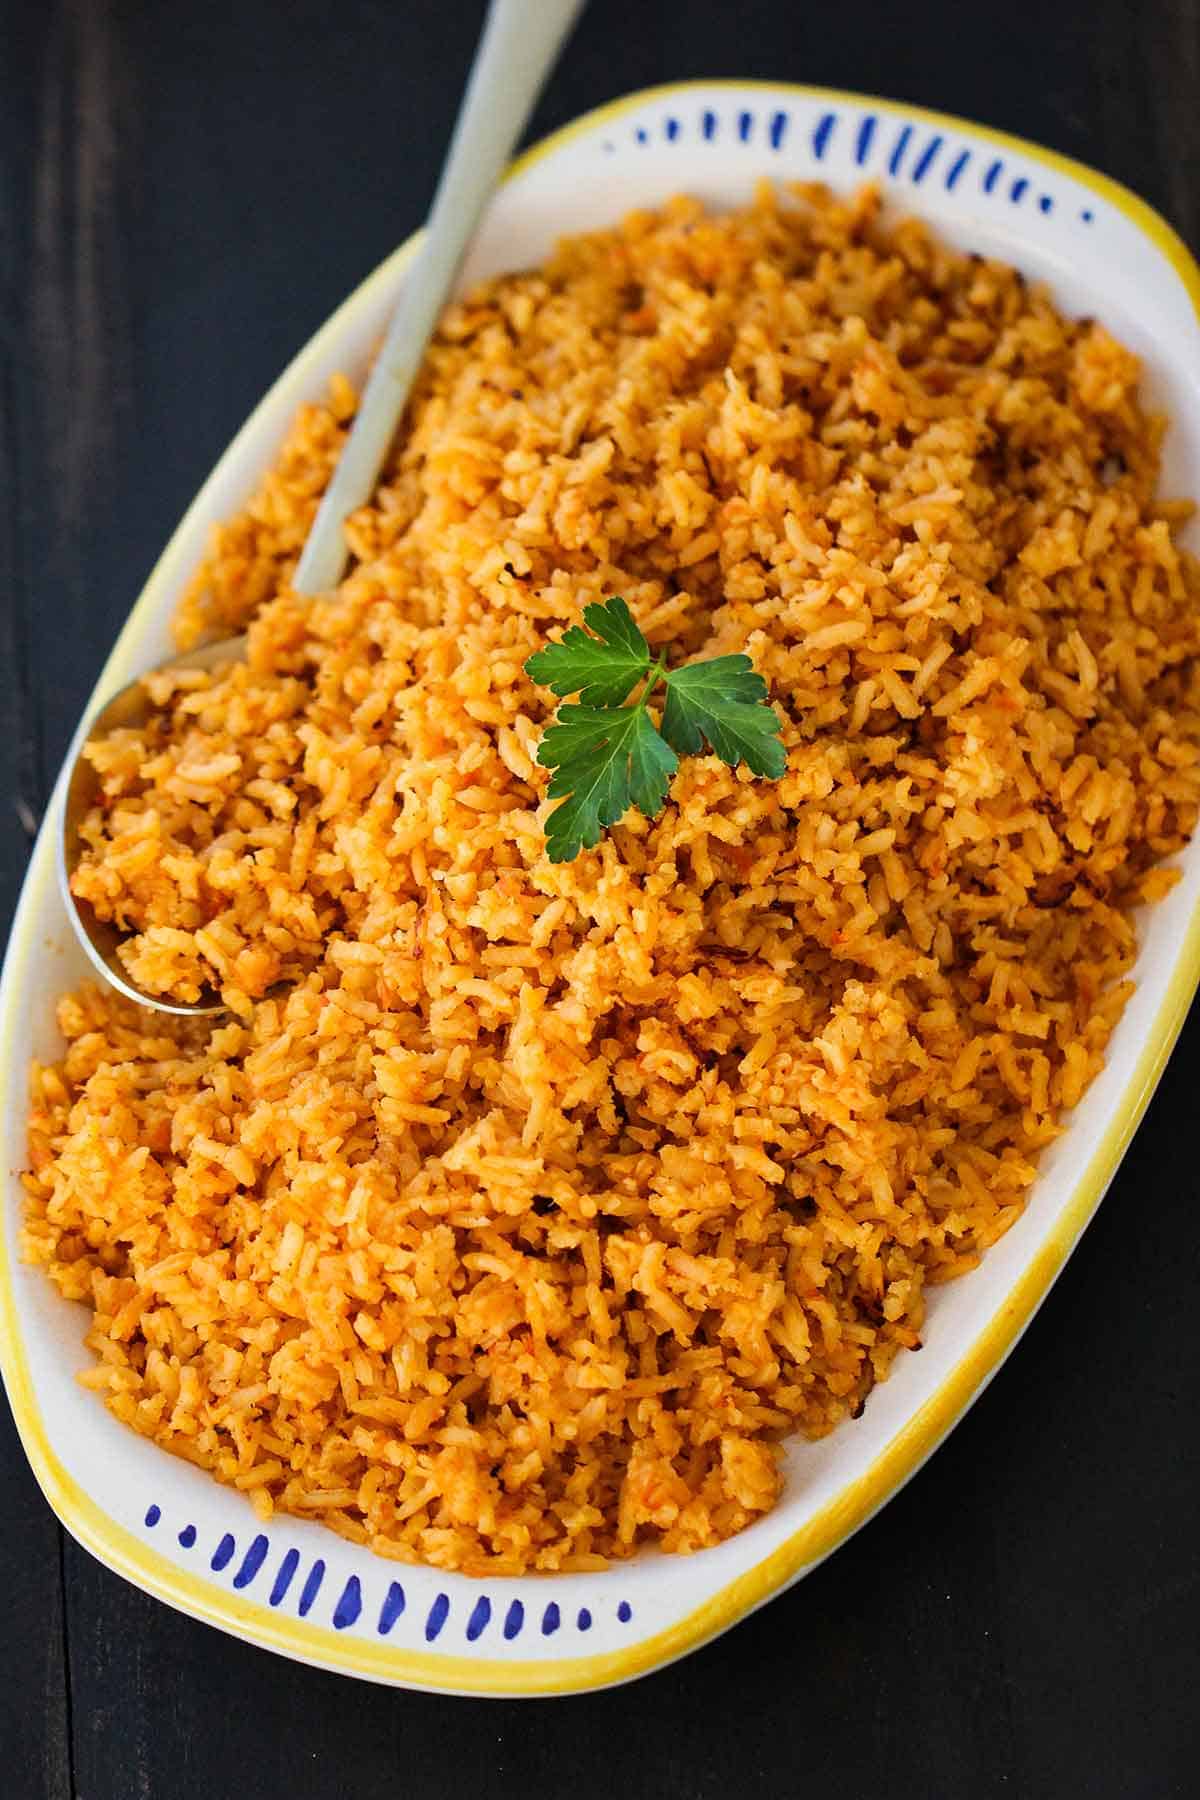
Chipitole® is a fast-food chain in North America that specializes in Mexican cuisine.  This is very similar to their signature rice dish.

If you’re looking for the perfect side dish for Taco Tuesday, or your next Mexican-themed dinner party, or just a healthy dish to snack on, this is it!  You will be amazed at how simple this incredible side is to prepare at home.  And it comes together in a snap!

VIDEO ALERT: Be sure to check out the video for this recipe in the recipe card.  If you like the video, subscribe to our YouTube Channel!

An overhead view of a large white bowl filled with Cilantro Lime Rice next to scallions and a bunch of cilantro, with a silver spoon in the bowl.

HOW TO MAKE CILANTRO LIME RICE

If you’re looking for a Chipotle Copy Cat Cilantro Lime recipe, we can only say…here it is! But, we actually think it’s even better!

This recipe really is foolproof and can be made in advance and just reheated before serving time!

And the rice is actually a lot of fun to prepare.

HOW TO MAKE PERFECTLY STEAMED RICE

Obviously, to make this dish be the best it can be, you need to prepare the rice perfectly.

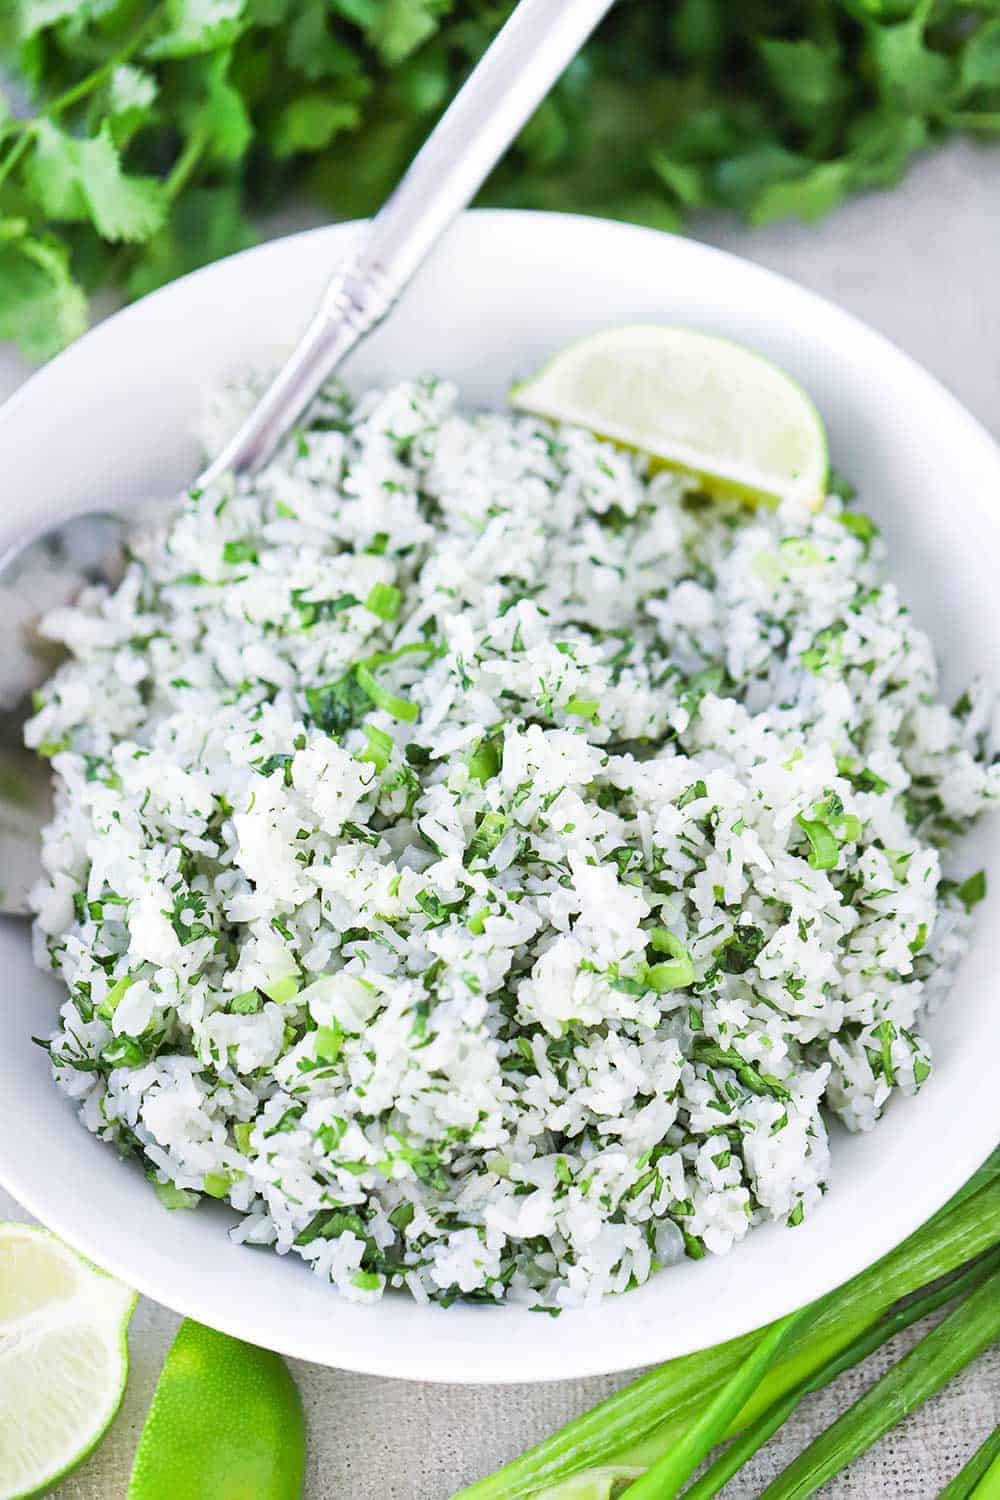
There are many grains of rice, but we love going with Jasmine rice for this dish.

It’s slightly sticky and has a mild fragrance to it that is matched beautifully against the lime and cilantro. Basmati rice and even long-grain white rice will work well, too.

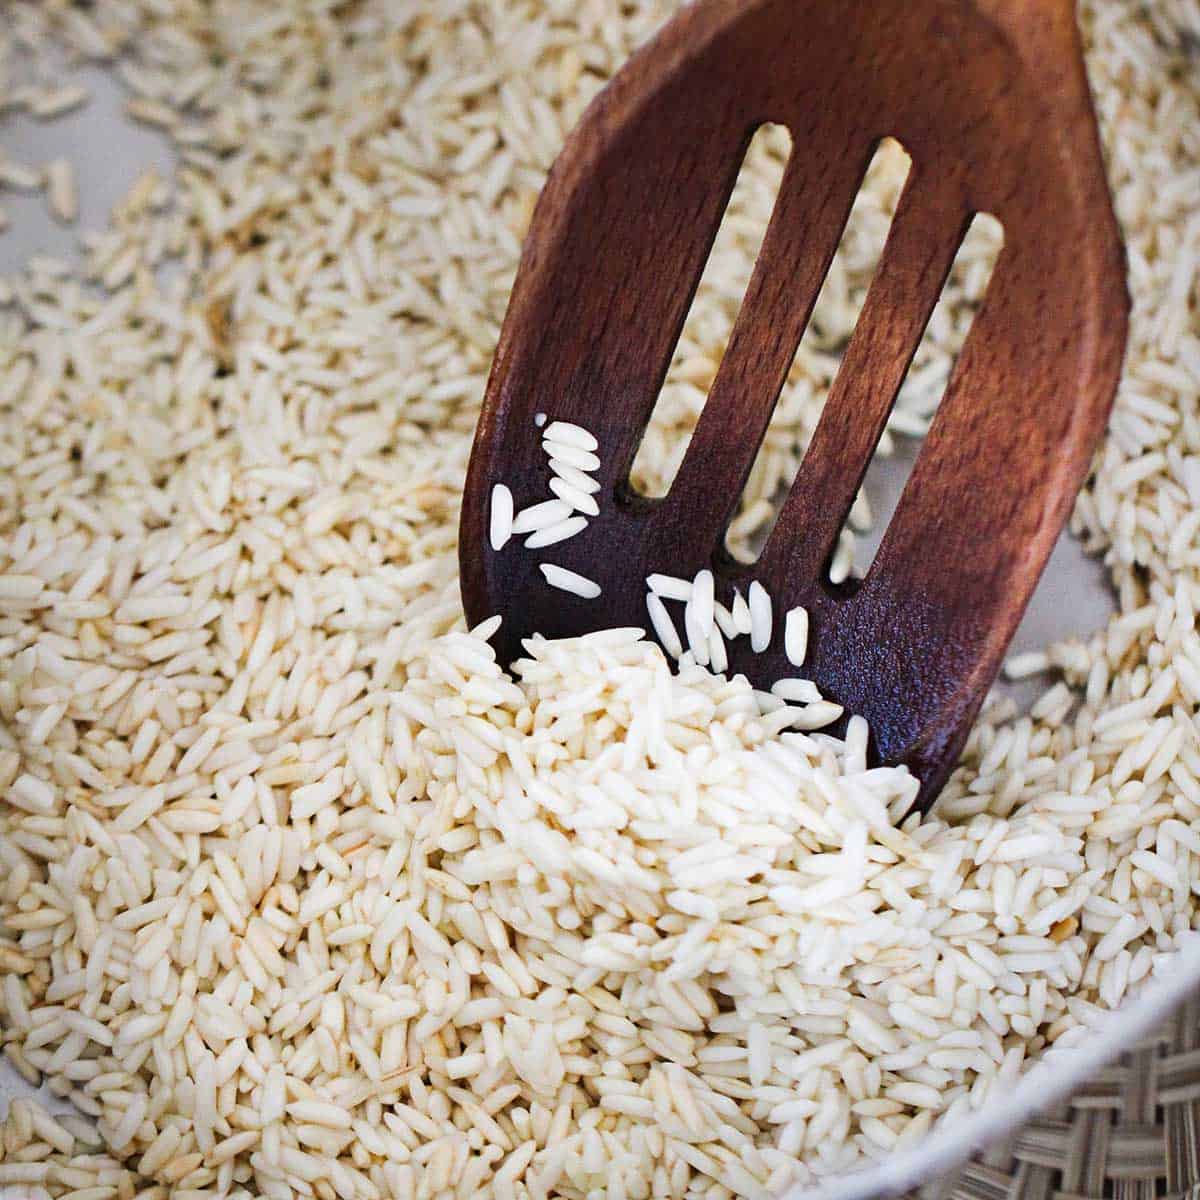
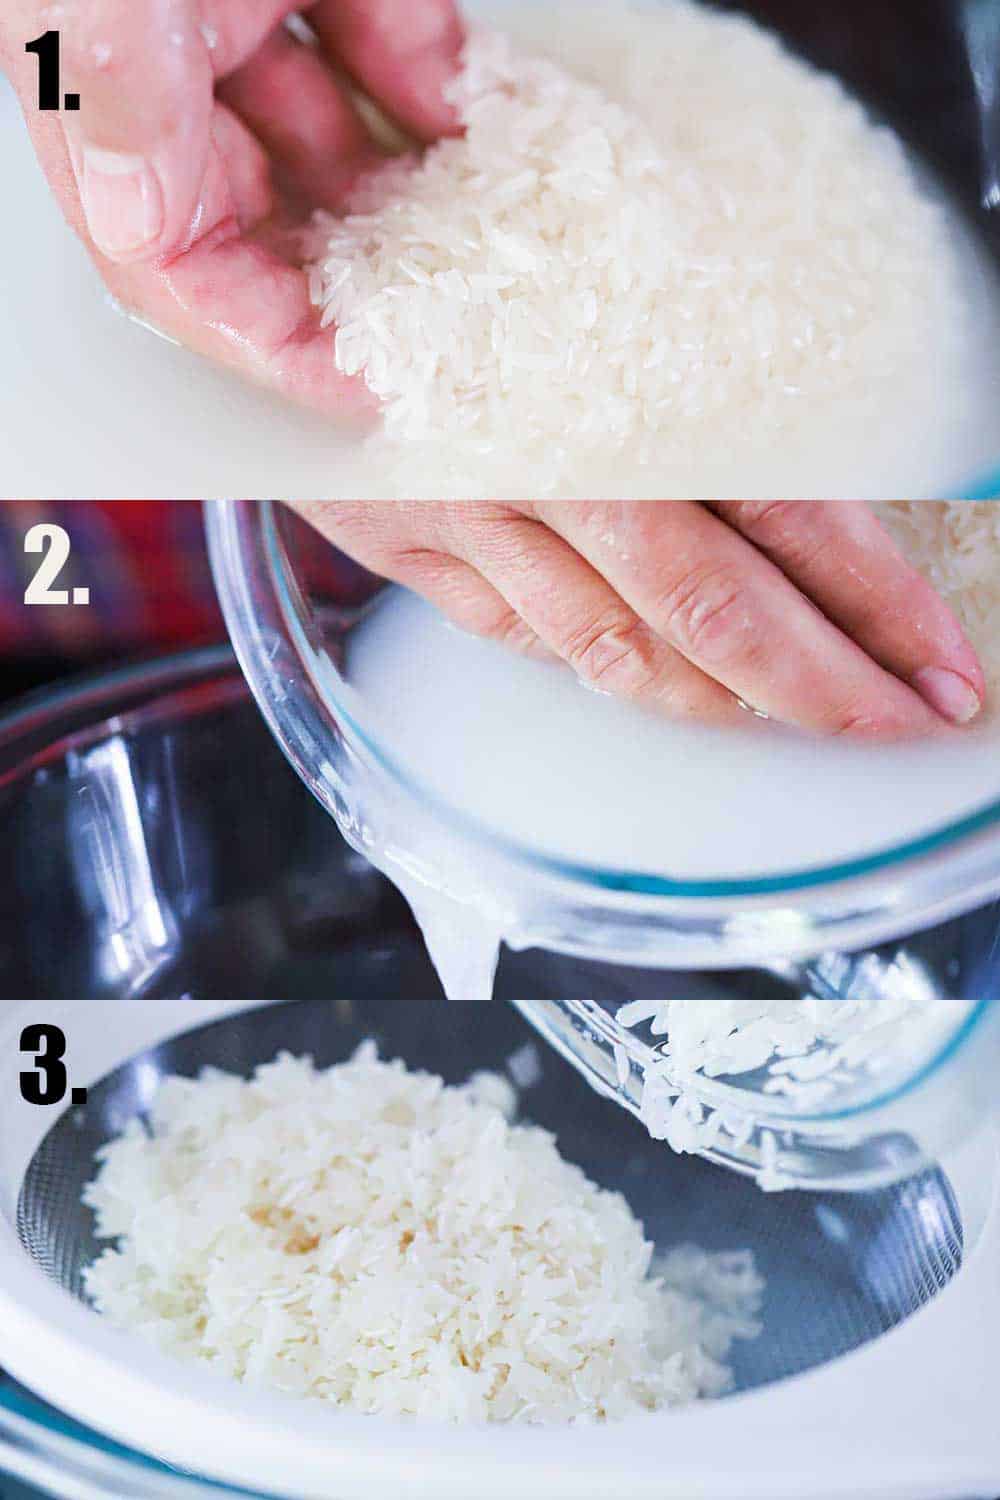
EXPERT TIP: We follow the 3 rinse process for preparing our rice. Simply add 1 cup of rice to a bowl and cover it with water. Swirl the rice around for a minute or so. This helps to remove starch. Use one hand to hold back the rice and use your other hand to pour the water out of the bowl and repeat this process two more times. The last time, allow the rice to sit in the water for 10 to 30 minutes, and then completely drain. Your rice is ready to start cooking!

3 stacked photos: Top is a hand swirling Jasmine rice in a bowl of water, middle shot is a hand holding back the rice as the water is poured from the bowl, and the bottom is the rice in a fine-mesh sieve over a bowl filled with the rice water.

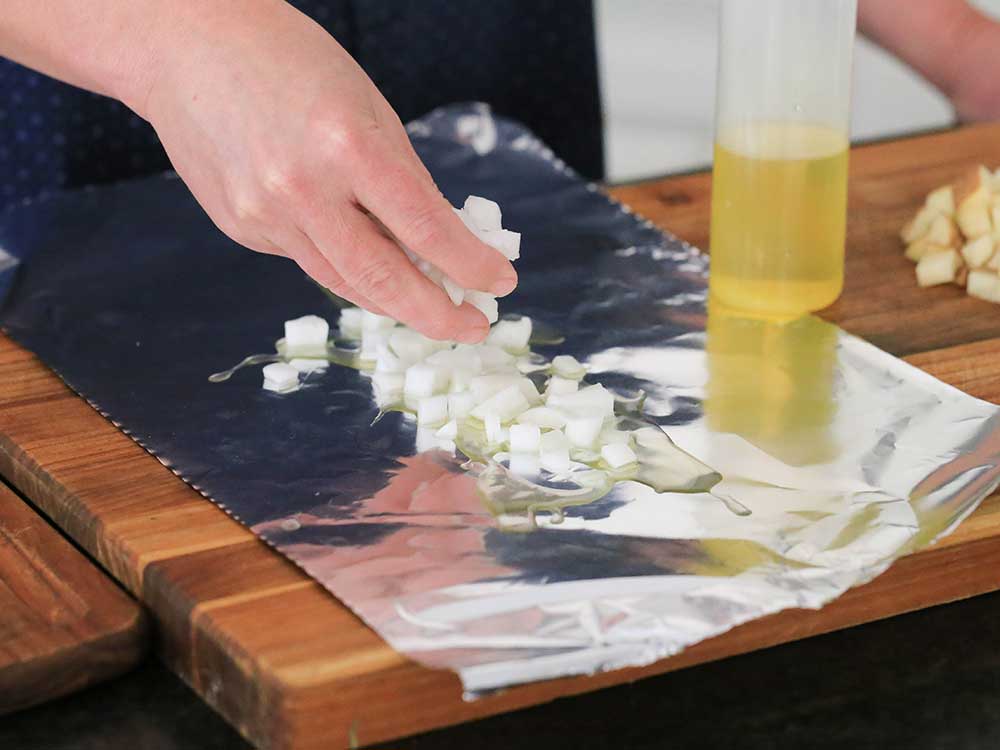
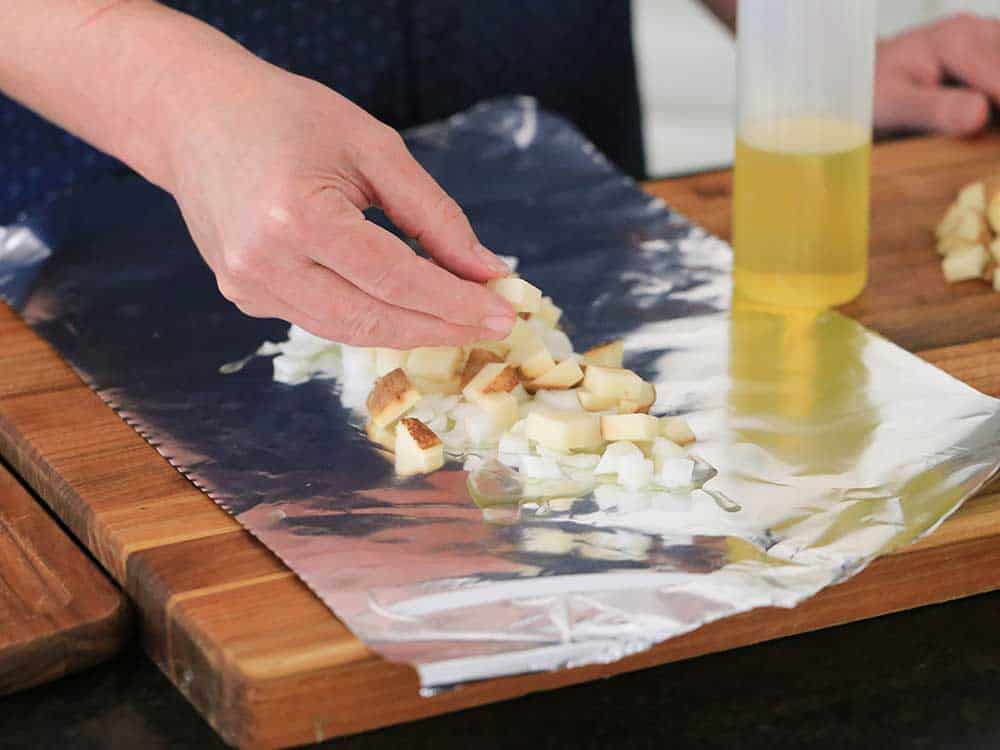
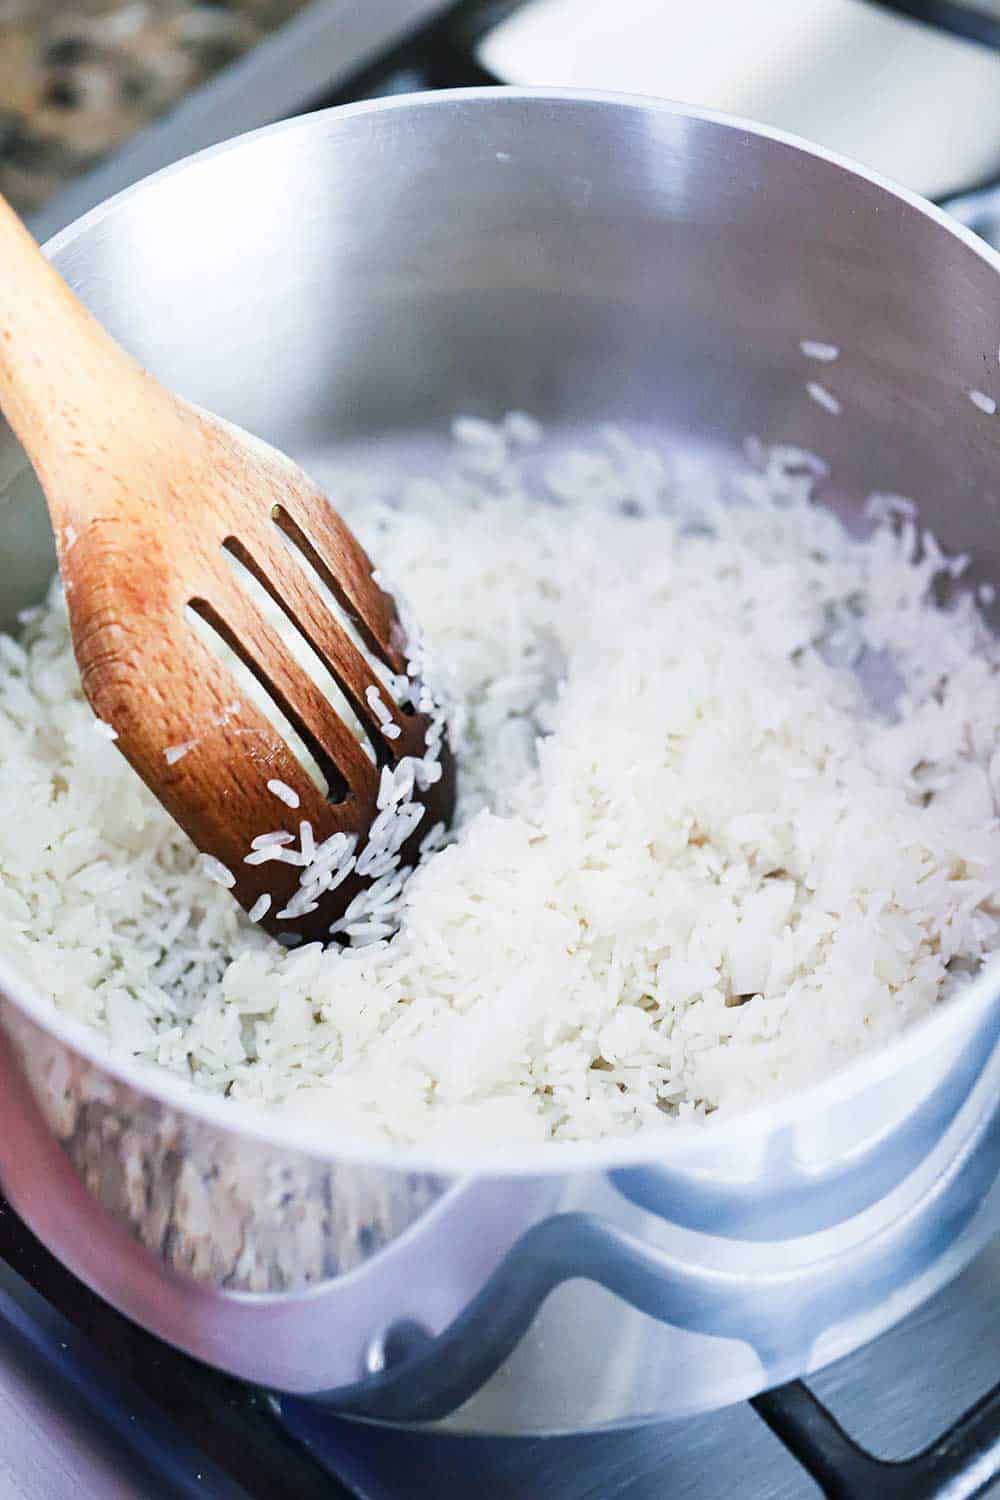
Next, it’s time to cook the rice over medium heat in olive oil and half a cup of chopped onions.

This will dry the rice out and cook the onions down all at once.

Sauté for just about 5 minutes.

A silver saucepan filled with Jasmine rice and chopped onions being stirred by a slotted wooden spoon.

THE PERFECT TEXTURE

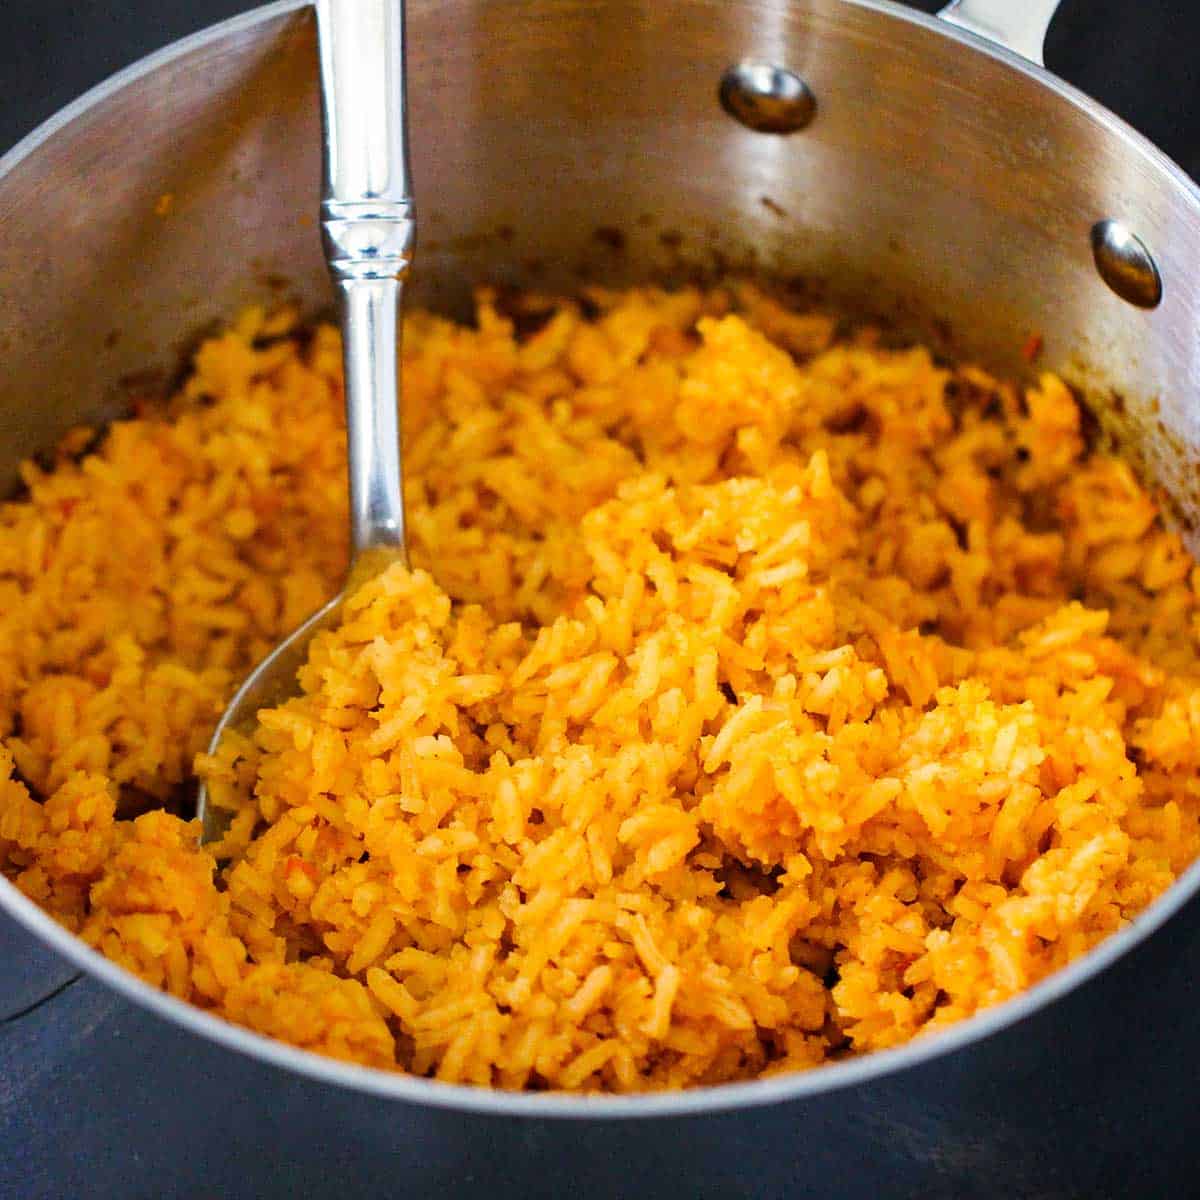
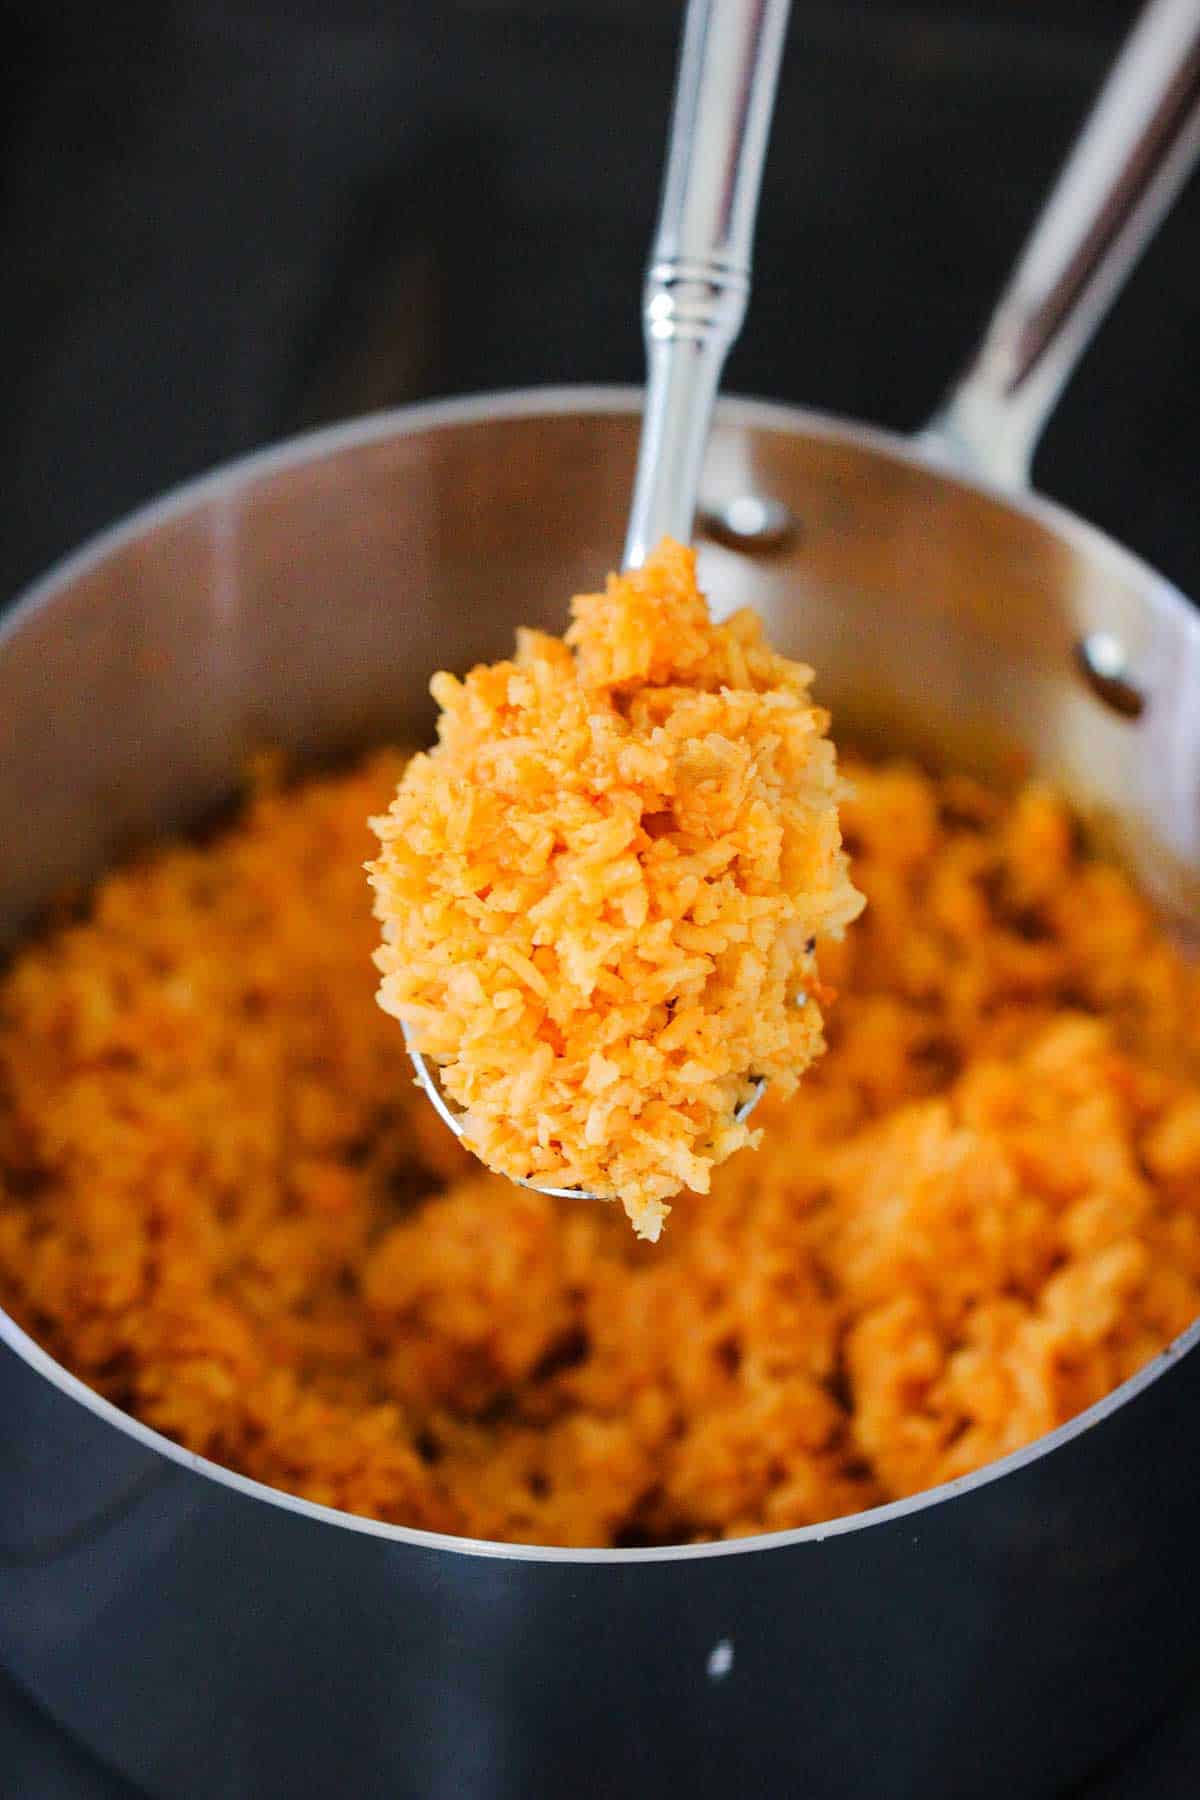
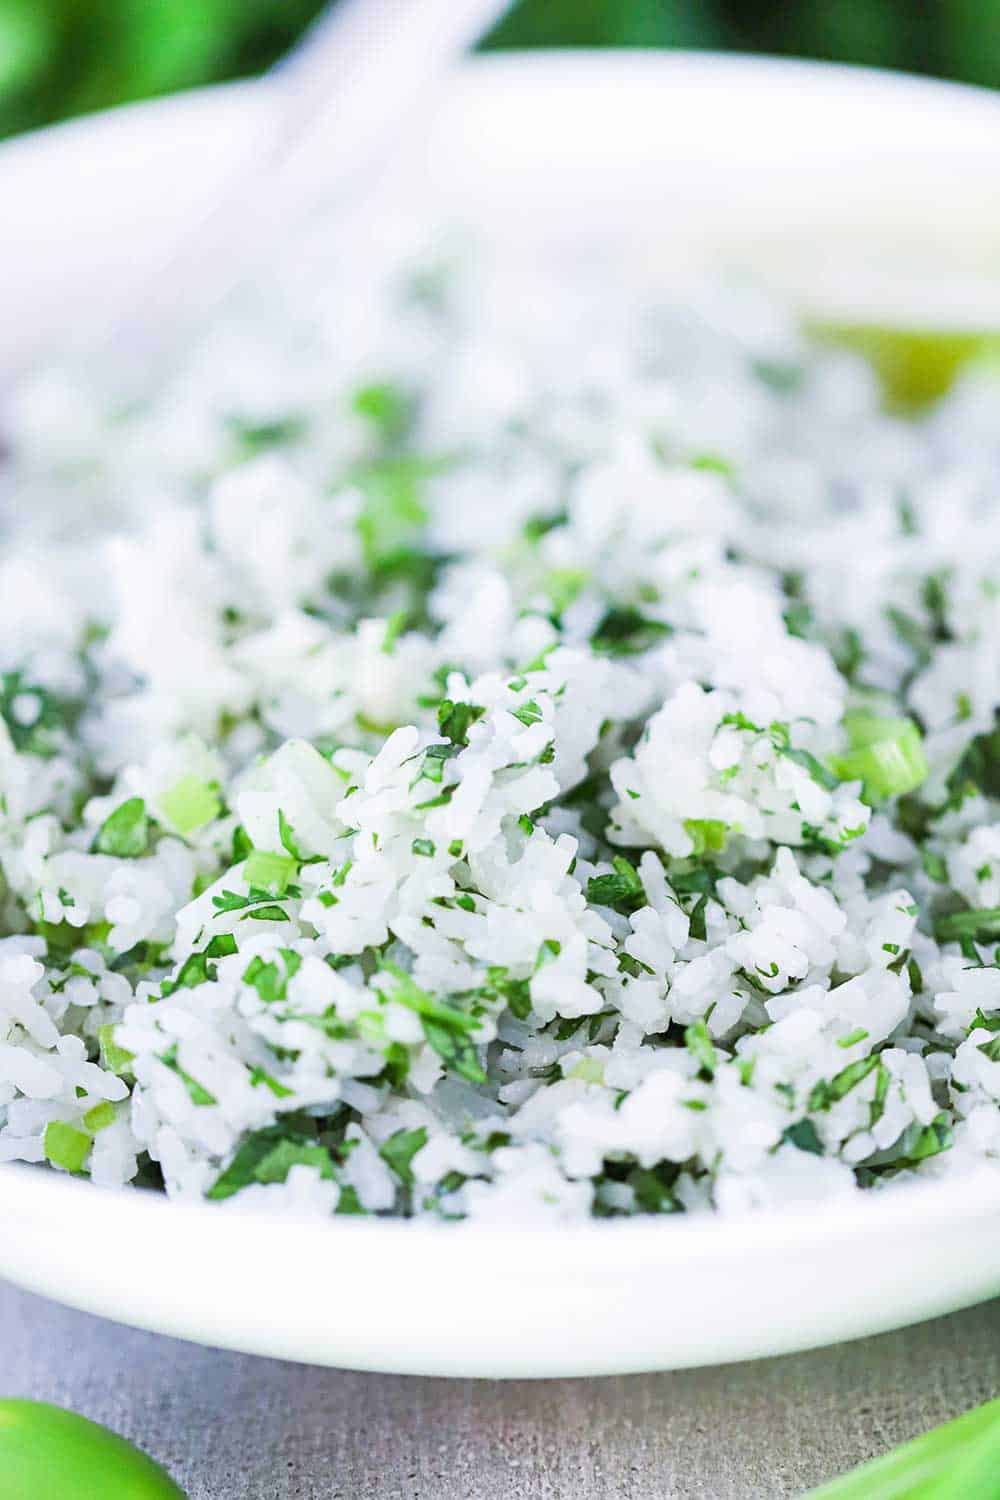
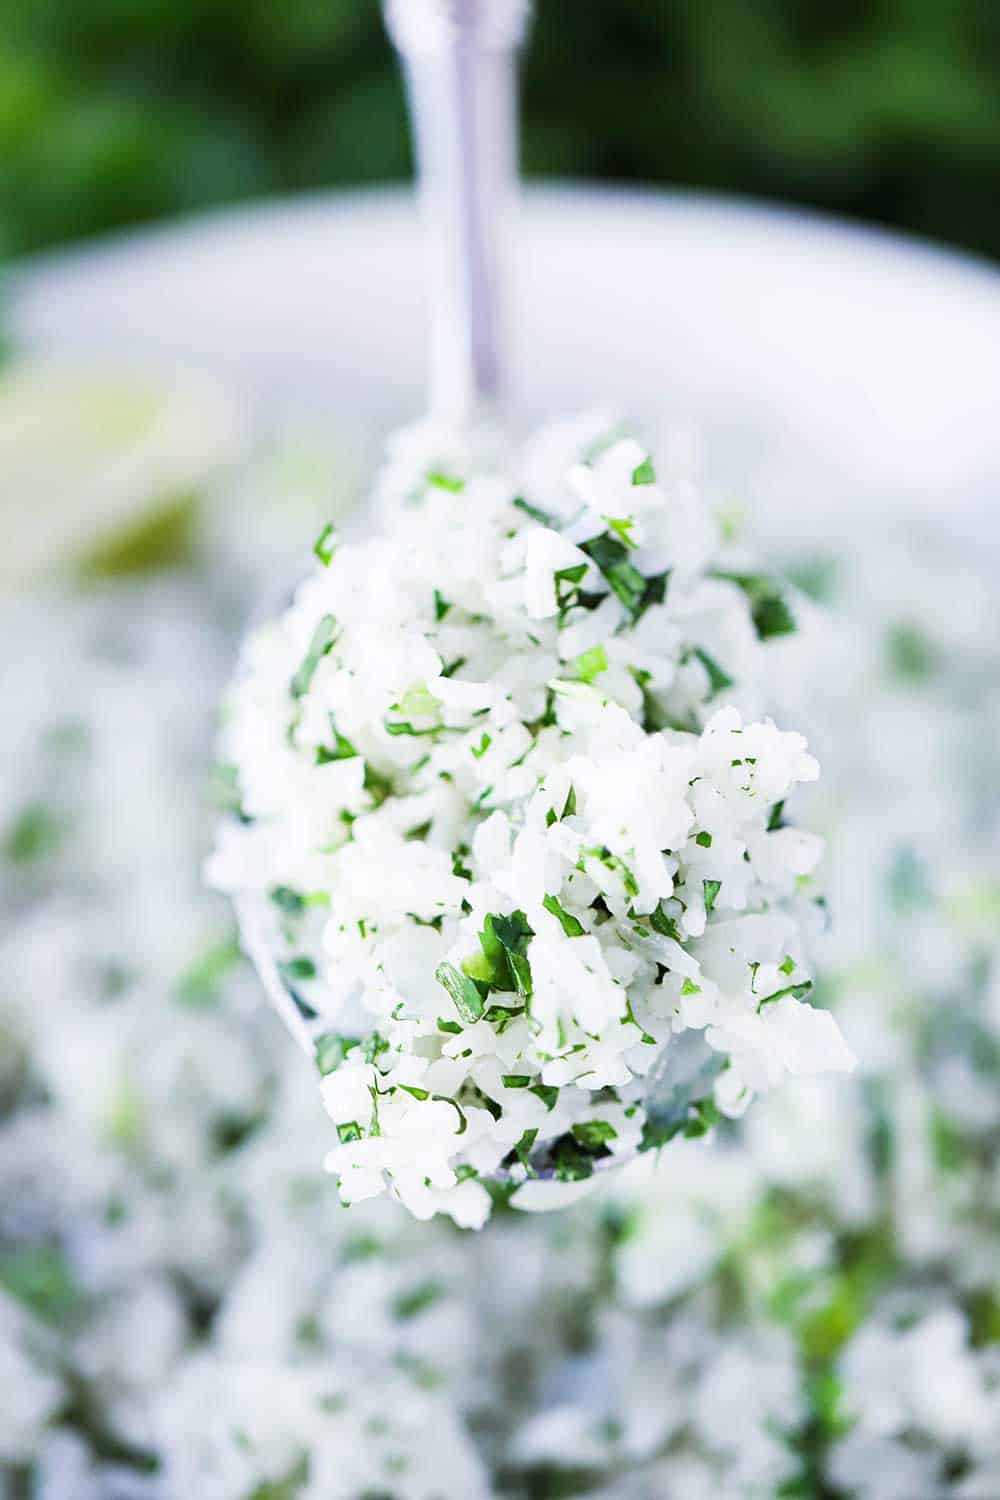
Preparing the rice in this manner will result in fluffy, yet slightly sticky rice.

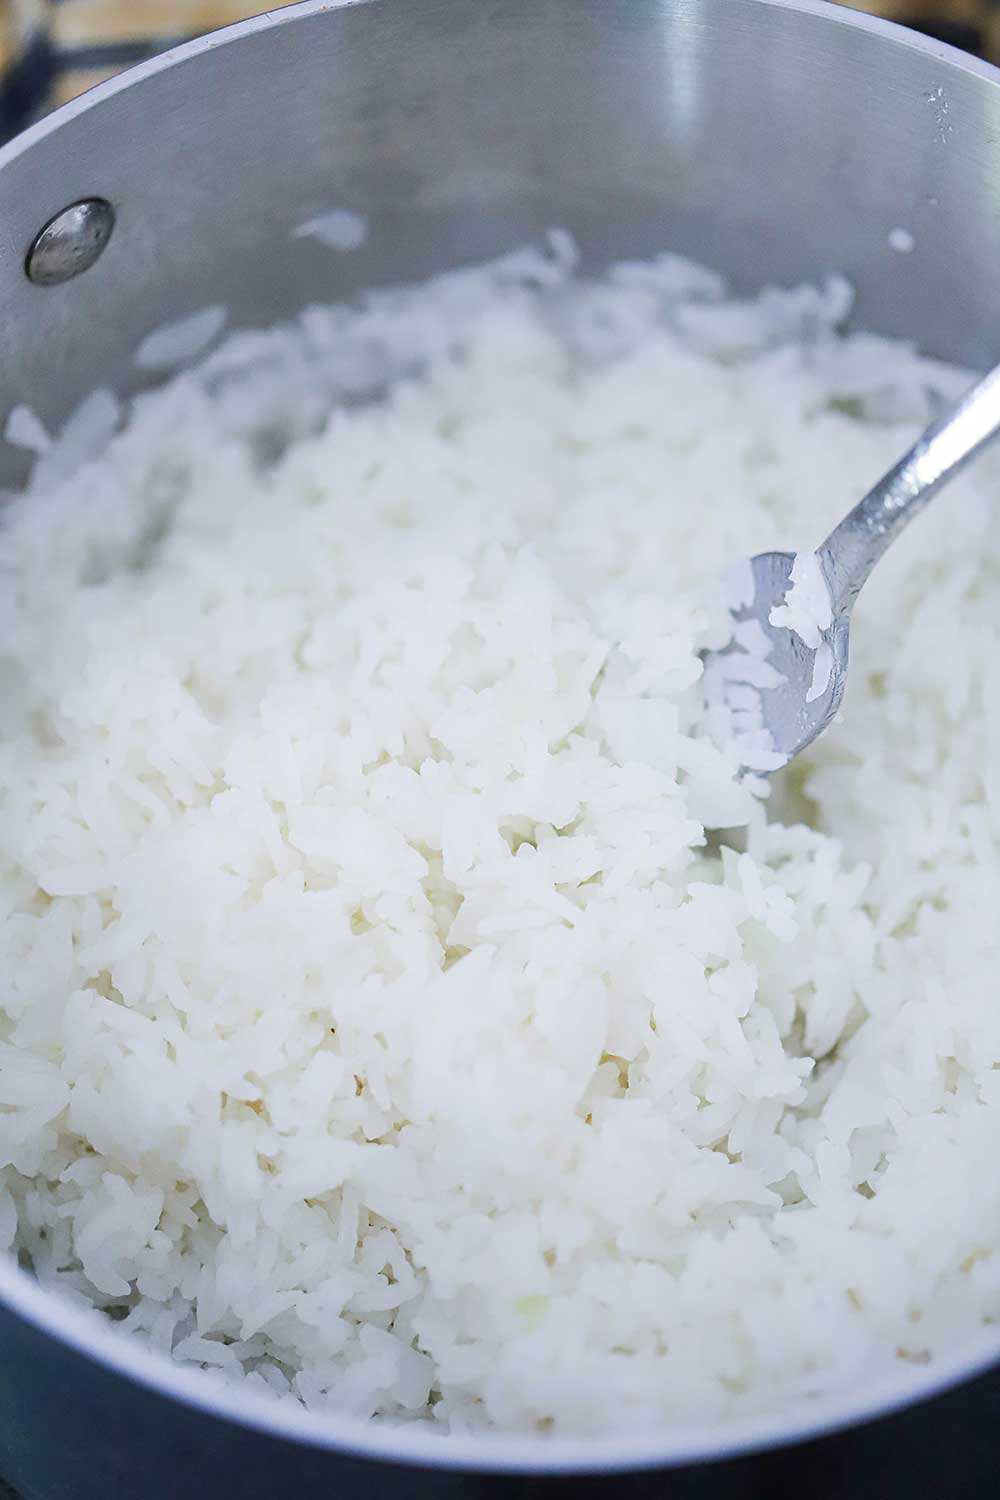
We add the water (1½ cups) with a couple of bay leaves and bring it to a boil.

EXPERT TIP: Once the water has come to a boil, it’s important to lower the heat to very low and cover the pan with a tight-fitting lid. Let the rice steam for 18 minutes and then check the rice. It should be fully cooked by this point, but if not, place the lid back on and let it steam for another couple of minutes. Resist opening the lid too soon, as this will impede the steaming process. Once finished, simply remove the bay leaves and fluff with a fork.

An overhead view looking down into a silver pan filled with fluffy cooked Jasmine rice with a fork in it.

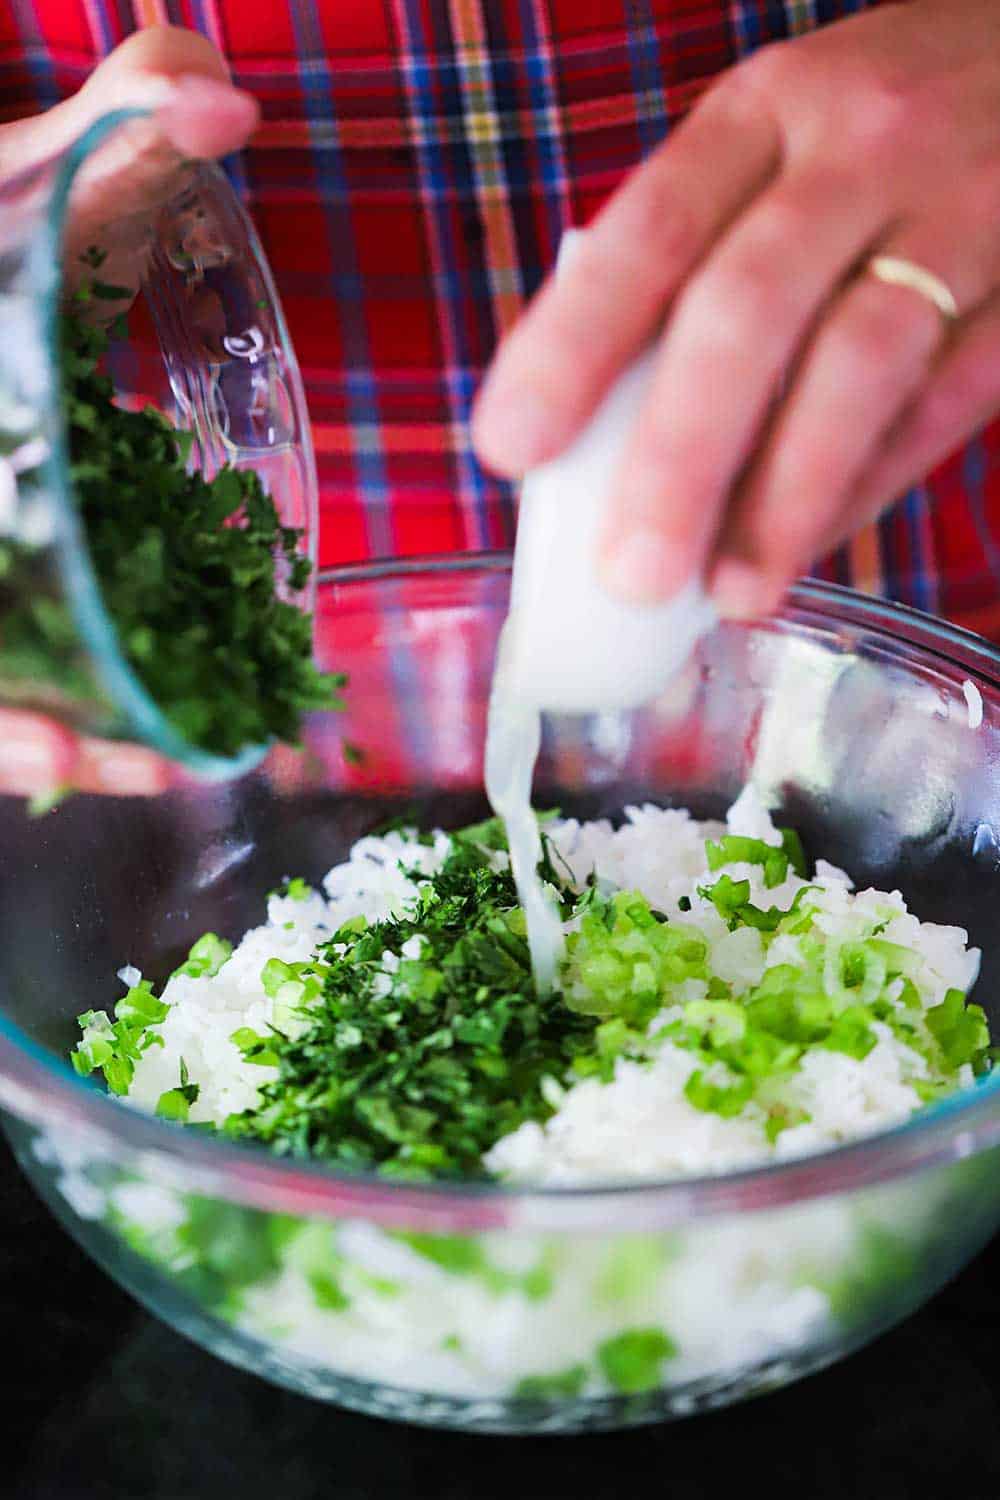
Transfer the cooked rice to a large bowl.

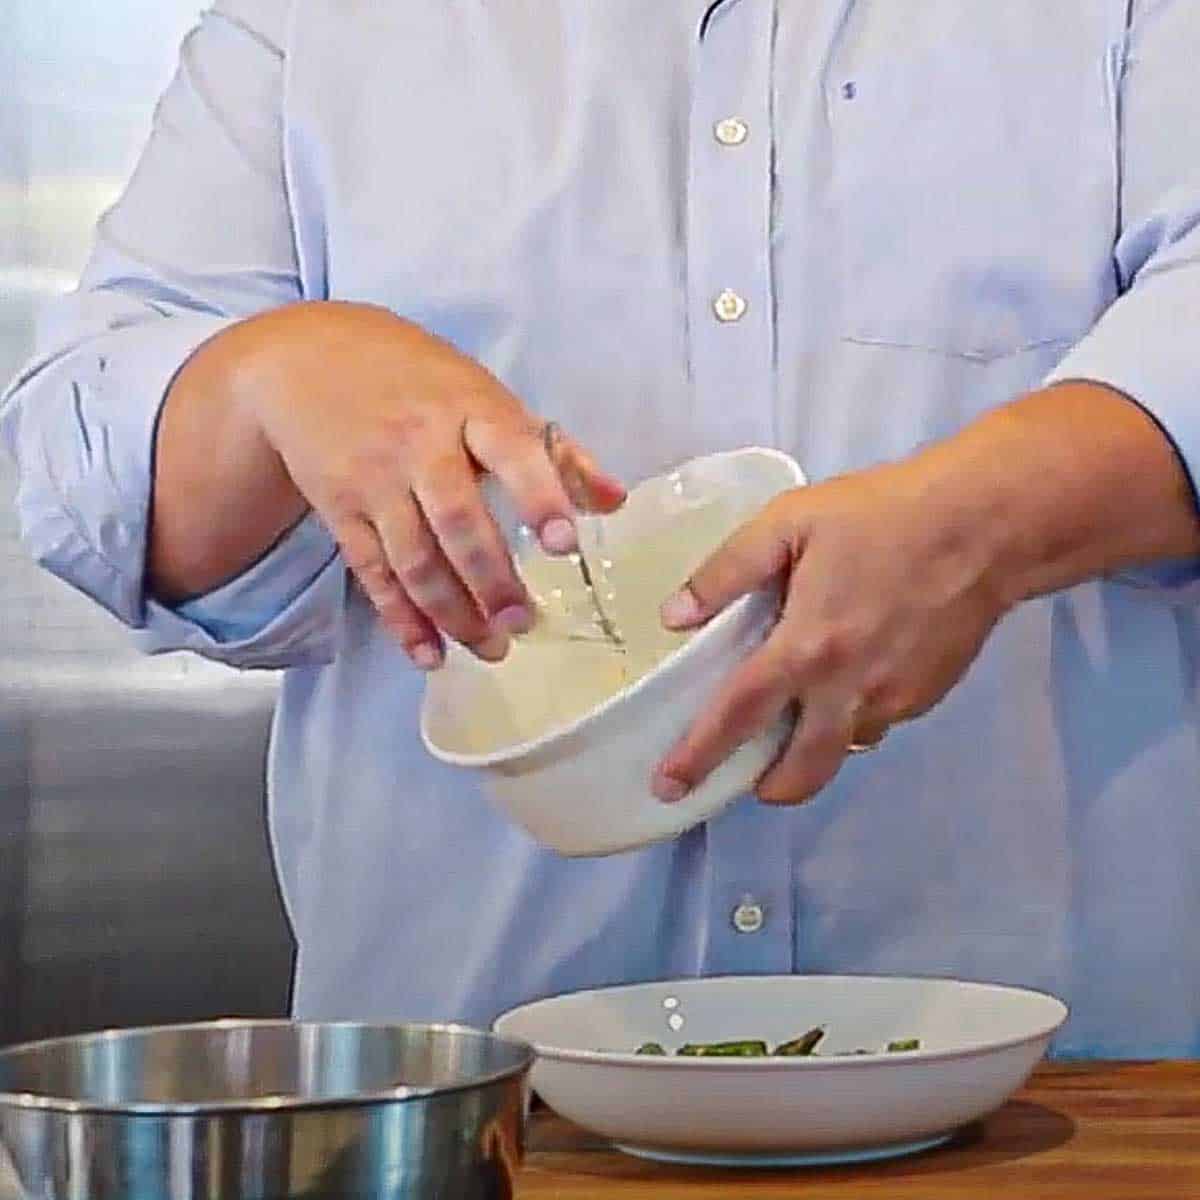
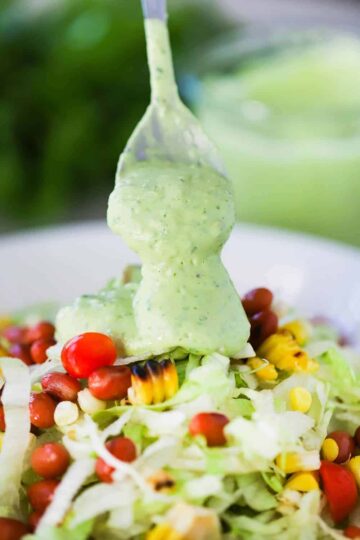
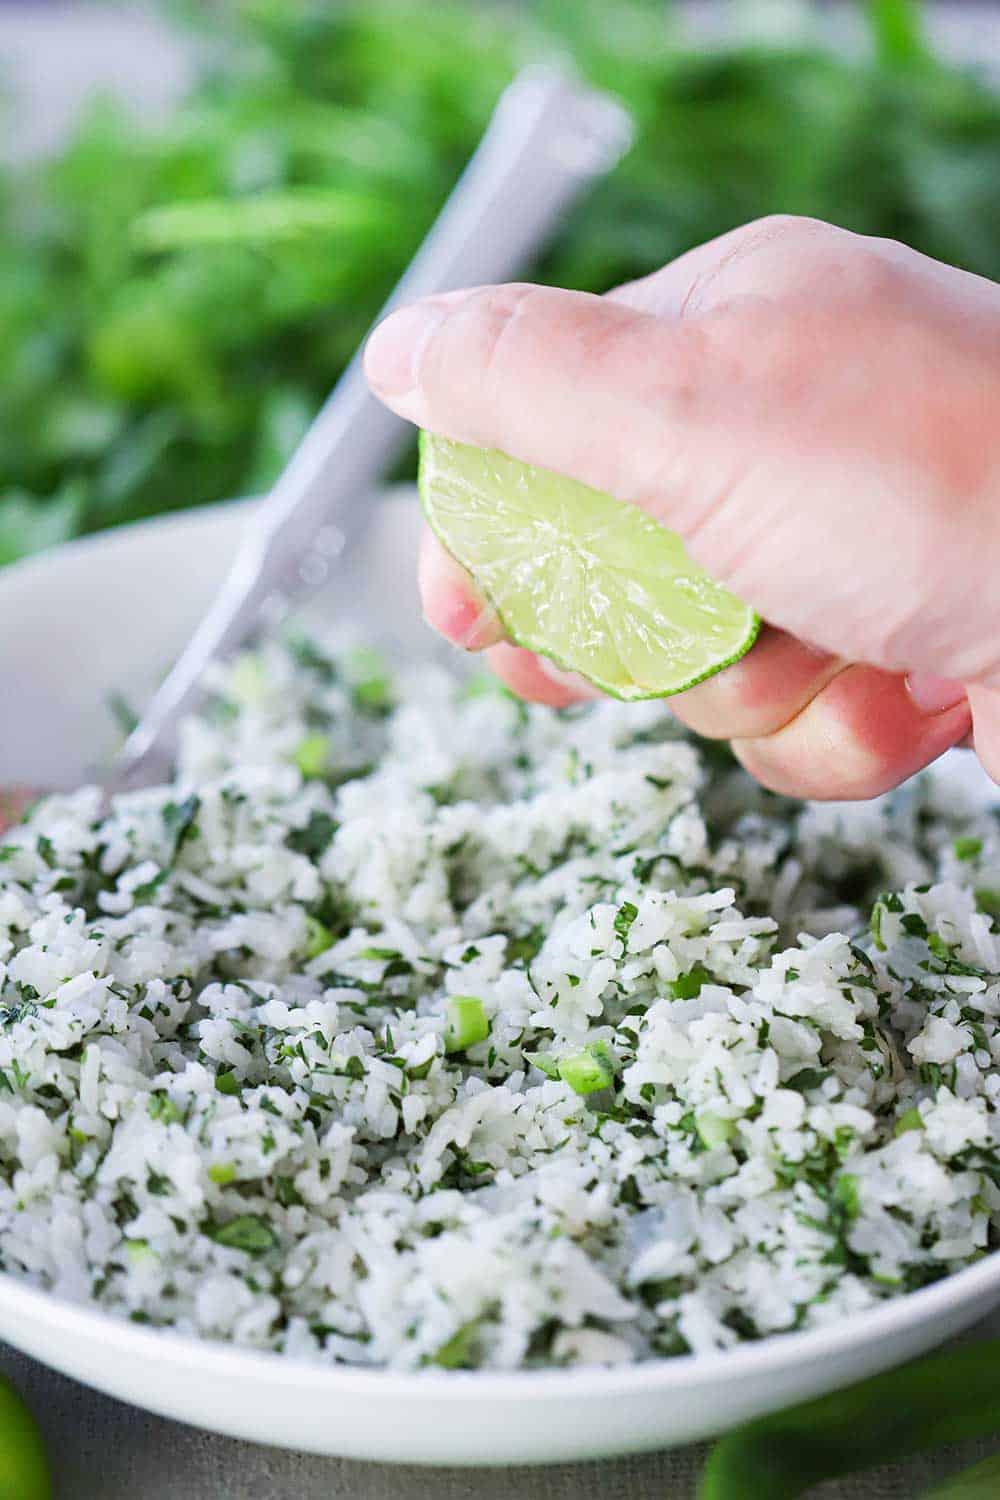
Add the chopped cilantro, chopped scallions (green onions), fresh lime juice, and salt.

Mix until fully combined. Taste and add more salt or lime, as desired.

Two hands pouring chopped cilantro and fresh lime juice into a bowl filled with cooked rice and chopped scallions.

WHAT GOES WITH CILANTRO LIME RICE?

This is such an amazing side dish because it goes with so many of our favorite Mexican or Tex-Mex entrees!

We love serving it alongside:
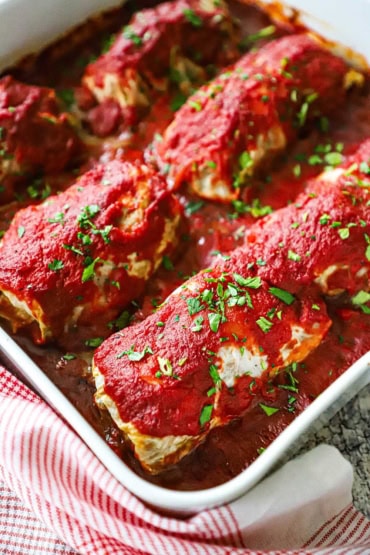
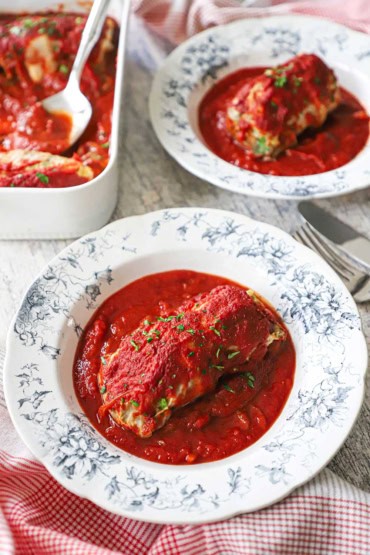
Tex-Mex Beef Tacos
Stuffed Chili Rellenos
Grilled Salmon with Poblano Compound Butter
Ancho Chile Cheese Enchiladas
Mahi-Mahi Tacos
Mama’s Classic Margaritas

A close-up view of a white bowl filled with Cilantro Lime Rice with a silver spoon in it.

CILANTRO LIME RICE FAQs

  • What is the best type of rice to use? We love going with Jasmine or Basmati rice, but you could also use a plain white long grain rice. Follow the same instructions and you’ll have good results. Jasmine and Basmati can be found in the rice section of most well-stocked supermarkets or online.
  • Can I use dried cilantro? Normally, we’d say dried herbs or okay to substitute for fresh. In some dishes, they even work better than fresh. But for this dish, we strongly suggest using fresh.
  • Do the scallions make the rice have a strong onion taste? No. Not at all. We only chop the white and green parts of two scallions. It deepens the flavor but isn’t overwhelming at all.
  • Can the dish be made in advance? Absolutely! The rice can be made up to 1 day in advance. Simply transfer the rice to a baking dish and cover with foil and then place in the oven preheated to 350°F for about 30 minutes.

Just before serving, we love to give another squirt of fresh lime over the top of the rice.

A hand squeezing a lime wedge over a white bowl filled with cilantro lime rice with a spoon in it, sitting next to fresh cilantro.

We think this rice is such the perfect side dish to your favorite Mexican and Tex-Mex dishes.

However, if you’re looking for traditional Mexican rice, our recipe is the real deal.

But in the meantime, you’ve just got to try out this Cilantro Lime Rice! It’s so refreshingly delicious!

A large spoon holding up a serving of Cilantro Lime Rice over a white bowl of the same.

Ready to make the best rice side dish in town? Go for it!

And when you do, be sure to take a photo, post it on Instagram, and tag @howtofeedaloon and hashtag #howtofeedaloon!

An overhead view of a large white bowl filled with Cilantro Lime Rice next to scallions and a bunch of cilantro, with a silver spoon in the bowl.
Print Recipe
5 from 3 votes

Cilantro Lime Rice

If you love Cilantro Lime Rice at your favorite Mexican restaurant, then you're are going to really love this recipe! It's so fresh and simple to prepare!
Prep Time10 minutes mins
Cook Time23 minutes mins
Rice soaking25 minutes mins
Total Time58 minutes mins
Course: Side Dish
Cuisine: Mexican / TexMex
Servings: 4
Calories: 243kcal
Author: Kris Longwell

Equipment

  • Medium saucepan with a tight-fitting lid
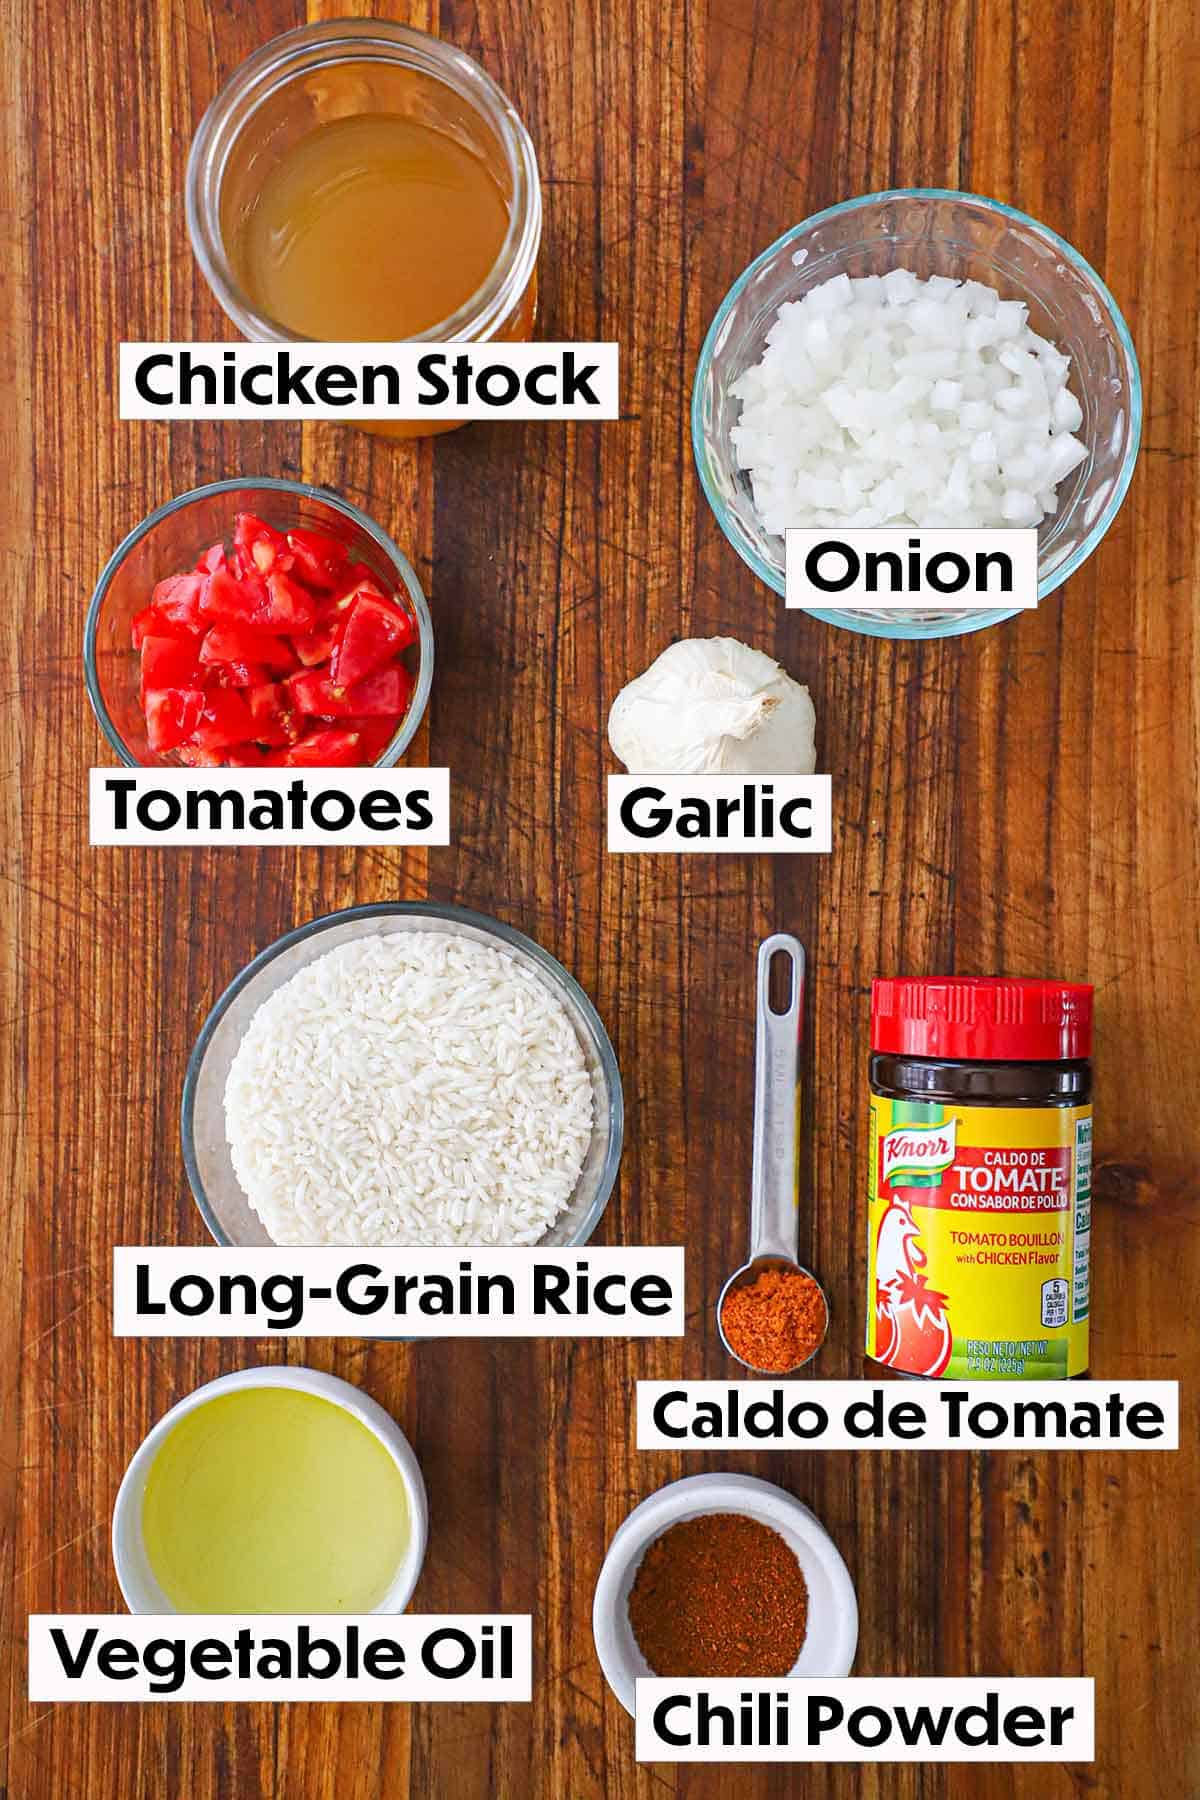
Ingredients

  • 1 cup rice Jasmine, basmati, or long-grain white
  • 2 tablespoon olive oil divided
  • ½ cup onion chopped
  • 1½ cups water
  • 2 bay leaves
  • ½ cup cilantro fresh, chopped
  • 2 scallions aka green onions, chopped
  • 2 tablespoon lime juice fresh, plus additional limes for garnish
  • ¾ teaspoon Kosher salt

Instructions

  • Add the rice to a bowl and cover with tap water. Swirl the rice around with clean hands until the water is a murky white color. Use one hand to hold the rice back and carefully discard the water in the sink or another bowl. Repeat this process two more times, but the 3rd time, allow the rice to sit in the water 10 to 30 minutes. Drain rice through a fine-mesh sieve.
  • In a medium saucepan (with lid), heat 1 tablespoon of the oil over medium heat. Add the onion and soaked rice and cook for 5 minutes, stirring frequently.
  • Add the 1½ cups of water and bay leaves and bring to a boil. Cover and lower the heat to low. Allow rice to steam for 18 minutes.
  • Remove the bay leaves and fluff the rice with a fork. Transfer to a serving bowl.
  • Add the cilantro, scallions (green onions), lime juice, and salt. Mix together with two large spoons. Serve at once!

Video

Notes

We love using Jasmine rice for this dish, but long-grain white rice works well, too.  Jasmine and basmati rice can be found in the rice section of most well-stocked supermarkets or online. 
Be sure to stir the rice frequently when cooking with the onion as it will want to stick to the bottom of the pan.  
Resist peeking at the rice while it is steaming.  If after 18 minutes the rice isn't quite cooked, add 1 more tablespoon of water, cover, and cook for another 2 to 3 minutes.
The amount of cilantro and lime is a matter of taste.  Once everything is mixed together, take a taste test, and add more cilantro, lime, or salt, if desired.
Reheating is simple. Just add the rice to a baking dish, cover with foil, and bake in an oven preheated to 350°F for 30 minutes.  Can also keep warm in a low temp oven (200°F).  
The rice will keep in the fridge for up to 1 week and can be frozen for up to 1 month.  

Nutrition

Calories: 243kcal | Carbohydrates: 40g | Protein: 4g | Fat: 6g | Saturated Fat: 1g | Sodium: 591mg | Potassium: 109mg | Fiber: 1g | Sugar: 1g | Vitamin A: 195IU | Vitamin C: 5mg | Calcium: 25mg | Iron: 1mg

Pesto Pasta Salad with Potatoes and Green Beans

June 28, 2020 by Kris Longwell Leave a Comment

A white bowl of pesto pasta with potatoes and green beans.

This dish is truly a celebration of fresh and vibrant flavor.

This salad is amazing year-round, but we especially love to serve it when vegetables and herbs are at their peak. Making pesto from scratch is so easy and puts this over the top. And you’ll love that comes together so fast!

VIDEO ALERT: Be sure to check out the video for this recipe in the recipe card.  If you like the video, subscribe to our YouTube Channel!

A white bowl of pesto pasta with potatoes and green beans.

HOW TO MAKE PESTO PASTA SALAD WITH POTATOES AND GREEN BEANS

You will be amazing at how quickly this salad comes together and it is wonderful served warm or at room temperature.

As mentioned, making the Easy Pesto Sauce is just that, easy, and really elevates this dish to culinary heights.

However, that being said…good-quality store-bought pesto works well in this dish, too. You can’t go wrong either way!

CHOOSING THE BEST VEGETABLES

There are plenty of potatoes to choose from for this dish. Small (or baby) red potatoes are great. Baby Yukon gold potatoes are wonderful, too.

Give them a good washing and then slice them to about ¼-inch thick.

EXPERT TIP:  We don’t peel the potatoes for several reasons.  One, the red color is pretty in the salad. Two, the skin is full of nutrients.  Three, it’s easier to leave them on.  And four…they are delicious with the skins on!

A hand holding a small red potato on a wooden cutting board while the other hand uses a knife to slice it, sitting next to a pile of sliced potatoes.

Fresh young green beans are perfect for this salad. Snip the ends before cooking them.

You can easily cut the beans in half, too, if the beans are too long. This gives them a better bite-size shape, which you may prefer.

EXPERT TIP: After you have dropped the vegetables into your pot of salt boiling water, they only will take about 8 minutes to become nice a soft. If you have a removable pasta pot with holes in it, then pull it out and let the veggies drain. Otherwise, simply remove the beans and spuds with a slotted spoon and keep that water boiling. The pasta will go in next!

One hand holding a fresh green bean on a cutting board while the other hand uses a large knife to cut it in half.

COOKING THE VEGETABLES AND PASTA

Transfer the cooked potatoes and beans to a large bowl and cover with foil to keep them warm. Cook the pasta to al dente according to the directions on the package.

Once the pasta is ready, drain and add to the vegetables.

EXPERT TIP: We love the look and the texture of fusilli pasta. However, any type of small pasta will work. You can go with penne, ziti, bow-tie, or elbow, just to name a few! Be sure to save about a cup of the pasta water to help loosen the salad once everything is combined.

Two hands with red oven mitt on dumping cooked pasta into a glass bowl filled with sliced potatoes and green beans.

Pour the amazing pesto sauce and Parmesan cheese all over the cooked pasta and veggies and gently stir.

This is such a bright, delicious,  and satisfying dish.

You will instantly smell the freshness of the pesto as it hits the warm pasta and vegetables. So good!

Two hands pouring a glass bowl of pesto sauce and another bowl of Parmesan cheese into a bowl of cooked fusili pasta.

GENTLY TOSS TO COMBINE

All you need to do now is to gently toss the salad until fully combined.

Give it a taste test at this point, if you feel it needs a little more salt, sprinkle some on and mix again.

EXPERT TIP: We like to add anywhere from ¼ to ½ cup of the pasta water to slightly thin the texture of the pesto dressing. Remember, the water is salted, so if you do add more salt, taste as you go as to not over-salt the salad.

A person holding two wooden spoons in a glass bowl filled with pasta salad with green beans.

PESTO PASTA SALAD WITH POTATOES AND GREEN BEANS IS THE PERFECT SIDE

This dish is absolutely amazing when served warm.

But, it is also addictively delicious when served at room temperature.

EXPERT TIP: If bringing to an outdoor BBQ, then we suggest keeping the salad in an air-tight container in the refrigerator until about an hour before serving. If traveling with the salad, keep it in cooler if possible.

A close up view of a large circular white serving bowl filled with pesto pasta salad with sliced potatoes and green beans.

The flavors in the salad just work so beautifully together.

Fresh and vibrant and ideal for a picnic, BBQ, or nice luncheon or shower.

It’s truly one of those dishes that is not only delicious in taste but beautiful in presentation, too.

A hand holding up a large spoon filled with pesto pasta salad with potatoes and green beans.

Ready to make one of the best pasta salads in town? Go for it!

And when you do, be sure to take a photo of it, post it on Instagram, and tag @howtofeedaloon and hashtag #howtofeedaloon!

A white bowl of pesto pasta with potatoes and green beans.
Print Recipe
No ratings yet

Pesto Pasta with Potatoes and Green Beans

This Pesto Pasta with Potatoes and Green Beans is truly a perfect side dish. It's great for brunch, lunch, or dinner. Fresh pesto makes all the difference, but this is even good with a good-quality store-purchased pesto. Make the pesto ahead of time, and then the dish comes together very quickly. Superb!
Prep Time15 minutes mins
Cook Time18 minutes mins
Total Time33 minutes mins
Course: Side Dish
Cuisine: Italian
Servings: 8 people
Calories: 366kcal
Author: Kris Longwell

Ingredients

  • 1 cup Pesto click for easy recipe
  • Kosher salt
  • 10 oz potatoes baby red, cut into slices about ¼-inch thick, about 2 cups
  • 10 oz green beans fresh, ends trimmed and cut in half
  • 1 lb pasta small
  • 1 tablespoon unsalted butter slightly softened
  • ¼ cup Parmesan cheese grated

Instructions

  • Make the pesto and set aside.
  • Bring a large pot of salted water to a rolling boil. Add the potatoes and green beans and cook until tender, about 8-9 minutes.
  • Using a large slotted spoon, or directly from pasta pan (with holes), transfer the potatoes and beans to a large serving bowl. Cover the bowl lightly with foil to keep the veggies warm.
  • Bring the water back to a rolling boil and add the pasta, stir well, and cook, stirring occasionally, until al dente, following package instructions.
  • Add the drained pasta to the bowl with the veggies. Scoop out and reserve about 1 cup of the pasta water. Add the pesto, Parmesan cheese, and butter to the pasta with vegetables. Stir and toss until the pasta and veggies are evenly coated with the sauce, adjusting the consistency with some of the cooking water if needed. Taste and add salt, if desired.
  • Serve warm or at room temperature.

Video

Notes

The homemade pesto can be made up to 1 week in advance.  Keep in an air-tight container in the refrigerator until ready to use.  Quality store-bought pesto works well in the recipe, too.
Baby gold potatoes work great in this recipe, too, or a combination of red, yellow, and even purple!
Our favorite type of pasta for this salad is fusilli, but any kind of small pasta will work, including penne, rigatoni, bow-tie, or elbow.
This is wonderful served warm or at room temperature.  If making ahead of time, toss the salad with about 1 tablespoon of olive oil and give it a good mixing before serving. 
The salad will keep in the refrigerator for up to 1 week.  We don't recommend freezing this salad.  

Nutrition

Calories: 366kcal | Carbohydrates: 47g | Protein: 11g | Fat: 12g | Saturated Fat: 3g | Cholesterol: 8mg | Sodium: 346mg | Potassium: 201mg | Fiber: 3g | Sugar: 4g | Vitamin A: 938IU | Vitamin C: 4mg | Calcium: 112mg | Iron: 1mg

POST UPDATE: This recipe was originally published in July 2018, but was updated with improved tweaks to the recipe, with new tips and photography, and a fabulous new video in June 2020!

Pappardelle Bolognese

June 25, 2020 by Kris Longwell 15 Comments

A large patterned Italian pasta bowl filled with Pappardelle Bolognese and a small bowl of Parmesan cheese next to it.

There are classic pasta dishes, and there are iconic pasta dishes. This recipe checks both of those boxes.

The sauce is stick-to-your-ribs delicious. Hearty, meaty, and so deeply satisfying. We layer the flavor with pancetta, fresh vegetables, 3 types of meat, red wine, San Marzano tomatoes, and our favorite Organic Beef Bone Broth from Pacific Foods (more on that soon).

VIDEO ALERT: Be sure to check out the video for this recipe in the recipe card.  If you like the video, subscribe to our YouTube Channel!

A large patterned Italian pasta bowl filled with Pappardelle Bolognese and a small bowl of Parmesan cheese next to it.

HOW TO MAKE PAPPARDELLE BOLOGNESE

This dish, also called Pappardelle alla Bolognese, has been a favorite in our house for many, many years.

By the way, wondering about the bolognese pronunciation? Click here to hear in English, Italian, and even German!

Traditional bolognese sauce starts with a medley of sautéed vegetables including chopped onion, carrots, and celery.

We love using a trio of protein (beef, pork, and veal) and a classic mirepoix (onion, celery, carrots).

Right from the start, the smell is amazing.

EXPERT TIP: For an even deeper flavor profile, we start off by sautéing 4 oz. of cubed pancetta in a large saucepan or Dutch oven with 1 tablespoon of olive oil. Once the pancetta is nice and crispy and rendered a little fat, toss in the veggies and cook until soft, about 10 minutes. Next, add the ground beef, veal, and pork. Cook until no longer pink. We recommend using a large spoon to remove much of the rendered fat at this point. Don’t drain the mixture, because you want to leave some of the fat for added flavor.

2 side-by-side photos, 1st of a mirapoix being sautéed in a blue Dutch oven, the 2nd is the same mixture with ground meat added in.

QUALITY INGREDIENTS MAKE ALL THE DIFFERENCE FOR PAPPARDELLE BOLOGNESE

We’ve said it many times before, and we’ll say it again: Almost all recipes are only as good as the quality of the ingredients that you make them with.

That’s why we want the best for our Pappardelle Bolognese recipe. A good robust beef broth is essential to achieve the depth of flavor that we’re after.

Pacific Foods Organic Beef Bone Broth is thoughtfully crafted with organic beef bones and vegetables to create a savory bone broth full of naturally occurring collagen. It’s honestly so delicious, it’s wonderful to simply pour, heat, and sip in a bowl as is. It’s really that good.

A box of Pacific Food bone broth sitting in front of a blue Dutch oven with a measuring cup pouring the broth into the pot.

To achieve the best-ever bolognese sauce, you need to give it time to simmer on the stove for 1½ to 2 hours.

The addition of warm milk adds a luxuriousness to the sauce that is amazing.

You’ll then want the sauce to simmer another 30 minutes to get the milk fully absorbed.

A grey saucepan with warmed milk being poured from it into a blue Dutch oven filled with an Italian meat sauce.

The sauce gets even better as it sits.

Just wait until you try the sauce the following day.

Oh, the sauce. It’s all about the sauce.

A large blue Dutch oven sitting on a stovetop filled with meat bolognese sauce with a wooden spoon in it.

CHOOSING THE BEST PASTA FOR BOLOGNESE SAUCE

Obviously, we love going with a nice large pasta called pappardelle.

For thick sauces such as this, a larger, more robust pasta is ideal. Although to be completely honest, we’ve made this with penne, rigatoni, and angel hair, and still loved it.

EXPERT TIP: Pappardelle pasta can be found in the Italian/pasta section of many well-stocked markets nowadays. If you can’t find it, you can make your own by cooking lasagna noodles according to package directions, and then use a pizza cutter to cut slices from each noodle that is about ½-inch wide. Always be sure to boil the pasta in water that has been well salted.

Two hands holding two wooden spoons tossing pappardelle bolognese in a large silver skillet.

This Pappardelle Bolognese Ragu recipe is the real deal and is always such a huge hit when we serve it to guests.

The sauce can easily be prepared up to several days in advance and kept in an air-tight container in the refrigerator, or frozen for up to 1 month.

EXPERT TIP: If you’ve made the sauce ahead of time, simply bring it back to a gentle simmer while you get your pasta going. Just before serving, we start by adding a couple of hefty spoonfuls to a large skillet/saucepan that’s over medium heat. Stir in the pappardelle to coat and then adding the rest of the sauce, stirring until fully combined. If desired, loosen the sauce a little with pasta water.

A close-up view of a large Italian pasta bowl filled with homemade pappardelle bolognese.

PACIFIC FOODS ALWAYS DELIVERS

Let’s say it again: Going with high-quality ingredients takes this dish to amazing culinary heights…in your very own kitchen.

Pacific Foods uses time-honored recipes and just a few simple ingredients, showcasing each ingredient’s true flavor and inherent nutrition. There are no additives or preservatives in their food.

They like to say: “We’re out to Nourish Every Body.” And we couldn’t agree more. Some of our other favorite dishes that star Pacific Foods’ amazing array of products include our Gourmet Beef Stroganoff, Air-Fryer Cordon Bleu Loaf with Mushroom Sauce, and Chicken Tagine with Preserved Lemons and Olives.

A large Italian pasta bowl filled with Pappardelle Bolognese sauce sitting next to a carafe and 2 glasses of red wine, and a box of Pacific Foods beef broth.

If you are craving a spectacular Italian pasta dish that hits all the right notes, you need to look no further.

Grab all those amazing (yet straightforward) ingredients and whip this incredible Pappardelle Bolognese up.

This easily feeds 6 to 8 hungry people and we promise will not disappoint!

A view looking downward into an Italian pasta bowl filled with pappardelle bolognese pasta next to a couple stemless wine glasses filled with red wine.

Ready to make the best pasta dish this side of Rome? Go for it!

And when you do, be sure to take a photo, post it on Instagram and tag @howtofeedaloon and @pacificfoods and hashtag #howtofeedaloon and #pacificfoods!

A large patterned Italian pasta bowl filled with Pappardelle Bolognese and a small bowl of Parmesan cheese next to it.
Print Recipe
4.86 from 7 votes

Pappardelle Bolognese

Pappardelle Bolognese is a favorite at our house. Make the pasta, if you can, and cut into /2" strips to make the perfect pappardelle...or, boil lasagna noodles, and cut those...or, just use fettuccine...no matter what...with this Bolognese sauce, you can't go wrong.
Prep Time20 minutes mins
Cook Time2 hours hrs 30 minutes mins
Total Time2 hours hrs 45 minutes mins
Course: Italian
Cuisine: Italian
Servings: 8 people
Calories: 553kcal
Author: Kris Longwell

Equipment

  • Large Dutch oven, or pot.

Ingredients

  • 2 tablespoon extra-virgin olive oil
  • 3 oz pancetta chopped
  • 1½ cups onion chopped
  • 3 celery stalks chopped
  • 3 large carrots peeled, chopped (a food processor works well)
  • 12 oz ground beef 85% lean is nice
  • 6 oz ground pork
  • 6 oz ground veal
  • ¾ cup dry red wine
  • 3 cups Pacific Foods Organic Beef Bone Broth divided (2 ½ cups and then a ½ cup)
  • 1 28 oz can whole tomatoes preferably San Marzano, drained
  • 3 tablespoon tomato paste
  • Kosher salt
  • Freshly ground black pepper
  • 1 cup whole milk
  • 1 lb pappardelle
  • Finely grated Parmesan cheese for serving

Instructions

  • Heat the oil in a large pot (preferably a Dutch oven) over medium-high heat. Sauté pancetta for 5 minutes.
  • Add the onions, celery, and carrots. Cook until soft, about another 10 minutes.
  • Add beef, pork, and veal and sauté, breaking it up, until browned, about 15 minutes.
  • At this point, if you feel you have too much fat that has rendered, tilt the pot and use a large spoon to collect the fat that has pooled at the end of the pot. Remove all grease except for about 1 tbsp.
  • Add wine; boil for 1 minute, deglazing the pan (scraping the brown bits from the bottom of the pan).
  • Add 2½ cups of the broth and the tomato paste; stir. Use your hands to squeeze and gently break the whole tomatoes into the sauce. Reduce heat and gently simmer, stirring occasionally, 1½ hours. Season with salt (2 tsp) and black pepper (1 tsp).
  • Warm the milk in a small saucepan and then gradually add to the sauce.
  • Simmer the sauce for another 30 minutes, stirring occasionally, until thickened and milk has completely been absorbed. Add more broth if the sauce is too thick. Taste and add more salt, if necessary.
  • Meanwhile, cook pasta in liberally salted, boiling water until al denté. Follow packaging instructions. Reserve ½ cup of the pasta liquid. Drain pasta.
  • Transfer 2 large spoonsful of the sauce to a large skillet over medium-high heat. Add pasta and toss until coated. Add in remaining sauce and a few tablespoons of the reserved pasta water until pasta is fully coated and the consistency is right.
  • Serve at once with Parmesan cheese on the side.

Video

Notes

Cubed pancetta can be found in many well-stocked supermarkets, often in the deli section.  You can also use sliced pancetta or prosciutto, roughly chopped. 
We like using beef, veal, and pork for this sauce.  However, you can use a combination of just beef and pork, or beef and veal.  Just make sure the amount you are using totals 24 oz (1 ½ lbs). 
The sauce can be made up to several days in advance.  Actually, it gets even better after it has time to meld even further in an air-tight container in the fridge.  The sauce freezes for 1 to 2 months.
If you can't find pappardelle, you can boil lasagna noodles and then use a pizza cutter to cut strips that are about ½-inch in width. Or, just go with a nice spaghetti, linguine, or other long pasta.

Nutrition

Calories: 553kcal | Carbohydrates: 49g | Protein: 26g | Fat: 22g | Saturated Fat: 7g | Cholesterol: 121mg | Sodium: 222mg | Potassium: 634mg | Fiber: 3g | Sugar: 6g | Vitamin A: 4693IU | Vitamin C: 5mg | Calcium: 86mg | Iron: 3mg

Homemade Steak Sauce

June 23, 2020 by Kris Longwell 14 Comments

A small spoon drizzling homemade steak sauce down the top and center of a grilled steak on a white plate next to roasted potatoes.

To be completely honest, we’re not big fans of bottled steak sauce. Nothing personal, just not big fans. But when you make it from scratch…holy smokes is it a game-changer.

In our books, there’s nothing much better than a perfectly prepared steak.  For instance, we love our Cowboy Ribeye or our Filet Mignon, but even with those, we serve them with homemade sauce (Chimichurri and Bordelaise, respectively). It’s time for a homemade steak sauce that rivals the best sauces in great steakhouses everywhere. 

VIDEO ALERT: Be sure to check out the video for this recipe in the recipe card.  If you like the video, subscribe to our YouTube Channel!

A small spoon drizzling homemade steak sauce down the top and center of a grilled steak on a white plate next to roasted potatoes.

HOW TO MAKE HOMEMADE STEAK SAUCE

A delicious steak sauce is actually quite simple to prepare, but the end result is bold and truly something special.

The entire sauce only takes about 15 minutes to prepare.

So good and a wonderful side to your favorite grilled steaks, and even seafood and vegetables!

THE INGREDIENTS YOU WILL NEED

To make steak sauce from scratch, here’s what you’ll need:

  • Unsalted butter
  • Onion, chopped
  • Garlic, minced
  • Tomato paste
  • Dijon mustard
  • Worcestershire sauce
  • Bourbon
  • Apple cider vinegar
  • Soy sauce
  • Lemon juice
  • Fresh rosemary

The makings for the best steak sauce in town.

The ingredients for steak sauce including bowls of tomato paste, mustard, vinegar and bottles of soy sauce and Worcestershire

After simmering the onion and garlic in the butter, it’s time to bring it all together.

Just a short simmer of 5 minutes is all that’s needed.

EXPERT TIP: Be sure to strain the mixture through a sieve into a medium-sized bowl. Then end-result should be smooth and silky. We use a wooden spoon to help press that sauce through the mesh.

A medium-sized silver saucepan filled with homemade steak sauce with a wooden spoon in it.

HOMEMADE STEAK SAUCE MAKES A GREAT GIFT

This recipe can easily be doubled, tripled, or even quadrupled. Divide it amongst small bottles, label, and give it as a great gift.

The sauce will keep in the refrigerator for up to 2 weeks and freezes beautifully for up to 2 months.

There’s nothing much better than a perfectly prepared steak, either at home or at the greatest steakhouses around the U.S. and beyond.

A small white bowl filled with homemade steakhouse with a small spoon lifting some out of the dish.

Ready to make the best homemade steak sauce this side of Kansas City? Go for it!

And when you do, be sure to take a photo, post it on Instagram, and tag @howtofeedaloon and hashtag #howtofeedaloon!

A small spoon drizzling homemade steak sauce down the top and center of a grilled steak on a white plate next to roasted potatoes.
Print Recipe
5 from 1 vote

Homemade Steak Sauce

This Homemade Steak Sauce will make you never look at the bottled stuff again. Robust and deeply flavorful and an amazing addition to a perfectly prepared steak. And it comes together in less than 20 minutes!
Prep Time5 minutes mins
Cook Time10 minutes mins
Total Time15 minutes mins
Course: Condiment
Cuisine: American
Servings: 6
Calories: 111kcal
Author: Kris Longwell

Ingredients

  • 4 tablespoon unsalted butter
  • ½ cup onion chopped
  • 2 cloves garlic minced
  • 3 tablespoon tomato paste
  • 2 tablespoon Dijon mustard
  • ¼ cup Worcestershire sauce
  • 2 tablespoon Bourbon optional
  • 2 tablespoon apple cider vinegar
  • 2 tablespoon soy sauce
  • 2 tablespoon lemon juice fresh
  • 2 sprigs rosemary fresh

Instructions

  • Melt the butter in a medium saucepan over medium heat. Add the onion and garlic and sauté until soft and translucent, about 5 minutes.
    4 tablespoon unsalted butter, ½ cup onion, 2 cloves garlic
  • Add the tomato paste, Dijon, Worcestershire sauce, Bourbon, vinegar, soy sauce, and lemon juice. Stir until completely combined.
    3 tablespoon tomato paste, 2 tablespoon Dijon mustard, ¼ cup Worcestershire sauce, 2 tablespoon Bourbon, 2 tablespoon apple cider vinegar, 2 tablespoon soy sauce, 2 tablespoon lemon juice
  • Add the fresh rosemary and simmer for 5 minutes.
    2 sprigs rosemary
  • Remove from heat and strain through a fine-mesh sieve into a small bowl. Press the back of a wooden spoon or spatula onto the mixture to help the liquid completely pass through, leaving behind the solids.
  • Serve at once, or transfer to an air-tight container with lid and store in the refrigerator for up to 2 weeks.

Video

Notes

This recipe can easily be doubled, tripled, or quadrupled to serve more people.  The quantities for this recipe will serve 4 to 6 people for one meal.
The alcohol in the Bourbon will cook out by about 99%.  If you prefer no alcohol at all, simply omit the Bourbon in the recipe. 
The steak sauce keeps in the fridge for up to 2 weeks and freezes for up to 2 months. 

Nutrition

Calories: 111kcal | Carbohydrates: 6g | Protein: 2g | Fat: 6g | Saturated Fat: 3g | Cholesterol: 20mg | Sodium: 570mg | Potassium: 212mg | Fiber: 1g | Sugar: 3g | Vitamin A: 368IU | Vitamin C: 6mg | Calcium: 25mg | Iron: 1mg

BLT Pizza with Pesto

June 21, 2020 by Kris Longwell 2 Comments

An overhead view of Pesto Pizza with Pancetta, Tomatoes and Arugula sitting on a cutting board next to sliced cherry tomatoes.

We love pizza. We love a good BLT. It’s no wonder then that we are madly in love with this culinary creation.

Using quick and easy homemade pesto sauce on this pizza is really spectacular. The semolina pizza dough is easy to prepare and it, along with the pesto, can be made in advance. All the other flavors come together to make this just about the best pizza we’ve ever made or devoured.

VIDEO ALERT: Be sure to check out the video for this recipe in the recipe card.  If you like the video, subscribe to our YouTube Channel!

A overhead view of a BLT pizza cut into squares on a wooden cutting board with a small bowl of red pepper flakes and a bowl of Parmesan cheese nearby.

HOW TO MAKE A BLT PIZZA

As mentioned, this pizza is not difficult to prepare at all.

You can easily make the pesto sauce up to 1 week in advance and the dough can be made ahead of time, too.

Assembly is a snap and fun to prepare, as well.

SEMOLINA DOUGH IS PERFECT FOR THIS PIZZA

Before we go any further, let’s talk about our homemade semolina dough.

Of course, you can use store-bought pizza dough, but if you follow our recipe, you’ll see how easy it is, and truly is what helps make this BLT pizza so amazing.

We like a little thickness to our crust for a BLT Pizza, but you can certainly use only half of the dough to make a thin crust.

A ball of semolina pizza dough sitting on parchments paper next to another dough ball.

The homemade easy pesto sauce matches so perfectly against the salty pancetta and tomatoes.

We make a big batch and put it on sandwiches, pasta, and salads!

Homemade pesto is the best!

A small white bowl with fresh pesto sauce in it.

LAYERS OF FLAVOR

As we all know, the ‘B’ of a BLT is, of course, bacon.

For this BLT pizza, we’re going with cubed pancetta, which is Italian cured pork, similar to bacon.

Sautéeing chopped green onions in the rendered pancetta fat adds an amazing depth of flavor for the pizza.

2 side by side images with the one on the left being pancetta cooking in a large silver skillet and the right being chopped green onions cooking in the same skillet.

Now, it’s time to build the pizza on your pizza paddle (or the back of a baking sheet or large cutting board).

Slather on a nice layer of the pesto sauce all over the stretched dough. Next a layer of sliced tomatoes, pancetta, sautéed green onions, and finally the cheese.

EXPERT TIP: Don’t worry about getting a perfectly round crust. For this pizza, give it more of an artisan feel and let it be a little misshapen. Press the edge of the dough with your fingers to give a little extra ‘weight’ to the crust edges.

At this point, you’ll need to make sure your oven is as hot as it can get, and place your pizza stone in there if you have one.

4 shots: 1st, two hands forming a pizza dough on a floured counter, 2nd: a hand using a spoon to spread pesto sauce on the dough, 3rd: a hand layering sliced cherry tomatoes on the pizza, and the 4th: a hand sprinkling white cheese on the pizza.

You can really go with any kind of chopped tomatoes, but we love cherry or grape tomatoes.

If you can find them, seek out yellow and purple tomatoes along with red to give the BLT pizza a beautiful presentation.

Bake the pizza at 550°F for only about 8 minutes. Keep an eye on the pizza to make sure it doesn’t burn on top!

Once the pizza is bubbling hot, remove from the oven and top with the arugula that you’ve dressed with a little extra-virgin olive oil, red wine vinegar, salt, and pepper.

Two stacked images with the top being a freshly baked BLT pizza on a wooden cutting board and the bottom is the same pizza with a hand sprinkling arugula on top.

BLT PIZZA IS A FLAVOR EXPLOSION

All the components of this pizza truly work amazingly well together.

Not one ingredient overpowers the other and they all are satisfyingly delicious.

EXPERT TIP: As with all pizza toppings, this pizza can be adapted to suit your tastes or what you have on hand. Bacon can be substituted for the pancetta, and any type of chopped tomato will work, as will any type of lettuce on top. The pesto is key to what makes this pizza so amazing, so we don’t recommend changing that element.

An overhead view of a BLT that has not been sliced and is next to a red checkered napkin.

OTHER PIZZA RECIPES TO TRY

This BLT pizza is, hands down, one of our all-time favorite pizzas, but some of our other favorites include:

  • Chicago-Style Deep Dish Pizza
  • BBQ Chicken Pizza
  • Soppressata, Mushroom, and Black Olive Pizza
  • Grilled Portobello BLT Pizzas
  • Deep Dish Pizza with Sausage and Broccoli Rabe

But, in the meantime, you’ve just got to make this amazing BLT Pizza with Pesto Sauce!

A close up view of a BLT pizza cut into squares next to a red checkered napkin.

This is such a crowd-pleasing pizza.

Every time we serve it we are amazed at how fast it gets devoured.

Make this pizza, and you’ll see what we mean.

A hand holding a square piece of a BLT Pizza with a bite taken out.

Ready to make one of the best pizzas on the planet? Go for it!

And when you do, be sure to tag @howtofeedaloon and hashtag #howtofeedaloon!

A hand holding a square piece of a BLT Pizza with a bite taken out.
Print Recipe
5 from 2 votes

BLT Pizza with Pesto Sauce

This BLT Pizza with Pesto, Pancetta, Tomato & Arugula is an amazing BLT pizza. The homemade pesto puts this pizza over the top. Well, that, and the homemade crust and the other incredible components of this amazing pizza!
Prep Time15 minutes mins
Cook Time15 minutes mins
Dough1 hour hr 30 minutes mins
Total Time2 hours hrs
Course: Pizza
Cuisine: Pizza
Servings: 4 people
Calories: 275kcal
Author: Kris Longwell

Equipment

  • Pizza stone, pizza oven, grill, or regular oven.

Ingredients

  • 1 semolina pizza dough click for the full recipe or use store-bought
  • Semolina or cornmeal (for dusting)
  • 4 oz pancetta cut into cubes (can also use 3 slices of bacon, roughly chopped).
  • 1 cup scallions roughly chopped
  • ½ cup classic pesto sauce click for full recipe
  • 1 cup tomatoes sliced, grape, cherry, or Roma - sliced or roughly chopped
  • 4 oz Fontina cheese shredded
  • 1 tablespoon olive oil
  • 2 teaspoon red wine vinegar
  • Pinch Kosher salt
  • cups baby arugula

Instructions

  • Place your pizza stone in the oven and preheat to 550°F. Allow the pizza stone to heat for 30 minutes.
  • Prepare pizza dough (unless using store-bought).
  • Prepare the easy pesto sauce.
  • On a lightly floured surface, stretch pizza dough to medium thickness.
  • Sprinkle your pizza paddle (or the back of a baking sheet) with a little semolina or cornmeal.
  • In a large skillet, cook the pancetta (or bacon) over medium heat until crisp. Drain on paper towels, reserving 1 tablespoon of the drippings in the skillet.
  • Cook scallion in the same skillet with rendered grease until tender, about 3 - 4 minutes. Use a slotted spoon to remove from pan and set aside.
  • Spread pesto over dough. Top with tomato pieces, pancetta, and scallions. Sprinkle with cheese. Brush olive oil over the edge of the pizza.
  • Carefully transfer the pizza to the pizza stone and bake 8 minutes, or until crust is golden and cheese is bubbly.
  • Meanwhile, in a medium bowl, whisk together the oil, vinegar, pepper, and arugula, toss to coat.
  • Top baked pizza with arugula mixture just before serving.

Video

Notes

We love using our homemade semolina pizza dough for this pizza, but pizza dough purchased from your local pizza shop or a restaurant is a great option, too.  We don't recommend pizza dough in a tube, however.
The pizza dough and pesto sauce can be made up to several days in advance.  Keep covered and in the fridge until ready to use.
Turn your oven on as high as it will go.  Place your pizza stone in the oven and let it heat for 30 minutes before transferring the pizza to it.
If you don't have a pizza paddle, you can use the back of a baking sheet or a large cutting board liberally sprinkled with semolina or cornmeal.  Give the pizza a shake every now and then to keep it loose on the surface, which will make transferring to the hot pizza stone easier.  
Bacon is a fine substitute for cubed pancetta. 
This pizza is best served right from the oven, although, leftovers (if there are any) are still pretty delicious the next day. 

Nutrition

Calories: 275kcal | Carbohydrates: 4g | Protein: 12g | Fat: 24g | Saturated Fat: 10g | Cholesterol: 52mg | Sodium: 421mg | Potassium: 232mg | Fiber: 1g | Sugar: 2g | Vitamin A: 818IU | Vitamin C: 10mg | Calcium: 178mg | Iron: 1mg

POST UPDATE: This post was originally published in February 2017, but was updated with improved tweaks to the recipe, new tips and photography, and a fabulous new video in June 2020!

Homemade Blueberry Pop Tarts

June 17, 2020 by Kris Longwell 17 Comments

A small white plate holding 2 homemade blueberry pop tarts, one that is split open on top, sitting next to a glass of milk.

This is one of those treats that is just so delicious and a joy to get the kids in the kitchen to help pitch in.

You will be surprised how easy it is to make these delicious sweet treats at home. You can also fill with vanilla custard or jam fillings. Use the same recipe that we use in our Jelly and Custard Doughnuts!

VIDEO ALERT: Be sure to check out the video for this recipe in the recipe card.  If you like the video, subscribe to our YouTube Channel!

A small white plate holding 2 homemade blueberry pop tarts, one that is split open on top, sitting next to a glass of milk.

HOW TO MAKE HOMEMADE BLUEBERRY POP TARTS

Okay, folks, it’s time to make pop tarts!  Woo hoo!

Before we get started putting together these amazing pastries, we recommend making the Perfect Pie Dough. It’s so easy and can be made up to several days in advance.

You can also make the blueberry filling up to a day or two in advance.

We love all types of fillings for homemade pop tarts, but there is something extra special about this blueberry mixture.

The process of making the blueberry filling is so simple and only requires you to simmer fresh blueberries with sugar and lemon juice. A cornstarch slurry thickens it to the perfect consistency and the addition of a handful of fresh blueberries thrown in at the end adds amazing texture and freshness.

EXPERT TIP: The filling can be made up to 3 days in advance and kept in an air-tight container in the refrigerator. It can also be frozen for up to 2 months.

A silver saucepan filled with bubbling blueberry filling with a wooden spoon in the pan.

STEPS FOR ASSEMBLING THE POP TARTS

This is when it’s fun to bring in the kids, or anyone who might want to have some fun in the kitchen making fruit pies from scratch!

Start by rolling out your dough into a large enough shape that will allow you to cut an approximate 10″ x 12″ rectangle. Cut the rectangle with a pizza cutter or sharp knife and do this on a well-floured surface. (See Step 1).

Next, use a pizza cutter (or sharp knife) to cut three rectangles, 4 inches each in width. (See Step 2).

Now, add a couple of tablespoons of the blueberry filling in the center of one half of the rectangle. (See Step 3).

3 stacked images with the top being a large rectangle of dough on a floured black marble countertop, and the middle is a hand using a cookie cutter to cut the dough into the 3rds lengthwise, and the bottom is a hand spoon blueberry filling onto one end of the dough strips.

A little water on the edges of the dough helps the dough adhere when folded over. (See Step 4).

Carefully use your fingers to fold the dough over to cover the blueberries. (See Step 5).

Gently crimp all 4 edges of the pie to create a seal. (See Step 6).

3 stacked images with the top being a hand brushing water on the edges of dough with blueberries on it, the middle are two hands folding the dough over the blueberries, and the bottom a hand using a fork to crimp the edges of the pop tart.

MAKING THE PERFECT POP TART

Now, a simple egg wash on the top helps the pop tarts to brown slightly. (See Step 7).

A couple of small slits in the top of the pie will help steam escape. (See Step 8).

Finally, a sprinkle of sugar on top adds a touch more sweetness and texture. (See Step 9).

3 stacked images with the top being a hand brushing egg wash on a pop tart, the middle a knife making slits in the top of a pop tart, and the bottom are fingers sprinkling sugar on the pop tart.

Transfer the Homemade Blueberry Pop Tarts to a baking sheet and then place it in a preheated oven at 375°F.

Let the tarts cool on a baking rack before glazing.

EXPERT TIP: A simple glaze is all the blueberry pastries need after they’ve cooled somewhat. We mix together 1¼ cup of confectioners’ sugar (aka powdered sugar) with a couple of tablespoons of water. If too thick, add a little more water, if too thin, add a little more sugar.

Spoon all over the top of the cooled pop tarts.

A hand using a spoon to drizzle sugar glaze over the top of baked homemade blueberry pop tarts.

FUN FOR THE KIDS AND ADULTS

Who doesn’t love a good ole Pop Tart every now and then?  Well, make them from scratch, and you’ll find an even greater appreciation for these awesome sweet treats.

This recipe makes 6 nice-sized pop tarts.

EXPERT TIP: Once the pop tarts are prepared, you can easily store them in an air-tight container in the refrigerator for up to 1 week. They are wonderful served warm or at room temperature.

Homemade blueberry pop tarts on a baking rack with fresh blueberries and spoon sitting nearby.

Pop Tarts conjure wonderful memories for so many of us.

When you make these from scratch, especially if you get the kiddos involved, you’ll have even greater memories to cherish.

They are fun and off-the-charts delicious!

Two hands that are holding a blueberry pop tart that has been split in half.

Ready to make the best sweet treat that kids and adults will be talking about for days to come? Go for it!

And when you do, be sure to take a photo, post it on Instagram, and tag @howtofeedaloon and hashtag #howtofeedaloon!

A small white plate holding 2 homemade blueberry pop tarts, one that is split open on top, sitting next to a glass of milk.
Print Recipe
5 from 6 votes

Homemade Blueberry Pop Tarts

Don't you just love Pop Tarts? Haven't had one in a while? Well, try these Homemade Blueberry Pop Tarts, and you'll never look at the boxed variety the same again. Be sure to whip up a batch of homemade pie dough and they're super easy, and incredibly tasty.
Prep Time30 minutes mins
Cook Time25 minutes mins
Resting Time15 minutes mins
Total Time1 hour hr 10 minutes mins
Course: Dessert
Cuisine: Dessert
Servings: 6 people
Calories: 426kcal
Author: Kris Longwell

Ingredients

  • Double recipe pie dough
  • 2 cups blueberries
  • ¼ cup sugar plus 1 tbsp
  • 1 tablespoon lemon juice
  • 2 teaspoon cornstarch
  • all-purpose flour for dusting work surface
  • 1 large egg
  • 1 cup confectioners' sugar

Instructions

MAKE AHEAD

  • Prepare the two pie doughs, form into two discs, wrap with plastic wrap, and keep in the refrigerator for up to 3 days.

PREPARE THE BLUEBERRY POP TARTS

  • Heat a medium-sized saucepan over medium heat and add 1½ cups of the blueberries, sugar (¼ cup), and lemon juice (1 tbsp). Stir with a wooden spoon until berries begin to release their juices and break down, about 5 minutes.
  • Meanwhile, in a small bowl, stir together the cornstarch and 2 tablespoons water. Add the cornstarch slurry to the saucepan and stir until thickened, a couple of minutes longer. Remove from heat and stir in the remaining ¼ cup of blueberries. Transfer to a bowl and set aside.
  • Preheat the oven to 375°F.
  • Working with one disc of dough at a time, transfer to a liberally floured work surface. Use the palm of your hand to begin flattening the dough. Use a floured rolling pin to gently roll the dough to a rough 10"x12" shape. Use a cookie cutter, or sharp knife, to cut the edges off each side of the dough to make a clean 10"x12" rectangle.
  • Using your pizza cutter, or knife, divide the dough into 3 rectangles, each 4"x 10."
  • Place about 2 to 3 tablespoons of the blueberry filling on one half of a rectangle, leaving a ½-inch border on each side. Brush a little water along the edges of each pie, and then use your fingers to carefully fold the side of the dough without the filling over the side with the filling.
  • Brush each pie with the egg wash. Then, use a small knife to cut a couple of slits on the top of each pie creating an "X." Sprinkle with a little sugar over the top of each pop tart and then transfer them carefully with a spatula to a baking sheet.
  • Bake the pies until golden, about 25 minutes (rotate the baking sheet halfway through).
  • Let the pies cool on the pan on a wire rack.
  • Meanwhile, mix 1¼ cup confectioners' sugar into a bowl with 2 tablespoons of water. The mixture should have the consistency of heavy cream.
  • Brush the icing over the cooled pies. Serve warm or at room temperature.

Video

Notes

Store-bought pie dough can be used, but we strongly making the Perfect Pie Crust from scratch.  The pie dough can be made several days in advance and kept wrapped in plastic wrap in the fridge, or frozen for up to 1 month.
Frozen blueberries can be substituted for fresh, in a pinch. 
Make sure to flour your work surface liberally before forming the pies.  When working with the first disc of dough, leave the other in the fridge.  If your kitchen is warm, and if you handle the dough too much, the butter will soften and will want to stick to your work surface.  If this is happening, go ahead and lift the rectangles of the dough up and sprinkle a little more flour beneath them.
Don't worry if the pies become a little misshapen when transferring to the baking sheet.  Fix them with your hands as best you can and re-crimp with your fork.  These are homemade and shouldn't look perfectly square, anyway!
It is completely normal for some of the blueberry juice to bubble out of the pies when cooking.  
The cooked pop tarts will keep in an air-tight container in the fridge for up to 10 days and they will freeze for up to 1 month.  But, they are best served fresh!

Nutrition

Calories: 426kcal | Carbohydrates: 36g | Protein: 1g | Fat: 12g | Saturated Fat: 4g | Cholesterol: 31mg | Sodium: 13mg | Potassium: 49mg | Fiber: 1g | Sugar: 33g | Vitamin A: 72IU | Vitamin C: 6mg | Calcium: 8mg | Iron: 1mg

POST UPDATE: The recipe was originally published in May 2015, but was updated with improved tweaks to the recipe instructions, new tips and photography, and a fabulous new video in June 2020!

This recipe is adapted from Williams Sonoma Blueberry Hand Pies

Pesto Pasta

June 14, 2020 by Kris Longwell 2 Comments

A white bowl filled with pesto pasta next to a grey napkin, two forks, and glass of white wine.

So often, we find that dishes with just a handful of fresh ingredients are simply the very best.

This dish is absolutely no exception to that rule. It’s all about the fresh basil, of course, but when combined with Parmesan cheese, pine nuts, garlic, and good-quality extra-virgin olive oil, it transcends into something magical. And it comes together in about 30 minutes!

VIDEO ALERT: Be sure to check out the video for this recipe in the recipe card.  If you like the video, subscribe to our YouTube Channel!

A white bowl filled with pesto pasta next to a grey napkin, two forks, and glass of white wine.

HOW TO MAKE PESTO PASTA

As mentioned, this iconic Italian pasta dish comes together very quickly.

We find that blanching the fresh basil first mellows the overall flavor of the pesto which works well with the cooked pasta.

You’ll use the same water to blanch the basil as well as cook the pasta in.

BLANCHING THE BASIL

You’re going to start off with 10 cups of fresh basil. That may seem like a lot, but like spinach, as it cooks, it wilts and reduces in size.

Drop the basil into a pot of salted, boiling water and stir to submerge.

EXPERT TIP: It only takes about 30 seconds to blanch the basil. To prevent the basil from continuing to cook, we recommend immediately transferring the blanched basil to an ice bath. We place a colander in a large bowl filled will water. Then add ice. The warm basil will melt the ice and then later, just remove the colander for easy removal of the basil. Be sure to squeeze out excess water and then pat the basil dry with paper towels.

4 shots: 1st hand dropping basil into a pot of boiling water, 2nd basil in a ice bath, 3rd two hands squeezing our excess water from blanched basil, 4th, two hands drying the blanched basil in paper towels.

THE INGREDIENTS YOU WILL NEED

As we have said, the ingredients of Pesto Pasta are simple and straightforward. Here’s what you’ll need:

  • Fresh basil
  • Parmesan cheese, grated
  • Pine nuts, aka pignoli
  • Garlic
  • Extra-virgin olive oil
  • Salt and pepper

Place everything, except the oil, in your food processor and pulse until fully processed.

EXPERT TIP: You’ll need to thin the mixture with a couple of tablespoons of the spinach/pasta water. Be sure to have your pasta cooking while you’re making the pesto, and remember to save about a cup of the water.

2 stacked images with the top of a food processor filled with basil leaves, pine nuts, grated parmesan cheese, and garlic and the bottom image after it has all been processed.

Place the basil mixture into a medium-sized bowl and use a large spoon to mix in the olive oil.

Stir for a couple of minutes to completely incorporate the oil into the mixture.

EXPERT TIP: We go with extra-virgin olive oil for our pesto pasta because it has a slightly lighter taste and texture, which works well against the flavorful basil and garlic.

A hand pour olive oil from a glass oil holder into a glass bowl filled with pesto with a large wooden spoon in the bowl.

CHOOSING THE RIGHT PASTA

You really can’t go wrong when selecting a pasta for pesto pasta.

We love buctani, spaghetti, and linguine for this dish, but penne or bow-tie works beautifully, too.

EXPERT TIP: This also makes a wonderful pasta salad served warm or at room temperature. If serving as a pasta salad, we recommend using small pasta, such as penne, fusilli, or elbow.

A pasta pot filled cooked spaghetti being transferred into a bowl filled with fresh pesto sauce.

Before tossing the pasta with the pesto, you’ll need to thin the sauce a little more with about ½ a cup of the spinach/pasta water.

Start with half of the pesto in a large pasta bowl.

Add all of the pasta, top with remaining pesto and little more Parmesan, and use a couple of large wooden spoons to toss until the pasta is fully coated.

A person in a red shirt using two large wooden spoons to toss a large pasta bowl filled with pesto pasta.

WHEN TO SERVE PESTO PASTA

This dish makes a wonderful “primo”, or first course, of a spectacular Italian feast.

But, honestly, the dish is so satisfying, it makes an amazing main dish.

Serve with crusty Italian bread, a leafy green salad, and a crisp, dry white wine, and you’ll be set. And happy.

An overhead view of a white pasta bowl filled with pesto pasta with a small basil leaf on top.

We just love pesto so much. Other recipes that include fresh pesto are:

Italian-Style Panini
Pesto Potato Salad with Green Beans
BLT Pizza with Pesto, Tomatoes, and Pancetta

And how about Sweet Pea Pesto Pasta! Yum!

But, for this Pesto Pasta…it’s all about the fresh pesto. And boy, oh boy, does it truly deliver the “Wow!” factor.

A close up view of a bowl filled with spaghetti and pesto sauce with a fork twisting the pasta.

Ready to make the best Pesto Pasta in town? Go for it!

And when you do, be sure to tag @howtofeedaloon and hashtag #howtofeedaloon!

A white bowl filled with pesto pasta next to a grey napkin, two forks, and glass of white wine.
Print Recipe
5 from 1 vote

Pesto Pasta

Pesto Pasta is a true Italian classic. This dish is just so fresh, and amazing in it's simplicity. It really is incredibly good. One of our favorites. Serve it warm as a main dish, or use a smaller pasta and serve it at room temperature for an amazing pasta salad.
Prep Time15 minutes mins
Cook Time15 minutes mins
Total Time30 minutes mins
Course: First course, Main Course
Cuisine: Italian
Servings: 6 people
Calories: 505kcal
Author: Kris Longwell

Equipment

  • Food processor

Ingredients

  • 10 cups basil fresh
  • ½ cup Parmesan cheese plus a little more for finishing off the dish
  • 2 tablespoon pine nuts aka pignolis
  • 2 cloves garlic minced
  • ½ cup extra-virgin olive oil plus a little more for finishing off the dish
  • ½ Kosher salt plus more for boiling water
  • 1 lb pasta uncooked, such as bucatini, spaghetti, or penne.

Instructions

  • Bring a pot of salted water to a boil. Meanwhile, place a colander in a large bowl of water, and then add ice. Working in 2 batches, blanch the basil in the boiling water for 20 to 30 seconds. Immediately transfser blanched basil to the ice bath.
  • Set aside ½ cup of the hot water and reserve the pot containing the blanching water.
  • Lift colander from ice water and squeeze out the excess water from the basil; transfer to paper towels and pat dry.
  • Add the pasta to the boiling water, and cook until al dente.
  • Meanwhile, pulse blanched basil, ½ cup Parmesan, pine nuts, garlic, ½ teaspoon salt, and ¼ teaspoon black pepper in a food processor until well combined. Adding a couple of tablespoons of water and pulse for another 5 to 10 seconds.
  • Transfer basil mixture to a medium bowl and stir in ½ cup extra-virgin olive oil.
  • Spoon ½ cup pesto and ¼ cup pasta cooking liquid into a large bowl. Transfer cooked pasta to the bowl and use wooden spoons or tongs to toss, adding the remaining pesto and another tablespoon of cheese, until pasta is nicely coated.
  • Divide among bowls and top with cheese and a drizzle of oil.

Video

Notes

Once you've finished blanching the basil, and transferred it to an ice bath, go ahead and your pasta cooking.  Boil it in the same water that you blanched the spinach in.  Remember to save about a cup of the pasta/spinach water.  
Be careful not to add too much salt to the pesto.  Hopefully, you have liberally salted your pasta water, so when you add some water to the sauce, you'll also be adding salt. Do a taste test and add more salt, if needed. 
We love serving this with long pasta, such as bucatini, spaghetti, or linguine.  However, this also makes a wonderful pasta salad served at room temperature.  If you're doing that, we recommend going with short pasta, such as penne, fusilli, or elbow. 
The pesto sauce and easily be made up to several days in advance and then gently reheated on the stove. 
Pesto sauce keeps in the refrigerator for up to 2 weeks and freezes well for up to 2 months. 

Nutrition

Calories: 505kcal | Carbohydrates: 59g | Protein: 15g | Fat: 14g | Saturated Fat: 4g | Cholesterol: 6mg | Sodium: 140mg | Potassium: 314mg | Fiber: 3g | Sugar: 2g | Vitamin A: 2175IU | Vitamin C: 8mg | Calcium: 187mg | Iron: 3mg

POST UPDATE: This recipe was originally published April 2015, but was updated with improved tweaks to the recipe, new tips, and photography, and a fabulous new video in June 2020!

Chicken Gyro with Tzatziki Sauce

June 11, 2020 by Kris Longwell 66 Comments

Two chicken gyros wrapped in foil on a white platter next to a small jar filled with tzatziki sauce with a spoon in, with a whole tomato and parsley in the background.

If you’re looking for an incredibly delicious and festive dish to serve to guests, friends, or just your family…this is the one for you.

Greek food is loaded with flavor and history and these babies are about as good as they come. You can easily double or triple the recipe and set up a fun gyro bar for parties and gatherings. Most of the components, including the Homemade Tzatziki Sauce, can be made up to a day in advance making preparation quick and easy!

VIDEO ALERT: Be sure to check out the video for this recipe in the recipe card.  If you like the video, subscribe to our YouTube Channel!

Two chicken gyros wrapped in foil on a white platter next to a small jar filled with tzatziki sauce with a spoon in, with a whole tomato and parsley in the background.

HOW TO MAKE CHICKEN GRYO WITH TZATZIKI SAUCE

Making a homemade gyro is really much easier than you might think.

No, we won’t be using a huge spiral spit with chicken (or lamb) attached to like you often see in Greek restaurants around the world.

We’ll be marinating amazing chicken, creating an incredible cucumber salad, and infusing amazing flavor to beautiful pita bread. And of course, making delicious tzatziki sauce from scratch.

CHOOSING THE RIGHT CHICKEN

For our chicken gyro, we love going boneless, skinless chicken thighs. The dark meat is flavorful and very tender. But, you can go with chicken breasts, too, you’ll just need to increase the cooking time to reach 165°F internal temperature.

We create a marinade that is loaded Greek goodness including Greek yogurt, garlic, red wine vinegar, lemon juice, and herbs.

EXPERT TIP: After tossing the chicken with the marinade and fully coating the pieces, we like to transfer it all into a large freezer bag. Squeeze the air out and then seal the bag. Use your hands to massage the marinade all over into the meat. Place in the fridge from 1 hour to 8 hours. This gives you more room in your fridge, and it also ensures every bit of the chicken pieces is covered with the marinade.

3 stacked images with the top being gyro marinade being poured over chicken in a bowl, the 2nd two wooden spoons tossing the chicken in the marinade, the 3rd the chicken being pressed in a large freezer bag.

Cucumbers are very common in Greek cuisine and are and an essential ingredient for a classic gyro.

Toss the cucumbers with some chopped tomatoes, red onion, parsley, red wine vinegar, salt, and pepper. Chill in the fridge while you’re preparing the remainder of the gyros.

This salad is so good, you’ll be tempted to eat it all up before you prepare the chicken. But wait. You’ll be glad you did.

A large glass bowl filled with a cucumber and tomato salad with a large wooden spoon in it.

HOMEMADE TZATZIKI SAUCE IS EASY TO MAKE

If there is one component of chicken gyro that you don’t want to skip, it’s the homemade tzatziki sauce.

All you have to do is shred some cucumber with a box grater, toss in the remaining ingredients, chill, and you got the best tasting tzatziki sauce you’ve ever tried.

EXPERT TIP: It’s important to remove the excess water from the cucumbers for the tzatziki sauce, otherwise the result will be too thin of a sauce. We squeeze the shredded (or finely chopped) cucumber wrapped in cheesecloth over a bowl or sink. If you don’t have cheesecloth, you can also use a kitchen towel or coffee filter, or just your hands to do the job.

2 stacked images with the top a peeled cucumber being shredded on a box grater and the bottom a glass bowl filled with tzatziki sauce and a whisk.

GRILLING THE CHICKEN IS IDEAL

Now, it’s time to grill the marinated chicken!

We fire our grill up to medium-hot and grill over direct heat until completely cooked, about 6 to 10 minutes per side.

EXPERT TIP: You can also cook the chicken in a skillet or bake in the oven. If using a skillet, add a little olive oil to the hot skillet and then cook until nicely browned and juices run clear. If baking, add to a rack on a baking sheet and cook at 400°F for 35 to 40 minutes, or until an instant-read thermometer reaches 165°F. But, if you can…grill the chicken! It gives a beautiful smokey, charred chicken that is fantastic.

A close up view of seasoned, cooked chicken thighs on hot grill.

INFUSED OIL ADDS DEPTH OF FLAVOR TO CHICKEN GYRO

This next step isn’t 100% necessary, but we feel it puts these homemade chicken gyros over-the-top in flavor.

Simply heat ¼ cup of olive oil in a small skillet over medium heat, toss in a couple of minced cloves of garlic, along with some dried oregano, rosemary, and a pinch of salt and pepper. Simmer for 5 minutes.

EXPERT TIP: For maximum flavor, brush the infused oil over one side of the pitas and then place them in the oven on a baking sheet in a warm oven until heated through. After you have cut the grilled chicken into strips, brush some of the infused oil all over the chicken. Again, the chicken gyros will be delicious if you skip this step, but if you don’t they’ll be even better!

3 stacked images with the top being a small skillet filled with oil, minced garlic, and dried herbs with a wooden spoon stirring it, the 2nd are two pitas on a foil-lined baking sheet being brushed with oil, the 3rd the same two pitas after they have been heated in the oven.

Bring on the added flavor with garlic and herb-infused oil.

This chicken is so flavorful it is insane.

A hand brushing infused oil over grilled chicken thighs on a wooden cutting board.

PERFECT FOR ENTERTAINING

This is the perfect recipe for serving at parties or family gatherings.

Place all the various components out and let everyone make their own chicken gyro!

EXPERT TIP: Have squares of aluminum foil on hand so folks can use them to hold their gyros together. And be sure to have plenty of napkins!

A hand using a small spoon to drizzle homemade tzatziki sauce over the end of a chicken gyro that is sitting next to a small jar of the sauce on a white platter.

One of our most cherished culinary memories from living in New York City was getting amazing chicken (or lamb) gyros from a hole-in-the-wall Greek restaurant mid-town.

It took several years of experimenting to finally get a recipe that comes very, very close to those incredible gyros in the Big Apple.

These are so good, you’ll be so excited that you can make amazing Greek gyros in your own home.

A hand holding a folded chicken gyro with tzatziki sauce inside.

Ready to make the best chicken Gyros this side of the Greek Islands? Go for it!

And when you do, be sure to take a photo of it, post it on Instagram, and tag @howtofeedaloon and hashtag #howtofeedaloon.

Two chicken gyros wrapped in foil on a white platter next to a small jar filled with tzatziki sauce with a spoon in, with a whole tomato and parsley in the background.
Print Recipe
4.97 from 26 votes

Chicken Gyro with Tzatziki Sauce

This Chicken Gyro with Tzatziki Sauce packs so much flavor into your lunch, you just won't believe it. You can make the cucumber topping a day ahead and letting the chicken marinate overnight produces amazing flavor. Be sure to make the homemade Tzatziki Sauce, it's easy, and the best!
Prep Time20 minutes mins
Cook Time35 minutes mins
Marinating Time1 hour hr
Total Time1 hour hr 55 minutes mins
Course: lunch
Cuisine: Greek
Servings: 6
Calories: 359kcal
Author: Kris Longwell

Equipment

  • Gas or electric grill (can also use stovetop or oven)
  • Aluminum foil squares, for serving

Ingredients

FOR THE MARINATED CHICKEN

  • 1¼ lbs chicken thighs boneless, skinless
  • ½ teaspoon Kosher salt plus more for seasoning chicken
  • ¼ teaspoon black pepper freshly ground
  • ¼ cup Greek yogurt plain, preferably whole milk
  • 3 cloves garlic minced
  • 2 tablespoon lemon juice 1 lemon
  • 2 teaspoon red wine vinegar
  • 2 tablespoon extra virgin olive oil
  • 1 teaspoon smoked paprika
  • 1 teaspoon coriander ground
  • 1 tablespoon dried oregano

FOR THE CUCUMBER SALAD

  • 1 cucumber peeled, seeded, and cut into ¼-inch pieces
  • ¾ cup tomatoes chopped
  • 1 small red onion chopped
  • ¼ cup flat-leaf parsley chopped
  • 1 tablespoon red wine vinegar
  • ¼ teaspoon Kosher salt
  • ¼ teaspoon black pepper freshly ground

FOR THE INFUSED OIL

  • ¼ cup extra-virgin olive oil
  • 2 cloves garlic minced
  • 1 teaspoon oregano dried
  • 1 teaspoon rosemary dried
  • 1 pinch Kosher salt
  • 1 pinch black pepper freshly ground

FOR ASSEMBLY

  • 6 8-inch pita rounds preferably pocketless
  • Homemade tzatziki sauce click for the full recipe

Instructions

MARINATE THE CHICKEN

  • Lightly season the chicken pieces all over with salt and pepper.
  • In a small bowl, whisk together the yogurt, garlic, vinegar, lemon juice, oil, salt, pepper, and seasonings until fully combined.
  • Place the chicken in a large bowl and pour the marinade all over. Use wooden spoons to stir the chicken around until fully coated with the marinade. Either cover with plastic wrap, or transfer to a large freezer bag, seal, and place in the refrigerator for 1 to 8 hours.

MAKE THE CUCUMBER SALAD

  • Place the cucumber, tomatoes, onion, parsley, vinegar, salt, and pepper in a medium-sized bowl. Gently mix. Set aside.

MAKE THE INFUSED OIL

  • Heat the olive oil in a small skillet over medium heat. Once hot, add the minced garlic, herbs, salt, and pepper. Gently simmer for 3 to 5 minutes. Remove from heat and set aside.

COOK THE CHICKEN AND ASSEMBLE THE GYROS

  • Heat grill to medium-high heat. Add chicken to grill and cook until fully cooked (about 15 minutes). Discard left-over marinade.
  • Bring the chicken inside and let sit for a couple of minutes. Meanwhile, turn your broiler on LOW. Place the pitas on a baking sheet lined with aluminum foil and brush the tops with the infused oil. Place in the oven, on the middle rack, until the pitas are warmed through, a couple of minutes. Keep an eye on them, don't let them burn!
  • Meanwhile, cut the chicken into strips and brush the infused oil all over the chicken.
  • Remove the warmed pitas from the oven. Build the gyros by adding about 1 tablespoon of the tzatziki sauce first, then a layer of chicken, topped with about a ¼ cup of cucumber topping, and then a little more tzatziki on top, if desired.
  • Fold up like the sides like a soft taco, wrap the ends with a square of aluminum foil, and serve immediately.

Video

Notes

Boneless, skinless chicken thighs work well for this recipe, but you could also go with thin chicken breasts.  Just make sure they are cooked through until juices run clear and internal temperature reaches 165°F. 
We love using whole milk Greek plain yogurt, but you could certainly use low-fat, or fat-free, but the marinade won't adhere to the chicken as well. 
The infused oil is optional, but it's really easy to make and makes a big difference in the final taste of the gyros. 
The tzatziki sauce, marinade, cucumber salad, and infused oil can all be made up to 12 hours before grilling the chicken.  Don't let the chicken sit in the marinade for more than 8 to 10 hours.
This recipe can easily be doubled or tripled for serving a crowd.  
The tzatziki sauce will keep in the fridge for up to 2 weeks, the cooked chicken and cucumber salad will keep for several days.  

Nutrition

Calories: 359kcal | Carbohydrates: 6g | Protein: 17g | Fat: 18g | Saturated Fat: 6g | Cholesterol: 93mg | Sodium: 379mg | Potassium: 372mg | Fiber: 1g | Sugar: 2g | Vitamin A: 640IU | Vitamin C: 12mg | Calcium: 43mg | Iron: 1mg

Steak and Eggs with Blistered Tomatoes

May 31, 2020 by Kris Longwell Leave a Comment

A view looking down on a white plate filled with a seared New York strip steak topped with a fried egg next to roasted tomatoes with a glass of orange juice nearby.

Every now and then you just have to do it. You have to turn breakfast into a meal fit for a king or a queen.

You know you’ve seen something like this on almost every decent breakfast/brunch menu out there. But, if you’re like us, you probably think the steak will be a disappointment and you’ll end up wishing you had ordered something else. With this recipe, we can 100% guarantee you will not be disappointed, but rather thrilled with the results!

VIDEO ALERT: Be sure to check out the video for this recipe in the recipe card.  If you like the video, subscribe to our YouTube Channel!

A view looking down on a white plate filled with a seared New York strip steak topped with a fried egg next to roasted tomatoes with a glass of orange juice nearby.

HOW TO MAKE STEAK AND EGGS WITH BLISTERED TOMATOES

This show-stopper of a meal isn’t difficult to prepare, but we do recommend getting all of the components of the dish in place before you start cooking.

Don’t forget to get started early with salting the steaks (more on that in a moment).

CHOOSING THE RIGHT STEAK

You’ve heard us say this before, but it couldn’t be more true for this dish: “Most meals are only as good as the quality of the ingredients you choose.”

If you’re going to make steak and eggs, then you need top-notch steaks. That’s why we turn to D&D Beef time and time again. Their commitment to quality is unmatched and we love knowing exactly where the beef came from. We HIGHLY recommend this amazing family-run ranch from the heartland of the United States, Nebraska!

For this dish, we’re going with D&D Beef’s New York Strip Steaks!

EXPERT TIP: To ensure super juicy steaks, we like to brine the meat at least one hour before searing and butter-braising them in our cast-iron skillet. The salt brings out moisture from the steaks which will lead to a juicier steak. Simply rinse the salt off the steak, pat the meat completely dry with paper towels, and then lightly season with salt and pepper.

A hand sprinkling salt all over an uncooked New York strip steak on a baking rack fitted into a baking sheet.

HOW TO BLISTER TOMATOES

Blistering tomatoes simply means you are roasting them until they are soft and slightly charred.

We love to go with grape tomatoes and slice into smaller pieces.

Simply toss them with extra-virgin olive oil, and fresh herbs, such as rosemary and chives, season with salt and pepper, and then place on a foil-lined baking sheet and roast under the broiler on HIGH for just a few minutes. Keep an eye on them…don’t let them burn!

3 stacked images with the top being a glass bowl filled with cherry tomatoes with olive oil and herbs being tossed by 2 wooden spoons, and the middle with the tomatoes on a foil-lined baking sheets, and the bottom of the same tomatoes after being roasted.

HOW TO BUTTER-BRAISE STEAKS

Now, it’s time to cook the steaks perfectly. Here’s what you’ll need to butter-braise the steaks, one a time.

  • 2 steaks (1 inch to 1 ½ inches in thickness)
  • Cast iron skillet (preferably 12-inch)
  • ¼ cup canola (or vegetable) oil (per steak)
  • Aromatics, such as fresh rosemary, or thyme, and a couple of cloves of garlic
  • 3 tablespoon of unsalted butter (per steak)
  • A metal spatula and tongs
  • Oven mitts
  • A large spoon
  • An instant-read thermometer

Start by bringing the oil to nearly smoking in a large cast-iron skillet over medium-high heat. Add the steak and sear on both sides, turning frequently with your spatula and tongs, for about 3 total minutes for a 1-inch thick steak, and 4 minutes for 1 ½ thick.

A New York strip steak being seared int a cast iron skillet with a pair of tongs and metal spatula getting ready to flip it over.

Now, the fun part starts.

Toss in the aromatics and butter. Now, with an oven mitt on, tilt the skillet and constantly spoon the hot butter and oil over the steak, flipping ever 20 to 30 seconds.

Cook until your instant-read thermometer reaches 125°F for medium-rare, or 135°F for medium.

A spoon pouring hot butter over a seared New York strip steak in a cast iron skillet with rosemary and garlic on the steak.

HOW TO SERVE STEAK AND EGGS WITH BLISTERED TOMATOES

Once the tomatoes have roasted, you can keep them warm in a low-temp oven covered with foil. The same is true for the steaks, especially if you are serving more than 2 people.

Once the steaks have cooked, it’s time to quickly fry up your eggs. We love serving them sunny-side up, but however you like to prepare your eggs will work perfectly.  Our favorite non-stick skillet comes from Sardel.  Their products are hand-crafted in Italy and are nothing short of amazing.

This dish is off-the-charts good by itself, but you can round it out even further by preparing our delicious Restaurant-Quality Hash Browns!

A view looking down on a white plate filled with a seared New York strip steak topped with a fried egg next to roasted tomatoes with a glass of orange juice nearby.

This will come as no surprise to hear that this Steak and Eggs with Blistered Tomatoes is The Loon’s all-time favorite breakfast dish.

It’s actually so incredible and satisfying, we often serve it for an amazing dinner.

Aren’t you craving this right about now?

A close up view of a seared New York strip steak on a white plate with a fried egg on top of it next to roasted cherry tomatoes with orange juice in the background.

A SHOW-STOPPER BREAKFAST

The tomatoes can be made in advance, simply re-heat in the oven before serving. They can even be served room temperature!

Butter-braising the steak is not only fun to prepare, but the end results are heavenly.

Folks, this is a breakfast you and your loved ones will be raving about for months to come.

A fork with a piece of steak stuck into it is being plunged into the yolk of an egg sitting on top of a seared steak next to roasted cherry tomatoes.

Ready to make the best breakfast in town? Go for it!

And when you do, be sure to take a photo, post it on Instagram, and tag @howtofeedaloon and hashtag #howtofeedaloon!

A close up view of a seared New York strip steak on a white plate with a fried egg on top of it next to roasted cherry tomatoes with orange juice in the background.
Print Recipe
No ratings yet

Steak and Eggs with Blistered Cherry Tomatoes

This Steak and Eggs with Blistered Cherry Tomatoes is the perfect 'special occasion' breakfast. This is, without doubt, the Loon's favorite morning dish. Butter-basting the steaks is off-the-charts good. Thick strip or ribeye steaks are ideal.
Prep Time15 minutes mins
Cook Time30 minutes mins
Total Time25 minutes mins
Course: Breakfast
Cuisine: American
Servings: 2 people
Calories: 528kcal
Author: Kris Longwell

Equipment

  • Cast-iron skillet, preferably 12-inch
  • Instant-read thermometer, spatula, tongs, and a large spoon.

Ingredients

  • 2 steaks 1 to 1½-inches thick
  • Black pepper freshly ground
  • Kosher salt for brining and then seasoning
  • 1 cup grape tomatoes or cherry, roughly chopped
  • 1 tablespoon extra-virgin olive oil
  • 1 tablespoon rosemary fresh, chopped + 4 sprigs
  • 1 teaspoon chives fresh, chopped, plus extra for garnish
  • canola oil or vegetable, ¼ cup for each braising
  • 4 cloves garlic
  • 7 tablespoon unsalted butter divided
  • 2 large eggs

Instructions

  • Pat the steaks dry with paper towels and then liberally sprinkle salt all over them. Place on a baking sheet and let rest for 1 hour, or overnight in the refrigerator on a plate loosely covered with a paper towel.
  • Gently rinse the steaks with running water, helping to remove all the salt. Use paper towels to completely dry off the steaks. Season the steaks with a couple of pinches of salt and pepper. Set aside.
  • Turn your broiler on HIGH.
  • Toss the roughly chopped tomatoes with the extra-virgin olive oil, rosemary, chives, ½ teaspoon salt, and ¼ teaspoon black pepper. Place on a baking sheet lined with foil and place 6 inches under the broiler. Roast for 1 to 2 minutes, and then stir the tomatoes around with a wooden spoon. Roast for another couple minutes, until soft and starting to char. Remove and loosely tent with a piece of foil. Keep your eyes on them in the oven, don't let them completely burn!
  • Heat ¼ cup of the canola oil in a large cast-iron skillet over medium-high heat until shimmering and just starting to smoke.
  • Add one steak, and sear, turning frequently with a spatula and tongs, until browned and crust has started to form on the outside of the steak, about 3 to 4 minutes Add the rosemary sprigs and garlic cloves, and butter.
  • With oven mitt on, carefully tilt the skillet to one side and use a large spoon to spoon the butter/oil all over the steak, flipping and continuing to spoon. Repeat this until the internal temperature is 125°F for medium-rare and 135°½F for medium. Set aside, tent with foil. Discard the oil/butter and herbs, and repeat this process with the 2nd steak.
  • In a separate, non-stick skillet, melt 1 tablespoon of butter and add the eggs. Cook for 1 to 2 minutes for sunny-side-up. Season with a pinch of salt and pepper.
  • Place the cooked steaks on plates, and top with roasted tomatoes and eggs. Serve immediately.

Video

Notes

Thick steaks work best for butter-braising.  We love going with New York strip steaks or ribeye.   1-inch to 1½-inches in thickness is ideal.   
The cooked steaks and roasted tomatoes can be kept warm in a 250 F oven.
The tomatoes can be made up to several hours in advance and he-heated in the oven or served room temperature.  They are delicious even when they're not warm!
Cook the steaks to your preferred doneness.  125°F for medium-rare (our favorite), or 135°F for medium.

Nutrition

Calories: 528kcal | Carbohydrates: 6g | Protein: 53g | Fat: 14g | Saturated Fat: 8g | Cholesterol: 431mg | Sodium: 199mg | Potassium: 875mg | Fiber: 1g | Sugar: 2g | Vitamin A: 2198IU | Vitamin C: 13mg | Calcium: 87mg | Iron: 5mg

POST UPDATE: This recipe was originally published in July 2015, but was updated with improved tweaks to the recipe, new tips, photography, and a fabulous new video in May 2020!

Grilled Bourbon Maple Wings

May 28, 2020 by Kris Longwell 13 Comments

A large wooden cutting board with a bunch of grilled bourbon maple chicken wings sitting next to a small bowl of sauce in front of a grey napkin.

If you are looking for a recipe that is a celebration of summer grilling, you’ve come to the right place.

This recipe is almost beyond description in how scrumptious it is. We are thrilled to have partnered with Kroger to share this “cook-in” recipe!  Whether you’re grilling inside or out, this recipe is one you’ll want to make time and time again!

VIDEO ALERT: Be sure to check out the video for this recipe in the recipe card.  If you like the video, subscribe to our YouTube Channel!

A large wooden cutting board with a bunch of grilled bourbon maple chicken wings sitting next to a small bowl of sauce in front of a grey napkin.

HOW TO MAKE GRILLED BOURBON MAPLE CHICKEN WINGS

There are several components to this dish that we feel put these wings in real contention for winning the battle of best wings ever.

The rub, the sauce, and even the prepping of the wings can all be done in advance, meaning that when it’s time to fire up the grill, you’re almost done!

The bourbon and the maple syrup are key, of course, and we’ll get to that soon.

The Perfect BBQ Rub is the perfect match against the slightly sweet sauce.

One batch is all you need for these wings, but the rub is so perfectly wonderful, that we double the recipe, just to have extra on hand!

A small pile of a perfect BBQ rub sitting on a wooden cutting board.

PREPARING THE CHICKEN

We love using whole chicken wings for this recipe. These wings are good and messy, and you want a whole wing that you can solidly grab with two hands (with plenty of napkins nearby!).

Place the chicken wings in a large bowl, add some olive oil and apple cider vinegar, and then dump all the BBQ rub. Toss with a couple of large wooden spoons until fully coated.

EXPERT TIP: The BBQ rub is so deeply flavorful, you could throw them on the grill right after coating them, and they would be delicious. But letting them chill and marinate in the refrigerator for at least 30 minutes, or even better, overnight, is recommended. You can simply cover the bowl with plastic wrap, or transfer to a large freezer baggie until ready to grill.

2 stacked photos, the top is a hand dumping a small glass bowl of BBQ rub into a bowl of chicken wings, and the bottom photo is the chicken wings being tossed with two wooden spoons coating the chicken with the rub.

QUALITY INGREDIENTS MAKE A BIG DIFFERENCE

It’s no surprise to say the two most important ingredients for our Bourbon Maple sauce are…you guessed it: Bourbon and maple syrup.

There are lots of awesome bourbons on the market. Ask that bourbon drinker in your life for a good option.

For the maple syrup, we always turn to Kroger’s Private Selection 100% Pure Grade A Amber Color Maple Syrup. The taste and texture are truly the best, and a MAJOR reason these wings are so epic in taste.

A hand pouring a jar of pure maple syrup into a stainless steel saucepan next to a bottle of the pure maple syrup all on a wooden cutting board.

The Worcestershire sauce, tomato paste, dried oregano, salt, and pepper round out the taste perfectly

Simmer until just thickened, about 5 minutes. Oh, the smell! Just amazing! Now it’s time to fire up the grill! Grilled Bourbon Maple Wings are getting close to a reality!

EXPERT TIP: Both the rub and the sauce can be made in advance. The rub will stay for weeks in an airtight container and the sauce will keep in the fridge for up to 1 week.

A stainless steel medium saucepan filled with bourbon maple sauce bubbling over a stove with a whisk in the pan.

GRILL THE WINGS OVER DIRECT HEAT

We’re getting close to prime time folks!

Fire the grill up to a nice medium-hot and place the wings on the grates, turning once after 5 minutes, and allowing them to cook for another 5 minutes. Slather on the sauce all over and let cook for another 3 minutes per side, or until fully cooked through and lightly charred

EXPERT TIP: You can absolutely cook these on your indoor grill if you don’t have an outdoor grill. Baking them is an option, too! Bake them at 350°F for 45 minutes, and then baste them all over with the sauce, and let them go another 15 minutes, or until nicely browned.

A hand using a small brush to rub BBQ sauce all over grilled bourbon maple wings on a gas grill.

This is a bold statement, but these wings are what all other wings wish they could be.

Bold. Messy. Insanely Delicious.

As mentioned, you’ll want to have an extra roll of paper towels handy before you start devouring these gems!

A hand holding up a grilled bourbon maple wing over a wooden cutting board filled with the same.

CELEBRATE SUMMER AT HOME WITH KROGER

If you’re stuck at home, that doesn’t mean you can’t celebrate summer and still have AMAZING summertime food to whip up and chow down on!

For the best products, we consistently turn to Kroger. They always deliver freshness and quality and have everything we need to make our summer grilling a HUGE success.

A bottle of pure amber maple syrup behind a pile of grilled bourbon maple wings all on a wooden cutting board.

These Grilled Bourbon Maple Wings are off-the-hook delicious.

Perfect for summer cookouts or summer cook-“ins”!

Just take a look at this baby and try not to have a mouth-watering experience.

A close-up view of a grilled bourbon maple wing on a cutting board next to a small white bowl of BBQ sauce with more wings in the background.

Ready to make and serve the most awesome grilled chicken wings ever? Go for it!

And when you do, be sure to take a photo, post it on Instagram, and tag @howtofeedaloon and @Krogerco and hashtag #howtofeedaloon and #RECIPEHASHTAGE (need to get this)

A large wooden cutting board with a bunch of grilled bourbon maple chicken wings sitting next to a small bowl of sauce in front of a grey napkin.
Print Recipe
5 from 4 votes

Grilled Bourbon Maple Wings

Grilled Bourbon Maple Wings...Really, what else needs to be said? Be sure to make the Perfect BBQ Rub, it really makes a huge difference in the taste! The rub and sauce can all be made a couple of days in advance. Let the wings marinate for at least 30 minutes, and up to 12 hours, or overnight!
Prep Time15 minutes mins
Cook Time30 minutes mins
Chill time30 minutes mins
Total Time1 hour hr 15 minutes mins
Course: BBQ, Entree
Cuisine: American Southern, BBQ
Servings: 6 people
Calories: 422kcal
Author: Kris Longwell

Equipment

  • Grill: Gas, charcoal, or electric. Indoor electric grill.

Ingredients

FOR THE WINGS

  • 2 lbs chicken wings whole
  • 2 tablespoon olive oil
  • 2 tablespoon apple cider vinegar
  • ½ cup BBQ rub

FOR THE SAUCE

  • 2 tablespoon unsalted butter
  • ¼ cup onion grated on the medium holes of a box cutter
  • ½ cup bourbon
  • ¾ cup maple syrup pure
  • 2 tablespoon tomato paste
  • 1 tablespoon Worcestershire sauce
  • ½ teaspoon oregano dried
  • ½ teaspoon salt
  • ¼ teaspoon black pepper freshly ground

Instructions

DO AHEAD

  • Make the Perfect BBQ Rub.

MARINATE THE WINGS

  • Place the wings in a large bowl and add the oil, vinegar, and BBQ rub and toss with large wooden spoons until the wings are completely coated. Cover with plastic wrap and chill in the refrigerator for 30 minutes, or up to overnight.

MAKE THE BBQ SAUCE

  • Melt the butter in a medium-sized saucepan over medium heat. Add the grated onions and cook for three minutes.
  • Add the bourbon, maple syrup, tomato paste, Worcestershire sauce, oregano, salt and pepper, and stir to incorporate.
  • Simmer for 5 minutes. Remove from heat and set aside.

GRILL THE WINGS!

  • Fire up your grill to medium-high heat.
  • Once the grill is ready, add wings to the grill.
  • Cook on each side until slightly charred, about 5 minutes per side.
  • Slather on the BBQ sauce, and cook for another 2 minutes each per side.
  • Remove and serve immediately with remaining BBQ sauce

Video

Notes

We strongly recommend making the BBQ rub for this recipe.  It matches perfectly against the sauce.
We love using whole chicken wings for this recipe, but you could certainly go with 'party wings' which only include the drumette and the wingette (but not the flap).  If so, you'll need to reduce the grilling time to just 3 to 4 minutes per side.  
Be sure to use Pure Maple Syrup, and not imitation pancake syrup.  Again, this makes a huge difference.  
The alcohol will 99.9% cookout through the simmering and grilling process.  
The rub and sauce can be made up to 2 days in advance.  We recommend letting the wings marinate for at least 30 minutes, but they're even better after they've chilled for at least a couple hours, or overnight. 
We love to serve them with extra sauce, but they're so loaded with flavor, they don't really need it. 
Be sure to serve these with lots of napkins!  

Nutrition

Calories: 422kcal | Carbohydrates: 29g | Protein: 15g | Fat: 16g | Saturated Fat: 4g | Cholesterol: 73mg | Sodium: 328mg | Potassium: 304mg | Fiber: 1g | Sugar: 25g | Vitamin A: 320IU | Vitamin C: 3mg | Calcium: 59mg | Iron: 1mg

Chicken Tagine with Preserved Lemons and Olives

May 26, 2020 by Kris Longwell 16 Comments

An overhead view of a large silver skillet filled with chicken tagine with preserved lemons and olives next to a bowl of couscous and a grey napkin.

This post is kindly sponsored by Pacific Foods, but the recipe, photography, video, and opinions are 100% ours.

If you’re looking for something new and delicious to do with chicken, then you’ve come to the right place.

Moroccan cuisine is steeped in history, tradition, and, in our opinion, incredible depth of flavor and texture in so many ways. This recipe is no exception. The spices, the broth, the preserved lemons, olives, and perfectly cooked chicken all come together to make a truly magical dish.

An overhead view of a large silver skillet filled with chicken tagine with preserved lemons and olives next to a bowl of couscous and a grey napkin.

HOW TO MAKE CHICKEN TAGINE WITH PRESERVED LEMONS AND OLIVES

In most Moroccan kitchens, this dish would be made with an actual tagine, which is a pottery cooking vessel consisting of two parts: a circular base unit that is flat with low sides and a large cone, or dome-shaped cover that sits on the base during cooking. (See video for visual reference).

For those who don’t own a tagine, you can still get wonderful results in a nice, large skillet or saucepan.


QUALITY INGREDIENTS MAKE A DIFFERENCE

We’ve said it before, but it bears repeating: Most recipes are only as good as the quality of ingredients that comprise the dish.

For this recipe, we stick with traditional Moroccan ingredients, such as saffron threads, turmeric, coriander, plus others.

Using a top-notch broth or stock is critical, too. This is why we always use Pacific Foods. More on that in just a bit.

EXPERT TIP: Saffron threads, turmeric, and coriander can be found in the spice section of most well-stocked supermarkets, gourmet food markets, or online.

A hand sprinkling saffron threads into a glass bowl of chicken broth next to a box of Pacific Foods chicken broth.

Preserved lemons are very common in Moroccan and Middle Eastern cooking, and we flip for them.

They are lemons that have been liberally pickled in salt and lemon juice for at least 1 month.

EXPERT TIP: We don’t recommend skipping the preserved lemons in this recipe. You know how fresh lemon brightens so many dishes. These preserved lemons go even further. They are not difficult to make at home, but you need to give yourself at least a month. We always order ours online and keep extra on hand. They will stay perfectly good for months on end.

Slicing them and browning them in your skillet is an amazing start to this spectacular dish. Set them aside once they are nicely browned.

Seared slicked preserved lemons in a stainless steel skillet.

THE BEST TYPE OF CHICKEN AND BROTH FOR CHICKEN TAGINE

We always go with chicken thighs when making a dish like this.

The dark meat is so flavorful and remains extremely tender during the braising process.

EXPERT TIP FOR THE CHICKEN: Bone-in, skin-on always delivers exceptional taste. Searing the pieces, skin-side down, will get the skin super crispy and will deepen the flavor of the dish.

EXPERT TIP FOR THE CHICKEN BROTH: The chicken will finish cooking when braised in the Pacific Foods Organic Chicken Bone Broth with Sea Salt. We love going with this particular broth because it is slow-simmered with organic chicken bones, vegetables, vinegar, rosemary, and a pinch of sea salt that deliver a savory bone broth full of naturally occurring collagen.

6 skin-on, bone-in chicken thighs that have been seared in a large silver skillet, skin side up.

After removing the seared chicken thighs from the skillet, it’s time to really amp up the flavors of this amazing Chicken Tagine.

Cook the onions and garlic until nice and translucent.

Now, stir in the spices and get ready for an amazingly delicious smell to emanate from your kitchen.

A skillet filled with sautéed onions and Moroccan spices with a wooden spoon in the middle.

WHAT TO SERVE WITH CHICKEN TAGINE

Chicken tagine is traditionally served over herbed couscous.

Place one or two of the cooked chicken thighs over a bed of couscous and then ladle the sauce with lemons and olives all over it.

This dish is stunning in presentation, and just wait until you take that first bite.

A white dinner plate with a serving of chicken tagine with preserved lemons and olives over a bed of couscous, all sitting next to a skillet filled with the chicken tagine.

PACIFIC FOODS’ COMMITMENT TO QUALITY

Let’s say it again: Going with high-quality ingredients takes this dish to amazing culinary heights…in your very own kitchen.

Pacific Foods uses time-honored recipes and just a few simple ingredients, showcasing each ingredient’s true flavor and inherent nutrition. There are no additives or preservatives in their food.

They like to say: “We’re out to Nourish Every Body.” And we couldn’t agree more. Some of our other favorite dishes that star Pacific Food’s amazing array of products include our Gourmet Beef Stroganoff, Cornbread Dressing with Sausage and Cranberries, and Air-Fryer Cordon Bleu Loaf with Mushroom Sauce.

A large silver skillet filled with chicken tagine with preserved lemons and olives, next to a bowl of couscous and a box of Pacific Foods organic chicken broth.

We love this Chicken Tagine with Preserved Lemons and Olives beyond words.

Unbelievably flavorful and you truly feel transported to a magical place with every single scrumptious bite.

The recipe is best served right off the stove, but it is still incredibly delicious gently reheated the next day.

A white plate filled with chicken tagine with preserved lemons and olives with a fork resting on the plate.

Ready to do something truly special with those chicken thighs you have on hand? Go for it!

And when you make this spectacular dish, be sure to take a photo, post it on Instagram, and tag @howtofeedaloon and hashtag #howtofeedaloon!

A white plate filled with chicken tagine with preserved lemons and olives with a fork resting on the plate.
Print Recipe
5 from 1 vote

Chicken Tagine with Preserved Lemons and Olives

This dish is truly something special. You can cook it in a traditional tagine cooking vessel, or in a large skillet, and have excellent results. Serve over prepared couscous. Divine.
Prep Time15 minutes mins
Cook Time45 minutes mins
Total Time1 hour hr
Course: Entree
Cuisine: Moroccan
Servings: 4
Calories: 633kcal
Author: Kris Longwell

Equipment

  • Tagine, or a large skillet/saucepan with a tight-fitting lid

Ingredients

  • 1 tablespoon saffron threads
  • 1½ cup Organic Chicken Bone Broth
  • 3 tablespoon all-purpose flour
  • 1 teaspoon Kosher salt
  • ½ teaspoon black pepper freshly ground
  • 3 tablespoon olive oil divided
  • 6 chicken thighs bone-in, skin on
  • 2 preserved lemons sliced
  • 1½ cups onion chopped
  • 4 cloves garlic minced
  • 2 teaspoon smoked paprika
  • 1 teaspoon ground cumin
  • 1 teaspoon ground ginger
  • ½ teaspoon ground cinnamon
  • ½ teaspoon ground coriander
  • 1 teaspoon ground turmeric
  • 1¼ cups green olives pitted
  • 4 tablespoon lemon juice
  • 2 tablespoon lemon zest
  • ½ cup cilantro fresh, chopped
  • ¼ cup pistachios roughly chopped (optional)

Instructions

  • Use your fingers to crumble the saffron threads into the chicken broth and stir to dissolve. Set aside.
  • On a platter, season the flour with ½ teaspoon salt and ¼ teaspoon black pepper. Dredge the chicken through the seasoned flour until fully coated.
  • Heat 1 tablespoon oil in a large skillet or Dutch oven over medium heat.
  • Sear the lemon slices until browned slightly on both sides, about 3 to 5 minutes. Remove from skillet and set aside.
  • In the same skillet, heat the remaining 2 tablespoon of oil over medium-high heat. Sear the chicken, skin side down, until golden and crispy, about 5 to 6 minutes. Transfer to a plate. (The chicken will not be fully cooked at this point).
  • Add the onion to the skillet and cook until soft and translucent, about 4 to 6 minutes. Add the garlic and cook for another 30 seconds, stirring occasionally.
  • Stir into the onions the paprika, cumin, ginger, cinnamon, coriander, turmeric, and ½ teaspoon salt. Stir until combined and very fragrant, about 1 minute.
  • Add the stock-saffron and use a wooden spoon to deglaze the pan by scraping up any bits that are stuck to the bottom of the skillet.
  • Place the chicken, skin-side up, throughout the pan. Cover and simmer for 30 minutes.
  • Remove the lid and stir in the reserved lemons, olives, lemon juice, zest, and cilantro. Cover and simmer for 10 more minutes.
  • Serve over couscous and garnish with remaining cilantro and chopped pistachios.

Video

Notes

Chicken breasts can be substituted for the thighs, though you'll lose some of the flavor if going with skinless.  If using large skin-on, bone-in breasts, you'll need to increase the braising (simmering) time to 35 to 40 minutes, or until internal temperature reaches 165°F.
All the spices in this dish can be found in the spice section of many well-stocked supermarkets, or at gourmet food shops, or online.
Although you can make preserved lemons at home, you'll need to start about a month in advance.  We find ordering them online is easy and the quality is good.
This dish is best served right off the stove, however, warmed leftovers are still really good.  
Searing the lemons and the chicken can all be done in advance, however, the chicken will lose some of the crispiness on the skin the longer it waits.  Be sure to simmer the seared thighs skin-side up. 

Nutrition

Calories: 633kcal | Carbohydrates: 19g | Protein: 31g | Fat: 22g | Saturated Fat: 6g | Cholesterol: 166mg | Sodium: 1375mg | Potassium: 614mg | Fiber: 5g | Sugar: 4g | Vitamin A: 957IU | Vitamin C: 16mg | Calcium: 71mg | Iron: 3mg

Best-Ever Lobster Salad

May 24, 2020 by The Loon 7 Comments

A close-up view of a lobster salad with cucumbers on a green leaf of lettuce on a decorative plate.

We know it’s sort of a lofty statement to say something is truly ‘the best ever.’  But wait until you try this dish.

In the tradition of our Best-Ever Chicken Salad, Best-Ever Tuna Salad, and Best-Ever Egg Salad, we’re thrilled to present what we feel is the best lobster salad in the world!

VIDEO ALERT: Be sure to check out the video for this recipe in the recipe card.  If you like the video, subscribe to our YouTube Channel!

A mound of lobster salad with cucumber on a leaf of lettuce on a decorative plate next to a glass of white wine and a platter.

HOW TO MAKE THE BEST-EVER LOBSTER SALAD

The best thing about this salad is how delicious it is. That’s a no brainer.

But the next best thing about how amazing this lobster salad is how easy it is to prepare!

PREPARING YOUR LOBSTER

There are many ways to get wonderful lobster meat for this salad.

You can steam a whole, live lobster. Or, you can steam lobster tails from your local fish market.

EXPERT TIP: Or, you can do what we love to do, order 1 lb. of fresh lobster meat (knuckles, claws, and tail meat) from www.LobsterAnywhere.com. They deliver to your doorstep lobster caught fresh right off the shore of the great state of Maine, U.S. Some of the best lobster in the world! And in most cases, you get it overnight!

A white serving bowl filled with fresh lobster, roughly chopped.

To prepare the cucumbers, we like to peel only a few strips for an attractive presentation.

Slice the cucumber down the middle, lengthwise, and then use a small spoon to remove the seeds.

Cut it up to your desired size. We like smaller chunks because we don’t want the cucumber to upstage the lobster meat, but that’s a matter of taste.

A man using a spoon to scrape the seed out of a cucumber that has been cut in half, lengthwise.

A CITRUS VINAIGRETTE IS THE PERFECT DRESSING

Citrus, such a lemon, is the perfect match against the succulent lobster meat, cucumber, and herbs.

Mix together the zest and juice from one lemon with a finely chopped shallot or small onion.

EXPERT TIP: We love to add a little more acid to the vinaigrette by mixing in 1 tablespoon of Champagne vinegar. If you don’t have access to Champagne vinegar, you could certainly use white wine vinegar, Sherry vinegar, or even apple cider vinegar. Add the extra-virgin olive oil slowly and whisk continuously to help emulsify the vinaigrette.

A hand pouring olive oil from a glass vessel into a glass bowl filled with lemon vinaigrette with a whisk in it.

Fresh dill bring a brightness to the lobster salad that is just wonderful.

Briny, slightly salty capers are a perfect match to the lobster meat and dill.

So delicious!

A hand dropping fresh dill from a small bowl into another glass bowl filled with lemon vinaigrette with a whisk in it.

THE FINAL TOUCH

Now, it’s time to add the vinaigrette to the salad.

Simply pour it all over the lobster and cucumbers, and then gently mix until fully coated.

EXPERT TIP: The vinaigrette and can be made up to 1 day in advance. Store in a jar, or container, with a tight-fitting lid, and then shake vigorously before adding to the salad. We do recommend allowing the dressed salad to chill for about 30 minutes before serving to allow the flavors to complete meld.

A person pouring a lemon vinaigrette from a mason jar into a glass bowl filled with chopped fresh lobster and cucumbers.

This salad is perfect for serving at a brunch, baby/wedding shower, but also as a starter to a wonderful backyard BBQ.  Or, a lovely salad for 2 on a Sunday afternoon at home.

You can place the salad in a serving bowl and let folks dish out their own portion, or do what we love, and place a mound of the salad on pieces of bibb, or butter lettuce.

No matter how you serve it, people will do nothing but rave.

A white serving bowl filled with a lobster salad with cucumber and herbs with a large silver spoon in the salad.

HOW TO SERVER BEST-EVER LOBSTER SALAD

This salad is so beautiful and undoubtedly has a certain sophisticated appeal. It’s approachable, not pretentious, yet still feels….well, fancy.

We encourage you to pull out your best dinnerware when serving this glorious salad.

Our favorite platter and serving plates that we own are hand-crafted in Portugal by Juliska that we received from the amazing The Table at Latona’s. Be sure to look at their GORGEOUS products. We love supporting small businesses, and this one is absolutely in a league of their own.

A large decorative platter filled with 4 lettuce leafs topped with a lobster salad with cucumbers and herbs.

If you love fresh lobster, and you love a fresh, vibrant salad, then this is the perfect recipe for you.

Start with quality lobster meat, and the rest is as easy as can be.  By the way, if you love this lobster salad, you’ll flip for our recipe for Lobster Tails!  To die for!

But in the meantime, talk about a show-stopper of a dish!

A close-up view of a lobster salad with cucumbers on a green leaf of lettuce on a decorative plate.

Ready to make the absolutely best-ever lobster salad this side of Maine? Go for it!

And when you do, be sure to take a photo of it, post it on Instagram, and tag @howtofeedaloon and hashtag #howtofeedaloon!

A close-up view of a lobster salad with cucumbers on a green leaf of lettuce on a decorative plate.
Print Recipe
5 from 1 vote

Best-Ever Lobster Salad

This lobster salad is so fresh and vibrant it truly is the best ever. You can go with freshly steamed lobster or even frozen lobster tails to make this salad. We like to order lobster meat from LobsterAnywhere.com
Prep Time15 minutes mins
Chill time30 minutes mins
Total Time45 minutes mins
Course: Appetizer or Salad
Cuisine: American
Servings: 8
Calories: 135kcal
Author: Kris Longwell

Ingredients

  • 1 lb lobster meat cooked and roughly chopped
  • 1 large cucumber seeded and roughly chopped
  • 1 tablespoon lemon zest usually from 1 lemon
  • 2 tablespoon lemon juice usually from 1 lemon
  • 1 tablespoon Champagne vinegar
  • 1 shallot finely chopped
  • 1 teaspoon Kosher salt
  • ½ teaspoon black pepper freshly ground
  • ⅓ cup extra-virgin olive oil
  • 2 tablespoon dill fresh
  • ¼ cup capers drained
  • 1 head butter lettuce for serving

Instructions

  • Place the cooked, chopped lobster and prepared cucumber in a large bowl.
  • In a small bowl, whisk together the lemon zest, lemon juice, vinegar, shallots, salt, and pepper.
  • In a slow, steady stream, pour the olive oil into the lemon mixture, whisking constantly to fully incorporate.
  • Mix the dill and capers into the vinaigrette.
  • Pour the vinaigrette over the lobster and cucumbers and mix gently with a large wooden spoon until fully coated.
  • Cover with plastic wrap and place in the refrigerator for 30 minutes, or for up to 2 hours.
  • Remove cover, and gently stir the salad. Serve as is, or over small butter lettuce leaves.

Video

Notes

Substitutes for Champagne vinegar are: white wine vinegar, Sherry vinegar, or apple cider vinegar.  
The vinaigrette can be made up to 1 day in advance.  Shake the jar vigorously to re-emulsify the dressing.
When serving this salad in a bowl, especially if serving outside, we recommend placing the bowl in a larger bowl filled with ice. 
This salad is best served within a couple of hours of preparing, but is still extremely delicious the following day.  
The salad will keep for up to 1 week in the refrigerator and freezes well for up to 1 month. 

Nutrition

Calories: 135kcal | Carbohydrates: 2g | Protein: 10g | Fat: 6g | Saturated Fat: 1g | Cholesterol: 72mg | Sodium: 685mg | Potassium: 220mg | Fiber: 1g | Sugar: 1g | Vitamin A: 715IU | Vitamin C: 5mg | Calcium: 62mg | Iron: 1mg

Crosshatch Sweet Potato Chips

May 19, 2020 by Kris Longwell 2 Comments

A large baking dish filled with cross hatch sweet potato chips with a small glass jar of spicy remoulade nestled into the chips.

We just love dishes that are spectacular in their simplicity. Let the ingredients shine!

This appetizer or side dish is no exception. The chips are light and airy, but so amazingly delicious. A quick fry and a sprinkle of sea salt are all that’s needed. They can be deep-fried, baked, or cooked in your air fryer! They are wonderful served with our Kickin’ Remoulade Sauce!

VIDEO ALERT: Be sure to check out the video for this recipe in the recipe card.  If you like the video, subscribe to our YouTube Channel!

A large baking dish filled with cross hatch sweet potato chips with a small glass jar of spicy remoulade nestled into the chips.

HOW TO MAKE CROSSHATCH SWEET POTATO CHIPS

The preparation for these chips really couldn’t be easier.

We use our mandolin to get the beautiful crosshatch pattern, but also very thinly sliced sweet potato slices will work just fine, too.

HOW TO MAKE THE CROSSHATCH PATTERN

On most mandolins, there will be a crosshatch symbol on the dial on the side of the tool.

Turn the dial to the crosshatch symbol and then carefully remove the blade in the middle of the mandolin.

Now, insert it back in with the blade with the ridges is facing up. (See photo for reference).

A hand holding a cross hatch blade over a mandolin.

Take one of your peeled sweet potatoes, and slice one end off so you have a flat, smooth edge.

Now, carefully slide the potato, cut-side down, across the blade. You can discard the first cut. You’ve now begun the crosshatch process.

Simply turn the potato to a 45° angle and slide it across the blade again. Take a look! You’ve just made your first crosshatch chip!

EXPERT TIP: It is important to handle the slice of the chips very carefully. Don’t rush and try and keep the edge of the potato flat and smooth. We recommend cutting the opposite end of the potato off as well. This will allow you to easily attach the safety guard to the end of the potato as you continue cutting, getting closer and closer to the end of the potato.

3 stacked images, the 1st a hand holding a peeled sweet potato on a mandolin, the next is the same potato turned 45 degrees, and the 3rd is the hand holding cross hatched sweet potato slices.

PREPARING THE SWEET POTATOES FOR A QUICK FRY

We find that 3 large sweet potatoes give you a nice large serving of crosshatch sweet potato fries.

This recipe will comfortably feed 4 to 6 people as an appetizer or a side dish.

A stack of thinly slice sweet potato chips in a cross hatch style.

Soaking the cut sweet potatoes is an important step to ensure crispy, perfectly cooked chips.

Soak the cut spuds in a large bowl of water for a minimum of 30 minutes. You can actually soak them overnight, and they’ll be just fine.

EXPERT TIP: If you prefer to bake the sweet potato chips, then you can skip soaking them. Simply brush them with a little olive oil all over, and then bake at 350° F for about 2 hours, moving them around on the pan every now and then. If you want to air fry your chips, we do recommend soaking them for 15 to 20 minutes, then dry them off, toss (or spray) them in oil, and then air-fry for 15 minutes at 350°F.

A large glass bowl filled with sliced sweet potatoes in a cross hatch style soaking in water.

Baking and air-frying these chips are absolutely wonderful, and of course, a little more healthy.

But these chips are so thin, they really only get a quick fry in the oil if you deep fry them.

EXPERT TIP: You don’t want your oil too hot or they will burn. If your oil is not hot enough, they’ll cook longer and could absorb more oil than is desired and be a little mushy. We find that 1 minute to 2 minutes in 350°F hot oil delivers perfectly golden chips.

A metal fry basket holding freshly fried crosshatch sweet potato chips.

HOW TO SERVE CROSSHATCH SWEET POTATO CHIPS

These babies are honestly so delicious by themselves, that a nice sprinkling of coarse sea salt is often all that’s needed.

We got the inspiration to make these when we ordered something similar at a gastropub in Omaha, Nebraska.

They work wonderfully as an appetizer or a side dish to a killer-good burger such as our Mushroom-Swiss Burger!

A hand sprinkling coarse sea salt over freshly made cross hatch sweet potato chips.

But, you know us, we love a good sauce.

A good dipping sauce is a perfect accompaniment for these crosshatch sweet potato fries.

Our Kickin’ Remoulade has just a touch of heat, which is the perfect match against the sweetness of the chips. Homemade Ranch is wonderful, too.

A small Mason glass jar filled with a spicy remoulade next to cross hatch sweet potato chips.

THE PERFECT APPETIZER AND SIDE DISH

Every time we serve these, we get rave reviews.

We often serve them for guests as an appetizer or a side dish for a BBQ, but they’re so easy, we love to whip up a batch for an afternoon snack.

As the Loon says, “You definitely can’t eat just one of these chips! They are insanely good! And with the sauce? Forget about it!”

A hand dipping a cross hatch sweet potato chip into a small jar of kickin' remoulade sauce.

Ready to make the best appetizer or side dish in town? Go for it!

And when you do, be sure to take a photo of it, post it to Instagram, and tag @howtofeedaloon and hashtag #howtofeedaloon!

A large baking dish filled with cross hatch sweet potato chips with a small glass jar of spicy remoulade nestled into the chips.
Print Recipe
5 from 1 vote

Crosshatch Sweet Potato Chips

These Crosshatch Sweet Potato Chips are to die for. The sweet potato flavor is so good. All you need is a mandolin, set on the waffle fry setting, a bit of hot oil, and some sea salt...a good dipping sauce...and you'll be convinced you're at the coolest gastropub on the planet. Addictively delicious!!
Prep Time15 minutes mins
Cook Time15 minutes mins
Total Time30 minutes mins
Course: Appetizer or Side Dish
Cuisine: American
Servings: 8 people
Calories: 226kcal
Author: Kris Longwell

Equipment

  • A mandolin with waffle/crosshatch blade, or a sharp knife
  • Deep fryer, or heavy skillet with oil

Ingredients

  • vegetable oil for frying
  • 3 large sweet potatoes or yams, peeled, with the ends cut off
  • 1 tablespoon Sea salt coarse, or to taste
  • Kickin' Remoulade Sauce optional, for dipping

Instructions

  • Turn your mandolin to the crosshatch (or waffle), setting. Make sure the blade is set with the crosshatch ridges (not the straight-edge blade) in the position to cut the potatoes.
  • Using the protective handle/cover, swipe the spud down the mandolin over the ridged blade. Discard the first slice.
  • Turn the potato 90°, and swipe down the mandolin again...you'll now have your first waffle fry. Repeat until all sweet potatoes are sliced.
  • Add the slices to a large bowl filled with water and allow to soak for at least 30 minutes, or up to 24 hours.
  • Meanwhile, heat the oil in a large skillet, or a deep fryer, to 350°F.
  • Drain the slices and dry them off well with a kitchen towel. Quickly fry in batches...only about 1 to 2 minutes per batch, or until fries are starting to turn a little brown.
  • Remove from oil and place on paper towels. Immediately sprinkle with sea salt.
  • Serve with your favorite dipping sauce, such as Kickin' Remoulade Sauce

Video

Notes

If you don't have a mandolin with a crosshatch blade, then you can use a sharp knife to carefully slice thin slices of the potatoes.  The thicker the slice, the longer it will take for them to become crispy. 
Click here to order the type of mandolin we use to make these chips. 
To bake the chips:  No need to soak the chips in water.  Simply coat all over with olive oil and then bake at 350°F for 2 hours, moving them around on the baking dish every 30 minutes or so.
To air-fry the chips: Soak them for 30 minutes, dry them off, and then lightly spray them with oil.  Air-fry on 350°F for 15 minutes. 
The chips will get even crispier after they have rested a couple of minutes.
These crosshatch sweet potato chips are best served within an hour or two of frying them.  

Nutrition

Calories: 226kcal | Carbohydrates: 26g | Protein: 2g | Fat: 8g | Saturated Fat: 1g | Sodium: 942mg | Potassium: 430mg | Fiber: 4g | Sugar: 5g | Vitamin A: 18088IU | Vitamin C: 3mg | Calcium: 38mg | Iron: 1mg

POST UPDATE: This recipe was originally published in June 2014, but was updated with improved tweaks to the recipe, with new tips and photography, and a fabulous new video in May 2020!

Lemon Meringue Pie

May 17, 2020 by Kris Longwell 2 Comments

A slice of a homemade lemon meringue pie on a white dessert plate with the whole pie in the background.

This quite possibly could be the #1 quintessential American diner dessert.

The tart lemon filling meets the sweet billowy meringue with a delicious flaky crust that brings it all together. The dough can be made well in advance, and then the pie comes together quickly. Another classic American pie is our Southern Chess Pie, Apple Pie, and of course Blueberry Buttermilk Pie! Hooray for pie!

VIDEO ALERT: Be sure to check out the video for this recipe in the recipe card.  If you like the video, subscribe to our YouTube Channel!

A slice of a homemade lemon meringue pie on a white dessert plate with the whole pie in the background.

HOW TO MAKE HOMEMADE LEMON MERINGUE PIE

As mentioned, a key component to a classic Lemon Meringue Pie is the homemade crust.

Of course, you can purchase store-bought, but trust us, pie dough made from scratch is just incredible.

EXPERT TIP: Be sure to have all the ingredients measured out and ready to go before you start making the filling. Timing is important in getting the perfect filling, so you won’t have time to be running to the pantry to grab an ingredient once the cooking begins.

MAKING PIE CRUST FROM SCRATCH

Although it’s not 100% necessary, we like making two batches of my perfect pie dough.

Roll the dough out to 12-inches in diameter and then carefully transfer to your pie dish.

EXPERT TIP: We like to roll out the 2nd pie dough and take small scraps to bulk up the top portion of the crust. This helps to prevent shrinkage. Blind baking is necessary for this pie. Simply fill the pie with weights (such a parchment paper topped with dried beans) and then bake for 17 minutes. Remove the weights and puncture the base of the crust all over with a fork (this is called ‘docking’). Bake for another 10 minutes until lightly browned.

An overhead view of a baked pie shell in a white pie dish with fork holes throughout the base of the shell.

MAKING THE FILLING FOR LEMON MERINGUE PIE

Use a medium-sized saucepan and whisk to dissolve the corn starch into the water and lemon juice. Stir in the sugar.

Bring to a boil and let simmer for exactly 1 minute. The mixture will become very thick. Ladle of few dollops (one at a time) into a bowl with the egg yolks.

Now, add the tempered eggs back into the saucepan, bring to a simmer, and simmer for exactly 1 more minute. You should see big crater-like bubbles on the surface of the filling.

3 stacked photos with the 1st of a metal pan with a whisk into stirring a corn starch slurry, and the 2nd a ladle adding the hot slurry to a bowl of egg yolks, and the 3rd of the pan with the tempered eggs in it with a hand whisking the mixture.

Stirring 2 tablespoons of unsalted butter and the zest from one lemon rounds out the amazing lemon curd filling.

Be sure to do this while the filling is still warm.

A hand dumping cubed butter from a small white bowl into a metal saucepan filled with lemon curd and lemon zest with a whisk in it.

Now, it’s time to transfer the filling into the warm pie crust.

The filling will be thick, but still able to pour.

Once the pie is allowed to chill, the filling will set.

Lemon curd being poured from a metal bowl into a baked pie shell in a white pie dish next to a striped napkin.

HOW TO MAKE PERFECT MERINGUE

Meringue is not hard to make at all. For a pie with a tall meringue topping, we go with 7 egg whites, but 4 will absolutely work, too.

Use a hand mixer, or your stand mixer fitted with the whisk attachment, or a hand mixer, and mix the whites with the cream of tartar until foamy.

Add in the sugar and mix on high until stiff peaks form, usually 2 to 3 minutes (with an electric mixer, it will take much longer with a non-electric hand mixer).

EXPERT TIP: Adding the meringue to the warm filling helps the meringue form a seal against the crust and limits the possibility of it pulling away from the sides. Use a small spatula or knife to press the meringue onto the sides of the crust.

A hand using a white spatula to transfer fluffy meringue onto of lemon curd in a pie shell in a white pie dish.

To make pretty mountain top snowy peaks, simply take the back of a spoon, and press down gently on various places on the meringue, and then pull straight up.

To get that beautifully slightly browned top, we like to place the pie in a 375°F oven and bake for 10 minutes.

You could also place under the broiler for a short moment, but be very careful to not let the meringue burn! A kitchen torch does the trick, too.

An overhead view of a lemon meringue pie with the topping lightly browned and sitting next to a striped napkin and dessert plates with forks.

STORING HOMEMADE LEMON MERINGUE PIE

You’ll need to allow the pie to chill, preferably in the refrigerator for 4 hours.

If the meringue pulls away at any time, you could easily whip up a little more meringue and fill in the gaps.

This pie is one that is comforting and always puts a smile on family and friends’ faces when you serve it to them.

A close up view of a lemon meringue pie in a white pie dish with a slice missing.

Ready to make a pie that will rival any diner across America? Go for it!

And when you do, be sure to take a photo of it, post it to Instagram, and tag @howtofeedaloon and hashtag #howtofeedaloon.

A single slice of a lemon meringue pie on a white plate with the whole pie in the background.
Print Recipe
No ratings yet

Lemon Meringue Pie

This is the most classic pie of them all. We like to make two crusts, using the second as scraps to help reinforce the top and prevent shrinkage, but that's not 100% necessary. Be sure to have everything measured out and ready to go before you start preparing the filling.
Prep Time1 hour hr 20 minutes mins
Cook Time1 hour hr
Chilling time4 hours hrs
Total Time6 hours hrs 20 minutes mins
Course: Dessert
Cuisine: American
Servings: 8 people
Calories: 468kcal
Author: Kris Longwell

Equipment

  • Electric hand mixer, or stand mixer with whisk, or hand mixer

Ingredients

FOR THE CRUST (MAKE AHEAD)

  • Two perfect pie crusts

FOR THE FILLING

  • 1⅓ cups water
  • ¼ cup lemon juice fresh
  • 5 tablespoon corn starch
  • 1⅓ cups sugar
  • 4 egg yolks Save the whites for the meringue
  • 1 tablespoon lemon zest
  • 2 tablespoon unsalted butter softened

FOR THE MERINGUE

  • 4 eggs whites use up to 7 (with ½ teaspoon cream of tartar) for higher meringue
  • ¼ teaspoon cream of tartar
  • ⅔ cup sugar

Instructions

BLIND BAKE THE CRUST

  • Roll out your pie dough to a 12-inch diameter. Roll it up with your rolling pin and carefully place in a 9-inch pie dish. Use your fingers to press the dough along the sides of the dish. Optional (but recommended): Roll out the 2nd dough and use a pizza cutter to cut strips to place along the top of the dish. Pinch the dough together, and use your index finger, and your thumb and index finger from your other hand to crimp the edges.
  • Place in the refrigerator for a minimum of 30 minutes, or up to 3 hours. Preheat the oven to 400°F.
  • Remove from the fridge, and either add pie weights to the dough, or add parchment paper and fill with dried beans, rice, or even pennies. Bake for 17 minutes.
  • Remove from the oven and carefully remove the pie weights or the parchment with the beans in it. Use a fork to puncture holes all over the bottom of the pie crust. Place back in the oven and bake until lightly browned, another 10 minutes. Remove and set aside.

MAKE THE LEMON FILLING

  • Place the egg yolks into a small-medium bowl. Set aside.
  • In a medium-sized pan, add the water and lemon juice. Stir in the corn starch and whisk until fully dissolved. Stir in the sugar and whisk until dissolved.
  • Turn the heat to medium-high and whisk continuously until the mixture comes to a boil. Simmer for exactly 1 minutes, whisking constantly. The mixture will be thick.
  • Remove from the heat and ladle about ⅓ of the corn starch mixture into the egg yolks, whisking constantly (this is 'tempering' the eggs)
  • Add the tempered egg yolks back into the pan and place back on the stove over medium heat. Whisking often, bring to a simmer and cook for exactly 1 minute. You should see big crater-like bubbles appearing on the surface.
  • Remove from the heat and stir in the butter and lemon zest. Pour into the pie crust.

MAKE THE MERINGUE AND FINISH OFF THE PIE

  • Turn your oven to 375°F.
  • In a large bowl, whisk (preferably with an electric hand mixer) the egg whites with the cream of tartar until foamy. Add the sugar and keep mixing on high until stiff peaks form.
  • Transfer the meringue on top of the warm lemon filling and gently spread, covering the pie completely, using a small knife or spatula to press the meringue against the sides of the crust. Press the back of a spoon in various places across the meringue and gently lift up, creating little peaks.
  • Bake the pie for 10 minutes, just until the tops of the meringue are starting to brown. Keep an eye on it, and don't let it burn!
  • Chill the pie for 4 hours before serving.

Video

Notes

We recommend using the scraps of the 2nd pie dough to reinforce the top of the pie crust.  This is a technique we picked up from www.sallysbakingaddiction.com, and we find it works very well.  Freeze any leftover pie dough for your next pie!   This isn't 100% necessary but does help to reduce shrinkage when blind baking.   Do be careful, however, to not bulk up the top of the crust, too much, otherwise, it will be top-heavy when you slice it, and possibly break at the bottom of the piece when you serve it.
Be sure to have all of your ingredients measured out and ready to go before you start the filling. Timing is key here. 
If the meringue pulls away from the crust while it's chilling, don't be upset.  This is very common and happens frequently.  If serving to guests, you could always make another small batch of meringue and fill in the open gaps just before serving.  We do that often.
You will also likely see small beads of liquid that form on the top of the pie.  This is called 'weeping', and honestly, there's really not much you can do about it. That's a result of temperature, altitude, and is almost unpreventable. 
Finally, it's not uncommon for there to be some excess liquid when you cut the first slice out.  If that occurs, simply soak it up with a paper towel.  Again, this is not uncommon and will not be an issue with the taste and texture of the pie. 
Of course, the pie will be delicious the following days after you prepare, but we do find it's best when served the day you make it.   Keep leftovers chilled in the fridge for up to 1 week. 

Nutrition

Calories: 468kcal | Carbohydrates: 56g | Protein: 2g | Fat: 9g | Saturated Fat: 3g | Cholesterol: 105mg | Sodium: 8mg | Potassium: 33mg | Fiber: 1g | Sugar: 50g | Vitamin A: 218IU | Vitamin C: 4mg | Calcium: 12mg | Iron: 1mg

POST UPDATE: This recipe was originally published in March 2014, but was updated with improved tweaks to the recipes, with new tips, photography and a fabulous new video in May 2020!

Shrimp Fra Diavolo

May 12, 2020 by Kris Longwell 20 Comments

Shrimp Fra Diavolo recipe

This dish is classic Italian fare and we absolutely love it.

Fra Diavolo is Italian for “Brother Devil.” The sauce is called this because it does carry some heat, but you can easily pull back on the crushed red pepper to make it less devilish. And it comes together in about 30 minutes! So amazing and truly devilishly delicious!

VIDEO ALERT: Be sure to check out the video for this recipe in the recipe card.  If you like the video, subscribe to our YouTube Channel!

Shrimp Fra Diavolo recipe

How to Make Shrimp Fra Diavolo

The ingredients in this Seafood Fra Diavolo are simple and straightforward.

And don’t be worried about the anchovies and peperoncini, they add depth to the overall taste that really sets this dish apart.

BUILDING THE FLAVOR PROFILE

Be sure to get shrimp with the shells and tails still attached. Sauteeing the shrimp shells in olive oil infuses that wonderful shrimp taste into the sauce.

Drain your tomatoes through a colander into a bowl, crushing the tomatoes with your hands to release their juices. The liquid from the can and the tomatoes go into the shrimp stock and wine sauce. Strain the sauce into a bowl and set aside.

EXPERT TIP: Adding white wine will continue to deepen the flavor of the sauce. Go with a nice dry white, such as Sauvignon Blanc or Chardonnay. Be sure to stand back when pouring in the wine, as there is a chance it could flame. Cook until the wine is reduced, about 5 minutes.

4 images of a large skillet on a stove. The first has shrimp shells simmering in olive oil. Next, white wine being poured in. Next, tomato sauce, and then last, the mixture being poured into a colander over a glass bowl.

Controlling the Spice Level

So, this Shrimp Fra Diavolo recipe is known for being a bit spicy. That being said, it’s really easy to control the heat.

A little later on, we’re going to add some chopped pepperoncini peppers with their brine. This will add a little heat to the dish, but not much.

EXPERT TIP: Here is a guide for controlling the heat in this dish:

  • Minimal spice: ½ to 1 teaspoon red pepper flakes
  • Medium spice: 2 teaspoons red pepper flakes
  • Spicy: 3 teaspoons red pepper flakes
  • Super spicy: 4 teaspoon red pepper flakes

After sauteeing the garlic and spices, next, go in the anchovies. They add depth of flavor to the dish but aren’t overpowering. The prepared sauce and finally the shrimp go into the pan to finish off the cooking process.

4 images of a large skillet on a stove. 1st image garlic, red pepper flakes and dried oregano. Next, chopped anchovies being dropped in. Next, tomato sauce and tomatoes being dropped in from a bow;. And last shrimp simmering in the sauce.

Finishing Off the Dish

We’re almost ready folks!

Once the shrimp is fully cooked and nice and pink (about 5 minutes of cooking), turn off the heat and add in the chopped pepperoncini (with brine) and the fresh parsley and basil.

EXPERT TIP: While the dish is simmering, bring a large pot of heavily salted water to a boil and cook your pasta until al dente. Long pasta is best for this dish. Linguine, fettucini, spaghetti, and angel hair are all excellent choices. Be sure not to overcook the pasta and drain it well before transferring to your serving dish.

A hand dumping chopped pepperoncini from a small bowl into a skillet filled with cooked shrimp, tomatoes, and fresh herbs.

This dish is truly as impressive in presentation as it is in taste.

If you love this dish, you would also love our Succulent Shrimp Scampi. It is the bomb (and spicy at all).

Learn more about the origins of this recipe and other popular dishes here!

A large silver skillet filled with cooked shrimp fra diavolo sitting on wooden planks.

Will Feed a Hungry Family

This dish is filling and easily feeds a family of 4 to 6.

Serve it with a nice green salad and a crusty loaf of Italian bread.

We love to finish the dish off with a little drizzle of good-quality olive oil.

A white olive oil bottle pouring olive oil over a pasta bowl filled with shrimp fra diavolo.

This dish is best served right off the stove.

You can make the sauce, before adding in the shrimp, up to 1 day in advance.

EXPERT TIP: We love going with large shrimp for this dish. We recommend extra large, or jumbo, or extra jumbo. Remember, you want to get shrimp with shells and tails still left on!

A hand lifting up a fork filled with shrimp fra diavalo from a bowl of the same.

Folks, this without a doubt is one of our all-time favorite pasta dishes.

It’s easy. It’s adaptable. And it’s festive.

And more than anything, it’s incredibly delicious.

A close up view of a large pasta bowl filled with shrimp fra diavolo and a large wooden spoon inserted into it.

Ready to make a devilishly yummy pasta dish? Go for it!

And when you do, be sure to take a photo of it, post it on Instagram, and tag @howtofeedaloon and hashtag #howtofeedaloon.

A large festive pasta bowl filled with shrimp fra diavolo with sliced Italian bread next to it and a glass of white wine.
Print Recipe
5 from 7 votes

Shrimp Fra Diavolo

Shrimp Fra Diavolo is classic Italian cuisine. The dish is known for being spicy, but it's easy to control how much heat you add to the dish (see Notes). And it comes together in about 45 minutes or less!
Prep Time15 minutes mins
Cook Time25 minutes mins
Total Time40 minutes mins
Course: Entree / Pasta
Cuisine: Italian
Servings: 6 people
Calories: 542kcal
Author: Kris Longwell

Equipment

  • A large skillet/saucepan and a colander.

Ingredients

  • 1 lb pasta linguine, spaghetti, fettuccini, angel hair
  • 1½ lbs shrimp extra large, peeled and deveined, shells reserved
  • 2 teaspoon Kosher salt divided
  • 1 28 oz. can whole tomatoes San Marzano are best
  • 3 tablespoon olive oil divided
  • 1 cup white wine dry
  • 6 cloves garlic minced
  • 2 teaspoon red pepper flakes 1 for minimal heat, 3 for spicy
  • 1 teaspoon oregano dried
  • 2 anchovy fillets chopped
  • ½ teaspoon black pepper freshly ground
  • ¼ cup basil fresh, chopped
  • ¼ cup parsley fresh, chopped
  • 4 pepperoncini peppers pickled, stemmed and seeded, chopped
  • 2 teaspoon pepperoncini peppers brine from the bottle
  • 2 tablespoon extra-virgin olive oil

Instructions

  • Bring a pot of heavily salted water to a boil. Add the pasta and cook until al dente, following packaging instructions.
  • Sprinkle salt and pepper all over the shrimp and set aside.
  • Pour tomatoes into a colander set over a large bowl. Squeeze the tomatoes with your hands to break them apart and release their juice. Transfer the drained tomatoes to a small bowl. Set the reserved juice aside.
  • Heat 1 tablespoon of the olive oil in a large skillet over medium-high heat until shimmering. Add shrimp shells and cook, stirring frequently, until they start to slightly brown, about 4 minutes.
  • Carefully add the wine and bring to a boil. Reduce heat to medium and simmer until liquid has reduced somewhat, about 3 to 4 minutes.
  • Add reserved tomato juice and simmer for 5 minutes.
  • Pour contents of the skillet into a colander set over a large bowl and press on the shells with the back of a wooden spoon. Discard shells and set the bowl with the tomato/shrimp stock sauce to the side.
  • Wipe out the skillet with paper towels. Heat remaining 2 tablespoons of oil in the skillet.
  • Add garlic, pepper flakes, and oregano over medium heat, stirring occasionally, for 2 minutes. Add anchovies and cook, stirring frequently, for 1 minute more.
  • Add reserved tomato juice mixture and bring to a simmer. Add in the tomatoes and simmer for another 5 minutes, until the sauce has thickened a little further. Stir in 1 teaspoon of salt and ½ teaspoon black pepper.
  • Add shrimp to skillet and simmer gently, stirring frequently, until they are pink, curled, and cooked through, about 5 minutes.
  • Remove pan from heat. Stir in basil, parsley, chopped pepperoncini, and brine.
  • Drain pasta and transfer to a serving bowl. Pour sauce over the top and drizzle with olive oil and garnish with extra parsley, if desired. Serve immediately.

Video

Notes

We love using large shrimp for this dish.  Extra Large, Jumbo, or Extra Jumbo are all excellent choices.  If frozen, place the shrimp in a colander and run cool water over them until they are thawed, usually about 5 to 8 minutes.  Be sure to keep the shells and tails!
Spice levels: ½ teaspoon red pepper flakes for low heat, 1 teaspoon for medium-low, 2 teaspoon for medium heat, 3 teaspoon for extra spicy, 4 teaspoon for super hot. 
The anchovies do add a depth of flavor but aren't overpowering at all.  
Pepperoncini peppers can be found in the condiments aisle of most well-stocked supermarkets, usually near the pickles and olives.  Hot banana pepper rings can be used in place of pepperoncini peppers, too. 
While you are prepping the ingredients for the dish, get your salted pasta water going.  Once you start sautéing the garlic, stick the pasta in.  Don't over-cook!  Drain completely before transferring to the serving dish. 
The sauce, up to adding the shrimp, can be made up to 1 day in advance.
The finished sauce (without pasta) can be frozen for up to 2 months.  

Nutrition

Serving: 1g | Calories: 542kcal | Carbohydrates: 60g | Protein: 34g | Fat: 12g | Saturated Fat: 2g | Cholesterol: 287mg | Sodium: 1678mg | Potassium: 344mg | Fiber: 3g | Sugar: 3g | Vitamin A: 484IU | Vitamin C: 15mg | Calcium: 201mg | Iron: 4mg

POST UPDATE: This recipe was originally published in October 2017, but was updated with improved tweaks to the recipe with new tips, photography, and a fabulous new video in May 2002!

Cheese Soufflé with Asparagus

May 9, 2020 by Kris Longwell 3 Comments

A fully cooked cheese soufflé with cheese in a white dish surrounded by a white linen napkin.

A Soufflé is a classic French dish that is not as difficult to make as you might think.  You can serve this in a larger soufflé dish or individual ramekins.  It’s perfect for brunch, served with our Roasted Tomato and Basil Soup and a green salad with homemade balsamic vinaigrette.  Get ready to impress!

A fully cooked cheese soufflé with cheese in a white dish surrounded by a white linen napkin.

🍶 The Ingredients

The ingredients for cheese soufflé with asparagus may be simple, yet they blend to create a light, airy dish that showcases the elegance of French culinary mastery. Find ingredient notes (including substitutions and variations) below.

An arrangement of ingredients on a white background for cheese soufflé with asparagus including asparagus, eggs, cheese, butter, flour, milk, chives, and seasonings.

🥦 Substitutions and Variations

  • Vegetables – The sky is the limit. You can easily substitute any type of veggie or use a combination of them. Roasting the vegetables softens them and deepens the flavor. Roasted (and chopped) broccoli and cauliflower are wonderful in this dish. Tomatoes and mushrooms are also amazing. Mix it up!
  • Cheese – Gruyeré is traditional and our favorite. But, you can also go with grated Fontina, Gouda, Swiss, Emmental, or white cheddar. Any melting cheese will work!
  • Flavor enhancers – The addition of chives gives a subtle depth of onion to the soufflé, but not overpowering. You could also include fresh herbs such as thyme, rosemary, basil, or sage. If using dried, only go with a total of 1 tablespoon.

See the recipe card (with video) below for a full list of ingredients and measurements.

👩🏼‍🍳 How To Make Cheese Soufflé with Asparagus

Small pieces of cut asparagus that has been roasted on a small roasting pan and seasoned with salt and pepper.
  1. Step 1: Toss the asparagus with oil, salt, and pepper and bake for 10 minutes.
A person dumping Parmesan cheese from a small glass bowl into a large white bowl that has been greased with softened butter.
  1. Step 2: Grease the dish with butter and sprinkle Parmesan cheese all over it. 
A person pouring milk from a small milk bottle into a silver saucepan with a roux in the bottom of it.
  1. Step 3: Make a roux in a saucepan and whisk in warm milk.
A person dumping an egg yolk from a small white bowl into a saucepan filled with the dough for a cheese soufflé with chives.
  1. Step 4: Once thickened, stir in cheese, Dijon, chives, salt, pepper, and the eggs (1 at a time).
A person holding up a hand-held electric mixer over a bowl of egg whites that have been beaten into soft peaks.
  1. Step 5: Beat the egg whites in a bowl until soft peaks form.
A person using a wooden spatula to fold fluffy egg whites into a soufflé batter in a glass bowl.
  1. Step 6: Gently fold the egg white into the yolk/cheese mixture. 

Expert Tips

We recommend using an electric hand mixer and a metal bowl to beat the egg whites into soft peaks. You want to stop as soon as you can lift the mixers out of the whites and small peaks form. Don’t overmix or the whites will become glossy, which impedes the dramatic rise in the dish.

Gently fold about ⅓ of the whites into the egg mixture. Again, be careful not to overmix. It’s better to have a few streaks of egg whites in the mixture than to completely knock the air out of the whites.

🔥 How to Bake a Soufflé

Roasted pieces of asparagus being dumped from a bowl into a soufflé dish that has been greased with butter and dusted with grated Parmesan cheese.
  1. Step 7: Place the prepared asparagus at the bottom of the soufflé dish.
Soufflé batter being transferred from a glass bowl into a white circular baking dish that has roasted asparagus in the bottom of it.
  1. Step 8: Add the egg mixture and smooth the top with a spatula.
A fully baked cheese soufflé with a browned surface sitting on a blue hot pad on a circular woven place mat.
  1. Step 9: Bake for exactly 27 minutes (no peeking!).
A spoon holding a spoonful of cheese soufflé with asparagus over a baking dish filled with the same.
  1. Step 10: Serve at once!

Expert Tip

We use our 1.5-quart soufflé dish for this recipe. But you can also do these in individual ramekins. We find that ramekins that are 3 to 4 inches in diameter and are 2 to 3 inches tall work best. They often produce a higher rise than the larger single dish.

🙋🏽‍♂️ Frequently Asked Questions

What type of cheese is best for a cheese soufflé with asparagus?

A blend of cheeses such as Gruyère and Parmesan is ideal for a cheese soufflé, as they provide rich flavor and a creamy texture, but you can also experiment with other cheeses like cheddar or goat cheese.

Can I prepare the soufflé mixture in advance?

While it’s best to bake cheese soufflés immediately after mixing to achieve the perfect rise, you can prepare the cheese sauce and roast the asparagus ahead of time, then combine and bake them just before serving.

What can I serve with cheese soufflé and asparagus?

Cheese soufflé with asparagus pairs beautifully with a light spinach salad, crusty bread, or a glass of crisp white wine, making for a delightful and elegant meal.

A partially eaten cheese soufflé with asparagus on a white dinner plate with a fork nearby.

🌞 Other Classic Brunch Recipes

  • A Croque Madame sandwich with a sunny side egg resting on top of it on a black plate.
    Croque Madame
  • An untouched circular loaf of homemade monkey bread on a circular white plate next to a couple mugs of coffee.
    Homemade Monkey Bread
  • An overhead view of fluffiest scrambled eggs on a white plate topped with finely snipped chives and a gold fork on the plate, too.
    Fluffiest Scrambled Eggs
  • A slice of Instant Pot Cheesy Frittata on a white plate
    Instant Pot Cheesy Sausage and Ham Frittata

Ready to impress everyone with this classic French masterpiece? Go for it!

And when you do, be sure to take a photo of it, post it on Instagram, and tag @HowToFeedaLoon and hashtag #HowToFeedaLoon!

A fully cooked cheese soufflé with cheese in a white dish surrounded by a white linen napkin.
Print Recipe
5 from 1 vote

Cheese Soufflé with Asparagus

Be sure to beat the egg white just until soft peaks form. Don't over-beat them so they become glossy. Then gently fold them into the egg mixture. This will give you the dramatic soufflé that will truly impress your guests.
Prep Time15 minutes mins
Cook Time37 minutes mins
Total Time52 minutes mins
Course: Brunch, lunch
Cuisine: French
Servings: 4
Calories: 419kcal
Author: Kris Longwell

Equipment

  • 1 large soufflé dish (1 ½ qt or 1.4 liters), or 4 small/medium ramekins
  • Hand mixer or stand mixer fitted with the whisk attachment

Ingredients

  • ½ lb asparagus ends trimmed, peeled, and cut into 1-inch pieces
  • 1 tablespoon olive oil
  • 1½ teaspoon Kosher salt
  • 1 teaspoon black pepper freshly ground
  • 3 tablespoon Parmesan cheese grated
  • 3 tablespoon unsalted butter plus more for greasing the dish
  • ⅓ cup flour
  • 1 cup whole milk warmed
  • 1 cup Gruyere cheese grated
  • 1 teaspoon Dijon mustard
  • 3 tablespoon chives finely chopped
  • 1 teaspoon Dijon mustard
  • 4 large eggs separated

Instructions

  • Preheat oven to 400°F.
  • Toss the asparagus pieces in the oil and sprinkle with ¼ teaspoon salt and ¼ teaspoon pepper.
  • Place the asparagus on a baking sheet and roast in the oven for 10 minutes. Set aside.
  • Liberally grease the soufflé dish (or ramekins) with butter. Sprinkle the Parmesan cheese all over the insides and bottom of the dish. It's okay if there is excess in the bottom of the dish.
  • In a medium saucepan, heat the butter over medium-low heat. Add the flour and whisk to fully incorporate. Cook for 1 to 2 minutes. Don't let it begin to brown.
  • Slowly whisk in the warmed milk, and bring to a simmer, or boil. Continue whisking and cooking until very thick, about 3 to 5 minutes.
  • Remove from heat and mix in the cheese, Dijon, chives, ½ teaspoon salt, and ¼ teaspoon of black pepper.
  • Gently stir in the egg yolks one at a time. Making sure they are fully incorporated before adding the next yolk.
  • In a large bowl (metal or glass), add the egg whites with a pinch of salt. Use a hand mixer on high to beat them until soft peaks just form. Don't over-beat them!
  • Add about ⅓ of the egg whites to the yolks/cheese mixture and gently fold them with a wooden spoon or whisk. Add the remaining whites and fold together until just combined. Don't overwork the mixture (it's okay if some white streaks are visible).
  • Transfer the asparagus into the bottom of the dish and then pour in the egg mixture, using a spatula to gently smooth the top.
  • Place the dish in the oven (400°F) and bake for 27 minutes.
  • Remove from oven and serve immediately.

Video

Notes

We use a soufflé dish that is about 6½ inches wide and about 3 inches tall.  You can also use individual ramekins, no smaller than 2 inches wide (up to 4 inches wide) or 1½ inches deep. 
The asparagus can be roasted up to several hours in advance.  We don’t recommend doing any of the other steps in advance.
Gruyere cheese is our favorite, but shredded Swiss, white cheddar, or fontina are all great choices.  Or a combination of them!  You’ll need 1 cup of cheese, plus the grated Parmesan for sprinkling on the greased dish.
IMPORTANT: Don’t open the oven door to peek before 25 minutes!  If at 25 minutes, you feel it is browning too much on top, gently cover with a piece of foil.
It is normal for the soufflé to deflate somewhat after it is served.  Don’t worry, it’s still just as delicious!

Nutrition

Calories: 419kcal | Carbohydrates: 14g | Protein: 22g | Fat: 26g | Saturated Fat: -4g | Cholesterol: 254mg | Sodium: 1157mg | Potassium: 302mg | Fiber: 2g | Sugar: 5g | Vitamin A: 1504IU | Vitamin C: 4mg | Calcium: 491mg | Iron: 3mg

Avocado Lime Dressing

May 5, 2020 by Kris Longwell 2 Comments

A spoon drizzling avocado lime over the top of a chopped salad in a white bowl topped with grilled corn, cherry tomatoes, and pinto beans.

We truly have a love affair with fresh avocados.  Cool, refreshing, and so versatile.

Of course, avocado has long been the reining rock-star ingredient in guacamole.  But it’s so wonderful when used in other recipes. This dressing is ideal for slaw and for a lovely Southwestern salad. Just the best!

A spoon drizzling avocado lime over the top of a chopped salad in a white bowl topped with grilled corn, cherry tomatoes, and pinto beans.

HOW TO MAKE AVOCADO LIME DRESSING

This recipe is simple to bring together.

We use our blender to purée the dressing, but you can easily use your food processor, or even a simple wooden spoon (with a little elbow grease) will do the trick.

It’s so delicious, it’s tempting to just eat spoonfuls of it before you even serve it!


THE INGREDIENTS YOU’LL NEED

This dressing is really fresh and very straight-forward, yet deep in flavor. Here’s what you’ll need:

  • Two ripe avocados
  • Mayonnaise
  • Fresh cilantro
  • Garlic
  • Lime juice
  • Jalapeno (Pickled)
  • Salt and pepper

EXPERT TIP: Non-fat yogurt can be substituted for the mayonnaise, if desired. If you want more heat, go with chopped fresh jalapenos. The more seeds you leave in from the pepper, the more heat you will have.

Ingredients for avocado lime dressing on a grey board including a cut open avocado, cut limes, a head of garlic, fresh cilantro, and a small bowl of mayonnaise.

We love going with Haas avocados, which are readily available in the produce section of most well-stocked markets.

Besides being downright delicious, avocados also are loaded with good nutritional value.

EXPERT TIP: When selecting avocados for this avocado lime dressing, they should be ripe, but not mushy. The skin should be a bright green that is just starting to turn a darker brown. If the flesh is very soft, and the tip of the avocado is dark brown, chances are, it’s over-ripened and will be brown.

An overhead view looking into the bowl of a blender with an avocado dressing inside.

We use this dressing on so many dishes.

Have you checked out our Mahi-Mahi Tacos?

We use this dressing in the slaw for the tacos and it is AMAZING!

Three mahi-mahi tacos in a taco holder with a fresh jalapeño nearby.

And, of course, it’s incredible on a salad.

We love going with cold iceberg lettuce, chopped, and topped with grilled corn, pinto beans, cherry tomatoes, and tortilla strips.

Mix together with about ¼ cup of the avocado lime dressing, and you’ll have one of the best salads you’ve ever made or eaten!

A spoon drizzling avocado lime over the top of a chopped salad in a white bowl topped with grilled corn, cherry tomatoes, and pinto beans.

Ready to make one of the most versatile and satisfying dressings in the world? Go for it!

And when you do, be sure to take a photo of it, post it to Instagram, and tag @howtofeedaloon and hashtag #howtofeedaloon!

A small glass jar holding freshly made avocado lime dressing next to a small spoon and a bunch of fresh parsley and a cut avocado in the background.
Print Recipe
5 from 1 vote

Avocado Lime Dressing

This avocado lime dressing is so vibrant in taste and is perfect for a Southwestern salad, or mixed with slaw, served on grilled seafood, and more!
Prep Time15 minutes mins
Total Time15 minutes mins
Course: Salad Dressing
Cuisine: American Southern, Tex-Mex, Mexican
Servings: 8
Calories: 282kcal
Author: Kris Longwell

Equipment

  • Food processor, blender, or whisk/wooden spoon

Ingredients

  • 2 avocados ripe, peeled, split in half, with pit removed
  • 2 cloves garlic roughly chopped
  • ½ cup cilantro fresh, chopped
  • 4 tablespoon jalapenos pickled, chopped
  • 3 limes juiced
  • 1 cup mayonnaise
  • ¾ teaspoon Kosher salt
  • ½ teaspoon black pepper ground

Instructions

  • Add all of the ingredients to a blender or food processor and pulse until fully combined. This can also be done with a large spoon in a wooden bowl, mix until desired consistency.
  • The dressing can be used immediately or transferred to a container with a tight-fitting lid and chilled in the refrigerator. Let dressing sit on the counter for about half-hour before serving, if chilled.

Video

Notes

Be sure to select avocados that are not overly ripe.  They should be a bit soft to the touch, but still a little firm.  See video for how to remove the skin and pit safely. 
Yogurt can be substituted for the mayonnaise.  
This dressing is not spicy at all.  However, if you want absolutely no heat, omit the pickled jalapenos and add a teaspoon of vinegar, such as white, Sherry, or apple cider.  For extra heat, go with chopped, seeded fresh jalapenos.  For even more heat, include some of the seeds from the fresh peppers.
This dressing is nice and thick, which we think is ideal, but that's our taste. If you prefer it a little thinner, add a tablespoon (or more) of milk or cream until desired consistency is reached.
The dressing will keep in the refrigerator for up to 2 weeks and freezes for up to 2 months. 

Nutrition

Calories: 282kcal | Carbohydrates: 8g | Protein: 2g | Fat: 14g | Saturated Fat: 2g | Cholesterol: 12mg | Sodium: 401mg | Potassium: 299mg | Fiber: 4g | Sugar: 2g | Vitamin A: 252IU | Vitamin C: 22mg | Calcium: 18mg | Iron: 1mg

Stuffed Poblanos with Red Sauce

May 3, 2020 by Kris Longwell 15 Comments

A stuffed poblano pepper on a white plate filled with a red sauce.

If you’re looking for an authentic Mexican dish that is as beautiful in presentation as it is in taste, look no further.

We love Mexican food so much. And this dish is classic. We’re crazy for Chile Rellenos Stuffed with Mexican Queso, but this dish is just as delicious, and so many of the components of it can be made in advance!

VIDEO ALERT: Be sure to check out the video for this recipe in the recipe card.  If you like the video, subscribe to our YouTube Channel!

A stuffed poblano pepper on a white plate filled with a red sauce.

HOW TO MAKE STUFFED POBLANOS WITH RED SAUCE

As mentioned, so many of the elements of this dish can be made 1 to 2 days in advance.

From the red sauce to the stuffing, even the roasting of the peppers can be done ahead of time!

PREPARING THE RED (ROJO) SAUCE

We’ll be honest and tell you that these stuffed poblanos are so delicious, that they don’t necessarily beg for a sauce.  But, still.  A sauce almost always makes a dish even better.

And we think this sauce is the perfect match for the mild spice of the peppers.

EXPERT TIP: We like going with good-quality canned whole tomatoes for the sauce. If you have beautifully ripe fresh tomatoes, then, by all means, use them.  If using fresh, you’ll need about 1 lb of them, typically about 3 medium-sized tomatoes. This recipe makes a decent amount of sauce, so if you prefer, you can cut the ingredients in half for less sauce. The sauce can be made up to 2 days in advance.  It’s also great for other dishes, spooned over an omelet or hamburger.

A large silver skillet filled with a red sauce with a wooden spoon in it.

Poblanos are one of our favorite types of peppers to cook with and serve.

They are considered mild, but they do carry some level of spiciness.

EXPERT TIP: Roasting the peppers under your broiler (4 inches away from the element) will deepen the flavor immensely and make removing the skin easy, as well as removing the seeds. The seeds and interior ribs are where the spice comes from. Remove them all for minimal spice or leave some in for extra heat. You can even carefully rinse the peppers under water to help remove the seeds.

3 stacked images, the top are poblanos peppers on a baking sheet, and the next are roasted poblanos and the bottom image is a hand removing seeds with a spoon.

THE PERFECT FILLING FOR ROASTED POBLANOS

For the filling, we start with fresh tomatoes, onion, and garlic. Dried oregano, cumin, and cinnamon deliver a classic Mexican taste.  We love using Mexican oregano, but regular dried oregano works great, too.

For ease, we use a rotisserie chicken from the supermarket and make our Perfect Steamed Rice in advance (up to 1 day).

EXPERT TIP: Simmering the puréed tomatoes and onions will help to cook out some of the liquid that the vegetables will release. After stirring in the remaining ingredients, you’re filling is ready, however, this can be made up to 1 to 2 days in advance. If making in advance, simply gently reheat the filling on the stove before stuffing the peppers.

A large silver skillet filled with rice, cooked chicken, and cheese, all being stirred with a wooden spoon into a red sauce.

This recipe makes enough filling to easily fill 6 to 8 large poblano peppers.

Use a spoon or fork to gently stuff the filling into the peppers.

EXPERT TIP: When cutting the slit down the top of the pepper, be sure not to cut too deeply, or you might cut the underside of the pepper. But if that does happen, don’t worry, the peppers will still cook just fine and still be easy to transfer to a plate or serving platter.

A hand using a spoon to fill a roasted poblano pepper with a chicken and rice mixture.

CHOOSING THE RIGHT CHEESE FOR STUFFED POBLANO PEPPERS

You’re going to want to choose a good melting cheese for these stuffed poblanos.

Great options are:

  • Mexican Chihuahua
  • Oaxaca
  • Asadero
  • Monterrey Jack
  • Cheddar

Using a combination of these is a great way to go, too!

A hand sprinkling shredded cheddar cheese on top of stuffed poblanos on a baking sheet.

This dish is so festive and perfect for serving friends and loved ones.

It’s the perfect dish for a Cinco de Mayo celebration.

Serve with a side of Homemade Guacamole and our Classic Margaritas, and you’ll have the perfect Mexican table!

A white platter filled with 3 stuffed poblanos next to 2 margaritas and a festive napkin.

THE ULTIMATE MEXICAN COMFORT FOOD

As mentioned, this is one of our favorite Mexican dishes to serve and eat.

The flavors work together perfectly and the texture is wonderful.

This is truly a deeply satisfying dish your guests will be so impressed with. We can assure you of this!

A hand holding a fork filled with a chicken and rice stuffing from inside a roasted poblano in a white bowl with red sauce.

Ready to make one of the most impressive (and delicious) Mexican dishes ever? Go for it!

And when you do, be sure to take a photo of the dish, post it to Instagram, and tag @howtofeedaloon and hashtag #howtofeedaloon!

An overhead view of a stuffed poblano pepper topped with melted cheese in a white serving bowl filled with a red sauce.
Print Recipe
5 from 6 votes

Stuffed Poblanos with Red Sauce

These Stuffed Poblanos with Red Sauce are a lighter, but equally as delicious, alternative to Chili Rellenos, which are usually fried with an egg batter. Roasting the chicken and the peppers really deepens the flavors. Remove the seeds and inner membranes for a very minimally spicy dish. But one that is exploding with flavor.
Prep Time45 minutes mins
Cook Time45 minutes mins
Total Time1 hour hr 15 minutes mins
Course: Mexican
Cuisine: Mexican
Servings: 4 people
Calories: 754kcal
Author: Kris Longwell

Ingredients

FOR THE SAUCE

  • ¼ cup onion chopped
  • 1 28 oz. can whole tomatoes with juice
  • 2 cloves garlic chopped
  • 1 cup chicken stock or vegetable stock
  • 1 tablespoon distilled white vinegar
  • 1 tablespoon sugar
  • 1 tablespoon oregano dried, Mexican oregano if available
  • 2 tablespoon corn oil
  • 1 teaspoon Kosher salt

FOR THE PEPPERS AND STUFFING

  • 4 cups chicken cooked, rotisserie is perfect
  • 6 poblano chiles
  • 2 medium tomatoes stemmed and roughly chopped
  • 1 cup onion chopped
  • 2 cloves garlic chopped
  • 1 teaspoon oregano dried, Mexican, if available
  • 1 teaspoon ground cumin
  • ½ teaspoon cinnamon ground
  • 1 teaspoon Kosher salt
  • 1½ cups rice cooked
  • ¼ cup cilantro fresh, chopped
  • 2 cups Monterey Jack cheese grated

Instructions

  • MAKE THE SAUCE
  • Pulse the onions and garlic in your food processor a couple of times. Add the tomatoes (with juice), stock, vinegar, sugar, and oregano, and pulse until puréed.
  • Heat corn oil in a deep heavy large skillet over medium heat until it shimmers. Add sauce and simmer for 10 minutes. Stir in salt. Keep warm on the stove, or store in an air-tight container if not using immediately.
  • ROAST THE PEPPERS
  • Position a rack about 4 inches from the broiler and turn on HIGH.
  • Set the peppers on a baking sheet and then place under the broiler for 5 minutes. Remove from oven and use tongs to flip the peppers over. Return to the oven and broil for another 5 minutes until smokey and charred all over. Keep an eye on them, as broilers can vary from oven to oven.
  • Use a small sharp knife to cut a slit on the top of the peppers from the tip to the end of the pepper, careful not to cut too deeply. Let cool slightly, peel off the skins, and use a small spoon to remove the seeds and inner ribs, or membranes. You can gently run water over the peppers in your sink to help remove excess seeds.
  • MAKE THE FILLING:
  • In your food processor, add the tomatoes, onion, garlic, oregano, cumin, cinnamon, and 1 teaspoon salt. Process until puréed, about 30 seconds.
  • Heat a large skillet over medium-high heat and add the puréed tomato mixture to the pan. Cook for about 5 to 8 minutes, until about half of the liquid has evaporated.
  • Take the pan off the heat and stir in the cooked chicken, cooked rice, cilantro, and 1½ cups of the cheese.
  • FINISH OFF THE DISH:
  • Portion the filling among the peppers, pressing their sides around the filling.
  • Broil the peppers on HIGH (4 inches under the heating element) until the cheese begins to melt and the tops begin to brown, about 4 minutes (keep an eye on them, don't let them burn!).
  • Carefully remove from the oven and top with the remaining cheese. Place under the broiler again until the cheese is completely melted and lightly browned, about 2 more minutes.
  • Ladle about ½ cup of the sauce into serving plates/bowls and gently place 1 stuffed pepper on top of the sauce on each plate.  Serve at once. 

Video

Notes

The sauce and filling can be prepared up to 2 days in advance.
Cutting up a rotisserie chicken is ideal for this recipe. However, you can also roast skin-on, bone-in chicken breasts that have been lightly rubbed with olive oil and then sprinkled with salt and pepper in a 350°F oven for about 50 minutes to 1 hour.  Let cool and then remove the skin and then the meat from the bone and roughly chop.
While cutting the slit in the pepper, don't cut too deeply, or you might cut through the other side. Once roasted, the peppers will be soft, but still pretty sturdy.  To completely remove the seeds (which contain the heat), carefully rinse the roasted peppers in your sink with cool water.  
Be sure to keep an eye on your broiler while cooking on HIGH.  You want the peppers to get a little smokey and very charred.  Be sure to not let the final broiling burn the cheese and peppers. 

Nutrition

Calories: 754kcal | Carbohydrates: 79g | Protein: 33g | Fat: 26g | Saturated Fat: 8g | Cholesterol: 93mg | Sodium: 1606mg | Potassium: 847mg | Fiber: 6g | Sugar: 12g | Vitamin A: 1772IU | Vitamin C: 158mg | Calcium: 514mg | Iron: 3mg

POST UPDATE: This recipe was originally published June, 2017, but was updated with improved tweaks to the recipe, new tips and photography, and a fabulous new video in May, 2020!

Chilaquiles

April 29, 2020 by The Loon 4 Comments

An overhead view of chilaquiles in a cast-iron skillet with 2 slices of lime and sliced avocado on top.

There are so many wonderful dishes that are of Mexican origin. This one is unique and truly one of our favorites.

We love brunch and we love Mexican cuisine. This dish is a huge celebration of both. We have served this alongside our Chile Rellenos Stuffed with Queso for an absolutely gorgeous and incredibly delicious Mexican brunch. You can make the chips and sauce well in advance, making the final assembly fast and easy!

VIDEO ALERT: Be sure to check out the video for this recipe in the recipe card.  If you like the video, subscribe to our YouTube Channel!

An overhead view of chilaquiles in a cast-iron skillet with 2 slices of lime and sliced avocado on top.

HOW TO MAKE CHILAQUILES FROM SCRATCH

This dish can absolutely be made in stages and as mentioned, makes the final preparation so easy.

The flavors are so bright and vibrant and the presentation is gorgeous when you bring it to the table.

HOMEMADE CORN TORTILLA CHIPS ARE EASY TO MAKE

Corn tortilla chips are a key ingredient in authentic chilaquiles.

And making them from scratch is so much easier than you might think.

EXPERT TIP: If you don’t have a deep fryer, simply add enough vegetable oil to a sturdy skillet (cast-iron) or pot (Dutch oven) to reach a depth of about an inch to 2 inches. Bring the oil to 350°F to 365° and then simply fry the cut tortillas. We go with packaged yellow corn tortillas and cut them into quarters. As soon as the oil stops simmering around the tortillas, they should be ready. Sample one from the first batch to make sure your timing is correct before continuing.

3 different views of corn tortillas being cut into quarters, and then another shot of them fried in a wire basket, and then another of fingers salting the chips.

Tomatillos are a key ingredient for the salsa verde sauce. They can be found in the produce section of most well-stocked grocery stores.

We love to add a couple of serrano peppers to the mix to add a little heat.

EXPERT TIP: Roasting the vegetables deepens the flavor and adds incredible taste to the sauce. Turn your broiler onto HIGH, and then roast them for about 5 minutes, about 4 inches from the heat. Carefully remove the pan from the oven and use tongs to turn the vegetables over. Return them to the oven and broil for another 5 minutes. Their skin will get dark and charred in places, which is what you want.

Three stacked images with the 1st being a hand holding a tomatillo and the next is a hand holding to cut serrano peppers, and the 3rd a baking sheet with roasted peppers on it.

PURÉEING THE VERDE SAUCE

After roasting the peppers, it’s time to get them ready for the skillet.

We use our blender to quickly purée them, but you could also do this in your food processor.

For safety, it’s a good idea to let the peppers cool a bit before transferring them to your blender or food processor.

Two stacked images with top being an overhead view of a blender filled with roasted peppers and the 2nd is of those same peppers after they have been puréed.

Now to the skillet, the sauce goes.

Bring to a boil and then add good-quality chicken stock. Let that simmer until slightly thickened, about 5 minutes.

Mexican crema, crème fraîche, or even just heavy cream adds a luxurious texture to the sauce that is wonderful.

A hand pouring Mexican crema from a bottle into a skillet filled with hot verdi sauce.

LAYERING THE CHILAQUILES

We love using our 10-inch cast-iron skillet for baking the dish, but you can also use a 12-inch cast-iron skillet. A 9″x13″ baking dish works perfectly well, too.

Choose a good melting cheese, such as Mexican Chihuahua, or Monterey Jack, cheddar, or a combination of these.

EXPERT TIP: When building the dish, first give the chips a gentle press into the pan or dish. Save some chips for filling the sides of the pan. We love to have crispy edges to the finished chilaquiles, which delivers wonderful texture and taste. After adding the sauce to the chips, use a wooden spoon to move the chips around so they all get coated.

3 stacked images with the top being corn tortilla chips being place into a cast-iron skillet, next a shot of a green sauce being ladled over the chips and the last shot of cheese being sprinkled on top.

This dish is definitely best when served piping hot right from the oven. Though it’s still delicious to munch on later in the day, the texture of the casserole loses some of its wonderful texture as it completely cools off.

Garnishes are really important in making the perfect chilaquiles. Be sure to have:

  • Fried eggs, sunnyside up
  • Chopped cilantro
  • Sliced avocado
  • Lime wedges
  • Extra cream, for drizzling
  • Hot sauce (optional)

We use our amazing 10″ Non-Stick Sardel pan for cooking the “sunny side up” egg perfectly.

A white plate of chilaquiles topped with a fried egg next to a glass of orange juice.

PERFECT FOR A CINCO DE MAYO BRUNCH

This dish is so incredibly festive, and is great year-round, but especially for a Cinco de Mayo brunch!

Once you pierce that perfectly cooked egg and watch that yummy yolk run down your perfectly prepared chilaquiles, you know you’re in for something special.

This is one of our favorite brunch dishes to prepare, and we’re pretty certain you’re going to have so much fun making it yourself and then serving to loved ones!

A fork piercing a sunnyside up fried egg onto of a plate of chilaquiles.

Ready to make the best Mexican brunch dish in the world? Go for it!

And when you do, be sure to take a photo, post it on Instagram, and tag @howtofeedaloon and hashtag #howtofeedaloon!

A close-up view of a cast-iron skillet filled with chilaquiles topped with two sunny side up fried eggs.
Print Recipe
5 from 1 vote

Chilaquiles

Chilaquiles is a mainstay on brunch menus throughout Mexico. Homemade corn tortilla chips, baked with made-from-scratch verdi sauce with melty cheese is incredible!
Prep Time15 minutes mins
Cook Time45 minutes mins
Total Time30 minutes mins
Course: Breakfast / Brunch
Cuisine: Mexican
Servings: 6 people
Calories: 565kcal
Author: Kris Longwell

Equipment

  • Deep fryer, or sturdy skillet filled with 1 to 2-inches of vegetable oil
  • Blender or food processor
  • 10" or 12" cast-iron skillet, or 9"x13" baking dish (for baking the chiaquiles)

Ingredients

  • Vegetable oil for frying
  • 15 corn tortillas quartered
  • 2 teaspoon Kosher salt divided
  • 20 tomatillos husks peeled off and the stems removed (if stems are visible)
  • 2 serrano chiles stems removed
  • 2 tablespoon olive oil
  • 1 cup onion chopped
  • 4 cloves garlic minced
  • 2 cups chicken stock or vegetable stock
  • ¾ cup Mexican crema or heavy cream, plus more for garnish
  • ¼ cup cilantro fresh, chopped, plus more for garnish
  • 1¼ cup Monterrey Jack cheese grated
  • 2 tablespoon unsalted butter
  • 4 large eggs
  • Salt and pepper to taste
  • 1 avocado peeled, pit removed, and thinly sliced, for garnish
  • 2 limes cut into wedges, for garnish
  • hot sauce for garnish

Instructions

  • Preheat oil in deep-fryer, or oil in a sturdy skillet, to 365°F.
  • Working in batches, fry the corn tortilla triangles until just golden and crisp, about 2 minutes. Once the chips stop sizzling in the oil, they should be done. Drain on paper towels and immediately sprinkle with Kosher salt. Set aside.
  • Meanwhile, preheat your broiler to HIGH.
  • Place the tomatillos (outer skins removed) and stemmed serranos on a large baking dish. Place under the broiler, about 4 inches from the heating element. Remove from the oven after 5 minutes, and use tongs to gently flip the vegetables over. Return to the oven and broil for another 5 minutes. Remove from the oven. The vegetables will be soft and charred in places.
  • Turn off broiler and preheat oven to 400°F.
  • Carefully transfer the roasted tomatillos and peppers to your blender or food processor. Blend (or process) until puréed, just a few seconds.
  • Heat the oil over medium-high heat in a large skillet or saucepan. Add the onion and cook until soft and translucent, about 3 to 5 minutes. Add the garlic and cook for another 30 seconds, stirring occasionally.
  • Carefully add the tomatillo/pepper purée to the onion mixture and bring to a simmer. Add the chicken stock and 1 teaspoon of salt and bring to a boil. Let simmer for about 5 minutes, until thickened somewhat. Turn off the heat and stir in the cream and cilantro.
  • Meanwhile, place the chips in a cast-iron skillet, or baking dish, and gently press down. Leave a handful of chips to place around the edges of the dish just before baking.
  • Carefully pour the verdi sauce over the chips. Use a wooden spoon to move the chips around, trying to cover as many of the chips in the sauce as possible. Top with the cheese, and then snuggle in the remaining chips along the perimeter of the dish, allowing some of the chips to stick up above the chilaquiles.
  • Place in the oven for 15 minutes, until cheese is melted and bubbling around the edges.
  • Meanwhile, melt the butter in a non-stick skillet and then gently add the eggs. Sprinkle with salt and pepper and cook until the yolk is just starting to set, about 1 to 2 minutes. Carefully slide the cooked eggs onto a large plate.
  • Remove the chilaquiles from the oven and top with the prepared eggs.
  • Garnish with additional chopped cilantro, avocado slices, lime wedges, Mexican crema, and hot sauce, if desired. Serve at once.

Video

Notes

Making the corn tortilla chips from scratch is easy and so delicious, but of course, store-bought chips will work just fine.  You'll need about 60 chips, close to a full bag.  
If the chips are extra salty, decrease the amount of salt you add to the verdi sauce to ¾ tsp. 
You can also bake the corn tortillas, instead of frying them.  Preheat your oven to 350°F and bake the quartered tortillas on a large baking sheet for 15 to 20 minutes, until crisp.  Lightly salt them once baked.
You can substitute jalapenos for the serranos.  For medium spiciness, go with 2 serranos, or 1 jalapeno.  For less spice, reduce to 1 serrano and 1 jalapeno with seeds and inside ribs removed.  For zero spiciness, omit the peppers. 
The chips and the sauce can be made up to 1 or 2 days in advance. 
Substitutes for Mexican crema are crème fraîche, heavy cream, or ½ cup sour cream mixed with ¼ cup milk. 
Chilaquiles are still tasty once it cools off, but it definitely best-enjoyed piping hot fresh out of the oven. 

Nutrition

Calories: 565kcal | Carbohydrates: 46g | Protein: 13g | Fat: 18g | Saturated Fat: 5g | Cholesterol: 152mg | Sodium: 1092mg | Potassium: 630mg | Fiber: 7g | Sugar: 9g | Vitamin A: 635IU | Vitamin C: 24mg | Calcium: 146mg | Iron: 2mg

POST UPDATE: The recipe was originally published in September 2014, but was updated with improved tweaks to the recipe with new tips, photography, and a fabulous new video in April 2020!

Mushroom Swiss Burger

April 26, 2020 by Kris Longwell 22 Comments

A mushroom Swiss burger on a white plate next to a small bowl of ketchup and and a beer.

Everyone has their favorite type of burger. This has become at the top of the list for us.  

There are a few tricks to making this the best burger you will ever make, serve, or eat. Grilled to perfection and an amazing mushroom sauce that comes together in about 20 minutes. This is one burger you’ll want to make time and time again!  And why not put it over the top with Homemade Hamburger Buns!

VIDEO ALERT: Be sure to check out the video for this recipe in the recipe card.  If you like the video, subscribe to our YouTube Channel!

A mushroom Swiss burger on a white plate next to a small bowl of ketchup and and a beer.

HOW TO MAKE THE BEST-EVER MUSHROOM SWISS BURGER

This burger is not difficult to prepare at all.

After forming our burger patties, we season and marinate them and then get started on the incredible mushroom sauce.

We are so thrilled to use our amazing PowerVision PowerEggX camera in filming this video. It is so awesome and so fun! Click here to learn more about this incredible camera.

CHOOSING THE BEST BEEF

Before you get started on the mushroom sauce, let’s get the patties formed and seasoned.

Since this is such a special burger, we recommend using good-quality beef.

EXPERT TIP: Nowadays, ground Wagyu is found in the meat department of most well-stocked supermarkets. Wagyu beef is wonderfully flavored and makes an amazing burger. Grass-fed beef is excellent, too. We go with 85% lean for ideal flavor and juiciness.

We use a metal ring that is 3 inches in diameter to help shape the burger, but you can certainly use your hands. Amp up the flavor profile by seasoning the patties with our Perfect BBQ Rub and then marinating the burgers with a few splashes of Worcestershire sauce on both sides of the patties.

Two photos with the first being two hands pressing ground beef into a metal ring and the second photo of fingers sprinkling BBQ rub on the hamburger patty.

MAKING THE PERFECT MUSHROOM SAUCE

In all honesty, it’s the mushroom sauce for this burger that truly puts it over the top. The mushrooms are perfectly seasoned and the sauce is rich and luxurious.

We start with 1 lb of sliced mushrooms and ¼ cup of chopped onions or shallots. After the mushrooms have started to reduce down, the addition of a good quality red wine deepens the flavor incredibly well.

EXPERT TIP: We love using chopped fresh thyme for the mushroom sauce, but you can also go with dried thyme leaves. If you do, reduce the amount to 1 tsp. Dried basil or oregano would be other suitable options, as well.

Two side by side photos, the first of sliced mushrooms in a skillet with a wooden spoon and the second photo is red wine being poured into the skillet with the mushrooms.

Now, it’s time to make a roux.

Simply add 2 tablespoons of all-purpose flour to the mushrooms and cook for a couple of minutes.

EXPERT TIP: It’s important to allow the flour to cook in the skillet for at least 2 minutes. By doing this, the flour will be completely incorporated and the flour taste will be eliminated.

A hand sprinkling flour from a small bowl into a skillet filled with sautéed mushrooms.

FINISHING THE SAUCE

We use beef stock (or broth) to make the sauce.  A touch of cream is the final touch to these amazingly delicious mushrooms.

The mushrooms are deep in flavor and the sauce is rich and creamy.

The perfect match to the grilled burgers and Swiss cheese.

A hand pouring cream into a skillet of sautéed mushrooms

While you are putting the finishing touches on the sauce, it’s time to fire up the grill to medium-high heat.

Once the mushrooms are finished, you can keep them warm over very low heat on the stove.

The mushroom sauce can easily be prepared up to a couple of days in advance. Simply reheat over medium heat before serving the mushroom Swiss burgers. We often make the sauce ahead of time and then serve the sauce in a medium-sized slow cooker on warm and let folks serve themselves.

A large skillet filled with a mushroom sauce with a wooden spoon in it.

GRILLING THE PATTIES FOR MUSHROOM SWISS BURGERS

Once your grill is nice and hot, it’s time to cook the burgers.

For medium to medium-rare, we recommend cooking the hamburgers for about 5 minutes per side.

EXPERT TIP: Use a spoon, or your fingers, to make an indention in the middle of the top side of each patty. Thick hamburgers tend to bloat as they cook, and often lose the patty shape and become more like softballs of cooked meat. The indention reduces this from happening and helps with even cooking.

Two hamburger patties on a grill being cooked for mushroom Swiss burgers.

These burgers are always such a huge hit whenever we serve them to friends and family.  We love to serve them with our Homemade Hamburger Buns!

Let folks pile as much of the mushroom sauce on top of their perfectly cooked burger as they want.

And these mushroom burgers are matched wonderfully with an ice-cold beer or iced tea, and of course our Perfect Homemade French Fries!

A large wooden spoon placing mushroom sauce onto a mushroom Swiss burger on a plate next to a pile of French fries.

PERFECT FOR OUTDOOR BBQs

These burgers are perfect for entertaining, but also for a fun afternoon in the backyard with the family.

If you don’t have access to a grill, you can cook the patties in a hot skillet until cooked to your desired doneness.

This Mushroom Swiss Burger is the ultimate show-stopper of hamburgers. One bite, and you’ll be in burger heaven!

A close up view of a mushroom Swiss burger on a white plate with a pile of French fries next to it.

Are you ready to make the best burger in town? Go for it!

And when you do, be sure to take a picture of it, post it on Instagram, and tag @howtofeedaloon and hashtag #howtofeedaloon!

A mushroom Swiss burger on a white plate next to a small bowl of ketchup and and a beer.
Print Recipe
5 from 8 votes

Mushroom Swiss Burger

Perfectly seasoned and cooked burgers with a luscious creamy mushroom sauce with melty Swiss cheese. This a true show-stopper of a hamburger!
Prep Time15 minutes mins
Total Time15 minutes mins
Course: Lunch / Dinner
Cuisine: American
Servings: 4
Calories: 856kcal
Author: Kris Longwell

Equipment

  • Gas or charcoal grill, or indoor grill, or grill pan

Ingredients

  • 2 lbs ground sirloin divided into 4 patties
  • 4 tablespoon Perfect BBQ rub or your favorite seasoning
  • 4 tablespoon Worcestershire sauce
  • 4 hamburger buns
  • 4 tablespoon unsalted butter
  • 8 slices Swiss cheese

FOR THE MUSHROOM SAUCE

  • 2 tablespoon olive oil
  • 2 tablespoon unsalted butter
  • ¼ cup onion chopped
  • 1 tablespoon thyme fresh, chopped
  • ½ teaspoon Kosher salt
  • ¼ teaspoon black pepper freshly ground
  • 1 lb mushrooms sliced
  • 1 tablespoon Worcestershire sauce
  • ¼ cup red wine
  • 2 tablespoon all-purpose flour
  • 1 cup beef stock or broth
  • 2 tablespoon heavy cream

Instructions

PREP THE BURGERS

  • Season the patties all over with the BBQ rub and a small sprinkle of salt and pepper. Place in a dish large enough to hold the patties, and sprinkle a few splashes of Worcestershire sauce over both sides of all patties. Cover and place in the refrigerator.

MAKE THE MUSHROOM SAUCE

  • Heat the oil over medium-high heat in a large skillet or saucepan. Add the butter and swirl the pan until it is melted.
  • Add the onions and cook until soft and translucent, about 3 to 5 minutes.
  • Add the chopped thyme and cook until fragrant, about 30 seconds.
  • Add the mushrooms and ½ teaspoon of salt and ¼ teaspoon black pepper. Stir to fully coat the mushrooms.
  • Cook until mushrooms are soft and beginning to exude liquid. Add 1 tablespoon Worcestershire sauce and the red wine (¼ cup) and cook until the liquid has reduced by about half, about another 4 to 5 minutes.
  • Sprinkle the flour all over the mushrooms and stir until fully incorporated. Cook for 2 minutes, stirring occasionally.
  • Add the beef stock and cook, stirring frequently, until thickened, about 4 to 5 minutes. Stir in the cream. Taste and add more salt, if desired. Keep warm on low heat on the stove.

FINISH OFF THE BURGERS

  • While the sauce is coming together, fire up your grill to medium-high heat.
  • Place the burgers directly over the heat and grill until desired doneness, about 5 minutes per side for medium to medium-rare.
  • Just before the burgers are done, place two slices of cheese on each patty. Also at this time, place the buttered side of all of the buns onto the grill.
  • Remove the burgers from the grill once the cheese has melted. Remove the buns once they are nicely toasted and brown around the edges.
  • Place burgers on the bottom buns and top with the warmed mushroom sauce. Top with the remaining buns.

Video

Notes

These are ½ lb burgers.  You can easily adjust the recipe to make smaller ¼ burgers.  You'll need to adjust the grilling time accordingly. 
We love using ground Wagyu beef, which can be found in the meat department of most well-stocked supermarkets.  Grass-fed ground sirloin is an excellent choice, too.  We go with 85% lean for the right amount of juiciness for the burger.
Use your favorite types of mushrooms.  We typically go with white button mushrooms that we slice nice and thick.  However, shitake, portabella, or other types of wild mushrooms are great choices.  If using dried, be sure to follow instructions on the packaging for re-hydrating.  
The mushroom sauce can be made up to 2 days in advance and then re-heated on the stove before serving.  We often keep the mushroom sauce in a small Crock-Pot on the 'Warm" setting when serving a crowd. 

Nutrition

Calories: 856kcal | Carbohydrates: 36g | Protein: 61g | Fat: 28g | Saturated Fat: 18g | Cholesterol: 242mg | Sodium: 1018mg | Potassium: 1402mg | Fiber: 3g | Sugar: 8g | Vitamin A: 1021IU | Vitamin C: 9mg | Calcium: 419mg | Iron: 8mg

Slow Cooker Asparagus Risotto

April 23, 2020 by Kris Longwell 11 Comments

A large white bowl filled with slow cooker asparagus risotto next to a pepper grinder and a glass of white wine.

Risotto, when done right, is so comforting and amazingly delicious.  When not done right, it’s dry and just not that appealing.

We love using our slow cooker for so many dishes, from Best-Ever Baby Back Ribs to Chicken Chow Mien, but folks, wait until you make this risotto in it!  You can’t believe how perfectly creamy the final dish is, and the taste?  All we can say is: “Wow! You gotta make this!”

VIDEO ALERT: Be sure to check out the video for this recipe in the recipe card.  If you like the video, subscribe to our YouTube Channel!

A large white bowl filled with slow cooker asparagus risotto next to a pepper grinder and a glass of white wine.

HOW TO MAKE SLOW COOKER ASPARAGUS RISOTTO

Perfectly prepared risotto takes some skill when making it in a skillet.

Our slow cooker version is fool-proof and gives you wonderfully creamy risotto every single time.  And if you love this recipe, you will flip for our Risi e Bisi (Rice with Peas).

PREPARING THE ASPARAGUS

Before we get started in the slow cooker, we need to do a little prep work, but don’t worry…not too much!

This includes cutting your asparagus into beautiful bite-size pieces.

EXPERT TIP: The ends of asparagus can be tough and somewhat chewy to the bite. We recommend cutting about an inch off from the end of each stalk. For an attractive presentation, slice the spears into 1-inch pieces, cutting on at a 45° angle with each slice. (see photo for reference).

Three images of two hands using a large knife to cut asparagus into bite-sized pieces on wooden cutting board.

Now, onto the rice. We highly recommend using a high-starch, short-grain rice such as Arborio or Carnroli when making risotto. It produces the creamy texture that you want in a perfectly prepared risotto.

If we can’t find arborio at your market, we love to order ours online.

EXPERT TIP: You’ll want to cook down the onions and garlic in a large skillet first. Next, a quick sauté sets the stage for perfect risotto. And then finally a reduction of white wine infuses incredible taste to the dish.

Two side-by-side images, one of a wooden spoon sauteing rice in a skillet, and the image next to it is white wine being poured into the skillet with the rice.

USING YOUR SLOW COOKER TO MAKE RISOTTO

Now it’s time to let your slow cooker do its magic. Transfer the rice to your 8 to 10-quart slow cooker and then add the broth, lemon zest, lemon juice, salt, and pepper.

No need to sauté the asparagus before adding it to your slow cooker. We simply dump it in for the last 30 minutes of cooking and it gets cooked perfectly.

EXPERT TIP: It may seem like you’ve got too much liquid. Don’t worry, the arborio rice slowly absorbs the amazing broth and transforms into a delicious creamy texture. We love going with chicken stock, but to make this dish 100% vegetarian, use vegetable stock or broth. It’s okay to give the mixture a stir every now and then.  That’s not 100% necessary, except for when you stir in the asparagus and then at the end of the cooking time.

Two side-by-side images with the first being a hand pouring chicken stock into a slow cooker from a measuring cup, and the next cut asparagus being dropped into the same slow cooker.

After 90 minutes, the slow cooker asparagus risotto will still have plenty of liquid, but you’re getting close.

Dump in the cut asparagus and give the whole mixture a good stir.

After another 30 minutes (2 hours total), the risotto will be almost ready. All that’s needed is to stir in the butter and Parmesan cheese.

A hand dumping grated Parmesan cheese from a small bowl into a slow cooker filled with asparagus risotto.

PERFECT FOR SPECIAL OCCASIONS

We absolutely love making and eating this risotto.

It’s a wonderful dish to serve on special occasions like Mother’s Day, or for baby or wedding showers, or for a fabulous brunch.

But it’s so easy to prepare, that you can easily serve this on a busy weeknight.

A large wooden spoon filled with slow cooker asparagus risotto being lifted out of the Crock-Pot.

SLOW COOKER ASPARAGUS RISOTTO FAQs

  • Can I use regular long-grain rice? You can, but you will not get that incredibly creamy texture that you get from Arborio or Carnaroli. Click the links to have either of these delivered to your doorstep (North America only).
  • Would canned asparagus be okay to use? In a pinch, yes. Drain them, cut them into 1-inch pieces, and stir them in during the final 15 minutes of cooking. But fresh is much, much better!
  • What are other ingredients could be included in the risotto? We love adding dried mushrooms! Soak them for 20 minutes in warm water, then strain them, roughly chop them, and stir them in when you stir in the butter and cheese. Cooked artichokes are a wonderful addition, too. 
  • What if there is too much liquid after two hours? You should be good after 2 hours of slow cooking, but if there are still pools of liquid, even after stirring, let the cooking continue for another 30 minutes or until you reach the creamy texture and the rice is tender.

A close-up view a large white bowl filled with slow cooker asparagus risotto.

Ready to make truly top-notch restaurant-quality risotto in your slow cooker? Go for it!

And when you do, be sure to take a photo of it, post it on Instagram, and tag #howtofeedaloon and hashtag #howtofeedaloon!

A close-up view a large white bowl filled with slow cooker asparagus risotto.
Print Recipe
4.50 from 4 votes

Slow Cooker Asparagus Risotto

You will never make risotto any other way once you follow this method for making it in your slow cooker. It's okay to give the risotto a stir every now and then, but not 100% necessary.
Prep Time10 minutes mins
Cook Time2 hours hrs 15 minutes mins
Total Time2 hours hrs 25 minutes mins
Course: Side Dish or Entree
Cuisine: Italian
Servings: 6
Calories: 556kcal
Author: Kris Longwell

Equipment

  • Large skillet/saucepan
  • 8 or 10-Qt Slow Cooker

Ingredients

  • 3 tablespoon olive oil plus more for serving
  • 1 cup onion chopped
  • 3 cloves garlic minced
  • 2 cups Arborio rice or Carnaroli
  • ¾ cup white wine
  • 5½ cups chicken stock or vegetable stock, heated
  • 1 tablespoon lemon zest from 1 large lemon
  • 2 tablespoon lemon juice from 1 large lemon
  • 1½ teaspoon Kosher salt
  • 1 teaspoon black pepper
  • 1 lb asparagus ends cut off, cut into 1-inch pieces
  • 6 tablespoon unsalted butter
  • 6 tablespoon Parmesan cheese grated

Instructions

  • Heat the oil in a large skillet or saucepan over medium-high heat. Add the onion and cook until soft and translucent, about 3 to 5 minutes. Add the garlic and cook for another 30 seconds.
  • Add the rice and stir to fully coat with the oil. Cook for three minutes.
  • Add the wine and cook until almost all the liquid has evaporated, about 3 to 5 more minutes.
  • Transfer the rice mixture to the slow cooker. Add the heated stock or broth, lemon zest, lemon juice, salt, and pepper. Cover, then turn on HIGH and cook for 90 minutes.
  • Remove the lid and stir the rice with the liquid. There will still be plenty of liquid at this point, but the rice should have expanded and starting to become soft. Stir in the asparagus, cover, and continue cooking on HIGH for another 30 minutes.
  • Remove the lid and stir in the butter and Parmesan cheese. Taste and add more salt, if desired.
  • Serve at once, adding a drizzle of quality olive oil, a sliver or two of fresh Parmesan, and a couple of grinds of black pepper, if desired.

Video

Notes

It's important to make sure the stock is warmed before adding to the slow cooker.  You can warm it on the stove in a saucepan, or in a heat-proof vessel in your microwave.  It doesn't have to be boiling, just not chilled or even room-temperature.
We strongly recommend using Arborio rice for this recipe.  Regular long-grain rice will not produce the creamy texture that makes this dish so special.  Click the link to have Arborio rice shipped to your doorstep.
Go with a good-quality dry white wine for the dish.  Chardonnay and Sauvignon Blanc are both good choices. 
We love adding butter to the final dish because it gives it an extra-special luxurious taste and texture, however, you can reduce the amount of butter, or even omit it, if desired, and still have a wonderful risotto.
Risotto is best served once it is ready, but it is still delicious reheated the following day. It will keep in the refrigerator for up to 1 week and can be frozen for up to 1 month. 

Nutrition

Calories: 556kcal | Carbohydrates: 68g | Protein: 14g | Fat: 18g | Saturated Fat: 6g | Cholesterol: 41mg | Sodium: 983mg | Potassium: 501mg | Fiber: 4g | Sugar: 7g | Vitamin A: 965IU | Vitamin C: 10mg | Calcium: 101mg | Iron: 5mg

Best-Ever Classic Nachos

April 21, 2020 by Kris Longwell 4 Comments

A row of cheese nachos on a white serving platter topped with chopped jalapeños.

These nachos are based off one of the greatest Tex-Mex restaurants in the world: Joe T. Garcia’s!

These are so delicious and are classic no-frills nachos.  Perfectly fried corn tortillas.  Lots of good-quality cheddar cheese.  Baked to perfection with a jalapeno relish on top!  They go perfectly with our Restaurant-Quality Salsa,  Steak Fajitas, Guacamole, and of course, our Classic Margarita!

VIDEO ALERT: Be sure to check out the video for this recipe in the recipe card.  If you like the video, subscribe to our YouTube Channel!

A stack of thin classic nachos topped with jalapeno relish on a wooden cutting board.

HOW TO MAKE BEST-EVER CLASSIC NACHOS

These nachos are surprisingly easy to prepare. It really comes down to going with quality ingredients.

We use our deep fryer, but they can certainly be fried in a cast-iron skillet or a sturdy pot, such as a Dutch oven.

THE INGREDIENTS YOU WILL NEED

As mentioned, these nachos are really only as good as the ingredients you choose.

Seek out a good-quality mild cheddar cheese.

EXPERT TIP: We recommend going with 16 oz. block of top-notch cheddar cheese and then shredding it yourself. The pre-shredded bagged variety tends to be a drier cheese, and you won’t get the creamy melting like you would with freshly shredded cheese. For the jalapenos, we just get our favorite pickled variety and then dice them finely with a knife. Be sure to use thin, yellow corn tortillas.

4 process shots for classic nachos, starting with cheese being grated, corn tortillas being held up, jalapeno peppers being diced, and a basket holding fried tortillas

Since cheese is the only main ingredient on top of the fried tortillas, we love to pile them high.

These classic nachos are meant to be really cheesy.

EXPERT TIP: Cooking the nachos in the oven will melt the cheese beautifully. Make sure to spread the cheese as evenly as possible over the fried tortilla to ensure even melting. Roasting the nachos with the diced jalapenos on the cheese mellows the peppers slightly and infuses them into the cheese.

A hand dropping diced jalapenos onto a fried tortilla topped with cheddar cheese on a baking sheet.

THE PERFECT TEX-MEX APPETIZER

These nachos are so delicious in their simplicity.

We love serving them as an appetizer to a fabulous Tex-Mex feast, or for a gathering of friends and family, or just for a fun snack on a Sunday afternoon!

EXPERT TIP: We like to hit the tortillas with just a sprinkling of salt right after they come out of the fryer. Coarse sea salt is great, but don’t overdo it! Just a small pinch is all that’s needed. The cheese has salt as well, so just a light sprinkle on the hot tortillas is all that’s needed.

A view of three baked classic nachos on a baking sheet.

HOW TO MAKE TORTILLAS WITHOUT A FRYER

These classic nachos are super crispy and which comes from them being quickly fried in oil.

Frying the tortillas will give them that authentic taste and texture, but there is another way of achieving crispy tortillas.

EXPERT TIP: If you want to crisp up the tortillas in the oven, no problem. They won’t have the same texture as the fried variety, but they will still be delicious. Simply preheat your oven to 350°F, brush oil over both sides of the tortillas, and then bake them on your baking sheet until crisp, about 15 to 20 minutes. Remove from oven, and load them up, and then proceed with the recipe as written.

A row of cheese nachos on a white serving platter topped with chopped jalapeños.

As mentioned, we think the finely diced pickled jalapenos round out the classic cheese nacho taste.

Even those who don’t like any spice level at all still find them delicious.

We keep additional diced peppers on hand for those of us who do prefer a little extra heat!

A hand using a small spoon to add diced jalapeños to a stack of classic nachos.

CLASSIC NACHOS ARE ALWAYS A HIT

Every time we serve these nachos, they get rave reviews.

Even more than the main course, they’re that good.

Crunchy, cheesy, with a little kick. The best!

Two hands pulling apart a classic nacho over a platter of them and next to a margarita.

Ready to make the best nachos this side of the Rio Grande? Go for it!

And when you do, be sure to take a picture, post it on Instagram, and tag @howtofeedaloon and hashtag #howtofeedaloon!

A stack of thin classic nachos topped with jalapeno relish on a wooden cutting board.
Print Recipe
No ratings yet

Best-Ever Classic Nachos

These nachos are based on the iconic Tex-Mex restaurant Joe T. Garcia's in Fort Worth, TX. and their amazing nachos. Tortillas fried to crispy perfection, lightly salted, and then layers of creamy melted cheddar cheese topped with finely diced jalapeno relish! The BEST!
Prep Time10 minutes mins
Cook Time5 minutes mins
Frying10 minutes mins
Total Time25 minutes mins
Course: Appetizer
Cuisine: Mexican / TexMex
Servings: 6
Calories: 364kcal
Author: Kris Longwell

Equipment

  • Deep fryer, or sturdy skillet with a couple of inches of vegetable oil

Ingredients

  • Vegetable oil for frying
  • 6 corn tortillas yellow
  • Kosher salt or coarse sea salt, for sprinkling the tortillas
  • 1 lb mild cheddar cheese shredded
  • ½ cup jalapeno peppers pickled, finely minced

Instructions

  • Heat oil to 365°F and preheat oven to 400°F.
  • Working in batches, place the tortillas in the hot oil, flipping occasionally with metal tongs, or a couple of forks, until golden and crispy, about 2 minutes per side.
  • Remove the fried tortillas to a plate lined with paper towels and immediately sprinkle them with a small amount of salt. Continue this process until all tortillas are fried and lightly salted.
  • Place the fried tortillas on a baking sheet. Top each tortilla with anywhere from ¼ to ½ cup of the shredded cheese. Be sure to spread the cheese evenly across all the tortillas.
  • Top each nacho with approximately 1 tablespoon of the diced peppers.
  • Place in the oven and bake until the cheese has fully melted. About 3 to 5 minutes. Keep an eye on them, don't let them burn! Remove from the oven and serve at once, with extra diced peppers on the side.

Video

Notes

We recommend using a good quality block cheddar cheese for these nachos.  Shred the cheese just before preparing the nachos with a shredding attachment on your food processor, or with a box grater.  
Distribute the entire 1 lb of cheese over the 6 fried tortillas.  This may seem like an excessive amount of cheese, but once melted, we think it's absolutely perfect.  The nachos are meant to be really cheesy!
If you don't have a deep fryer, the tortillas can easily be fried in a sturdy skillet or pot, such as a cast-iron skillet or a Dutch oven filled with a couple of inches of oil.  Fry the tortillas in batches.
Although we think frying the tortillas delivers that authentic Tex-Mex nachos taste, you can also bake them to crisp them up for building the nachos.  Preheat the oven to 350°F and then brush oil over both sides of the tortillas, place on a baking sheet, and bake until crisp, about 15 to 20 minutes, flipping halfway through. Keep an eye on them to prevent burning.  Then proceed with the recipe as written.
This recipe can easily be doubled when feeding a crowd.  

Nutrition

Calories: 364kcal | Carbohydrates: 13g | Protein: 20g | Fat: 17g | Saturated Fat: 12g | Cholesterol: 79mg | Sodium: 481mg | Potassium: 141mg | Fiber: 2g | Sugar: 1g | Vitamin A: 838IU | Vitamin C: 9mg | Calcium: 566mg | Iron: 1mg

Parmesan Crusted Chicken

April 19, 2020 by Kris Longwell 9 Comments

A white dinner plate filled with roasted asparagus topped with Parmesan crusted chicken with a small bowl of vodka sauce next to it.

This is one of those dishes that we turn to time and time again.

This dish really is perfect in so many ways. We often serve it when having guests over, or we make it for ourselves after a long, busy day. We think it’s wonderful with simple roasted asparagus, and the easy vodka sauce puts it over the top. And it all comes together in about a half-hour!

A white dinner plate filled with roasted asparagus topped with Parmesan crusted chicken with a small bowl of vodka sauce next to it.

HOW TO MAKE PARMESAN CRUSTED CHICKEN

Besides incredible taste and easy preparation, another great thing about this dish is that most of the ingredients you’ll probably already have on hand.

Get all the components of the recipe together first, and then it all comes together very quickly

We definitely recommend going with thin chicken breasts.

Use a mallet, or even a rolling pin, to make the cutlet nice and thin.

EXPERT TIP: If your chicken breast is large, you can easily slice in half, lengthwise, and then pound it to about ¼-inch in thickness. To prevent the meat from shredding, we place the cutlet in a large freezer baggie and then gently pound it with the side of the mallet in an outward motion.

A mallet turned on its side on a chicken breast in plastic freezer baggie.

SETTING UP THE DREDGING STATION

After pounding out the chicken breasts, it’s time to bread the Parmesan Crusted Chicken!

First, we sprinkle salt and pepper on both sides of the cutlets.

Then, one at a time, place the chicken in the seasoned flour, then the egg bath, and finally coat with the Parmesan and seasoned bread crumbs. Repeat with the remaining cutlets.

Three views of a chicken cutlet being breaded, first in flour, then an egg bath, and then seasoned bread crumbs.

Now, it’s time to quickly fry the cutlets.

We use a combination of olive oil and butter.

EXPERT TIP: When cooking the cutlets, be sure not to overcrowd the pan; otherwise, the cutlets won’t cook evenly, and will take longer to brown, and therefore absorb more oil than is desired. Keep cooked cutlets warm in a low-temperature oven (200°F) until they are all finished. You may need to add a little more butter as you fry additional cutlets.

Two Parmesan chicken cutlets cooking in butter in a later steel skillet.

WHAT TO SERVE WITH PARMESAN CRUSTED CHICKEN

As mentioned, this chicken pairs incredibly well with a pink vodka sauce.

Simply follow the recipe here, but cut the sauce ingredients in half. Unless serving this with pasta, make the full batch.

EXPERT TIP: We also love serving this with roasted asparagus. To prepare them, simply cut the ends off the asparagus, toss them in a couple of tablespoons of olive oil, and then sprinkle salt and pepper all over them. Roast them on a baking sheet in the oven for about 15 minutes at 400°F while the chicken cutlets are cooking. The vodka sauce can be made up to a day in advance.

A skillet filled with a Italian vodka sauce with a wooden spoon in it.

IDEAL FOR ENTERTAINING OR A WEEK-NIGHT DINNER

This dish is so simple, yet beautiful in presentation.

It’s truly perfect for a beautiful dinner party, but also easy enough to whip up on a busy weeknight.

The cutlets can be prepared up to a couple of hours in advance of serving, just warm them in a low-temperature oven at 200°F to 250°F.

A white serving platter of roasted asparagus with three Parmesan crusted chicken cutlets on top.

Parmesan Crusted Chicken is a knock-out without the sauce, no doubt.

But you need to trust us when we tell you that the sauce puts the dish over the top.

Just incredible!

A white plate filled with a layer of roasted asparagus, topped with Parmesan crusted chicken and a spoon adding a layer of vodka sauce on top.

Ready to make the best chicken dish on the planet? Go for it!

And when you do, be sure to take a picture of it, post it on Instagram, and tag @howtofeedaloon and hashtag #howtofeedaloon!

A white dinner plate filled with roasted asparagus topped with Parmesan crusted chicken with a small bowl of vodka sauce next to it.
Print Recipe
5 from 2 votes

Parmesan Crusted Chicken

Parmesan Crusted Chicken is hands down one of our all-time dishes to make for guests or just for us when we're in the mood for a meal that is easy yet incredibly delicious. Serving it with homemade (easy) Italian vodka sauce puts it over the top!
Prep Time15 minutes mins
Cook Time15 minutes mins
Vodka Sauce15 minutes mins
Total Time45 minutes mins
Course: Entree
Cuisine: American, Italian
Servings: 6
Calories: 568kcal
Author: Kris Longwell

Ingredients

  • 6 chicken breasts skinless, boneless, pounded to ¼-inch thick
  • 1 teaspoon Kosher salt
  • ½ teaspoon black pepper freshly ground
  • 1 cup all-purpose flour
  • 3 large eggs
  • 1 tablespoon milk or water
  • 1¼ cup bread crumbs plain
  • 1 teaspoon oregano dried
  • 1 teaspoon basil dried
  • ½ cup Parmesan cheese grated
  • 2 tablespoon olive oil
  • 2 tablespoon unsalted butter plus more, if needed
  • Vodka sauce optional

Instructions

  • After thinning the chicken breasts with a mallet or rolling pin, season them all over with salt and pepper.
    6 chicken breasts, 1 teaspoon Kosher salt, ½ teaspoon black pepper
  • Set up your dredging station: In a medium pan or plate, mix together the flour with 1 teaspoon salt and ½ teaspoon pepper. In a 2nd pan or medium bowl, mix together the lightly beaten eggs with the milk (or water). Finally, in another medium pan or plate, mix together the bread crumbs, Parmesan cheese, and dried herbs.
    1 cup all-purpose flour, 3 large eggs, 1 tablespoon milk, 1¼ cup bread crumbs, 1 teaspoon oregano, 1 teaspoon basil, ½ cup Parmesan cheese
  • One cutlet at a time, first, dredge the chicken in the flour until fully coated. Next, dip in the egg bath to coat, shaking off excess. Next, press into the bread crumbs until fully coated. Place on a plate or platter, and repeat with the remaining cutlets.
  • Heat the oil in a large skillet over medium heat until shimmering. Add the butter and swirl until melted. Working in batches (don't overcrowd the pan), place the chicken cutlets into the pan. Cook until nicely browned on the bottom, about 3 to 4 minutes. Flip over and cook until the other side is also browned and the cutlet is fully cooked, another 3 to 4 minutes. Place on a plate lined with paper towels and continue cooking the remaining cutlets, adding more butter if necessary.
    2 tablespoon olive oil, 2 tablespoon unsalted butter
  • Serve at once with vodka sauce, if desired.
    Vodka sauce

Video

Notes

Thin chicken breasts are recommended for this dish.  To reach ¼-inch thickness, place the cutlets, one at a time, in a large freezer baggie and use the side of a mallet or a rolling pin and gently pound out the meat until you've reached the correct thickness. 
For these cutlets, we prefer regular bread crumbs instead of Panko.  But if you prefer an extra crunchy cutlet, you could certainly use Panko. You could also double the breading process, but you'll most likely need to increase the breading ingredients.
The cutlets can be made up to a couple of hours before serving. Keep warm (or re-warm) in a low-temperature oven (200° to 250°).
The cooked cutlets will keep in the refrigerator for up to 1 week and can be frozen for up to 1 month. 
To make the vodka sauce: 
  1. Heat 1 tablespoon oil in a skillet over medium heat. 
  2. Sauté 1 cup of onion until soft, about 3 minutes. 
  3. Add 3 minced garlic cloves and cook for another 30 seconds. 
  4. Add 3 tablespoon fresh chopped basil and 1 tablespoon freshly chopped parsley, and ¼ teaspoon red pepper flakes. Season with salt and pepper. 
  5. Stand back and add ¼ cup of vodka.  Light with a long match (stand back!) and cook until flame subsides. 
  6. Add 2 cups of marinara, and simmer for 3 minutes. 
  7. Add ¼ cup of heavy cream, and then stir in ¼ cup of grated Parmesan cheese.
  8. Can be made up to 1 day in advance. 

Nutrition

Calories: 568kcal | Carbohydrates: 33g | Protein: 59g | Fat: 20g | Saturated Fat: 7g | Polyunsaturated Fat: 3g | Monounsaturated Fat: 8g | Trans Fat: 0.2g | Cholesterol: 254mg | Sodium: 986mg | Potassium: 956mg | Fiber: 2g | Sugar: 2g | Vitamin A: 396IU | Vitamin C: 3mg | Calcium: 179mg | Iron: 4mg

Fried Asparagus

April 16, 2020 by Kris Longwell 8 Comments

A pile of fried asparagus stalks pouring out of a paper bag.

VIDEO ALERT: Be sure to check out the video for this recipe in the recipe card.  If you like the video, subscribe to our YouTube Channel!We absolutely love asparagus. It’s so versatile and so delicious. And wait until you try (fry) these babies.

There are so many ways to prepare asparagus, especially in the spring, when they are at their peak. But breading them and then giving them a quick flash fry is incredibly delicious. Dip them Homemade Ranch or Kickin’ Remoulade, and you’ve got something really special to serve!

A pile of fried asparagus stalks pouring out of a paper bag.

HOW TO MAKE FRIED ASPARAGUS

These gems are actually incredibly easy to make.

All you need to do is set up a quick dredging station, heat some oil to 365°F, and you are good go!

PREPARING THE ASPARAGUS

We love using large asparagus for this recipe, but you can certainly go with small, thin asparagus, too.

EXPERT TIP: Before breading them, you’ll need to prep the asparagus. The ends can be tough and chewy to eat. We recommend using a sharp knife to cut about 1 to 2 inches off of the base of the vegetable. If they are thick, you’ll probably want to peel the skin off the lower ends of the stalks.

While you are preparing the asparagus, start heating your oil.

A hand using a chef's knife to cut the ends of of three asparagus stalks on a cutting board.

Now, it’s time to set up your dredging station. We use 3 baking tins to do this.

In the first tin, we have flour, seasoned with salt and pepper. Next is the egg bath, with Parmesan cheese and lime juice mixed in. And finally, the last leg of the station is seasoned bread crumbs with smoked paprika mixed in.

EXPERT TIP: We love using seasoned Panko bread crumbs because they deliver amazing crunchy texture and are wonderfully seasoned. You can easily substitute plain bread crumbs or plain seasoned bread crumbs. If going with unseasoned bread crumbs, add 1 teaspoon of dried oregano and 1 teaspoon of dried basil to the mixture, along with the smoked paprika.

Three images grouped together showing asparagus being dredged in four, then egg, the bread crumbs.

FLASH FRY UNTIL GOLDEN

Once you’ve breaded all of the asparagus, it’s time to quickly fry them.

Your oil should be in the range of 350°F to 365°F. Fry them in batches for just a couple minutes, until crispy and golden brown.

EXPERT TIP: We love to use our deep fryer to make fried asparagus. You can absolutely use a cast-iron skillet, or a Dutch oven, too. The oil only needs to be 1 or 2 inches deep. Use a candy thermometer to gauge the temperature, or tear off a small piece of bread and toss it in. If it browns and crisps in about 15 seconds, it’s ready.

A fryer basket holding a batch of fried asparagus.

Fried asparagus is really beautiful when you serve it, too.

These are at their best served nice and hot.

A sprinkling of coarse sea salt is a nice finishing touch just before serving!

A hand sprinkling coarse sea salt of a pile of fried asparagus.

A GREAT APPETIZER

These are such a hit every time we serve them.

And don’t worry if they are not 100% covered in breading. That’s part of their charm, it’s nice to see the yummy asparagus that you are munching on.

As mentioned, it’s even better with a dipping sauce, such as Homemade Ranch, Fresh Marinara Sauce, or our Kickin’ Remoulade Sauce!

A small jar of ranch dressing in the middle of a bunch of fried asparagus with one being lowered into the jar.

This truly is one of our most favorite appetizer dishes to serve and to chow down on!

However, if you don’t want to fry asparagus, try our Seared Scallops with Asparagus or our Roasted Asparagus with Chopped Egg Salad.  You will also love our Cheese Souflé with Asparagus and our Slow-Cooker Asparagus Risotto!

But if you do want to give these babies a quick fry, we’re pretty certain you’re going to love them as much as we do!

A hand holding a fried asparagus stalk that has been bitten in half.

Ready to make the best appetizer in town? Go for it!

And when you do, be sure to take a picture of it, post it on Instagram, and tag @howtofeedaloon and hashtag #howtofeedaloon!

A pile of fried asparagus stalks pouring out of a paper bag.
Print Recipe
4.50 from 2 votes

Fried Asparagus

Fried Asparagus is so easy and so delicious. Simply set up an easy dredging station and heat your oil to 365°F, and you're good to go! Great served with Homemade Ranch!
Prep Time15 minutes mins
Cook Time15 minutes mins
Total Time30 minutes mins
Course: Appetizer
Cuisine: Appetizer
Servings: 8 people
Calories: 157kcal
Author: Kris Longwell

Equipment

  • Deep fryer or heavy skillet (or Dutch oven) with a couple of inches of vegetable oil in it

Ingredients

  • vegetable oil for frying
  • 1 lb asparagus spears the ends cut off and the ends peeled
  • 1 cup all-purpose flour
  • ½ teaspoon Kosher salt
  • ¼ teaspoon black pepper freshly ground
  • 3 large eggs
  • 3 tablespoon Parmesan cheese grated
  • 1 tablespoon lime juice
  • 1 cup bread crumbs seasoned Panko
  • 1 teaspoon smoked paprika
  • 1 teaspoon coarse sea salt for finishing

Instructions

  • Heat oil to 365°F.

SET UP THE DREDGING STATION

  • Place about ½ cup of water in a pan or medium-sized bowl. Set aside.
  • In a baking pan or on a platter, mix together the flour with the salt and pepper.
  • In a second pan or medium-sized bowl, mix together the eggs with the Parmesan cheese and lime juice,
  • In a third pan, or on a platter, mix the bread crumbs with the smoked paprika.
  • Wet the asparagus in the water, and then dredge through the flour to coat. Next, add the floured asparagus to the egg mixture, turning to coat. Shake off excess egg, and then dredge through the bread crumb mixture. Place breaded asparagus on a platter and repeat the process with remaining asparagus.

QUICK-FRY THE ASPARAGUS

  • Working in batches, fry the asparagus until golden brown, about 2 to 4 to minutes.
  • With a slotted spoon or fry basket, transfer to paper towels to drain briefly.
  • Sprinkle with coarse sea salt.
  • If desired, serve with homemade ranch, fresh marinara, or kickin' remoulade.

Video

Notes

If your asparagus is large, we recommend cutting 1 to 2 inches off the ends of each stalk and using a peeler to cut the skin off at the end of each stalk.  Not 100% necessary, but it makes the ends of the fried asparagus soft and not chewy.
Don't worry if the breading doesn't cover the asparagus stalks completely.  It's nice to see some of the green asparagus through the breading.
If using traditional breadcrumbs, you may want to do a double-dredge if the breading looks thin.  This is a matter of taste.  We find that with Panko bread crumbs, a single dredging per stalk is perfect.
These can also be baked instead of fried.  Preheat oven to 400°F and bake for 20 minutes, or until crisp and golden brown.  
These are definitely best served fresh out of the fryer.  And spectacular when served with homemade ranch, marinara, or our kickin' remoulade. 

Nutrition

Calories: 157kcal | Carbohydrates: 24g | Protein: 8g | Fat: 12g | Saturated Fat: 3g | Cholesterol: 71mg | Sodium: 593mg | Potassium: 189mg | Fiber: 2g | Sugar: 2g | Vitamin A: 668IU | Vitamin C: 4mg | Calcium: 73mg | Iron: 3mg

POST UPDATE: This recipe was originally published in April 2016, but was updated with improved tweaks to the recipes, new tips, photography, and a fabulous new video in April 2020!

Homemade Ranch Dressing

April 14, 2020 by Kris Longwell Leave a Comment

A hand pouring homemade ranch dressing onto a green salad in a brown wooden bowl.

Homemade is almost always going to be better. And with this recipe, there’s no question about it: homemade is the best!

This dressing is amazingly fresh and so delicious on a nice leafy green salad, but also as a dip for chips, veggies, or appetizers such as fried pickles and fried asparagus! And it comes together in a matter of minutes!

VIDEO ALERT: Be sure to check out the video for this recipe in the recipe card.  If you like the video, subscribe to our YouTube Channel!

A hand pouring homemade ranch dressing onto a green salad in a brown wooden bowl.

HOW TO MAKE HOMEMADE RANCH DRESSING

Homemade Ranch Dressing from scratch is so simple to put together.

The fresh herbs are really what makes this dressing shine. The buttermilk adds a little tang to the classic Ranch taste.

THE INGREDIENTS YOU WILL NEED

Here’s what you’ll need to make this incredible salad dressing and dip:

  • Buttermilk
  • Sour cream
  • Mayonnaise
  • Chives
  • Parsley
  • Dill
  • Salt and pepper

And that’s the makings of the most iconic American salad dressing of all time! Learn more about its amazing history here.

A layout of the ingredients for homemade ranch dressing including bowls of sour cream, mayo, buttermilk, and fresh herbs and a pepper grinder.

As mentioned, going with fresh herbs really brings this recipe to life.

Fresh dill isn’t always used in Ranch dressing, but we think it elevates the taste profile in a really good way.

EXPERT TIP: If you can’t get fresh herbs, you can go with dried. Use 1 teaspoon for the chives and parsley, and ½ teaspoon of dill. A substitute for buttermilk is ¼ cup of plain yogurt mixed with ¼ cup of whole milk and a ½ teaspoon of white vinegar.

A hand scraping chopped chives into a bowl of Ranch dressing ingredients.

Once all the ingredients have been placed in a medium bowl, all that’s needed is a good whisking!

Be sure everything has been fully incorporated.

Oh, how we love homemade ranch dressing!

A glass bowl filled with ranch dressing with a wire whisk in it.

CHILLING THE HOMEMADE RANCH DEEPENS THE FLAVOR

Once all the ingredients have been combined, you can start using the dressing.

However, we find transferring it to a jar or container with a tight-fitting lid, and then placing in the refrigerator for at least one hour helps the flavors to meld and improve the taste.

EXPERT TIP: The consistency of this recipe is perfect for a salad dressing, but also as a dip. However, if you prefer your dressing a little less thick, simply increase the amount of buttermilk to your own tastes.

A Mason jar filled with homemade ranch dressing with a lid on top, next to chives, buttermilk, and a pepper grinder.

This stuff is so good we put it on everything!  And if you like this dressing, you’ll also love our Avocado Lime Dressing!

It’s so delicious, it’s even good drizzled over pizza!

And did we mention it served with our Homemade Fried Asparagus? Oh my!

The tip of a fried asparagus being dipped into a small jar of homemade ranch dressing.

Ready to make the best Ranch dressing in town? Go for it!

And when you do, be sure to take a picture, post it on Instagram, and tag @howtofeedaloon and hashtag #howtofeedaloon!

A hand pouring homemade ranch dressing onto a green salad in a brown wooden bowl.
Print Recipe
No ratings yet

Homemade Ranch Dressing

Homemade Ranch is so fresh and so delicious and the difference between it and the bottled stuff is night and day. Perfect for a salad or as a dip.
Prep Time10 minutes mins
Total Time10 minutes mins
Course: Salad Dressing
Cuisine: American
Servings: 8
Calories: 140kcal
Author: Kris Longwell

Equipment

  • Jar (or container) with a tight-fitting lid

Ingredients

  • ¾ cup buttermilk
  • ½ cup sour cream
  • ½ cup mayonnaise
  • 1 tablespoon chives finely chopped
  • 1 tablespoon fresh parsley finely chopped
  • 1 teaspoon fresh dill finely chopped
  • 1 tablespoon onion powder
  • 1 tablespoon garlic powder
  • ¼ teaspoon Kosher salt
  • ¼ teaspoon black pepper freshly ground

Instructions

  • Add all ingredients to a medium-sized bowl and whisk until completely combined.
  • Transfer to a jar (or container) and cover. Chill in the refrigerator for at least one hour.

Video

Notes

Fresh herbs are amazing in this recipe, but in a pinch, you can certainly go with dried.  For chives and parsley substitute 1 teaspoon of dried and ½ teaspoon dill. 
The buttermilk can be substituted with ½ cup plain yogurt combined with ½ cup milk and 1 teaspoon of white vinegar.  
If you prefer a thinner dressing, then add additional buttermilk to reach the desired consistency.  The dressing will thicken somewhat as it chills in the fridge.  We like to let the dressing sit out at room temp for about an hour before serving.
The dressing will keep for up to 10 days in a jar with a lid in the fridge.   It freezes just fine for up to 2 months. 

Nutrition

Calories: 140kcal | Carbohydrates: 3g | Protein: 1g | Fat: 8g | Saturated Fat: 1g | Cholesterol: 15mg | Sodium: 190mg | Potassium: 63mg | Fiber: 1g | Sugar: 2g | Vitamin A: 182IU | Vitamin C: 1mg | Calcium: 36mg | Iron: 1mg

POST UPDATE: This recipe was originally published in November 2013, but was updated with improved tweaks to the recipe, new tips, photography, and a fabulous new video in April 2020!

Ham and Swiss Sliders

April 12, 2020 by Kris Longwell 2 Comments

A white plate containing a pile of ham and Swiss sliders next to a yellow napkin.

If there ever was a grand champion of sliders, this quite possibly would be the one.

If you’re looking for something delicious to do with that leftover baked ham, or if you’re craving something that is through-the-roof delicious, these babies fit the bill for both. And they come together in about half an hour!  Other amazing slider recipes are our Bratwurst Sliders, Gourmet Beef Sliders, Pot Roast Sliders!

VIDEO ALERT: Be sure to check out the video for this recipe in the recipe card.  If you like the video, subscribe to our YouTube Channel!

A white plate containing a pile of ham and Swiss sliders next to a yellow napkin.

HOW TO MAKE HAM AND SWISS SLIDERS

We absolutely love everything about sliders. Their smallness in size is the perfect excuse to eat a bunch of them!

As mentioned, we love making these incredible sandwiches whenever we have leftover ham, such as our Honey Bourbon Glazed Ham.

But these things are so incredibly flavorful, using thinly sliced ham from your local deli is fantastic, too!

BUILDING THE PERFECT SLIDER

It all starts with the perfect bun. We highly recommend using Hawaiian buns.

Simply use a serrated knife to slice a set of 12 buns in half, from top to bottom.

Next, add a layer of mayonnaise, then ham, cheese, and then add the top layer of the buns.

Four images of the process of building a ham and cheese sliders starting with slicing the buns, then adding layers of mayo, ham, and cheese.

We have to say that what really puts these Ham and Swiss Sliders over the top is the buttery poppyseed sauce.

Melt the butter and then simply whisk in the other ingredients.

EXPERT TIP: We think 8 tablespoons (1 stick) of butter is perfect for the sliders, however, this can easily be reduced to 4 tablespoons, and it will still be incredibly delicious.

A whisk in a glass bowl holding melted butter with poppy seeds.

POUR THE SAUCE DIRECTLY OVER THE SLIDERS

Now it’s time to take these sliders to the next level. Place the prepared sliders into a 9″x13″ baking dish.

Simply pour the butter sauce all over the tops of the buns.

EXPERT TIP: We use a spoon to scoop up some of the sauce that has pooled in the dish and re-distribute it all over the tops of the buns. As the sliders bake, the butter sauce will absorb into the buns and make them incredibly flavorful. Be sure to allow the butter sauce to rest for 10 minutes on the top buns before baking.

A hand pouring a butter sauce over the tops of ham and Swiss sliders in a white baking dish.

After the sliders have had about 10 minutes to soak up some of the amazing butter sauce, it’s time to bake them!

Place them in a 375°F preheated oven.

After 17 minutes, remove the foil and then let them bake for another 4 to 5 minutes, until the tops are golden brown.

A white baking dish filled with baked ham and Swiss sliders.

HAM AND SWISS SLIDERS ARE IDEAL FOR ENTERTAINING

Once they are finished baking, simply slice the sliders and serve on a platter.

Whenever we serve these for guests, people literally flip for them.

But, they are so delicious, we often whip up a batch just for ourselves. They’re a bit decadent but insanely good.

An overhead view of a white baking dish filled with ham and Swiss sliders with one missing.

Talk about easy yet amazingly delicious!

And you can easily assemble these gems several in advance of serving, just wait to pour the butter sauce over the buns until you are ready to bake!

Once you set these incredible Ham and Swiss Slider out, just watch how fast they go!

A spatula holding up a ham and Swiss slider over a baking dish filled with them.

Ready to make the best slider in the world? Go for it!

And when you do, be sure to take a picture of them, post it on Instagram, and tag @howtofeedaloon and hashtag #howtofeedaloon!

A spatula holding up a ham and Swiss slider over a baking dish filled with them.
Print Recipe
5 from 1 vote

Ham and Swiss Sliders

These Ham and Swiss Sliders and a bit decadent, but so insanely delicious. Perfect for entertaining or a yummy lunch for the family. Use leftover ham or sliced deli ham.
Prep Time10 minutes mins
Cook Time20 minutes mins
Total Time30 minutes mins
Course: Appetizer
Cuisine: American
Servings: 6
Calories: 569kcal
Author: Kris Longwell

Equipment

  • 9"x 13" baking dish

Ingredients

  • baking spray
  • 12 Hawaiian dinner rolls unattached
  • 24 slices deli ham or 12 thicker slices slices of baked ham
  • 8 slices Swiss cheese
  • ¼ cup mayonnaise
  • 8 tablespoon unsalted butter melted (1 stick)
  • 1 tablespoon poppy seeds
  • 1 tablespoon Dijon mustard
  • 1 teaspoon onion powder
  • 1 teaspoon Worcestershire sauce
  • ¼ teaspoon Kosher salt
  • ¼ teaspoon black pepper ground

Instructions

  • Preheat oven to 375°F and spray the baking dish with cooking spray.
  • Place the lower layer of the buns in the baking dish, and add a layer of mayonnaise, then a layer of ham, and then a layer of cheese. Top with the top layer of the buns.
  • In a medium bowl, mix together the melted butter, poppy seeds, Dijon, onion powder, Worcestershire sauce, salt, and pepper.
  • Pour the butter mixture all over the tops of the buns and then cover with foil and let sit for 10 minutes.
  • Place the covered dish in the oven and bake for 17 minutes. Remove the foil and bake for another 3 to 5 minutes, until the tops of the buns are golden brown.
  • Let the sliders sit for a few minutes before removing from the dish. Place on a cutting board and use a sharp knife to separate the sliders from each other. Serve at once!

Video

Notes

This recipe can easily be doubled if serving a large group.
We love using 1 stick of butter, but if desired, you can reduce the butter amount to 4 tablespoons and it will still be delicious.
The sliders can be assembled up to 3 hours before baking.  Wait to pour the butter sauce over the buns until 10 minutes before baking.
Other types of cheese that would be delicious are provolone, Gruyere, fontina, and Monterey Jack.
Thinly sliced honey ham from the deli is great for this recipe, but so is thinly sliced left over baked ham.

Nutrition

Calories: 569kcal | Carbohydrates: 2g | Protein: 31g | Fat: 31g | Saturated Fat: 7g | Cholesterol: 135mg | Sodium: 1570mg | Potassium: 357mg | Fiber: 1g | Sugar: 1g | Vitamin A: 661IU | Calcium: 213mg | Iron: 1mg

Maple Glazed Carrots

April 8, 2020 by Kris Longwell 8 Comments

An oval serving dish filled with maple glazed carrots with colorful napkin nearby.

These amazing maple-glazed carrots provide a sweet and savory flavor that enhances any meal, making them an irresistible side dish. They are especially perfect for a holiday feast, pairing wonderfully with bourbon-orange glazed ham and creamy French au gratin potatoes for a festive dining experience.

An oval serving dish filled with maple glazed carrots with colorful napkin nearby.
[feast_advanced_jump_to]

🥕 The Ingredients

With just a handful of ingredients, they come together harmoniously to create a delicious dish that delights the palate. Find ingredient notes (including substitutions and variations) below.

The ingredients for maple-glazed carrots displayed on a wooden background, including fresh carrots, maple syrup, butter, parsley, salt, and pepper, arranged neatly for easy preparation.

🌿 Substitutions and Variations

  • Vegetables – The carrots can be cut into matchsticks or sliced into medallions. Frozen carrots can be substituted, but they need to be completely thawed, drained, and dried. We don’t recommend canned carrots, but they can be used in a pinch. Fresh parsnips can be used in place of the carrots, or in addition to them.
  • Herbs – Dried parsley can be substituted, but only go with 1 tsp. Fresh thyme adds additional flavor, too.
  • Broth – Chicken broth is delicious, but vegetable stock is a great choice, too, which will keep the dish vegetarian.
  • Maple Syrup – Be sure to use 100% pure maple syrup. We do not recommend pancake syrup.

See the recipe card (with video) below for a full list of ingredients and measurements.

👩🏼‍🍳 How To Make Maple-Glazed Carrots

Chopped shallots being sautéed in butter in a large silver skillet.
  1. Step 1: Sauté the chopped shallots in melted butter.
A person adding strips of fresh carrots into a skilet filled with sautéed shallots and simmering butter.
  1. Step 2: Add the carrots and season with salt and pepper.
A person adding maple syrup from a small bowl and chicken broth from a measuring cup into a skillet filled with carrots strips.
  1. Step 3: Add the chicken broth and maple syrup.
A person lifting a glass lid from a skillet filled with simmering maple-glazed carrots.
  1. Step 4: Bring to a boil, reduce heat to a simmer, cover, and cook until tender.
A person using a wooden spatula to stir maple-glazed carrots in a large silver skillet.
  1. Step 5: Cook and stir until sauce is reduced to a glaze.
A person adding chopped fresh parsley into a skillet filled with simmering maple-glazed carrots.
  1. Step 6: Stir in the fresh parsley.

Expert Tip

This recipe serves four. If you are serving more folks, then the recipe doubles easily. You can prepare the dish in advance and then reheat before serving, but it’s so easy to make, we recommend serving it fresh from the skillet.

🙋🏽‍♂️ Frequently Asked Questions

How do I cut the carrots for Maple-Glazed Carrots?

We love the matchstick version mostly because they are so attractive, but you can certainly slice them into small circular medallions. Since carrots vary in size, the cooking time may be less. Test for tenderness until you reach the desired texture.

Can I use canned carrots for Maple-Glazed Carrots?

In a pinch, yes. But they will be extremely soft, almost mushy. But, still tasty.

Can Maple-Glazed Carrots be made in advance?

You can prep the carrots, shallots, and parsley in advance. You can prepare the dish a few hours in advance, and then reheat on the stove until hot, but we do recommend serving these fresh.

A large serving spoon raising a serving of maple-glazed carrots over a bowl of the same thing.

Ready to make the best side dish in town? Go for it!

And when you do, be sure to take a photo, put it on Instagram, and tag @HowToFeedaLoon and hashtag #HowTofeedaLoon!

An oval serving dish filled with maple glazed carrots with colorful napkin nearby.
Print Recipe
5 from 4 votes

Maple Braised Carrots

These carrots are amazing. Peel carrots, and then cut into equal-sized 'sticks.' Saute shallots in butter, throw in the carrots with salt, pepper, maple syrup, and stock (chicken or vegetable)…and finish with fresh-cut parsley…and they are an incredible side dish to a very special meal.
Prep Time10 minutes mins
Cook Time20 minutes mins
Total Time30 minutes mins
Course: Side Dish
Cuisine: American
Servings: 4 people
Calories: 243kcal
Author: Kris Longwell

Equipment

  • Large saucepan or skillet with a tight-fitting lid

Ingredients

  • 2 tablespoon unsalted butter
  • 1 shallot finely chopped
  • 4 large carrots peeled, cut into ¼" match sticks
  • ½ teaspoon Kosher salt
  • ¼ teaspoon black pepper freshly ground
  • ¼ cup pure maple syrup
  • ¾ cup chicken stock or vegetable stock
  • 1 tablespoon Italian parsley fresh, finely chopped

Instructions

  • Heat the butter over medium heat in a large skillet with a tight-fitting lid.
    2 tablespoon unsalted butter
  • Add the shallots and cook, stirring often, until soft, about 4 minutes.
    1 shallot
  • Add the carrots to the pan and season with salt and pepper. Raise the heat to high and add the pure maple syrup and broth.
    4 large carrots, ½ teaspoon Kosher salt, ¼ teaspoon black pepper, ¼ cup pure maple syrup, ¾ cup chicken stock
  • Bring to a boil, then reduce the heat to medium-high, cover, and cook for 8 minutes.
  • Uncover and continue to cook until the liquid has reduced to a glaze and the carrots are very tender, about 10 minutes longer.
  • Stir in the parsley and serve at once.
    1 tablespoon Italian parsley

Video

Notes

NOTE: Watch the video near the top of the recipe for visual guidance.
If desired, you can slice the carrots into circular medallions.  Fresh carrots are far superior to canned carrots, but in a pinch, they’ll still be good.  Drain the carrots before proceeding with the recipe.
Be sure to go with Pure Maple Syrup, not imitation syrup, or pancake syrup. 
To make the dish 100% vegetarian, use vegetable stock in place of chicken stock.
You can make the dish a few hours in advance of serving, if necessary.  Reheat in the skillet before serving. We do recommend serving this, however, fresh off the stove.
This recipe can easily be doubled, or even tripled, to serve a large group. 

Nutrition

Calories: 243kcal | Carbohydrates: 27g | Protein: 5g | Fat: 8g | Saturated Fat: -2g | Cholesterol: 34mg | Sodium: 857mg | Potassium: 652mg | Fiber: 4g | Sugar: 16g | Vitamin A: 24572IU | Vitamin C: 12mg | Calcium: 59mg | Iron: 1mg

POST UPDATE: This recipe was originally published in November 2016, but was updated with improved tweaks to the recipe, new tips, photography, and a fabulous new video!

Honey Bourbon Glazed Ham

April 5, 2020 by Kris Longwell 12 Comments

An overview shot of a honey bourbon glazed ham next to a bowl of mashed potatoes, glazed carrots, and a glass of white wine.

Honey Bourbon Glazed Ham is a stunning centerpiece for any holiday feast, boasting a rich, sweet glaze that makes it a true show-stopper. This delectable roast pairs beautifully with maple-glazed carrots, creamy French dauphinoise potatoes, and warm homemade dinner rolls, creating a memorable dining experience for family and friends.

A large Berkshire ham roast that has been scored on top resting on a white oval platter and surrounded by various side dishes.
[feast_advanced_jump_to]

🍯 The Ingredients

Despite having only a handful of ingredients, the combination of honey, bourbon, and spices beautifully enhances the rich flavor of the smoked ham, creating a truly unforgettable dish.

An arrangement of ingredients for honey bourbon glazed ham including a smoked ham, a sniffer bottle of bourbon, vinegar, honey, mustard, and molasses.

🐖 What Is a Berkshire Ham?

  • A Berkshire ham comes from a breed of pigs that originated in England. They are known for their marbling, which delivers deeply flavorful ham that is extremely tender and juicy.
  • A Berkshire ham is not cheap, we’re not going to mislead you about that. But it is superior in taste and is ideal for special meals such as Easter.
  • You can order them for expedited delivery from D’Artagnan or Gourmet Food Store.

See the recipe card (with video) below for a full list of ingredients and measurements.

Expert Tip

EXPERT TIP: You’ll want to score the side of the ham with the layer of fat. This is called the fat cap and is loaded with flavor. As the ham roasts, the slits will begin to spread open, allowing you to baste the meat with more of the glaze. Don’t cut the slits more than ½-inch deep, otherwise, the slits will spread too much during the roasting process.

How To Make Honey Bourbon Glazed Ham

A glass bowl filled with a honey bourbon and ground mustard glaze in it with a whisk inserted in the middle of the bowl.
  1. Step 1: Whisk together the glaze ingredients in a medium bowl. 
A person using a large chef's knife to score the top of a smoked Berkshire ham.
  1. Step 2: Use a sharp knife to score the top of the ham.
A man in an orange dress shirt looking down at a Berkshire ham that is resting in a large roasting pan.
  1. Step 3: Place ham on a roasting rack in a roasting pan and add water.
A person using a pastry brush to apply a honey bourbon glaze over the top of a roasted and smoked Berkshire ham that has been scored with a knife.
  1. Step 4: Glaze and roast the ham, basting again every 20 minutes. 
A fully cooked Berkshire ham that has been browned on top is resting in a large roasting pan.
  1. Step 5: Allow the ham to rest for at least 10 minutes. 
A person using a meat fork and a large carving knife to cut a large roasted ham into slices on a white platter.
  1. Step 6: Slice and serve!

🍽️ How To Serve

  • After you slice the ham, you can serve it warm or at room temperature. To reheat ham (before serving), preheat your oven to 325°F, cover the ham slices in foil, place them in a roasting pan, and bake for about 20 minutes.
  • Be sure to have plenty of extra glaze on hand, just remember to let your guests know that there is alcohol (bourbon) in it. 99% of the alcohol that was applied during the roasting time will have burned off.
  • This ham pairs wonderfully with white or red wine (pork is versatile). We recommend a nice bodied Cabernet for red or a dry Chardonnay or Sauvignon Blanc for white.

🔥 How To Store and Reheat

  • Place leftover ham in an air-tight container with a lid and refrigerate for up to 1 week.
  • Leftover slices can be wrapped in foil and reheated in a 325°F oven for 20 minutes, or gently heat in the microwave on high in 15-second intervals.
  • This ham is amazing when made into ham and Swiss sliders.

🙋🏽‍♂️Frequently Asked Questions

What types of ham are best for Honey Bourbon Glazed Ham


We love purchasing a Berkshire ham from our friends at D’Artagnan. You could also go with an amazing ham from Mangalitsa Estates. These are “special occasion” hams and cost more than what you’ll find at the supermarket.

What is the best substitute for bourbon for Honey Bourbon Ham?

Apple cider works wonderfully as a substitute.

What can I use leftover Honey Bourbon Ham for?

First, and foremost, save the ham bone so you can make New Orleans red beans and rice. We also love to make a classic ham loaf and leftover ham and potato casserole. Or, get ready for the best ham sandwiches you’ll ever experience!

A white dinner plate filled with several slices of honey bourbon glaze ham next to braised carrots, cooked potatoes and a glass of white wine nearby.

😋 What to Serve with Glazed Ham

  • A round pot filled with Southern-style green beans on a white and blue striped place setting.
    Southern-Style Green Beans
  • The Ultimate Macaroni and Cheese in a large cast iron skillet with a wooden spoon.
    The Ultimate Macaroni and Cheese
  • A large serving spoon lifting up a helping of broccoli casserole with cheddar and rice over a dish of the same.
    Broccoli Casserole with Cheddar and Rice
  • A square white baking dish filled with corn casserole next to a plate filled with the same.
    Corn Casserole

Ready to make the most amazing baked ham in the entire world? Go for it!

And when you do, be sure to take a picture of it, post it on Instagram, and tag @HowToFeedaLoon and hashtag #HowTofeedaLoon!

A large Berkshire ham roast that has been scored on top resting on a white oval platter and surrounded by various side dishes.
Print Recipe
No ratings yet

Honey Bourbon Glazed Ham

This Honey Bourbon Glazed Ham is just amazing and the perfect dish for Easter Sunday, or any other special occasion. So simple, yet so incredible in flavor. And you'll love the leftovers! Yum!
Prep Time15 minutes mins
Cook Time2 hours hrs
Resting time10 minutes mins
Total Time2 hours hrs 25 minutes mins
Course: Entree
Cuisine: Entree
Servings: 15 people
Calories: 398kcal
Author: Kris Longwell

Equipment

  • Large roasting pan with rack

Ingredients

  • 1 cup bourbon
  • ¼ cup apple cider vinegar
  • ¾ cup honey
  • ¼ cup molasses or maple syrup
  • ¼ cup brown sugar
  • ¼ cup spicy brown mustard
  • 1 15 lb ham smoked, bone-in, preferably Berkshire or Heritage

Instructions

  • Preheat oven to 350°F.
  • Whisk bourbon, cider vinegar, honey, molasses, brown sugar, and mustard in a medium bowl. Set aside.
    1 cup bourbon, ¼ cup apple cider vinegar, ¾ cup honey, ¼ cup molasses, ¼ cup brown sugar, ¼ cup spicy brown mustard
  • Score fat on top of ham in a crosshatch pattern, not cutting more than approxiamtely ½-inc deep.
    1 15 lb ham
  • Set the ham on a rack in a large roasting pan and add enough water to fill to ¼" inch, about 2 cups.
  • Brush ham with glaze and roast, basting every 20 minutes with extra glaze. (Tent with foil if browning too quickly, until insta-read thermometer registers 135 F, about 2 hours).
  • Transfer ham to cutting board and let rest 10 minutes before slicing. Serve with additional brown mustard, if desire.

Video

Notes

NOTE: Watch the video near the top of the recipe for visual guidance.
If your ham is frozen, let it thaw in the refrigerator for 3 to 4 days before cooking.  
A bone-in, smoked Heritage ham is another great option for ham.  Look in the body of the post for links to distributors of excellent Berkshire or Heritage hams.  
If you don’t want alcohol in the glaze, then substitute the bourbon with apple cider, chicken broth, or beef broth, however, the taste will be different.  It will be delicious, but a different profile than with the bourbon.  99% of the alcohol cooks out during the roasting process.  
Though the smoked ham is already cooked, we recommend roasting the ham until an internal temperature of 135°F is reached.  An instant-read thermometer helps with this. 
Leftovers will keep in the refrigerator for up to 1 week, and they freeze beautifully for up to 2 to 3 months. 

Nutrition

Calories: 398kcal | Carbohydrates: 22g | Protein: 1g | Fat: 6g | Saturated Fat: 1g | Cholesterol: 1mg | Sodium: 52mg | Potassium: 106mg | Fiber: 1g | Sugar: 22g | Vitamin C: 1mg | Calcium: 18mg | Iron: 1mg

POST UPDATE: This recipe was originally published in March 2016, but was updated with improved tweaks to the recipe, new tips, photography, and a fabulous new video in March, 2025!

Roasted Potatoes in Foil

April 2, 2020 by Kris Longwell 15 Comments

A foil packet filled with cubed roasted potatoes in foil on a baking pan.

If you want a 5-star side dish that requires only 5 ingredients (including salt and pepper), you’re about to get really excited!

These perfectly roasted potatoes are so simple to prepare but are spectacular in taste and texture.  We love them served along with a juicy steak, or our favorite grilled burger! A home run of a side dish every single time!

VIDEO ALERT: Be sure to check out the video for this recipe in the recipe card.  If you like the video, subscribe to our YouTube Channel!

A foil packet filled with cubed roasted potatoes in foil on a baking pan.

HOW TO MAKE ROASTED POTATOES IN FOIL

These potatoes are so easy to prepare, and you can adapt them to your own tastes, too.

We go with sturdy foil to create the foil packets for the potatoes.

Russet potatoes work perfectly, but you could really go with any type of potato you have on hand. Yukon gold or red new potatoes are wonderful options.

PREPARING THE ONIONS AND POTATOES

If using russet potatoes, typically figure 1 potato per person/packet.

EXPERT TIP: We start by cubing the potatoes with a large, sharp knife. BONUS: No need to slice to potatoes! Just scrub and remove any dark spots. Potato cubes of about ½-inch in thickness cook quickly and only require about 20 minutes in the oven.

Place a rectangle of foil (approx. 12″ x 18″) on your work surface. If you’re serving four people, then you’ll need four pieces of foil. Start by adding about 1 tablespoon of oil down the center of the foil, and then add a layer of chopped onions.

NOTE: The chopped onions completely cook down during the roasting process. They practically melt into the potatoes and a depth of flavor that is incredible.

Two hands using a chef's knife to slice and cube a russet potato on a large wooden cutting board.
Two hands placing chopped onions on a rectangle of foil with a bottle of oil next to it.

Next comes a layer of the cubed potatoes. Use half of them for the first layer.

Sprinkle with salt and then pepper. The more pepper you use, the more ‘kick’ the potatoes will have.

Next, add another tablespoon of oil, and then repeat the process.

Two hands placing cubed potatoes on a piece of foil for oven-roasted potatoes in foil.
A hand sprinkling salt over cubed potatoes and chopped onions on a piece of foil.

FORMING THE FOIL PACKET

Once you’ve created your two layers of oil, onion, potato, salt, and pepper (with another splash of oil on top), it’s time to create the packet for roasting.

Simply bring the long-side edges of the foil to meet over the potato mixture, and use your fingers to pinch the foil together and form a seal.

Fold ’em up!

Two hands folding up the sides of a piece of foil over cubed potatoes and chopped onion.

Preheat your oven to 400°F.

Place the packets on a baking sheet.

EXPERT TIP: We bake the Roasted Potatoes in Foil for 20 to 25 minutes. We recommend carefully removing the potatoes from the oven after 20 minutes. Very carefully open on of the packets and either pierce a potato cube or grab one for you to taste. If the potato is very tender, they’re ready to eat. If not, place them back in the oven for another 5 to 10 minutes.

Two hands holding a baking sheet with two foil packets on it.

ROASTED POTATOES IN FOIL ARE THE PERFECT SIDE DISH

The potatoes are so incredibly flavorful and are the perfect side dish, especially with a nice juicy steak!

Diced potatoes on the grill in foil are perfect, too. When the grill is closed, it acts as an oven, so preparing them on the grill is as easy as making them in the oven.

So easy, so elegant, and so yummy.

A close up view of a white dinner plate loaded with roasted potatoes in foil next to a grilled steak.

As mentioned, these potatoes are easily adaptable to your taste.

Other wonderful additions to add into the packets prior to roasting include:

  • Fresh herbs such as thyme, rosemary, sage, or basil. (If using dried, just give a couple shakes over the potatoes)
  • Fresh mushrooms, whole or sliced
  • Small frozen vegetables, such as chopped broccoli, carrots, cauliflower, or chopped bell peppers
  • Shredded cheese, such as mozzarella, gruyere, or Monterrey Jack

Mmmm…Aren’t you craving these potatoes right about now?

A fork holding up a helping of roasted potatoes in foil over a plate with a grilled steak on it.

AN IDEAL SIDE DISH FOR ALL OCCASIONS

These roasted potatoes are so versatile.

We love serving them at an outdoor cookout. They grill perfectly. Or place in a cast-iron skillet and place over a campfire.

They are also gorgeous when served alongside a perfectly cooked steak for a dinner for two, or serving guests.

A white dinner plate loaded with roasted potatoes and a grilled steak with a fork nearby.

Ready to make the best (and easiest) potato side dish EVER? Go for it!

And when you do, be sure to take a picture post it on Instagram, and tag @howtofeedaloon and hashtag #howtofeedaloon!

A foil packet filled with cubed roasted potatoes in foil on a baking pan.
Print Recipe
5 from 2 votes

Roasted Potatoes in Foil

This truly is the easiest side dish in the world. And you just can't believe the taste. The onion melts into the potatoes and the flavors are simple yet so satisfying. Perfect next to a steak, burger, or fish.
Prep Time10 minutes mins
Cook Time20 minutes mins
Course: Side Dish
Cuisine: American
Servings: 4
Calories: 325kcal
Author: Kris Longwell

Equipment

  • 4 pieces of foil, about 12" x 18"

Ingredients

  • 4 tablespoon olive oil
  • 2 cups onion chopped
  • 4 russet potatoes scrubbed and cut into ½-inch cubes
  • 1 tablespoon Kosher salt
  • 1 teaspoon black pepper ground

Instructions

  • Preheat oven to 400°F.
  • Place the foil pieces on a work surface.
  • Add about ½ tablespoon of oil down the middle (lengthwise) of each piece of foil. Add ¼ cup of onions over the oil on each piece of foil. Add half of each cubed potato over the onions. Sprinkle with salt and pepper. Repeat this process, adding a little more (approx. 1 tsp) of oil over the top.
  • Bring the edges from the long side of each foil piece together and pinch to form a seal. Fold in the ends and place on a baking sheet.
  • Roast in the oven for 20 minutes. Test a piece of cooked potato to ensure they are very soft and tender. If not fully cooked, add back into the oven for 5 to 10 more minutes.
  • Serve in the foil packet, or carefully transfer onto individual plates or serving platter.

Video

Notes

We recommend using a good sturdy foil for these potatoes.  You can also double wrap the packets.  You want to avoid openings in the packets because steam will escape and not cook the pototoes fully.
Yukon gold, baby red or white potatoes, and fingerling potatoes are all work perfectly, too.  We don't peel the potatoes, but you can if you prefer. 
These can also be cooked on a grill with a cover.  Don't place the packets over direct heat, but close the grill and follow the same cook times as for the oven version.
Other wonderful additions to add into the packets are fresh herbs (or a sprinkle of dried), such as thyme, oregano, sage, or basil.  Sliced (or whole) mushrooms will cook perfectly as they steam.  A sprinkle of shredded mozzarella, gruyere, Swiss, or Monterrey Jack is great, too.
These potatoes are wonderful served piping hot, but they are addictively delicious even after they've cooled off. 

Nutrition

Calories: 325kcal | Carbohydrates: 46g | Protein: 5g | Fat: 8g | Saturated Fat: 2g | Sodium: 1758mg | Potassium: 1005mg | Fiber: 4g | Sugar: 5g | Vitamin C: 18mg | Calcium: 46mg | Iron: 2mg

Slammin’ Sloppy Joes

March 31, 2020 by Kris Longwell 20 Comments

Slammin' Sloppy Joes sandwich on a white plate next to a jar of pickles.

It’s time to bring this classic sandwich back to its original glory. And make it better than ever!

We have enjoyed Sloppy Joe’s for years. My mom (Kris’s mom) makes a version called Juicy Burgers. Simple but so delicious. We’ve taken the original recipe and amped up the flavors a few notches and thrown in a few tricks to make this one of the most delicious sandwiches of all time. And is on the table in about 30 minutes!

VIDEO ALERT: Be sure to check out the video for this recipe in the recipe card.  If you like the video, subscribe to our YouTube Channel!

Slammin' Sloppy Joes sandwich on a white plate next to a jar of pickles.

HOW TO MAKE SLAMMIN’ SLOPPY JOES

These sandwiches are very adaptable to what you have on hand in your refrigerator and pantry.

We love using ground beef, but you could also use ground chicken or turkey, too. By the way, ever wonder where the name for this iconic sandwich comes from? Learn all about that here!

THE INGREDIENTS YOU WILL NEED

As mentioned, this recipe is very adaptable to the ingredients you have on hand. Here are the ingredients we love to use, but we’ll include some substitutions, too:

    • Ground beef – Substitute: Ground chicken, turkey, or pork
    • Chopped onion – Substitute: Granulated onion or onion powder
    • Chopped green bell pepper – Substitute: Any type of bell pepper, or jalapeno. Canned green chilies are great, too.
    • Beef stock – Substitute: Chicken or Vegetable stock, or water
    • Tomato sauce – Substitute: Increase the amount of ketchup to 1½ cups and add an additional ¼ cup of water of beef broth/stock
    • Ketchup/Chili Sauce – Substitute: Sriracha ketchup, or just regular ketchup with a squirt of chili sauce or sriracha sauce, or chipotle adobo sauce (or just plain ketchup)
    • Worcestershire sauce – Substitute: 1 teaspoon soy sauce, you may need to reduce salt in the recipe
    • Dijon mustard – Substitute: Yellow mustard, or spicy brown mustard, or dry mustard (1 tsp)
    • Apple cider vinegar – Substitute: Red or white wine vinegar, or 1 teaspoon of balsamic
    • Shredded cheddar cheese – Substitute: Whatever cheese you have on hand, shredded or sliced!
    • Sesame buns – Substitute: Any kind of sliced sandwich bread is awesome!

We start off by sautéing the onion and pepper in a large skillet with the oil over medium heat.

A large silver skillet filled with sautéed green bell peppers and onion with a wooden spoon in it.

CHOOSING THE RIGHT MEAT

We love going with ground chuck beef for our Slammin’ Sloppy Joes.

85% lean is perfect because it’s not too fatty but still renders just enough to add a nice depth of flavor.

EXPERT TIP: After the meat has browned, tilt your skillet to the side so the grease will gather. Take a large spoon, remove most of the rendered grease into a small bowl, and then discard. Don’t get rid of all of it, though, leaving about 1 tablespoon is great and helps to flavor the meat. Draining the cooked meat through a colander into your sink will drain all the grease away, which we don’t recommend, but that’s up to you.

A large silver skillet filled with cooked ground beef for sloppy joes.

You can find Chili Sauce in the condiment section of most well-stocked supermarkets.

The chili sauce will add just a little zip to the meat mixture, but not overly spicy.

If you prefer no heat at all, simply use regular ketchup in place of the chile sauce.

A hand pouring a small glass bowl of chili sauce into a skillet of cooked ground beef.

SIMMER UNTIL REDUCED

Once all the ingredients have been added to the cooked meat, you’ll notice the mixture is a bit juicy.

This is completely normal.

As the Sloppy Joes simmer, the liquid will reduce down and deepen the flavor profile. This only takes about 20 minutes!

A large silver skillet filled with juicy sloppy joes mixture.

These Slammin’ Sloppy Joes are so delicious and such a treat for the kids AND adults (we recommend a nice cold beer for the grown-ups!).

We love to make a double batch and eat sloppy joes all week long!

Yum.

An overhead view of a skillet filled with sloppy joes meat mixture with a wooden spoon in the middle.

SLAMMIN’ SLOPPY JOES ARE FUN TO MAKE

We’ve taken the old-fashioned sloppy joes recipe and elevated it up a notch or two.

And it’s so easy to make, the kids have fun pitching in, too.

Another wonderful sandwich is our Grilled Honey Mustard Sandwich and our Rockin’ Black and Bleu Burger! But, seriously, take a look at this amazing Sloppy Joe sandwich!

A sloppy joes sandwich on a white plate next to a jar of sliced pickles.

Sloppy Joe’s got a bit of a bad rap over the years.

I think school cafeterias have some apologizing to do for this.

But, we’re here to save the day…one bite at a time!

Two hands holding a sloppy joe sandwich with a bite taken out of it.

Ready to make the best Sloppy Joe in town? Go for it!

And when you do, be sure to take a picture, post it on Instagram, and tag @howtofeedaloon and hashtag #howtofeedaloon!

A sloppy joes sandwich on a white plate next to a jar of sliced pickles.
Print Recipe
5 from 4 votes

Slammin' Sloppy Joes

These Slammin' Sloppy Joes are just that...Slammin!! This is the original recipe, kicked up a few notches. Serve with a crisp pickle, a cold beer or soda, and you'll be one happy camper.
Prep Time10 minutes mins
Cook Time20 minutes mins
Total Time30 minutes mins
Course: lunch
Cuisine: American
Servings: 6
Calories: 444kcal
Author: Kris Longwell

Ingredients

  • 1 tablespoon olive oil
  • 1 cup yellow onion chopped
  • ½ cup green bell pepper cored, seeded, chopped
  • 1½ lbs ground beef 85% lean, preferably
  • ¼ cup beef stock
  • 1 cup tomato sauce
  • ½ cup chili sauce
  • 1 tablespoon Worcestershire sauce
  • 1 tablespoon Dijon mustard
  • 1 tablespoon apple cider vinegar
  • 1 tablespoon brown sugar dark or light
  • 1½ Kosher salt divided
  • ½ teaspoon fresh ground black pepper divided
  • 1 cup cheddar cheese grated
  • 6 sesame-seed sandwich buns split and lightly buttered

Instructions

  • In a large skillet, heat the oil over medium heat. Add the onions and bell peppers and cook, stirring occasionally, until soft, about 6 to 8 minutes.
  • Add the beef and break up with a wooden spoon. Cook until no longer pink, about 10 to 12 minutes. If desired, remove the excess grease by tilting the skillet to one side, and remove the grease with a large spoon into a small bowl. Leave about 1 to 2 tablespoon in the skillet.
  • Add the beef stock, tomato sauce, chili sauce, Worcestershire sauce, mustard, vinegar, brown sugar, salt, and pepper and bring to a simmer, stirring to fully incorporate.
  • Reduce the heat to medium and simmer for 20 minutes until most of the liquid has reduced down, stirring occasionally.
  • Toast the buttered buns (a couple minutes under the broiler...but keep an eye on them!)
  • On a baking sheet, add a mound of meat mixture for each sandwich you are preparing. Place a handful of cheese on top of each mound of meat. Place under the broiler until cheese has melted. Keep an eye on them, don't let them burn!
  • Use a spatula to transfer the sloppy joe mounds topped with melted cheese onto the bun bottoms. Add the top bun and serve at once!

Video

Notes

See body of post for ingredient substitutions.
Heinz makes an excellent chili sauce that can be found in the condiments section of your supermarket, near the ketchup.  We love using Sriracha ketchup for just a little more heat.  Regular ketchup works great, too.
The Sloppy Joe's meat mixture will keep in the refrigerator for up to 1 week and freezes beautifully for up to 2 months.

Nutrition

Calories: 444kcal | Carbohydrates: 13g | Protein: 26g | Fat: 12g | Saturated Fat: 4g | Cholesterol: 100mg | Sodium: 886mg | Potassium: 646mg | Fiber: 3g | Sugar: 8g | Vitamin A: 566IU | Vitamin C: 19mg | Calcium: 175mg | Iron: 3mg

POST UPDATE: This recipe was originally published in April 2015, but was updated with improved tweaks to the recipe, new tips, new photography, and a fabulous new video in March 2020!

Homemade Orange Sweet Rolls

March 29, 2020 by Kris Longwell 16 Comments

A spatula holding up a homemade orange sweet roll over a pan filled with other rolls.

Looking for a sweet treat for breakfast that will keep the kids (and adults) coming back for more?

We absolutely love homemade pastries. Especially for breakfast including Cinnamon Rolls and Grandma’s Kolaches. But these orange sweet rolls bring back such wonderful childhood memories, and are so delicious!

VIDEO ALERT: Be sure to check out the video for this recipe in the recipe card.  If you like the video, subscribe to our YouTube Channel!

A spatula holding up a homemade orange sweet roll over a pan filled with other rolls.

HOW TO MAKE HOMEMADE ORANGE SWEET ROLLS

These rolls are really not difficult to prepare.

Give yourself enough time to let the dough rise, twice, and the rest is a snap.

MAKE THE DOUGH FROM SCRATCH

The dough for these rolls is incredibly flavorful and slightly denser than standard cinnamon rolls.

The sour cream adds a wonderful taste and texture.

EXPERT TIP: It’s very important to not add the warmed milk and melted butter to the flour/yeast mixture if either is too hot. Let the butter cool until just warmed, about 90° to 100° F. If they are too hot, they will kill the yeast when added, which will result in heavy, dense rolls. Let the dough rise in a warm, draft-free area until doubled in size. This can take anywhere from 1 to 3 hours. Be patient!

A ball of dough sitting a ceramic bowl.

After the dough has doubled in size, roll it out to 10″x 14″ rectangle on a lightly floured surface.

Use a small spatula (or butter knife) to spread the softened butter all over the rolled out dough.

Roll the dough from the long side, jellyroll style. Slice into 2-inch slices.

A hand spreading softened butter on a rectangle of pastry dough.
Two hands rolling dough for homemade orange sweet rolls.
A hand using a large chef's knife to slice sweet rolls from rolled dough.

PROOFING THE DOUGH TWICE IS CRITICAL

Proofing is the process of yeast fermenting the dough, which causes it to rise.

Factors such as yeast freshness, altitude, and room temperature can cause proofing time to vary for every home baker. Just remember, homemade orange sweet rolls take patience!

After placing the rolls in the pan, you’ll need to allow the rolls to proof (or rise) for another hour.

EXPERT TIP: The initial proofing can be done the night before. Instead of placing the dough in a warm, draft-free area, cover the bowl with plastic wrap and place in the refrigerator for at least 8 hours.

A hand placing an uncooked orange sweet roll into a circular pan.

Once it’s time to bake the rolls, you’re getting close.

As the rolls bake, they will expand even further and the smell is amazing.

EXPERT TIP: We love using a 9-inch diameter cake pan (with 2-inch sides), but a square 8″x 8″ baking pan will work, too.

A circular metal pan holding freshly baked orange sweet rolls.

HOMEMADE ORANGE SWEET ROLLS GLAZE

While the rolls are baking, it’s time to whip up the glaze.

Fresh orange juice, mixed with 2 cups of confectioner’s (powdered) sugar and 2 tablespoons of orange zest is all that’s needed. Mix together until a glaze is formed.

EXPERT TIP: Allow the rolls to cool for about 10 minutes before glazing. If you glaze too soon, the heat from the freshly baked rolls will liquefy the glaze.

A hand using a small spatula to spread orange icing over baked sweet rolls.

These homemade orange rolls are truly something special.

It may seem like there is a lot of sugar, which, well, there is. But the sugar melts into the butter and dough and is perfection.

A metal pan holding homemade orange sweet rolls with two rolls missing.

These rolls were our favorites as kids.

Never did we imagine we could improve on the store-bought packaged variety.

Well, we were wrong. Just look at this:

A individual orange sweet roll on a blue plate with a fork cutting it in half.

Ready to make the kids and the rest of the family really excited for the best rolls in the world? Go for it!

And when you make them, be sure to take a photo, post it on Instagram, and tag @howtofeedaloon and hashtag #howtofeedaloon!

A individual orange sweet roll on a blue plate with a fork cutting it in half.
Print Recipe
5 from 1 vote

Homemade Orange Sweet Rolls

These Homemade Orange Sweet Rolls are everything you think they should be...and more. Heavenly and delicious.
Prep Time15 minutes mins
Cook Time35 minutes mins
Proofing3 hours hrs
Total Time3 hours hrs 50 minutes mins
Course: Breakfast / Dessert
Cuisine: American
Servings: 6 people
Calories: 684kcal
Author: Kris Longwell

Equipment

  • 9" diameter cake pan, or 8"x 8" baking dish

Ingredients

FOR THE DOUGH

  • 3⅔ cup all-purpose flour
  • 2¼ teaspoon rapid rise dry yeast 1 package, active dry yeast will work, too
  • ½ cup whole milk warmed to approx. 100° F
  • 6 tablespoon unsalted butter melted, and then cooled to approx. 100° F
  • ½ cup sour cream
  • ⅓ cup sugar
  • 2 teaspoon Kosher salt
  • 1 large egg lightly beaten

FOR THE SWEET ROLLS

  • 6 tablespoon unsalted butter softened
  • ⅔ cup sugar
  • 2 tbs orange zest

FOR THE ICING

  • 1 tablespoon orange zest
  • 2 cups confectioner's sugar aka powdered sugar
  • 4 tablespoon fresh orange juice

Instructions

MAKE THE DOUGH

  • In a large bowl of a stand mixer, fitted with the dough attachment, mix together the flour and the yeast.
  • With the mixer on medium speed, add the warmed milk and melted butter (that's cooled slightly) to flour/yeast mixture. Next add in the sour cream, sugar, salt, and egg.
  • Beat at medium speed until the dough is smooth and elastic, approximately 5 minutes (Dough should pull away from sides of the bowl, but still stick to the bottom).
  • Spray a large bowl with nonstick cooking spray.
  • Place the dough in prepared bowl, turning to coat top.
  • Cover, and let rise in a warm draft-free place until the dough has about doubled in size, approximately 1 to 2 hours (seen note).

PREPARE THE SWEET ROLLS

  • Spray a 9-inch round pan (2 inches in height works well) with nonstick cooking spray. Set aside.
  • Lightly punch down the prepared dough and on a lightly floured surface, roll dough into a 14"x10" rectangle.
  • Spread the softened butter (6 tablespoons) evenly over dough.
  • In a small bowl, stir together sugar (⅔ cup) and zest (2 tablespoons) then sprinkle over butter.
  • Starting on one long side, roll dough into a log.
  • Slice into 9 to 10 rolls.
  • Place rolls in prepared pan.
  • Cover, and let rise in a warm draft-free place until almost doubled in sized, approximately 45 minutes to 1 hour.
  • Preheat oven to 350° F.
  • Bake, uncovered, until golden brown, approximately 30 minutes.
  • Let cool in pan on a wire rack for about 10 to 15 minutes.

MAKE THE ICING AND FINISH THE ROLLS

  • In a medium bowl, stir together the remaining 1 teaspoon zest, confectioners' sugar, and orange juice until smooth.
  • Drizzle and smear icing over warm rolls.

Video

Notes

If using active dry yeast in place of rapid rise, simply allow the dough to rise a little longer.  There are multiple factors that will cause the time for the dough to rise to vary from time to time.  It may only take 1 hour for the dough to double in size, but it could take up to 3 hours.
IMPORTANT: Don't add really hot milk and melted butter to the flour/yeast mixture.  If you do, it will kill the yeast and the dough won't rise.  We recommend using an instant-read thermometer to check the temperature.  Neither the milk or the melted butter should be over 100° to 105° F.
The dough can be prepared the night before.  Instead of letting it rise in a warm, draft-free area, simply cover with plastic wrap and place in the refrigerator for at least 8 hours.
If you don't have a zester or micro-plane, you can rub the skin of the oranges against the small blades on the side of a box cutter. 

Nutrition

Calories: 684kcal | Carbohydrates: 134g | Protein: 10g | Fat: 18g | Saturated Fat: 6g | Cholesterol: 104mg | Sodium: 817mg | Potassium: 147mg | Fiber: 2g | Sugar: 74g | Vitamin A: 915IU | Vitamin C: 4mg | Calcium: 70mg | Iron: 4mg

POST UPDATE: This recipe was originally published in May 2017, but was updated with improved tweaks to the recipe, tips, new photography, and a fabulous new video in March 2020!

Chicken and Broccoli Alfredo

March 25, 2020 by Kris Longwell 21 Comments

Creamy Pasta with Chicken and Broccoli in a red pan

Chicken and Broccoli Alfredo is the perfect weeknight meal.  Well, it’s great on the weekend, too!

This dish is so delicious and it gets even better: You can put this together in 30 minutes. Serve with a nice crusty loaf of bread, and you’ll love that it’s a meal in one skillet.

VIDEO ALERT: Be sure to check out the video for this recipe in the recipe card.  If you like the video, subscribe to our YouTube Channel!

Creamy Pasta with Chicken and Broccoli

HOW TO MAKE CHICKEN AND BROCCOLI ALFREDO

We can’t stress enough how quickly this dish is to prepare.

The only tool you need to make this dish is an oven-ready pan or skillet. A cast-iron works wonderfully, as does a Dutch oven.

See note in recipe card on how to make this recipe if you don’t have an oven-ready pan or skillet.

CHOOSING THE RIGHT CHICKEN

One of the many awesome things about this dish is that it is so adaptable to whatever ingredients you have on hand.

We absolutely love going with bone-in, skin-on chicken thighs. They are loaded with flavor and crisping the skin before cooking them ads amazing taste and texture

EXPERT TIP: You can also use boneless chicken breasts. Simply cook them in your skillet with a little oil, or butter, until fully cooked (internal temperature of 165°F). Serve whole, or cut the chicken into bite-size chunks and stir into the finished dish. This can also be done with boneless chicken thighs. If using legs, follow the recipe as written, but reduce the cooking time to 15 minutes.

A hand using a pair of tongs to sear chicken thighs in a large red skillet on the stove.

THE SAUCE COMES TOGETHER VERY QUICKLY

The sauce is so flavorful and creamy, but not heavy at all!

After the chicken is finished cooking, set it aside and discard any of the rendered grease and oil from the pan.

Create a roux with the butter and flour and then add in the milk, cream, chicken stock, Dijon, Worcestershire sauce, garlic powder, salt, and pepper. Whisk until thickened, about 5 to 8 minutes.

Cream being poured into a red skillet with a roux in it.

For the pasta, go with whatever you have on hand. We prefer pasta that is smaller in sizes, such as orecchiette or shells, rather than long and tubular, such as spaghetti or linguine. The shell-shape of the pasta acts as little bowls for the sauce.

But again, any pasta will work wonderfully!

EXPERT TIP: Follow the package instructions for cooking the pasta. Don’t overcook the pasta, or it will become bloated and soggy in the sauce. Also, add the broccoli in the final 3 minutes of cooking. This goes for fresh or frozen. Both the pasta and broccoli can be cooked an hour or two in advance.

A pot full of cooked pasta shells and broccoli florets being transferred into a skillet with alfredo sauce.

We can’t say it enough about this recipe: It’s so delicious and so versatile! And beautiful, too!

Other options for the broccoli could be peas, carrots, spinach, kale, corn, and more! Frozen, canned, or fresh all work perfectly!

And for the sauce, use milk, heavy cream, half-and-half, or almond milk. Or a combination of any of them!

An antique bowl with chicken and broccoli alfredo in it, next to a glass of white wine.

Another easy 1-pot 30-minute meal is our Mediterranean Pasta with Shrimp and Artichokes!…give it a look!  Not to mention our Easy Tex-Mex Pasta!

But in the meantime, we strongly recommend you making this incredible Chicken and Broccoli Alfredo!

An overhead view of a large red skillet holding seared chicken thighs in a broccoli and pasta alfredo sauce.

This dish is wonderful right off the stove, however, you can make the sauce and the chicken in advance. Stir in the cooked pasta and broccoli after re-heating the sauce. Warm the chicken in a low-temp oven (200°F) for about 30 minutes and then add to the re-heated sauce.

This dish is so easy to prepare and is truly one of our all-time favorite dishes to make, serve, and eat!

Mmmmmm…makes you hungry, right?

An antique bowl with chicken and broccoli alfredo in it, next to a glass of white wine.

Ready to make the best alfredo 1-pot wonder dish in town? Go for it!

And when you do, be sure to take a picture, post it on Instagram, and tag @howtofeedaloon and hashtag #howtofeedaloon!

Creamy Pasta with Chicken and Broccoli
Print Recipe
4.91 from 10 votes

Chicken and Broccoli Alfredo

This Chicken and Broccoli Alfredo is so easy to prepare but looks amazing and tastes even better. You'll love bringing the skillet directly to the table and serve this incredible dish family-style. And the recipe can be easily adapted to fit whatever you have in your pantry and fridge!
Prep Time10 minutes mins
Cook Time25 minutes mins
Total Time35 minutes mins
Course: Entree
Cuisine: American
Servings: 6 people
Calories: 693kcal
Author: Kris Longwell

Equipment

  • Oven-ready skillet/saucepan (see note)

Ingredients

  • 1 tablespoon olive oil
  • 3 lbs chicken thighs 5 or 6, bone-in, skin-on
  • 3 teaspoon Kosher salt divided
  • 2 teaspoon black pepper ground, divided
  • 8 oz orecchiette pasta
  • 12 oz broccoli florets, fresh, if frozen, thawed
  • 2 tablespoon unsalted butter
  • 2 tablespoon all-purpose flour
  • 1 cup milk
  • ¼ cup heavy cream
  • 1 cup chicken stock
  • 1 tablespoon Dijon mustard
  • 1 tablespoon Worcestershire sauce
  • 1 teaspoon garlic powder
  • ½ cup Parmesan cheese grated

Instructions

  • Preheat oven to 425°F.
  • Season chicken all over with salt and pepper.
  • In a large oven-ready skillet, heat oil over medium-high heat.
  • Place chicken, skin side down, in the hot skillet. Cook until golden brown, about 8 to 10 minutes. (Shift the chicken around in the skillet occasionally to prevent sticking).
  • Remove from heat and turn chicken over. Place skillet in the oven for 20 minutes until chicken is completely cooked (internal temperature of 165°F). Use tongs to remove chicken onto a platter or plate.
  • Discard the oil and any rendered grease from the skillet. Leave the brown bits that have stuck on the surface of the pan.
  • Meanwhile, bring a pot of salted water to a boil. Add the pasta and cook until al dente, typically about 10 to 12 minutes, check package instructions for guidance. Add the broccoli in the final 3 minutes of cooking. Drain, and set aside.
  • Return the skillet to the stove over medium heat and add the butter. Once melted, stir in the flour and whisk for about 2 minutes.
  • Stir in the milk, cream, chicken stock, Dijon, Worcestershire sauce, garlic powder, 1 teaspoon salt, and ¼ teaspoon ground black pepper. Stir constantly until thickened, about 5 minutes.
  • Add the cooked pasta and broccoli and gently stir until well-mixed. Stir in the cheese, and then nestle the cooked chicken thighs in the skillet. Serve at once.

Video

Notes

If you don't have an oven-ready skillet or saucepan, sear the chicken as instructed in a regular skillet.  Place the chicken in a baking dish and bake as instructed.  Discard oil and rendered fat from the skillet and continue with recipe as written.
Any kind of chicken will work for this recipe.  If using boneless chicken breasts, cook them in the skillet until fully cooked (internal temp of 165°F) and skip baking in the oven.  Cut the chicken into bite-sized pieces, or serve whole. 
If using frozen broccoli, thaw first in the microwave.  Substitutes for broccoli are carrots, peas, spinach, kale, corn or artichokes.  Fresh, frozen, or canned all work perfectly fine.  Of course, fresh is best, but any variety will still deliver great taste.
For the sauce, we prefer the ratio of 1 cup whole milk to ¼ cup heavy cream and then 1 cup of chicken stock.  You could use half and half or almond milk as a substitute, or a combination of any of these.  Just make sure to use 1¼ cups of the dairy to the 1 cup of stock.
This dish is served right off the stove, but the pasta/broccoli and sauce can be made a couple hours in advance of finishing the dish.  Add a couple of dashes of olive oil on the cooked pasta and broccoli and mix to keep them from drying out. 

Nutrition

Calories: 693kcal | Carbohydrates: 12g | Protein: 44g | Fat: 32g | Saturated Fat: 9g | Cholesterol: 257mg | Sodium: 845mg | Potassium: 792mg | Fiber: 2g | Sugar: 4g | Vitamin A: 925IU | Vitamin C: 51mg | Calcium: 202mg | Iron: 2mg

POST UPDATE: The recipe was originally published in April 2017, but was updated with improved tweaks to the recipe, tips, new photography, and a brand new fabulous video in March 2020!

Sausage-Stuffed Mushrooms

March 22, 2020 by Kris Longwell 13 Comments

A platter filled with sausage-stuffed mushrooms next to a plate of the same.

Looking for an amazing appetizer dish using wonderful mushrooms and Italian sausage?  Look no further!

These babies are so delicious, it’s impossible to not keep going back for more!  And they are so easy to prepare and very adaptable to whatever ingredients you have in your pantry!

VIDEO ALERT: Be sure to check out the video for this recipe in the recipe card.  If you like the video, subscribe to our YouTube Channel!

sausage-stuffed mushrooms recipe

HOW TO MAKE SAUSAGE-STUFFED MUSHROOMS

This recipe is easily adaptable to your own tastes and what you have in your pantry.

We love making our own seasoned bread crumbs, but store-bought will work just fine, too. We add pickled sweet cherry peppers for a little extra kick, but you could also use pickled banana peppers or even jalapenos!

CHOOSING THE RIGHT MUSHROOM

We truly love mushrooms of all varieties, but just your basic white button mushroom works perfectly for this recipe.

Try and choose larger-sized mushrooms, they hold more of the amazing filling and work perfectly.

But, you can use smaller ones, as well. You’ll just have more (but smaller) stuffed mushies for serving!

A white bowl holding white button mushrooms with a few extra next to the bowl.

The ingredients for the sausage filling are Italian perfection. We love the addition of some vinegary cherry peppers. The tang and the touch of heat are the perfect complement to the sausage.

Everything comes together in such a delicious way!

An overhead view of breadcrumbs, chopped mushrooms, links of sausage, and other ingredients for stuffed mushrooms

The cooked filling is so good, that you could almost sit down with the plate and just eat it as is!

But, try and resist.

This filling is perfectly constructed to bake inside a mushroom cap with a little olive oil!

A platter of cooked sausage and breadcrumbs for filling mushrooms.

MOUTH-WATERINGLY DELICIOUS

Take a look at this sausage-stuffed mushroom, and tell us you don’t want to immediately pop that into your mouth!

Mouth-watering delicious!

And while we’re talking about mushrooms, you’ll just love our Polenta with Sautéed Mushrooms and Caramelized Onions, Seared Haddock with Mushroom Agrodolce Sauce, and our Salisbury Steaks with Mushroom Gravy!

Mushroom-1

As soon as you pull these out of the oven, you will see that they simply make the best-stuffed mushrooms you’ll ever try. The flavor is so comforting and perfectly balanced.

You can’t get a much better yummy appetizer than this dish!

Mmmmmmm.

A baking dish filled with sausage-stuffed mushrooms sitting in chicken stock.

Okay, I think we’ve hopefully convinced you. But, just in case…take one more close look at these Sausage-Stuffed Mushrooms.

You gotta make these!

sausage-stuffed mushrooms recipe

Another amazing Italian starter is our Spiendini alla Romana (Italian Stuffed Bread) and our Italian-Style Baked Clams!

But in the meantime, let’s make this amazing Sausage-Stuffed Mushrooms recipe!

A close-up view of a sausage-stuffed mushroom on a white plate.
Print Recipe
5 from 2 votes

Sausage-Stuffed Mushrooms

This Sausage-Stuffed Mushrooms recipe always gets rave reviews every time we serve them. They are honestly always one of the very first apps to go. The flavors match perfectly together. Just a little zip from the cherry peppers is wonderful alongside the sausage, cheese, and seasoned bread crumbs. Amazing!
Prep Time20 minutes mins
Cook Time30 minutes mins
Total Time50 minutes mins
Course: Appetizer
Cuisine: Italian
Servings: 6
Calories: 306kcal
Author: Kris Longwell

Ingredients

FOR THE SEASONED BREADCRUMBS

  • 3 slices white bread crusts removed, torn into large pieces
  • ¼ cup Romano cheese grated
  • 1 tablespoon garlic minced
  • 1 tablespoon parsley fresh, chopped
  • 1 teaspoon oregano dried
  • ½ teaspoon Kosher salt
  • ¼ teaspoon black pepper

FOR THE MUSHROOMS

  • 16 large mushrooms white button are best
  • 2 tablespoon olive oil plus more for drizzling
  • 6 oz Italian sausage casings removed, 2 or 3 links
  • 1 cup green bell pepper finely chopped
  • 1 tablespoon garlic minced
  • 1 cup seasoned bread crumbs
  • ¾ cup chicken stock plus 2 more tablespoons (for baking)
  • 2 tablespoon Romano cheese grated
  • ¼ cup cherry peppers stems and seeds removed, chopped
  • 1 tablespoon parsley fresh, chopped, for garnish

Instructions

MAKE THE SEASONED BREADCRUMBS

  • In a food processor, pulse the bread until coarsely ground.
  • Add the cheese, garlic, parsley, oregano, salt, and pepper. Pulse again until crumbs are finely ground. Set aside.

PREPARE THE STUFFED MUSHROOMS

  • Preheat the oven to 400°F.
  • Wipe the mushrooms clean and remove the stems (don't discard the stems). Pick out the 12 best and largest caps, and set them aside.
  • Finely chop the remaining 4 mushroom caps and all of the stems (you can use your food processor for this). Set aside.
  • In a large pan, heat 2 tablespoon of the oil over medium-high heat.
  • When the oil is hot, add the sausage and cook for 4 to 5 minutes, or until browned. Break the sausage apart with a wooden spoon as it cooks.
  • Add the green peppers, garlic, and chopped mushrooms, raise the heat to high, and cook, stirring occasionally, for about 10 minutes, or until it is starting to brown and most of the liquid from the mushrooms has evaporated.
  • Reduce the heat to medium and stir in the bread crumbs and chicken stock (¾ cup). Cook for 2 minutes.
  • Turn off the heat and stir in the cheese and pickled cherry peppers.
  • Spread the mixture onto a platter and let cool for a bit.
  • Stuff each of the reserved mushroom caps with 1½ tablespoons of the sausage mixture.
  • Place the stuffed mushrooms in a casserole dish and drizzle them with the remaining 2 tablespoons of oil. Add 2 tablespoons chicken stock to the dish.
  • Bake for 20 minutes.
  • Transfer mushrooms to a platter and spoon juices over the top.
  • Sprinkle with chopped parsley and a dusting of Romano cheese. Serve at once. 

Video

Notes

Large white button mushrooms work best, but portobello would well, too.  Any shroom that has a cap large enough to hold the filling. 
Sweet cherry peppers are found bottled in the condiments section of most well-stocked supermarkets.  They are a little spicy, especially if you don't remove the seeds.  Mild banana peppers are a great substitute.  If not using cherry peppers or any kind of pickled substitute, then add 1 tablespoon of red wine vinegar to the mixture. 
We love using sweet Italian sausage but choose whatever is your favorite.
Depending on the size of the mushroom caps, you might not use all the sausage filling.  We love it on grilled mushrooms, on pizza, or even mixed into scrambled eggs.
The mushrooms are best when served soon after baking. 

Nutrition

Calories: 306kcal | Carbohydrates: 26g | Protein: 13g | Fat: 12g | Saturated Fat: 2g | Cholesterol: 29mg | Sodium: 848mg | Potassium: 402mg | Fiber: 2g | Sugar: 4g | Vitamin A: 254IU | Vitamin C: 25mg | Calcium: 148mg | Iron: 2mg

POST UPDATE: The recipe was originally published in April 2017, but was updated with improved tweaks to the recipe, tips, new photography, and a fabulous new video in March 2020!

Roasted Tomato Basil Soup

March 19, 2020 by Kris Longwell 548 Comments

A white soup filled with roasted tomato basil soup next to sliced grilled cheese sandwiches.

If there was ever the ultimate comfort soup, this bowl of deliciousness would be a serious contender.

We go with a combination of fresh tomatoes and canned crushed tomatoes for the perfect taste and texture. The fresh basil and stock are just the right amount of balance to the soup. The cream adds depth and luxuriousness. And, once you’ve roasted the tomatoes, the soup comes together in about 30 minutes!

A white soup filled with roasted tomato basil soup next to sliced grilled cheese sandwiches.

HOW TO MAKE ROASTED TOMATO SOUP

Roasting the tomatoes for this easy tomato basil soup delivers a deeply satisfying taste for the soup.

You can really go with any type of tomato here, but we find Roma tomatoes work best. And, they are typically available all year.

ROASTING THE TOMATOES IS EASY

Simply preheat your oven to 375°F, line a large baking sheet with foil, and slice the tomatoes in half.

If using whole tomatoes, then cut them into thick (½-inch) slices. Drizzle with olive oil and then sprinkle them with salt and pepper. After baking for 1 hour, they will be tender and perfectly cooked.

EXPERT TIP: The tomatoes can be roasted in advance, up to 24 hours. Once the pan is cool enough to handle, cover the tomatoes with either kitchen towels (not pressing down on them), or with plastic wrap. When ready to use, carefully transfer the roasted tomatoes with a spatula (or your hands) from the baking sheet to the pot.

A baking sheet lined with foil filled with cut tomatoes to be roasted.
A baking sheet lined with foil with roasted tomatoes on it.

After sautéing chopped onions in olive oil, throw in 4 minced cloves of garlic along with some chopped fresh thyme.

Next goes in a large can (28 oz) of crushed tomatoes and the fresh basil.

Season with salt and pepper and let simmer for just 10 minutes.

A large blue Dutch oven with tomatoes and herbs simmering in it with a wooden spoon in the pot.

FRESH TOMATO BASIL SOUP IN ABOUT 30 MINUTES

Once the canned tomatoes have simmered with the basil, it’s time to add in the roasted tomatoes.

Add the stock and let simmer on low for 20 to 30 minutes.

We’re getting close, folks!

A metal spatula dropping roasted tomatoes into a pot of tomato basil soup.

To reach the right consistency, we use our immersion blender.

EXPERT TIP: You could also purée the soup in a blender or even a food processor. Using either of these appliances will give you a very smooth texture. The immersion blender allows you to make the soup as smooth, or textured, as you desire. Whichever method you opt for, use caution. The soup is hot and can splatter and cause a burn if it reaches your skin.

An immersion blender puréeing roasted tomato basil soup in a large pot.

A final addition of heavy cream adds a depth of silkiness and taste that makes this the best-ever creamy tomato basil soup recipe on the planet.

The soup is now ready to eat, or you can keep it at a low simmer until ready to serve.

EXPERT TIP: You can substitute whole milk or half-and-half in place of the heavy cream. The finished soup will not be as silky, and the cream does add a layer of taste that we think is wonderful, but the other options are fantastic, too. For a completely dairy-free version, don’t add the cream or milk at all.

Heavy cream being poured from a milk jar into a pot of tomato soup.

THE PERFECT SOUP FOR ENTERTAINING

This soup is so satisfying and always gets rave reviews when we serve it to guests.

Silky, cream, and layers upon layers of taste.

And it’s so easy to prepare!

A ladle filled with roasted tomato basil soup in a large blue Dutch oven.

ROASTED TOMATO BASIL SOUP FAQs

  • Can I use only canned tomatoes? Yes, but you won’t get the deep roasted taste from roasting fresh tomatoes. If using only canned, skip the roasting steps of the recipe and go with two 28 oz. cans of tomatoes, we recommend one can of crushed tomatoes, and one can of whole tomatoes, preferably San Marzano (make sure the can is labeled “certified”).
  • What about dried herbs, can I use them? For the thyme, absolutely, go with 1½ teaspoons of dried. For the basil, you won’t get those beautiful specs of basil, and the flavor won’t be as robust, but in a pinch, you could go with ¼ cup of dried basil.
  • How do you make those delicious looking croutons? Cut a loaf of bread into thin slices. Cube the slices (2 or 3) and place them in a bowl. Add 1 tablespoon of olive oil, 1 minced garlic clove, and a pinch of salt and pepper. Preheat oven to 400°F and bake until golden, flipping once – about 8 minutes.
  • How long will the soup keep? As with so many soups and stews, this gets even better the next day. It will keep in an air-tight container in the refrigerator for up to 1 week and freezes beautifully for up to 2 months.

A white bowl of roasted tomato basil soup with croutons on top.

THE PERFECT DUNKING SOUP

You and your loved ones will flip when you serve this amazing soup. Other favorite soup recipes are our:

Rustic Lentil Soup
Broccoli Cheddar Soup
Roasted Butternut Squash Soup
Classic French Onion Soup
Homemade Chicken and Dumplings

But in the meantime, make this amazing Roasted Tomato Basil Soup! The PERFECT soup for grilled cheese sandwich dunking!

A hand dunking a grilled cheese sandwich into a bowl of tomato basil soup.

Ready to make the best tomato basil soup in the world? Go for it!

And when you do, be sure to take a picture, post it on Instagram, and tag @howtofeedaloon and hashtag #howtofeedaloon!

A white soup filled with roasted tomato basil soup next to sliced grilled cheese sandwiches.
Print Recipe
5 from 199 votes

Roasted Tomato Basil Soup

This Roasted Tomato Basil Soup is the ultimate in comfort. Roasting the tomatoes gives the soup a deep, rich flavor. And over-the-top good with grilled cheese sandwiches.
Prep Time20 minutes mins
Cook Time1 hour hr 20 minutes mins
Total Time1 hour hr 40 minutes mins
Course: Soup
Cuisine: Soup
Servings: 8 people
Calories: 190kcal
Author: Kris Longwell

Equipment

  • Large Dutch oven, or soup pot

Ingredients

  • 9 Roma tomatoes sliced lengthwise
  • 3 tablespoon extra virgin olive oil
  • 2 tablespoon unsalted butter
  • 1 yellow onion diced
  • 4 garlic cloves minced
  • 1 tablespoon fresh thyme minced
  • 1 teaspoon Kosher salt
  • ½ teaspoon ground black pepper
  • 1 28 oz. can San Marzano tomatoes crushed
  • 1 cup basil fresh, roughly chopped
  • 1 tablespoon sugar
  • 2 cups chicken stock
  • ⅔ cup heavy cream

Instructions

  • Preheat oven to 375°F.
  • Spread tomato halves on a baking sheet. Drizzle with olive oil, and then sprinkle with salt and black pepper.
  • Roast tomatoes for 1 hour. Remove from oven and set aside.
  • Heat 2 tablespoon oil, or butter, in a large pot (or Dutch oven) over medium-high heat.
  • Add onion, and saute for about 5 minutes.
  • Stir in the garlic, thyme, salt, and pepper. Sauté for another minute.
  • Add crushed tomatoes, basil, and sugar to the pot. Lower the heat and simmer for about 10 minutes.
  • Add the stock and the roasted tomatoes into the pot. Simmer for 30 minutes, stirring every now and then.
  • Use an immersion blender to purée the soup, or very carefully transfer to a blender or food processor to purée. This would most likely need to be done in a couple batches. Return the soup to the pot.
  • Stir in the cream.
  • To make the mini croutons: Cut a few small pieces of bread in small cubes, add a little oil, diced garlic and basil...bake at 400 for about 7 minutes... these make wonderful croutons!
  • Add the croutons to the top of the served soup. Serve at once!

Video

Notes

We find fresh Roma tomatoes are perfect for roasting, but most tomatoes will work.  Thick slices are best.  Be sure to cut away any brown spots, especially on the top of the tomato.  The roasted tomatoes can be made up 1 day in advance, but we think using them within a couple of hours or roasting is best. 
Fresh thyme and basil is always best, but if using dried, then reduce the thyme to 1½ teaspoons and ¼ cup of dried basil. 
Whole milk, or half-and-half can be substituted for the cream, although the soup won't be as silky and the taste not as rich, but will still be delicious.
Substitute vegetable stock/broth for the chicken stock to make the soup 100% vegetarian. 
The soup will keep in the fridge for up to 1 week and freezes beautifully for up to 2 months. 

Nutrition

Calories: 190kcal | Carbohydrates: 9g | Protein: 3g | Fat: 12g | Saturated Fat: 5g | Cholesterol: 37mg | Sodium: 389mg | Potassium: 283mg | Fiber: 1g | Sugar: 5g | Vitamin A: 1161IU | Vitamin C: 13mg | Calcium: 36mg | Iron: 1mg

POST UPDATE: This recipe was originally published in March 2014, but was updated with improved tweaks to the recipe, new tips, photography, and a brand-new fabulous video in March 2020!

Pub-Style Guinness Beef Pie

March 15, 2020 by Kris Longwell 74 Comments

Pub-Style Guinness Beef Pie recipe

This Pub-Style Guinness Beef Pie recipe is truly something to celebrate.  How about St. Patrick’s Day!  Or any day of the year, for that matter.

We love ordering these at our favorite Irish pub, but I have to say…I think this version is even better.

Pub-Style Guinness and Beef Pie recipe

HOW TO MAKE GUINEESS BEEF PIE

We promise this dish isn’t difficult to make. You don’t need the luck of the Irish to make it, you just need a little time.

The meat mixture filling can be made several days in advance and is actually even better after it sits for a day or so. Even the dough for the crust can be made in advance!

Watch us show you how to make Guinness Beef Pie!

The ingredients in this Guinness Beef Pie are just the essence of comfort food. Starting with a nice brisket, which is a perfect cut of meat to braise.

Combined with the smoked bacon, sautéed mushrooms, carrots, herbs, and of course, Guinness, you’ve got the lineup for a stunning and delicious dish.

Guinness Beef and Pie recipe

GUINNESS BEEF PIE IS STEEPED IN HISTORY

The combination of porcini and white button mushrooms and thick pieces of smoked bacon just kick our senses into high gear.

It is such a beautiful marriage of mushrooms and bacon to have in this incredible dish. The flavors here and the texture are really unmatched.

But we’re just getting started.

Guinness Beef Pie recipe

Now, I’ve got to tell you…if you are going to make this Guinness Beef Pie, and by all means, you really must, I implore you to make the Perfect Pie Crust. (click link for easy-to-follow recipe)

It is really not that difficult, and it can easily be made up to 2 days ahead, as well as the filling for this dish!

Just take your time, make these amazing components, and then bring them all together when you are ready to serve up something truly spectacular.

perfect pie crust recipe

CAN BE PREPARED IN STAGES

When the stew is simmering on the stovetop and then in the stove, you’ll begin to imagine what this amazing dish will taste like on that first bite.

It will take you to the beautiful lush green hills of Ireland and back home.  This dish is the stuff that legends are made of.

This dish is layered in tradition and incredible taste. You can also easily double the recipe and serve a St. Patrick’s Day crowd!

Guinness and Beef Pie recipe

And now, we’re really getting close.

In goes the incredible stew, ready to be topped off with another layer of the Perfect Pie Crust.

And then it’s baked to perfection.

Maybe it’s time to crack open a Guinness and celebrate what you’re creating here.

Guinness and Beef Pie recipe

GUINNESS PIE IS A ST. PADDY’S TRADITION

Now, it’s time to count your lucky Irish four-clovers because you are about to make one of the most impressive and delicious dishes of your life!

Trust us when we tell you, when you present this dish to your loved ones, they will absolutely gasp in impressed astonishment. And don’t worry about all about making this incredible Pub-Style Guinness and Beef Pie…you’ve got the luck of the Irish on your side.

Guinness and Beef Pie recipe

Ready to make the best St. Paddy Day meal in the world?  Go for it!

And when you do, be sure to take a picture, post it on Instagram, and tag @howtofeedaloon and hashtag #howtofeedaloon!

A Guinness beef pie sitting next to a bottle of Guinness beer.
Print Recipe
5 from 20 votes

Pub-Style Guinness Beef Pie

This Pub-Style Guinness Beef Pie recipe is about as comforting and fulfilling as any recipe ever was. The Guinness and porcini add such a depth of flavor and the slow simmered beef becomes fork-tender. And of course, the crust. You simply must make this with the crust. It all comes together to make Irish magic! You will need 10 oz. ramekins, or you can make in a pie dish.
Prep Time30 minutes mins
Cook Time4 hours hrs
Total Time4 hours hrs 30 minutes mins
Course: Entree
Cuisine: Irish
Servings: 4 people
Calories: 899kcal
Author: Kris Longwell

Equipment

  • Dutch oven, or oven-ready dish/pot.
  • 2 10 oz. ramekins, or a pie dish

Ingredients

  • 2 Perfect pie dough (link to recipe below) you will have enough for two pie crusts, top and bottom
  • 2 oz porcini mushrooms dried
  • 2 tablespoon olive oil
  • Kosher salt and freshly ground black pepper
  • 3 lb brisket cut into bite-size chunks
  • 2 onions chopped
  • 3 large carrots chopped
  • 1 tablespoon brown sugar light or dar
  • 4 tablespoon all-purpose flour
  • 1 11.2 oz bottle Guinness
  • 2 beef bouillon cubes
  • 1½ cup beef stock
  • 1 tablespoon balsamic vinegar
  • 1 sprig thyme fresh
  • 1 bay leaf fresh
  • 2 sprigs parsley fresh
  • 4 strips bacon smoked, thick-cut
  • 8 oz mushrooms sliced or halved
  • 2 tablespoon butter for greasing the pan, or cooking spray
  • 1 egg yolk plus 1 tablespoon water (make an egg wash in a small bowl)
  • Coarse sea salt for topping
US Customary - Metric

Instructions

MAKE AHEAD

  • Perfect Pie Dough (click for easy recipe)

PREPARE THE BEEF PIES

  • Heat 2 cups of water in the microwave until steaming. Place the porcini dried mushrooms in a bowl and add the hot water. Stir to submerge all mushrooms. Let sit for 15 to 20 minutes.
  • Strain the porcini mushrooms and liquid through a sieve into another medium bowl. Place the mushrooms on a cutting board and roughly chop them. Save the strained liquid.
  • Preheat oven to 325°F.
  • Season the meat with salt and pepper.
  • Heat 1 tablespoon oil in a large heatproof pot (preferably a Dutch oven) over medium-high heat and sear the meat until browned all over. You'll probably need to do this in batches. Set aside.
  • At this point, if excess liquid (fat) has accumulated in the pot, discard most of it.
  • Over medium heat, in the same pot, add the onions and carrots, adding a little more oil, then sauté until starting to get soft, about 8 minutes.
  • Add in the sugar and flour, stirring to coat and make a roux, about 4 minutes.
  • Add the meat, and any collected juices, back into the pot and mix with a wooden spoon.
  • Warm the stock (either in the microwave or on the stove). Crumble the bouillon cubes into and whisk until dissolved.
  • Add in the Guinness, stock, balsamic, porcini mushrooms, and the porcini soaking liquid.
  • Tie together the thyme, parsley and bay leaf and nestle into the pot.
  • Add 1 teaspoon salt and ½ teaspoon black pepper.
  • Cover with lid and place in preheated oven for 3 hours.
  • While the stew is cooking, cook the bacon in a large skillet over medium heat, until crisp. Drain on a paper-towel-lined plate. Roughly chop and set aside.
  • Add the mushrooms and cook until they have released their liquid and starting to turn golden. Set aside.
  • Once the stew is finished, stir in the bacon/mushroom mixture.
  • Increase oven temperature to 425°F. Liberally grease your ramekins or pie dish/pan with softened butter or cooking spray.
  • Roll out the first pie dough to about ¼" to ⅛" thickness. If using ramekins, cut 4 circles out that are about 2 to 3 inches wider in diameter than the top of each ramekin. If using a pie dish/pan, cut a circle out that is about 2 inches wider in diameter than the top of the pie dish/plate.
  • Line the ramekins (or pie dish/pan) with the cut dough with overhang. Use scissors (or knife) to trim away the excess dough. The dough should just reach the top of the dish.
  • Par bake the dough in the oven, using pie weights, or lining the bottom of the dough with parchment paper and adding dried beans. Bake for about 12 minutes and then remove from oven and remove weights or beans/parchment paper.
  • Lower oven temperature back t 325°F.
  • Add the beef to the dish using a slotted spoon so not too much sauce goes into the pie.
  • Fill until the meat mixture is slightly higher than the rim of the dish. You may have extra stew...that's okay, it freezes beautifully and is also delicious by itself.
  • Roll out the remaining dough to the same thickness and cut a circle just big enough to cover the ramekins or dish/pan.
  • Brush the edges of par-baked pastry with the egg wash, then cover with the dough top(s).
  • Crimp the edges of the dough to seal them together, then re-roll your trimmings to make a decoration (i.e., tree leaves), if you prefer.
  • Use a sharp knife to make two large slits in the top dough, then add the decorations (if using), and then brush the top generously with the egg wash.
  • Sprinkle the coarse sea salt and black pepper over the top. Place on a baking sheet and bake for 40 to 50 minutes, until golden.
  • Remove from the oven and place on a baking rack for 10 to 20 minutes. Serve and enjoy!

Video

Notes

You can use a beef chuck roast as a substitute for the brisket. 
If you can't find dried porcini mushrooms, you can use any variety of dried mushroom.  ALWAYS be sure to reconstitute the mushrooms in warm/hot water before consuming them. 
The filling can be made up to several days in advance.  In fact, letting the filling sit for a day or two makes the flavors meld together even more.
The dough can be made up to a day in advance.  Wrap in plastic and keep in the refrigerator. 
If you have access to a second oven, the bottom layer of crust can be par-baked while the filling is cooking in the oven. 

Nutrition

Calories: 899kcal | Carbohydrates: 33g | Protein: 81g | Fat: 32g | Saturated Fat: 8g | Cholesterol: 289mg | Sodium: 1170mg | Potassium: 1984mg | Fiber: 5g | Sugar: 10g | Vitamin A: 9303IU | Vitamin C: 10mg | Calcium: 60mg | Iron: 8mg

POST UPDATE: This recipe was originally published in March 2018 but was updated with improved tweaks to the recipe, tips, photography, and a fabulous new video in March 2020!

Instant Pot Corned Beef with Cabbage

March 12, 2020 by Kris Longwell 17 Comments

A platter of Instant Pot corned beef and cabbage

If you’re looking for the perfect (and easy) recipe to celebrate St. Patrick’s Day with, you’ve found it.

There is something so soothing and very delicious when these wonderful ingredients come together in the Instant Pot! And it’s really a full meal in one pot. You’ve got carrots, potatoes, beef, and of course, cabbage! And it’s on the table in less than 90 minutes!

A platter of Instant Pot corned beef and cabbage

HOW TO MAKE INSTANT POT CORNED BEEF WITH CABBAGE

This brisket cut is cured with salt, so it is just loaded with flavor. And thanks to the Instant Pot, it couldn’t be easier to make.

Bring along the potatoes, carrots, and cabbage, and the flavorful aromatics that come in the spice packet of the roast, and you’ve got something truly magical to serve!

Corned Beef with Cabbage recipe

Of course, this dish is popular at New Year’s, too. Legend has it, this dish brings you luck for the new year! In the Southern U.S., black-eyed peas are New Year’s tradition, and we just love that dish. We love to start the feast off with Creamy Irish Potato Soup!

But, boy, oh boy, do we love Corned Beef with Cabbage, too!

Set a platter of this deliciousness out at your St. Paddy’s Day or New Year’s Eve party, and you’ll be guaranteed to have a wonderful and prosperous year (or at least a fulfilling NYE!).

Corned Beef with Cabbage recipe

TENDER CORNED BEEF

Many home cooks find that corned beef can be tough, even after a long, slow roast in the oven.

The Instant Pot solves this problem, in a fraction of the time.

You won’t believe how tender and juicy the brisket is when you first cut into it.

Corned Beef with Cabbage recipe

Use a sharp knife to slice the corned beef against the grain. Place on a nice platter with the steamed vegetables. We just love the presentation of the dish as well as the amazing comforting taste and texture.

This Instant Pot Corned Beef with Cabbage is so good at New Year’s and St. Paddy’s Day, but we love it any time of the year.

Corned Beef with Cabbage recipe

Ready to make the best St. Patrick’s Day recipe of them all? Go for it!

And when you do, be sure to take a picture, post it on Instagram, and tag @howtofeedaloon and hashtag #howtofeedaloon!

A platter of Instant Pot corned beef and cabbage
Print Recipe
5 from 2 votes

Instant Pot Corned Beef with Cabbage

This Instant Pot Corned Beef with Cabbage is a St. Paddy's Day and New Year's Eve tradition, but it's so easy to make in the Instant Pot, we have it year round. The flavors go together perfectly. Find the corned beef in the packaged meat section in most supermarkets. So delicious!
Prep Time10 minutes mins
Cook Time1 hour hr 5 minutes mins
Total Time1 hour hr 15 minutes mins
Course: Entree
Cuisine: American
Servings: 6 people
Calories: 557kcal
Author: Kris Longwell

Equipment

  • Instant Pot

Ingredients

  • 3 lb corned beef brisket 3 - 4 lbs, with spice packet
  • 4 cloves garlic peeled
  • 6 cups water
  • 1 lb potatoes baby red, quartered
  • 1 lb carrots 3 to 4 large, peeled, cut into 1" pieces
  • 1 small green cabbage cut into 6 wedges

Instructions

  • Place the garlic and corned beef into the Instant Pot.
  • Add the water and sprinkle the contents of the spice packet over the top.
  • Secure the lid on the Instant Pot, move the valve to SEAL and select the MEAT/STEW setting on HIGH PRESSURE for 55 minutes.
  • Let pressure release naturally for 30 minutes.
  • Remove the lid and carefully transfer beef to a carving board and tent with foil.
  • Remove 2 cups of the water from the Instant Pot and set aside. Carefully discard the remaining water (use oven mitts to do this).
  • Add the 2 cups of water back into the Instant Pot.
  • Place a steamer basket in the pot and add the potatoes, then carrots, then cabbage, in that order.
  • Secure the lid on the Instant Pot and STEAM on HIGH for 5 minutes.
  • Perform a Quick Release and remove the veggies from the Instant Pot.
  • Slice the beef against the grain and place the vegetables around the meat.
  • Lightly salt and pepper the veggies. Serve at once!

Video

Notes

The cooked corned beef is wonderful the following day.  
The beef and vegetables will keep in the refrigerator for up to 1 week.  The brisket will freeze for up to 2 months.  We don't recommend freezing the vegetables as they will break down during the freezing process. 

Nutrition

Calories: 557kcal | Carbohydrates: 25g | Protein: 38g | Fat: 19g | Saturated Fat: 7g | Cholesterol: 122mg | Sodium: 2854mg | Potassium: 1438mg | Fiber: 7g | Sugar: 7g | Vitamin A: 12746IU | Vitamin C: 118mg | Calcium: 122mg | Iron: 7mg

POST UPDATE: This recipe was originally published in December 2017, but was updated with tweaks to the recipe, new photography, and a fabulous new video in March 2020!

Mediterranean Pasta with Shrimp

March 10, 2020 by Kris Longwell 27 Comments

A large silver saucepan filled with Mediterranean pasta with shrimp.

Mediterranean cuisine draws from the sea and the surrounding cultures of France, Italy, Greece, and more.

This dish is not only amazing in flavor, but it’s also incredibly easy to prepare and is healthy, too! If you’re feeling really ambitious, make the pasta from scratch!  And the dish comes together in about 30 to 40 minutes!  Perfect for a weeknight meal or a glorious dinner party on the weekend!

A large silver saucepan filled with Mediterranean pasta with shrimp.

HOW TO MAKE MEDITERRANEAN PASTA AT HOME

Pick yourself up some nice large shrimp from your favorite fish market.

The other Mediterranean ingredients we love to use include:

  • Artichoke hearts
  • Sun-dried tomatoes (in oil)
  • Olives (we love Kalamata)
  • Garlic
  • Olive oil
  • Red pepper flakes
  • Fresh parsley

SEARING THE SHRIMP

Part of what makes this dish so quick is that none of the elements requires an extended cook time. Searing the shrimp is no exception.

We simply heat 4 tablespoon of good-quality olive oil in a nice, large skillet over medium-high heat and then add the seasoned shrimp. After 2 or 3 minutes, simply flip the shrimp, and cook until they’ve curled a bit and are beautifully pink.

EXPERT TIP: All that’s needed to season the shrimp is a few pinches of salt and pepper. Once placed in the hot oil, don’t move the shrimp around until they are ready to flip, about 2 to 3 minutes. Another option would be to rub a little olive oil all over the shrimp, salt and pepper them, and then grill them over hot heat for a few minutes per side. Either way of preparing them is great, but we really love searing them in the same skillet that you’ll be preparing the rest of the dish in.

A large silver saucepan filled with sautéed shrimp.

Remove the cooked shrimp to a clean plate.

Next, it’s time to toss in the halved or quartered artichoke hearts, onion, garlic, lemon zest, and red pepper flakes.

Sauté them until softened and the artichokes are starting to brown, just a little.

A large silver saucepan filled with sautéed artichokes, onions, and garlic.

CHOOSING THE RIGHT WINE

White wine is the basis for many Mediterranean Pasta dishes.

We love a good dry wine such as Chardonnay or Sauvignon Blanc.

EXPERT TIP: Bring the sauce to a boil, and then lower the heat slightly and simmer for about 10 minutes. This will remove all but very small traces of alcohol in the dish. If you prefer not to cook with wine, then omit it completely, increase the stock to 2 cups, and add 1 tablespoon of your favorite vinegar; balsamic would be a good choice.

A hand pouring white wine from a small bottle into a skillet of cooked vegetables.

Now, it’s time to bring this amazing Mediterranean Pasta home!

Add in the remaining ingredients (except for the cooked shrimp) and simmer until slightly thickened, about another 10 minutes.

We love the combination of these ingredients, but you could also include sautéd mushrooms, sausage, and/or spinach.

A large silver saucepan filled with olives and sun-dried tomatoes with a wooden spoon in it.

EXPERT TIP: This is a good time to bring a pot of salted water to a boil. We love using linguine, but many types of pasta would work. Long pasta, such as bucatini, spaghetti, angel hair, or fettuccini would be great choices.

Once the sauce has thickened slightly, all that’s needed is the shrimp.

Slowly transfer the shrimp to the pan and stir to combine.

Drain the pasta, and stir it in until fully mixed.

Seared shrimp falling from a wooden cutting board into a pan of cooked artichokes and olives.

THE PERFECT WEEKNIGHT DINNER

This dish is incredibly delicious, but is also so quick and easy to prepare, it’s perfect for those busy weeknights.

But, just look at this dish, too.

It would be a gorgeous pasta dish for a glorious dinner party. Serve it with a Classic Caesar Salad and a nice crusty loaf of Italian bread.

A white bowl with a large edge holding Mediterranean pasta with shrimp.

MEDITERRANEAN PASTA WITH SHRIMP FAQs

  • Can a different protein be used in the dish? Absolutely! This dish is extremely adaptable to what your favorite ingredients are and what you have on hand. Grilled chicken breasts would be fantastic. Just cook them, slice them, and then stir them in at the end. Italian sausage is great, as is chicken or turkey sausage. You could even leave the meat out completely, use vegetable stock, and have a delicious vegetarian dish!
  • Can I use dried sun-dried tomatoes (not in oil or water)? Of course! You’ll just need to re-hydrate them by soaking them in warm water for about 10 minutes. You can also use bottled sun-dried tomatoes in water.
  • What wine pairs best with the dish? We’d go with a nice, crisp Sauvignon Blanc, Chardonnay, or Pinot Grigio. Get a couple of bottles, and be sure to use it in the dish. That makes a big difference!
  • How much can be made in advance? Since this dish is so quick to prepare, we recommend serving this fresh from the stove. You could cook the shrimp up a few hours early and also cook the pasta, then add a few dashes of olive oil to coat the pasta, and then cover until ready to add to the sauce. Although the sauce can be made in advance (up to 1 day), you’ll still have a wonderful dish. But, we think fresh is best!

A close-up view of a bowl filled with Mediterranean pasta.

Ready to make the best pasta dish this side of the Amalfi Coast? Go for it!

And when you do, be sure to take a picture, post it on Instagram, and tag @howtofeedaloon and hashtag #howtofeedaloon!

A large silver saucepan filled with Mediterranean pasta with shrimp.
Print Recipe
5 from 9 votes

Mediterranean Pasta with Shrimp

This pasta dish is so fresh and deep in flavor. Perfect for weeknights but also elegant enough for a lovely weekend dinner party. Serve with chilled white wine and crusty Italian bread.
Prep Time15 minutes mins
Cook Time25 minutes mins
Total Time40 minutes mins
Course: Italian
Cuisine: Italian
Servings: 4 people
Calories: 568kcal
Author: Kris Longwell

Equipment

  • Large (12-inch) saucepan/skillet
  • Pot for boiling pasta

Ingredients

  • 1 lb shrimp large, peeled and deveined
  • salt and pepper
  • 4 tablespoon olive oil
  • 1 14 oz. can artichoke hearts drained, halved or quartered
  • 1 medium yellow onion chopped
  • 6 cloves garlic minced
  • 2 teaspoon lemon zest
  • ⅛ teaspoon red pepper flakes or more, to taste
  • 1 cup white wine
  • 1 cup chicken stock
  • 2 tablespoon lemon juice
  • 1 cup sun-dried tomatoes in oil, drained and roughly chopped
  • 1 cup kalamata olives pitted, left whole or halved
  • 2 tablespoon flat-leaf parsley fresh, chopped, divided
  • 12 oz linguine fresh or dried

Instructions

  • Bring a large pot of salted water to a boil.
  • Meanwhile, sprinkle the shrimp with salt and pepper all over.
    1 lb shrimp, salt and pepper
  • In a large saute pan, heat the olive oil over medium-high heat. Add the shrimp and cook, without moving them around, for 2 to 3 minutes, until nicely pink and starting to brown on the edges. Use a spatula to flip and cook the other sides for another 2 to 3 minutes, until fully cooked, slightly curled, and bright pink. Set aside on a plate or platter.
    4 tablespoon olive oil
  • In the same pan, sauté the artichokes, onion, garlic, lemon zest, and red pepper flakes until the artichoke slices and onion start to brown, about 10 to 12 minutes.
    1 14 oz. can artichoke hearts, 1 medium yellow onion, 6 cloves garlic, 2 teaspoon lemon zest, ⅛ teaspoon red pepper flakes
  • Add the wine and stir gently to dislodge any bits from the bottom of the pan. Bring to a boil and then lower the heat slightly and simmer until reduced by about half, about 8 to 10 minutes.
    1 cup white wine
  • Add the stock, lemon juice, sun-dried tomatoes, olives, 1 tablespoon of parsley, ¾ teaspoon salt, and a healthy pinch of black pepper.
    1 cup chicken stock, 2 tablespoon lemon juice, 1 cup sun-dried tomatoes, 1 cup kalamata olives, 2 tablespoon flat-leaf parsley
  • Simmer until slightly thickened, about 10 minutes.
  • While the sauce is simmering, cook the pasta. Drain and return to the pot.
    12 oz linguine
  • Return the shrimp to the sauce just to warm through, about 2 minutes.
  • Add the cooked pasta to the sauce and stir around with tongs or a large wooden spoon until all the pasta is well-coated with the sauce.
  • Turn the pasta into a serving dish or individual bowls. Garnish with the remaining parsley and serve at once.

Video

Notes

You can easily substitute chicken for the shrimp.  Season it with salt and pepper and cook it in a skillet with olive oil over medium heat until cooked through.  Grilling the chicken is great, too.  Slice, or roughly chop, and add to the sauce during the final stage of the recipe.
To make this dish vegetarian, omit the protein (fish or meat) and use vegetable stock for the chicken stock. 
If you prefer not to use wine during the cooking process, double the stock and 1 tablespoon of a good vinegar, such as balsamic or apple cider.
You can use your favorite type of pasta, but we find the long pasta works great with the sauce.  Such as bucatini, spaghetti, or fettuccini. 
This dish is best served right off the stove, but you can cook the shrimp a couple of hours in advance.  The pasta can be cooked, drained, and then tossed with some olive oil and then covered, up to several hours before serving. 
It's still amazing the next day, gently heated in the microwave or on the stove.  It will keep in the fridge for up to 1 week.  The sauce freezes beautifully for up to 2 months. 

Nutrition

Calories: 568kcal | Carbohydrates: 87g | Protein: 40g | Fat: 9g | Saturated Fat: 2g | Cholesterol: 288mg | Sodium: 1048mg | Potassium: 1397mg | Fiber: 7g | Sugar: 16g | Vitamin A: 419IU | Vitamin C: 26mg | Calcium: 235mg | Iron: 7mg

POST UPDATE: The recipe was originally published in June 2014 but was updated with improved tweaks to the recipe, tips, new photography, and a fabulous new video in March, 2020!

Chicago-Style Deep Dish Pizza

March 8, 2020 by Kris Longwell 10 Comments

A Chicago-Style Deep Dish Pizza on a cutting board with a slice pulled out next to Parmesan cheese.

This pizza is truly the stuff that dreams are made of. Dreams of unbelievable deliciousness.

But folks, this isn’t a dream. It’s the real deal. The crust is buttery and classic Chicago-style. The sauce is robust. And the sausage and cheese are the perfect topping. If you want an authentic Chicago Deep-Dish pizza recipe, you’ve come to the right place. Let’s do this! This pizza gives New York-Style Pizza a run for its money! 

A Chicago-Style Deep Dish Pizza on a cutting board with a slice pulled out next to Parmesan cheese.

HOW TO MAKE CHICAGO-STYLE DEEP DISH PIZZA

As we go through this not-difficult-to-have-success process, we’ll show you exactly how to make a Chicago deep-dish pizza that rivals even the best in Chi-Town. Learn more about its amazing history here.

We’ll go over all this shortly, but here’s what makes a great Chicago deep-dish pizza: The dough! The dough! The dough! And then the sauce, the cheese, and the sausage. And did we mention the dough?

PERFECT CHICAGO DEEP-DISH PIZZA CRUST RECIPE

We are using a technique called laminating for this dough. It’s a similar concept to flaky, buttery croissants.

Butter is a key component of this dough. For the best results, we use our stand mixer and the dough attachment.

Mix together the flour, cornmeal, sugar, salt, and yeast. Add the warm water and melted butter and mix until the dough is smooth and satiny. About 5 minutes.

EXPERT TIP: We use Quick Rise (or Instant Rise) yeast for this recipe. You can use regular Active Yeast, too, you just may need the dough to rise a little longer for it to reach double in size. We do heat the water slightly, and the melted butter should not be scorching hot. If the water or butter is too hot, it will kill the yeast. Around 100°F is perfect.

Next, roll the dough into a smooth ball by rounding out the sides with your hands, and then place it in a greased bowl and cover it with plastic wrap. Place in a warm and draft-free area for 90 minutes to 2 hours.

Pizza dough in the bowl of a stand mixer.
A ball of pizza dough held by two hands.
A ball of pizza dough in a ceramic bowl.

BUTTERY AND FLAVORFUL GUARANTEED

After 1½ to 2 hours, the dough should have nearly doubled in size. Remove the plastic wrap, gently dump the dough onto a lightly floured surface, and press it down (or gently give it a couple of punches).

Use a rolling pin to roll the dough out roughly into a 9″x15″ rectangle. Brush on the ¼ cup of softened butter, and then roll the dough up with both hands from the short end of the rectangle.

Form the dough into a ball again, place it back in the greased bowl, cover it again with plastic wrap, and place it in the refrigerator for another 45 minutes.

Risen pizza dough in a ceramic bowl with a hand pulling back plastic wrap on top.
Two hands rolling pizza dough on a floured surface.

Now, it’s time to roll the dough out and transfer it to the pizza pan.

If you are using a 12-inch pizza pan, then roll the dough out to a 19 to 20-inch diameter. If using two 9-inch pans, then divide the dough into 2 pieces, and roll each out to a diameter of 14 to 15 inches.

Carefully transfer the dough to the pan, and trim away the excess. Use your fingers to press the dough along the edges of the pizza pan.

Two hands pressing pizza dough into a deep dish pizza pan.

CHICAGO-STYLE PIZZA SAUCE

The sauce for this pizza is quite simple to put together, yet deeply flavorful.

We use 7/11 Ground Tomatoes in our version, but if you can’t find ground tomatoes, you can use crushed tomatoes.

No cooking is needed. Simply mix together the tomato paste with the ground (or crushed) tomatoes and seasonings, and then stir in the hand-crushed whole tomatoes.

A clear bowl of Chicago deep dish pizza sauce with a wooden spoon in it.

Now, it’s time to layer the pizza.

Start with 4 cups of grated (or sliced) fresh mozzarella. Next is the sausage, and then the sauce.

EXPERT TIP: We recommend using fresh mozzarella rather than pre-shredded packaged cheese. There is just a better taste and texture with fresh. Shred the mozzarella with a box grater or thinly slice it. Also, no need to cook the sausage before baking the pizza. Simply layer in small pieces of the sausage to cover the mozzarella.

A hand layer pieces of Italian sausage over a bed of cheese in a pizza pan.
A spoon ladling pizza sauce over sausage in a deep dish pizza pan.

FINISHING THE PIZZA OFF

We love to top our Chicago-Style Deep Dish Pizza with a healthy amount of grated Parmesan.

The pizza is now ready to be baked.

EXPERT TIP: The pizza bakes for 28 to 30 minutes. Keep an eye on the crust, we usually loosely cover the pizza with a sheet of foil after about 15 minutes to prevent the edges from getting too browned.

Fingers sprinkling Parmesan cheese over an unbaked Chicago-Style Deep Dish Pizza.

After the pizza is finished baking, you’ll want it to rest for 10 minutes.

You will probably see some liquid bubbling on the surface when you take the pizza from the oven. This is normal and will settle while it rests.

Use a large spatula or wooden spoon to help you ease the pizza out of the pan and onto a cutting board.

A baked deep-dish pizza in a pizza pan.
A fully cooked Chicago-style deep dish pizza on a cutting board.

HOW TO SLICE CHICAGO-STYLE DEEP-DISH PIZZA

We find that using a serrated knife is the best way to slice the pizza.

Obviously, this dough is thicker than regular pizza crust and almost has a light bread texture to it.

Be sure to serve it nice and hot (although it’s still amazing even the next day!).

A slice of Chicago-style deep dish pizza being lifted from the pizza.

There is truly something magical about this pizza.

We love all kinds of pizza, including our wonderful Thin Crust Pizza with Soppressata, Mushrooms and Olives,and Detroit-Style Pizza.

And folks, just look at this deep-dish beauty.

A deep dish pizza with a slice missing on a cutting board.

CHICAGO-STYLE DEEP DISH PIZZA FAQs

  • Can I use Active Dry Yeast instead of Rapid Rise? Of course! You may need to allow the dough to rise a little longer, but even after just two hours, the dough should have doubled on the first rise.
  • Can I make this in a cast-iron skillet? Absolutely! We recommend using a 12-inch skillet if going with the cast-iron skillet method. Roll the dough out to at least 20 inches in diameter before placing to into the pan.
  • How far in advance can I assemble the pizza? You can assemble the pizza for up to an hour before baking. The longer the dough sits before baking, however, it will continue to rise. If you want to make the dough the night before, no problem, just let it proof (rise) in the refrigerator.
  • Does the entire baked pizza need to be removed from the pan? Not at all. It’s a little more challenging to cut out the first piece when it’s still in the pan, but it’s certainly doable.

A slice of Chicago-style deep dish pizza on an individual plate with a bite taken out.

Ready to make the best pizza that even the Windy City folks will rave about? Go for it!

And when you do, be sure to take a photo, post it on Instagram, and tag @howtofeedaloon and hashtag #howtofeedaloon!

A Chicago-style deep dish pizza with a slice missing sitting on a wooden cutting board.
Print Recipe
5 from 3 votes

Chicago-Style Deep Dish Pizza

Chicago-Style Deep Dish Pizza is nothing like thin-crust New York Pizza. But it is amazing...so much flavor from the wonderful crust, to the cheese, toppings, and zesty sauce. Baked to perfection!
Prep Time3 hours hrs
Cook Time45 minutes mins
Total Time3 hours hrs 45 minutes mins
Course: Pizza / Italian
Cuisine: American, Italian
Servings: 8 people
Calories: 693kcal
Author: Kris Longwell

Equipment

  • 1 12-inch deep dish pizza pan, or 2 9-inch cake pans with 2-inch straight-edge sides

Ingredients

FOR THE DOUGH

  • 3¼ cups all-purpose flour
  • ⅓ cup medium-ground cornmeal
  • 1½ teaspoon salt
  • 1 tablespoon sugar
  • ¼ oz. rapid rise yeast 1 package
  • 1¼ cups warm water 90 to 100 F
  • ¼ cup unsalted butter melted and cooled to 90 F
  • ¼ cup unsalted butter softened
  • 1 tablespoon olive oil for coating the pan

FOR THE SAUCE

  • ⅔ cup tomato paste
  • ¼ cup ground tomatoes
  • ¾ teaspoon oregano dried
  • ¼ teaspoon Kosher salt
  • ½ teaspoon extra-virgin olive oil
  • 1 28 oz. can whole tomatoes drained and hand-crushed

TOPPINGS

  • 4 cups mozzarella fresh, sliced or mozzarella
  • 14 oz Italian sausage hot or sweet, removed from casing and crumbled
  • ½ cup Parmesan cheese grated

Instructions

MAKE THE DOUGH

  • In the bowl of a stand mixer fitted with the dough attachment, add the flour, cornmeal, salt, sugar, and yeast. Mix on low until combined.
  • Turn the speed to medium and add the melted butter and then warm water. Continue mixing until the dough has come together and is smooth and not too sticky to the touch, about 5 minutes. Remove from the bowl, and use your fingers to form a ball, turn the edges under to smooth it out. Place in a large greased bowl. Cover with plastic wrap and place in a warm, draft-free area until doubled in size, 90 minutes to 2 hours.
  • Transfer the dough to a lightly floured surface, and gently punch the dough a few times with your hands. Roll the dough out to a 10" x 16" rectangle.
  • Smear the softened butter all over the dough. Starting at the short end of the rectangle, use your fingers to roll the dough, jelly-roll style, into a log. Lift the dough from the surface and form into a ball. Place back into the bowl, cover with plastic wrap, and place in the refrigerator for 45 to 50 minutes.

MAKE THE SAUCE

  • In a medium-sized bowl, whisk together the tomato paste, ground (or crushed) tomatoes, oregano, salt, and oil until completely mixed. Use your hands to crush the whole tomatoes into the bowl. Stir again until all is incorporated. Set aside.

ASSEMBLE THE PIZZA

  • Preheat oven to 475°F.
  • Remove the dough from the refrigerator and transfer it to a lightly floured surface. If using a 12-inch pan, use a rolling pin to roll the dough out to an 18 to 20-inch diameter. If using 2 9-inch pans, divide the dough in half, and roll them out to 15 to 16 inches in diameter.
  • Fold the dough in half to create a semi-circle. Then fold it again, into a quarter-circle.
  • Lightly oil the pizza pans and then gently transfer the dough to the pan. Unfold the pizza and use your hands to press the dough into the sides of the pan. Use a knife, or kitchen shears, to clip away excess dough that's hanging over the edge of the pan.
  • Add the mozzarella over the dough, and then pinch off pieces of the sausage and cover the cheese. Spread the sauce over the top, and then sprinkle on the Parmesan cheese.
  • Bake for 28 minutes, loosely covering the pizza with foil once the dough is nicely browned, usually after about 15 minutes.
  • Remove from oven and let rest for 10 minutes.
  • Use a hot pat to hold the pan at an angle with one hand. With the other hand and a large spatula, carefully ease the pizza out of the pan onto a cutting board or pizza paddle. Use a serrated knife to slice the pizza. Serve at once!

Video

Notes

Let the melted butter cool to 90 to 100°F before adding to the mixer.  Heat the water in your microwave for about 10 to 15 seconds, until it's warm, about 90 to 100 degrees.
If using Active Dry Yeast, give the dough a little longer to rise and double in size, typically a couple of hours.
If you can't find ground tomatoes, use crushed tomatoes instead.
No need to cook the sausage before baking the pizza.
Remember to tent the pizza with foil after about 15 minutes of baking to prevent the edges of the dough from burning. 
To remove the pizza from the pan, gently slide a large spatula under one side of the crust.  You may need to use one hand to pull one side of the pizza away from the pan, allowing you to slip the spatula under the pizza.  The dough is sturdy, so it should not come apart when transferring to a board.   Alternatively, use a sharp knife and/or pizza cutter to slice the pizza still in the pan. 

Nutrition

Calories: 693kcal | Carbohydrates: 46g | Protein: 28g | Fat: 32g | Saturated Fat: 12g | Cholesterol: 117mg | Sodium: 1498mg | Potassium: 450mg | Fiber: 2g | Sugar: 5g | Vitamin A: 1115IU | Vitamin C: 6mg | Calcium: 388mg | Iron: 4mg

POST UPDATE: This recipe was originally published in April 2014, but was updated with improved tweaks to the recipes, with new tips, photography, and a fabulous new video in March 2020!

The crust for this recipe was adapted from Cook’s Illustrated.

Authentic General Tso’s Chicken

March 5, 2020 by Kris Longwell 39 Comments

A white bowl of General Tso's Chicken with a pair of chop sticks next to it.

We absolutely love Chinese food so much. And this one of the most classic Chinese-American dishes of them all.

We’ve been playing with this recipe for many years now, and we are so happy to share with you this newly revised version. The chicken is crispy and yet incredibly tender. And the sauce? Oh, the sauce. And it all comes together in about 30 to 40 minutes!

VIDEO ALERT: Be sure to check out the video for this recipe in the recipe card.  If you like the video, subscribe to our YouTube Channel!

A white bowl of General Tso's Chicken with a pair of chop sticks next to it.

HOW TO MAKE AUTHENTIC GENERAL TSO’S CHICKEN

There are several tricks to making General Tso’s Chicken taste like what you get at your favorite Chinese restaurant. First and foremost, ‘mise en place’ is critical. This is a culinary French term meaning, everything in its place. Essentially, once this dish starts coming together, things move quickly. You won’t have time to run to the pantry to grab an item once you are stir-frying. Prep all the ingredients, have them easily within reach, and then get started.

Now, back to the dish, the chicken needs to be flavorful and tender on the inside, with a slight crunch on the outside.

And the sauce needs to be the perfect combination of sweet, savory, and if you prefer, a slight hit of spiciness.

START WITH THE CLASSIC SAUCE

Let’s start off by putting together the sauce. It’s really quite simple, but exploding with incredible depth of flavor.

What you’ll need:

  • Chicken stock
  • Corn starch
  • Rice vinegar
  • Tomato paste
  • Light soy sauce
  • Dark soy sauce
  • Brown sugar (we prefer dark)

EXPERT TIP: We strongly recommend you seek out both of the soy sauces: Chinese dark, and Chinese light. Chinese light is not low-sodium soy sauce. It is a “thin” soy used in traditional Chinese cooking. In a pinch, you could use traditional Japanese soy sauce. Dark soy sauce is thick and sweet, and honestly, there is no substitute. Good news: Both are more and more commonly found in the Asian section of most well-stocked supermarkets, or at your local Asian market. You can also order them online (see links above).

Simply whisk all the ingredients together in a medium-sized bowl and set aside.

A whisk in a white bowl of General Tso's brown sauce.

PREPARING THE CHICKEN FOR GENERAL TSO’S

We love using boneless, skinless chicken thighs for this iconic dish. It stays super tender and we think is deeply flavorful.

Coat the chicken pieces in the marinade ingredients along with the corn starch and then heat your oil to 375°F in your wok.

VERY IMPORTANT: We strongly recommend using a wok ring when cooking this dish!  The ring holds the wok in place, you do not want an unstable wok when you are cooking with hot oil! You’ll need to fry the chicken in two or three batches. Cook until nice and golden, about 4 to 6 minutes. Be sure to let the oil return to 375°F before continuing with the next batch.

A large metal wok sitting on a wok ring on a gas stove top.
A wok ring is super important for safety

Just look at the crispy, perfectly cooked chicken!

EXPERT TIP: After frying the chicken pieces, you’ll need to discard the oil from the wok. We recommend allowing the oil to cool somewhat, and then very carefully, use a funnel to transfer the oil to a heat-proof container. Most cities have a location where you can bring used cooking oil in larger quantities. It is not an environmentally good practice to pour used oil down your drain.

A slotted metal spoon holding pieces of fried chicken over a wok filled with hot oil.

Now, we’re ready to bring this dish home!

Heat 6 tablespoon of peanut oil in your wok.

As soon as the oil starts to shimmer, and very slightly smoke, add the peppers, ginger, and garlic.

A wok over a flame with chopped ginger, garlic, and red chili peppers cooking in hot oil.

After just 30 seconds, add in the prepared sauce.

Stir the sauce continuously for about 3 to 5 minutes.

The sauce will thicken before your eyes and should be smooth and silky. Keep stirring! Don’t let it burn.

A wooden spoon stirring a thick brown sauce in a large wok.

FINISHING THE DISH

Next, very carefully transfer the prepared chicken into the wok.

Use a wooden spoon to stir the chicken around in the sauce.

It will only take two or three minutes to warm the chicken. We love to finish the dish off by stirring in 2 tablespoon of sesame oil.

Pieces of fried chicken dropping from a platter into a wok filled with General Tso's chicken sauce.

We just love the sauce for Authentic General Tso’s Chicken.

So much that we made sure our version was good and saucy.

If you prefer less sauce, simply cut the sauce ingredients in half. But why would you want to that?

Cooked General Tso's chicken in a wok.

GENERAL TSO’S CHICKEN FAQs

  • Can I use chicken breasts instead of thighs? Of course! Just make sure to get boneless and skinless. We think the chicken thighs have great taste and texture for this dish, but with all the flavor that’s happening in this dish, chicken breast meat will work just fine.
  • Is there a substitute for Light Soy Sauce, Dark Soy Sauce, and Shaoxing Rice Wine? If you’re looking for the most authentic tasting General Tso’s, then get your hands on these ingredients. If that’s just not possible, then you use regular Japanese soy sauce for the light and the dark (there really is no substitute for dark soy sauce), and use either Dry Sherry or regular rice wine vinegar for the Shaoxing Rice Wine. These ingredients are becoming more increasingly available in many well-stock markets, and certainly in Asian food markets, or order online (click the links to order). 
  • Can I use a skillet, if I don’t have a wok? Sure! Go with a large, sturdy skillet, or saucepan that can handle high heat, and follow the recipe as written.
  • What is General Tso’s served with? It is best served with Perfectly Steamed White Rice and garnished with sesame seeds and chopped green onions (aka scallions).

A white plate of General Tso's Chicken on a bed of white rice with a pair of chop sticks nearby.

If you are a lover of this classic Chinese-American dish, then you’ve just got to give this recipe a try.

By the way, ever wondered where the name of this classic dish came from? Learn more here:

Here are some other amazing Asian dishes you will want to try:

Sesame Chicken
Homemade Egg Rolls
Sweet and Sour Pork
Beef and Broccoli Stir Fry
Authentic Shrimp Pad Thai

In the meantime, go and make this Authentic General Tso’s Chicken!

A close-up view of a white bowl holding prepared General Tso's Chicken next to another bowl of white rice.

Ready to make a dish better than any takeout you’ll ever have? Go for it!

And when you do, be sure to take a picture, post it on Instagram, and tag @howtofeedaloon and hashtag #howtofeedaloon!

A white bowl of General Tso's Chicken with a pair of chop sticks next to it.
Print Recipe
5 from 15 votes

Authentic General Tso's Chicken

This Authentic General Tso's Chicken is the real deal. Use the links below to easily order the Shaoxing rice wine, light soy sauce, and dark soy sauce online. It's super easy! And be sure to use a wok ring when making this dish. Super important! This dish is one of our all-time favorites!
Prep Time20 minutes mins
Cook Time20 minutes mins
Total Time40 minutes mins
Course: Chinese, Entree
Cuisine: Chinese
Servings: 6 people
Calories: 648kcal
Author: Kris Longwell

Equipment

  • Wok (with wok ring), or large, sturdy saucepan (skillet)

Ingredients

FOR THE CHICKEN

  • 2¼ lbs chicken thighs boneless, skinless, cut into 1 to 2-inch chunks
  • 1 teaspoon light soy sauce
  • 1 teaspoon dark soy sauce
  • 1 teaspoon Shaoxing rice wine
  • 2 egg yolks
  • ⅔ cup corn starch
  • 3½ cups peanut oil for frying, plus an extra tablespoon for the marinade mixture.

FOR THE SAUCE

  • ¾ cup chicken stock unsalted
  • 2 tablespoon corn starch
  • 2 tablespoon rice vinegar can use Shaoxing wine
  • 2 tablespoon tomato paste
  • 4 tablespoon light soy sauce
  • 2 tablespoon dark soy sauce
  • ¼ cup brown sugar we like dark

FOR STIR FRYING

  • 6 small dried red chiles arbul or Thai red peppers work well, ends snipped and slightly cut down the middle
  • 6 tablespoon peanut oil for frying (about ½ cup)
  • 2 teaspoon ginger fresh, finely chopped
  • 2 teaspoon garlic minced
  • 2 teaspoon sesame oil

FOR SERVING

  • 1 tablespoon scallions green onions, thinly sliced, for garnish
  • 1 tablespoon sesame seeds for garnish
  • 2 cups steamed white rice

Instructions

  • Place all the sauce ingredients in a bowl and whisk until the corn starch has dissolved and is fully combined. Set aside.
  • Place the chicken pieces in a large bowl. Add the soy sauces, 1 teaspoon peanut oil, and egg yolks. Mix with two large wooden spoons. Add the corn starch and continue mixing until the chicken pieces are coated with the marinade mixture.
  • Heat the oil (3½ cups) over high heat in your wok (on a wok ring), or heavy 12-inch saucepan. Working in batches, carefully add the coated chicken pieces into the oil, once it has reached 375°F. Cook until golden brown and cooked through, about 4 to 6 minutes. Transfer to a platter lined with paper towels. Set aside.
  • Let the oil cool somewhat, and then very carefully discard. Wipe the wok clean with paper towels and place back on wok ring on the stove. Heat the 6 tablespoon of oil over medium-high heat until shimmering and smoking very slightly.
  • Carefully add the peppers, garlic, and ginger and stir-fry for 30 seconds.
  • Add the sauce to the wok and stir constantly with a wooden spoon. Continue cooking and stirring until the sauce has thickened, about 3 to 5 minutes.
  • Carefully add the cooked chicken to the sauce in the wok and stir to fully coat. Simmer for about 2 minutes, enough time to heat the chicken pieces.
  • Turn the heat off and stir in the sesame oil.
  • Transfer the chicken with sauce to a serving platter. Garnish with sesame seeds and chopped green onions/scallions. Serve immediately with steamed white rice.

Video

Notes

Boneless, skinless chicken thighs are our choice for General Tso's, but you could also go with boneless, skinless chicken breasts, too.  (But thighs are better!).
When you add the corn starch to the marinated chicken, it will take a couple minutes of mixing with large spoons/utensils.  The chicken will seem a little 'gloopy', not like floured chicken when making Southern fried chicken.  This is normal, the chicken will get crisp.  Not overly crispy, but a nice golden crust.  Test one chicken piece after the first cooking to make sure it's cooked through.
Frying the chicken in the oil/wok should be done in a couple batches.  Once you add the chicken to the hot oil, use metal tongs or large utensil to circulate the chicken, and preventing them from sticking to each other. 
Be sure to slit the peppers before adding them to the oil.  They will impart a very small nuance of heat.  If you prefer absolutely no heat at all, leave them out.  
General Tso's Chicken, as we all know, is still pretty good the next day, but, of course, it's best served fresh from the wok.
A sturdy 12-inch skillet or saucepan will work if you don't have a wok.  When using a wok, we highly recommend a wok ring to prevent any spillage of the extremely hot oil.
A wok and wok ring will work on a gas stove or an electric stove, but is best over a flame. 

Nutrition

Calories: 648kcal | Carbohydrates: 29g | Protein: 31g | Fat: 38g | Saturated Fat: 9g | Cholesterol: 233mg | Sodium: 950mg | Potassium: 485mg | Fiber: 1g | Sugar: 10g | Vitamin A: 310IU | Vitamin C: 2mg | Calcium: 48mg | Iron: 2mg

POST UPDATE: This recipe was originally published in July 2017, but was updated with improved tweaks to the recipe with expert tips, new photography, and a fabulous new video in March 2020!

Best-Ever Mexican Rice

March 3, 2020 by Kris Longwell 22 Comments

A platter filled with a pile of homemade Mexican rice topped with a sprig of fresh parsley with a large serving spoon inserted in the side.

Best-Ever Mexican Rice comes together in about 30 to 40 minutes. We take you through the steps to make restaurant-quality rice every single time! It’s the ideal side to our Tex-Mex Beef Tacos, Ancho Enchiladas, and Stuffed Chili Rellenos!

A platter filled with a pile of homemade Mexican rice topped with a sprig of fresh parsley with a large serving spoon inserted in the side.
[feast_advanced_jump_to]

🍚 The Ingredients

Authentic Mexican rice relies on just a few simple ingredients, but using the right ones is essential to achieve its signature vibrant flavor and perfect texture. Find ingredient notes (including substitutions and variations) below.

An arrangement of ingredients for Mexican rice on a wooden background including chicken stock, diced onion, chopped tomatoes, garlic, rice, caldo de tomate, oil, and chili powder.

👉 Variations and Substitutions

  • Rice – We recommend going with white long-grain rice for the best texture. However, Basmati or Jasmine are fine substitutes. We don’t recommend instant rice or wild rice.
  • Broth – You can go with chicken broth or vegetable stock. Water can be used as a substitute.
  • Vegetables – You can use canned diced tomatoes, just be sure to drain them. The chopped onions and garlic do not impart strong flavor, but do contribute to the authentic taste.
  • Caldo de Tomate – This is one ingredient you don’t want to skip. It can be found in the soup section of most well-stocked supermarkets, or the Hispanic/Mexican section, at Hispanic markets, or online. Be careful when adding salt; the Caldo de Tomate (tomato bouillon) typically has salt in it.

See the recipe card (with video) below for a full list of ingredients and measurements.

👩🏼‍🍳 How To Make Best-Ever Mexican Rice

A person standing behind a blender filled with puréed tomatoes, onions, and spices.
  1. Step 1: Purée the tomatoes, onions, and garlic in a blender.  
A whisk being used to whisk chicken stock in a pan that has chili powder and tomato bouillon dissolved into it.
  1. Step 2: Heat the stock over medium heat and whisk in the Caldo de Tomate and chili powder. 
A wooden slotted spoon being used to stir long-grain rice in the bottom of a silver saucepan.
  1. Step 3: Toast the rice in a little oil over medium heat in a saucepan.
A wooden slotted spoon stirring a puréed tomato and onion mixture into a saucepan filled with toasted long-grain rice.
  1. Step 4: Add the puréed mixture to the rice and cook until most liquid has evaporated. 
A person pouring a seasoned chicken stock from one pan into another pan filled with long-grain rice and puréed tomatoes and onions.
  1. Step 5: Add stock, bring to a boil, then lower the heat, cover, and cook for 20 minutes.
A person submerged in a saucepan filled with homemade Mexican rice.
  1. Step 6: Fluff with a fork (or spoon) and serve at once. 

Expert Tip

For traditional Mexican rice, we prefer not to have large chunks of tomato and onion in the dish. If you want a little more texture from the vegetables, just give them a couple of quick pulses in the blender or food processor so they are not completely pulverized.

🍽️ How To Serve

  • One cup of rice will absorb much of the liquid and expand. This recipe will easily feed four people. It can also be doubled with no problem, but the cooking time may need to be slightly increased.
  • We love to serve the rice like they do at Mexican restaurants, on a large platter. Garnish with a sprig of cilantro for an attractive presentation.
  • This, along with authentic refried beans, is the perfect side to dishes like grilled steak fajitas, savory shrimp fajitas, or authentic beef enchiladas.

🙋🏽‍♂️ Frequently Asked Questions

Can Mexican Rice be made in advance?

Yes! You make the rice 3 to 4 hours in advance. Transfer the rice to a pan or dish and cover with foil. Heat in the oven (250°F to 350°F) until heated through, about 15 to 20 minutes.

Is there a substitute for the Caldo de Tomate

You can go with regular chicken bouillon, in a pinch. The Caldo de Tomate adds a depth of tomato and delivers the classic taste, but it’s still delicious with regular bouillon.

How do I keep my Mexican rice from burning or undercooking?

This is the big question. Everyone’s stovetop is different. It may take a little practice, but after you’ve brought the rice to a boil, be sure to turn the heat to low and cover the pan. Too high heat will cause the rice to burn. However, it’s not uncommon for there to be a layer of rice that sticks to the bottom of the pan. This is okay. If the heat is so low that it doesn’t fully cook the rice, simply add a little more liquid and continue cooking for another 5 to 10 minutes with the lid on. 

A person holding up a large spoon of homemade Mexican rice over a silver saucepan of the same.

🇲🇽 Other Classic Mexican Sides

  • A cast-iron skillet filled with refried beans and topped with crumbled Cojita cheese and several jalapeno slices.
    Authentic Refried Beans
  • An overhead view of a large white bowl filled with Cilantro Lime Rice next to scallions and a bunch of cilantro, with a silver spoon in the bowl.
    Cilantro Lime Rice
  • Best-ever guacamole in a black molcajete and topped with chopped tomatoes, bacon, and lime wedges.
    Best-Ever Guacamole
  • An overhead view of a large oval Dutch oven filled with borracho beans with a wooden spoon inserted into the middle of them.
    Authentic Borracho Beans

Ready to make the best Mexican rice this side of the Rio Grande? Go for it!

And when you do, be sure to take a picture, post it on Instagram, and tag @HowToFeedaLoon and hashtag #HowToFeedaLoon!

A platter filled with a pile of homemade Mexican rice topped with a sprig of fresh parsley.
Print Recipe
5 from 2 votes

Mexican Rice

We're really not making this up. This truly is the Best-Ever Mexican Rice! Find the Caldo de Tomate in the Latin section of your supermarket. We go with Knorr. If using a sodium-free version, you'll need to add ¾ teaspoon of salt when adding the other seasonings.
Prep Time10 minutes mins
Cook Time30 minutes mins
Total Time40 minutes mins
Course: Appetizer or Side Dish
Cuisine: Mexican / TexMex
Servings: 8 people
Calories: 146kcal
Author: Kris Longwell

Equipment

  • Blender or food processor
  • 2 saucepans, one preferably should be 3-quart pan approx. 8 inches in diameter.

Ingredients

  • 2 Roma tomatoes sliced in half
  • 1 cup onion roughly chopped
  • 2 cloves garlic
  • 1¾ cups chicken stock plus 2 tbsp, or water
  • 2 teaspoon Caldo de Tomate
  • 1 teaspoon chili powder
  • 2 tablespoon vegetable oil or olive oil
  • 1 cup long grain rice

Instructions

  • Place the tomatoes, onions, garlic in a blender, or food processor, and purée until smooth. Using a spatula to scrape down any onion pieces that didn't get puréed. Repeat and set aside.
    2 Roma tomatoes, 1 cup onion, 2 cloves garlic
  • In a medium saucepan, heat the stock over medium heat and stir in the Caldo de Tomate and chili powder.
    1¾ cups chicken stock, 2 teaspoon Caldo de Tomate, 1 teaspoon chili powder
  • Meanwhile, in a separate 3-quart saucepan, heat the oil over medium heat. Add the rice and cook, stirring occasionally, until it's slightly translucent and barely toasted, about 5 to 6 minutes.
    2 tablespoon vegetable oil, 1 cup long grain rice
  • Transfer the tomato/onion/garlic mixture into the pan with the rice. Raise the heat to medium-high and cook until any excess liquid cooks out, about 3 minutes.
  • Turn the heat to high and add the stock mixture to the rice. Bring to a boil, then lower the heat to low, and cover. Cook for 20 minutes.
  • Remove from heat, remove the lid, and fluff with a fork. Serve at once.

Video

Notes

NOTE: Watch the video near the top of the recipe for visual guidance.
If you can’t get decent Roma tomatoes, you can go with a 15 oz. can of whole tomatoes, drained.
Water can be sustituted for the chicken stock.  If you want 100% vegetarain, check the Caldo de Tomate label, in most varieties, there is some chicken fat.  You’ll need to use vegetable bouillon in place of the Caldo de Tomate.  The taste won’t be as authentic, but it will still be good. 
If using a sodium-free Caldo de Tomate, you’ll need to add ½ to ¾ tablespoon of salt to the cooking liquid.
It is not uncommon for there to be a thin layer of lightly burnt rice at the bottom of the pan.  We think it adds a little texture to the final dish.  However, if you prefer, when transferring the cooked rice from the pan to the serving dish, just don’t scrape the bottom of the pan. A soak in soapy water will make clean-up super easy. 
The rice can be made up to 1 day in advance, and we find that re-heating it on a baking sheet in a 350°F oven for about 20 minutes works best. 
The rice will keep in the refrigerator for up to 1 week and freezes for up to 1 month, although with Mexican rice, fresh is definitely best. 

Nutrition

Calories: 146kcal | Carbohydrates: 23g | Protein: 3g | Fat: 4g | Saturated Fat: 3g | Cholesterol: 2mg | Sodium: 82mg | Potassium: 153mg | Fiber: 1g | Sugar: 2g | Vitamin A: 203IU | Vitamin C: 4mg | Calcium: 16mg | Iron: 1mg

POST UPDATE: This recipe was originally published in April 2014, but was updated with improved tweaks to the recipe, expert tips, new photography, and a fabulous new video in March 2020!

Hearty Beef Stew

March 1, 2020 by Kris Longwell 27 Comments

A white bowl filled with hearty beef stew next to torn white bread.

If you’re looking for a stew that will comfort you, make you feel happy, and be about the most delicious bowl of yumminess you’ve had all year…you’ve come to the right place.

This stew is reminiscent of Beef Bourguignon, which slow cooks in a robust red wine. The meat is melt-in-your-mouth good and the depth of flavor is incredible. You can slow cook this in a pot, preferably a Dutch oven, or in your slow-cooker. Either way is comfort food at its very best.

VIDEO ALERT: Be sure to check out the video for this recipe in the recipe card.  If you like the video, subscribe to our YouTube Channel!

A white bowl filled with hearty beef stew next to torn white bread.

HOW TO MAKE HEARTY BEEF STEW

This easy beef stew recipe is a snap to make at home.

We’ll take you through all the easy-to-follow steps for honestly making the best beef stew you’ll ever eat or serve.

THE BEST BEEF FOR BEEF STEW

We highly recommend a nice 3 to 4 lb chuck roast for this hearty beef stew.

Now, there are different types of chuck roast.

EXPERT TIP: The best cuts of a chuck roast to look for are top blade, chuck eye, and arm pot roast. Be sure to look for thin streaks of fat throughout the meat – this is called ‘marbling.’ These streaks of fat melt during cooking and bastes the meat internally so it becomes moist and tender. However, don’t confuse marbling with the thicker strips of fat that separate distinct muscles.

Cutting the meat into 1-inch chunks, and the dredging them in seasoned flour, and then searing them in the pot locks in flavor and helps to keep the meat super tender.

A pile of seared beef chuck on a wooden cutting board.

BUILDING THE FLAVOR PROFILE

After the meat has been seared (usually in two batches), set the meat aside, and in the same pot, it’s time to sauté the vegetables.

If necessary, add a little more oil, and then add in the onions, carrots, and celery.

EXPERT TIP: As the meat sears, some of the meat and seasoned flour will stick to the bottom of the pan. This is normal and very good. A little later, when you add the red wine, you’ll use a wooden spoon to scrape up all the delicious goodness. This is called de-glazing and deepens the flavor of the stew.

A blue Dutch oven filled with carrots, celery and onion being stirred by a wooden spoon.

Next, goes in the wine. That’s right, an entire 750ML bottle of good quality, robust wine.

You’ll also add beef stock and hand-crushed whole tomatoes.

After simmering for 10 minutes, the alcohol cooks out, and the wine begins to transform into a deeply flavorful stew.

A bottle of red wine being poured into a blue Dutch oven filled with sautéed vegetables.

Finally, it’s time to add the meat back into the pot.

You’ll want to create a thickener at this point. We take a ¼ cup of all-purpose flour and combine it with a heaping tablespoon of tomato paste.

Whisk this into the hearty beef stew and it will slightly thicken.  NOTE:  The stew will continue to thicken as it slow cooks in the oven, or slow-cooker.

Seared beef being dropped into hearty beef stew from a cutting board.

HEARTY BEEF STEW SLOW COOKER VERSION

If you want to transfer the stew to a slow-cooker to finish cooking, this is the time to do it.

Simply add to your slow-cooker and set the setting to low, for 6 to 8 hours, or on high for 3 to 4 hours.

We love our slow-cooker, but we really love covering the stew in the Dutch oven with the lid, and then let it finish off in the oven for an hour and a half, to two hours. Stirring once or twice during the cooking.

A ladle filled with hearty beef stew over a Dutch oven of the stew.

WHAT TO SERVE WITH BEEF STEW

The stew is just amazing and always gets major rave reviews when we serve it to family and friends.

As with so many dishes, it’s even better the next day.

It’s very filling and is even better when served with Country White Bread, and you and your loved ones will be so very happy.

A hand dunking a torn piece of white bread into a bowl of hearty beef stew.

Just in case you need one more reason to make this stew.

Just take a close look at the bowl full of deliciousness.

We promise you, it’s just a good as it looks. Maybe even better!

Two hands holding a white bowl filled with hearty beef stew.

Ready to make the best Hearty Beef Stew in the land? Go for it!

And when you do, be sure to take a picture, post it on Instagram, and tag @howtofeedaloon and hashtag #howtofeedaloon!

A ladle filled with hearty beef stew over a Dutch oven of the stew.
Print Recipe
5 from 6 votes

Hearty Beef Stew

This Hearty Beef Stew is so heart-warmingly amazing. Slow cook in your oven with your Dutch oven (or your slow cooker) with a robust red wine. This will be the best hearty beef stew you'll ever have!
Prep Time15 minutes mins
Cook Time2 hours hrs 30 minutes mins
Total Time2 hours hrs 45 minutes mins
Course: Stew
Cuisine: American
Servings: 8 people
Calories: 501kcal
Author: Kris Longwell

Equipment

  • Large Dutch oven, or sturdy pot with a lid. Or, slow-cooker.

Ingredients

  • ¾ cup all-purpose flour you'll use 3 tablespoons at first, and then the rest at the end
  • 2 teaspoon Kosher salt divided, 1 teaspoon for dredging, 1 for tomato thickener
  • 1½ teaspoon black pepper divided, 1 teaspoon for dredging, ½ teaspoon for stew
  • 3½ lb beef chuck cut into 1 to 2-inch pieces
  • 2 tablespoon unsalted butter
  • 2 tablespoon olive oil
  • 1 cup yellow onion chopped
  • 1 cup carrots peeled and sliced
  • 1 cup celery chopped
  • 15 oz pearl onions if frozen, thawed
  • 1 750ML bottle red wine robust cabernet or burgundy is great
  • 1 28 oz can whole tomatoes drained and roughly chopped
  • 1 cup beef stock
  • 1 tablespoon tomato paste heaping

Instructions

  • Pre-heat the oven to 350F (unless using a slow-cooker).
  • On a platter, stir together the ½ cup flour, 1 teaspoon salt, and 1 teaspoon pepper.
  • Turn the beef pieces in the seasoned flour, shaking off any excess.
  • Heat the butter and oil in a large Dutch oven over medium heat.
  • Add half of the floured meat into the pan. Let cook for 5 minutes without stirring. Use a wooden spoon to turn the meat around in the pan, and cook for another 5 minutes until the meat is browned all over. Use a slotted spoon to remove the meat to a clean plate.
  • In the same pot, add a little more oil, if necessary. Add the onion, carrots, and celery to the pan and cook over medium-high heat, stirring often, until the vegetables have softened, about 5 - 8 minutes. Stir in the pearl onions.
  • Pour in the wine and use a wooden spoon to scrape up the browned bits from the bottom of the pan.
  • Stir in the tomatoes and stock and bring to a boil. Simmer for 10 minutes.
  • Meanwhile, in a small bowl, add ¼ cup of flour and the tomato paste. Use a fork to work the paste into the flour. It's okay if it's not completely a paste.
  • Return the beef to the pan. Add 1 teaspoon of salt and ½ teaspoon of pepper.
  • Stir in the tomato thickener and whisk for about 1 to 2 minutes, until slightly thickened. The stew will continue to thicken as it cooks in the oven or slow-cooker.
  • Place the lid on the pot and place in the oven for 1½ to 2 hours until the meat is very tender, stirring a couple of times during the cooking process. If using a slow-cooker, add the stew and cook on LOW for 6 to 8 hours, or on HIGH for 3 to 5 hours. Serve warm with bread!

Video

Notes

A 3 to 4 lb nicely marbled chuck roast works best for this stew.
Don't worry about the dark layer that will form on the bottom of the pan from searing the floured meat.  It is loaded with flavor and will come up with a wooden spoon after you've added the wine. This is called de-glazing.
It is very important to bring the wine (and stock and tomatoes) to a boil and then a strong simmer for 10 minutes. This cooks out the alcohol taste and transforms the wine into a wonderful sauce.
If you prefer to not cook with wine, then we suggest not making this particular stew.  The robust wine is critical to making this stew hearty and uniquely delicious. Another wonderful beef stew recipe (without wine) is our Slow Cooker Beef Stew. 
The stew is even better the next day.  It will keep in the refrigerator for up to 1 week and freezes beautifully for up to 2 months. 

Nutrition

Calories: 501kcal | Carbohydrates: 19g | Protein: 41g | Fat: 16g | Saturated Fat: 6g | Cholesterol: 145mg | Sodium: 842mg | Potassium: 943mg | Fiber: 2g | Sugar: 5g | Vitamin A: 2875IU | Vitamin C: 7mg | Calcium: 67mg | Iron: 5mg

POST UPDATE: This recipe was originally published in March 2015 but was updated with improved tweaks to the recipe with tips, new photography, and a fabulous new video.

Stuffed Cabbage Rolls

February 27, 2020 by Kris Longwell 9 Comments

A straight-on view of a stuffed cabbage roll with tomatoes sauce that has been split in half and spread open so the beef and rice filling is visible.

This is such a quintessential ‘farm-to-table’ recipe. Steeped in tradition and loaded with heart-warming goodness.

With a touch of sweetness in the sauce, countering perfectly against the beef filling and cabbage leaves, this filling dish is perfect for feeding a hungry family on a chilly evening. Actually, they are delicious any time of the year! And they are really fun to put together, all in less than 1 hour!

A straight-on view of a stuffed cabbage roll with tomatoes sauce that has been split in half and spread open so the beef and rice filling is visible.

How to Make Stuffed Cabbage Rolls

The Ingredients You Will Need

As you would expect, there are no exotic ingredients in this dish. You can even adapt the seasonings to your own tastes. Here’s what you’ll need to have on hand:

Green cabbage – The larger, the better. Don’t go with Napa cabbage.
Oil – Olive oil or extra virgin olive oil.
Medium-sized onion – One cut into slivers.
Celery – Chopped.
Tomato paste – Use half of a small can (6 oz).
Crushed tomatoes – Canned. Can substitute fresh tomatoes (2 cups), or a 28 oz. can of whole tomatoes, crushed with your hands (juice included).
Honey – Don’t skip this ingredient!
Lemon juice – Freshly squeezed is best.

For the Beef and Rice Filling

Ground beef – 90% lean is best (you won’t be able to drain any rendered grease). You can also opt for ground pork, turkey, chicken, or a combination of any of them.
Rice – Fully cooked. Steamed or instant rice works just fine.
Medium onion – Finely chopped.
Beef broth – Homemade or store-bought.
Seasonings – Smoked paprika, dried oregano, garlic powder, salt, and pepper.
Egg – Lightly beaten.

EXPERT TIP: Be very careful when lowering the cabbage into the boiling water. You will see the outer leaves start to pull away from the head. Use a pair of tongs (and possibly kitchen shears) to pull the leaves free, one after another.

A hand using a pair of tongs to life a cabbage leaf out of a pot of boiling water.

Tips for Making Perfect Stuffed Cabbage Rolls

Choose the Right Cabbage – Opt for a head of green cabbage that is firm and heavy. Blanch the leaves in boiling water for a few minutes until they are pliable. This will make it easier to roll them without tearing. You can also freeze the cabbage for a few days before using it; this helps to soften the leaves.

Create a Flavorful Filling – For the beef and rice filling, use ground beef, or a combination of beef and pork for added flavor and moisture. Cook the rice fully before mixing it with the meat to ensure it doesn’t absorb too much moisture from the filling. Season the mixture well with seasonings and herbs like smoked paprika, oregano, basil, dill, garlic, salt, and pepper for a more robust flavor.

Simmer the Sauce – Sauté the onions and celery for at least 15 to 20 minutes. The onions will begin to caramelize, producing a deeply flavorful, slightly sweet taste. Simmer the sauce for at least 15 minutes, stirring constantly. Taste and additional salt, if desired.

Let Rest Briefly, Then Serve at Once – As the rolls cook, there will be a little rendered grease from the beef. This adds flavor and texture to the tomato sauce. Let the dish rest for 5 to 10 minutes, and then serve immediately. The rolls will cool off quickly and they are best served nice and hot.

EXPERT TIP: Here’s how to roll the cabbage rolls: First, you’ll need to take a cabbage leaf. If there is a large, thick portion of the leaf from the core, simply trim it away. Add a couple of tablespoons of the mixture along the middle of the cabbage leaf, lengthwise. Next, simply fold the ends in and then roll the cabbage up.

A person using his two hands to roll an uncooked beef and rice mixture within a cabbage leaf on a wooden cutting board.

How To Serve

As mentioned, these rolls are definitely served hot.

This recipe will easily feed a family of four. Be sure to reserve sauce to serve at the table.

We love serving these rolls on top of a bed of best-ever mashed potatoes and warm, crusty bread. It is simple, farm-to-table comfort food at its very best.

EXPERT TIP: Ladle enough of the sauce over the rolls to cover them, but again, be sure to leave enough sauce for passing at the table. We love to plate the rolls onto a small pool of the delicious sauce for each serving.

A person using a medium-sized ladle to pour on a tomato sauce over stuffed cabbage rolls in a white square baking dish.

Other Classic Home-Style Recipes to Try

This dish reminds us of visiting Amish country in Lancaster County, in Pennsylvania. But it also takes us back to an amazing home-cooked meal by grandma. Here is a tried and true collection of nostalgic dishes that are sure to be instant family favorites:

  • Grandma’s Swiss Steak
  • Classic Salisbury Steak with Mushroom Gravy
  • All-American Pot Roast
  • Grandma’s Roasted Pork Loin
  • Homemade Chicken and Dumplings
  • Pan-Fried Pork Cutlets with Peaches
  • Southern Stewed Okra and Tomatoes
  • Grandma’s Homemade Kolaches
  • Classic Peach Pie
  • Old-Fashioned Vanilla Ice Cream

These are all classic in every possible way. But, in the meantime, isn’t this dish calling your name?

An overhead vide of six stuffed cabbage rolls that have been baked in a square with baking dish with a tomato sauce on top of the rolls and on top, too.

Classic Farm-to-Table Comfort Food

There is just something so comforting about this dish. The straightforward flavors work perfectly together.

Remember, you can also core the cabbage and then freeze it for 24 hours, and then let it completely thaw. This makes the leaves come away easily, too!

Even those in your family who think they don’t like cabbage will most likely flip for this dish. The cabbage texture and taste become mild and is the perfect vessel for the savory filling. The tomato sauce brings it all together!

Two vintage serving bowl filled with single servings of stuffed cabbage rolls ina rich tomato sauce.

Ready to make an amazing, authentic farm-to-table dish? Go for it!

A straight-on view of a stuffed cabbage roll with tomatoes sauce that has been split in half and spread open so the beef and rice filling is visible.
Print Recipe
5 from 5 votes

Stuffed Cabbage Rolls

Stuffed Cabbage Rolls have become a staple in our home, especially when the weather turns chilly. These are not hard to make and are so hearty and bursting with flavor. You'll feel like you're eating grandma's special dinner. So good!
Prep Time30 minutes mins
Cook Time1 hour hr 15 minutes mins
Total Time1 hour hr 45 minutes mins
Course: Entree
Cuisine: American, Amish
Servings: 5 people
Calories: 319kcal
Author: Kris Longwell

Equipment

  • large stock pot large enough to hold a head of cabbage

Ingredients

  • 1 large green cabbage

For the Sauce

  • 2 tablespoon olive oil
  • 2 tablespoon unsalted butter
  • 1 large onion thinly sliced
  • 3 ribs celery chopped
  • ¼ cup tomato paste
  • 1 28 oz can crushed tomatoes
  • ¼ cup honey
  • ¼ cup fresh lemon juice
  • 1 teaspoon Kosher salt
  • ½ teaspoon black pepper

For the Beef and Rice Filling

  • 1 lb ground beef chuck 90% lean
  • 1 medion onion finely chopped
  • 1 cup white rice cooked
  • ¼ cup beef stock
  • 1 teaspoon smoked paprika
  • 1 teaspoon oregano dried
  • 1 teaspoon garlic powder
  • 1½ teaspoon Kosher salt
  • 1 teaspoon black pepper
  • 1 large egg lightly beaten

For Serving

  • 2 tablespoon Italian parsley chopped, for garnish (optional)

Instructions

  • Use a sharp knife to remove the outer portion of the cabbage core carefully. Bring a large pot of water to a boil over high heat.
    1 large green cabbage
  • Carefully lower the cabbage into the water and cook, pulling off each outer leaf with tongs as it becomes tender, about 1 minute (or less) per leaf. Transfer the leaves to a baking rack on a baking sheet until you start to get close to the center of the cabbage. Depending on the size of the cabbage, you should get between 6 and 12 cabbage leaves.
  • Heat oil in a large saucepan over medium-high heat. Add the butter and stir until melted.
    2 tablespoon olive oil, 2 tablespoon unsalted butter
  • Add sliced onions and celery, and cook, stirring, until lightly caramelized, about 15 to 20 minutes.
    1 large onion, 3 ribs celery
  • Add tomato paste and cook, stirring, for another 1 to 2 minutes.
    ¼ cup tomato paste
  • Add tomatoes, lemon juice, honey, salt, and pepper and bring to a simmer. Partially cover and simmer for 15 minutes. Set aside.
    1 28 oz can crushed tomatoes, ¼ cup honey, ¼ cup fresh lemon juice, 1 teaspoon Kosher salt, ½ teaspoon black pepper
  • Preheat oven to 350°F.
  • Meanwhile, mix together the beef, onions, rice, beef stock, paprika, oregano, garlic powder, salt (1½ tsp), and pepper (1 tsp) in a large bowl. Stir in the egg until just mixed. Place in the refrigerator until ready to use.
    1 lb ground beef chuck, 1 medion onion, 1 cup white rice, ¼ cup beef stock, 1 teaspoon smoked paprika, 1 teaspoon oregano, 1 teaspoon garlic powder, 1½ teaspoon Kosher salt, 1 teaspoon black pepper, 1 large egg
  • Portion out the meat into mounds equal to the number of cabbage leaves (ie, 6 mounds of meat for 6 cabbage leaves). Working 1 at a time, place a beef mixture in the center of each cabbage leaf and slightly flatten, fold the sides inward, and then roll up.
  • Ladle enough sauce into a baking dish (9"x13 or smaller) to cover the bottom. Transfer rolls, seam side down, to the dish on top of the sauce. Top each of the rolls with more sauce, leaving enough sauce to serve at the table.
  • Bake until cooked through (at least 145°F), usually about 45 to 60 minutes (depending on the size of the rolls). Remove from the oven and let rest for 5 to 10 minutes. Garnish with chopped parsley and serve at once with extra sauce on the side.
    2 tablespoon Italian parsley

Video

Notes

See the video near the top of the blog post for visual guidance. If you liked the video, please subscribe to our YouTube channel. 
Don't worry about removing the entire core of the cabbage.  You want the cabbage to still be intact once added to the boiling water.
Be very careful lowering the cabbage into the boiling water.  Preferably, use heat-resistant gloves.  Or, find an extra pair of hands and a couple of large tongs to gently lower the cabbage head into the boiling water.  As an alternative, you can place the cabbage in the pot of water and then bring it to a boil.  Either way is perfectly acceptable.
Be sure to leave some of the sauce for serving the final dish. We like to ladle about a ½ cup of sauce on each plate, and then top it with a couple of cabbage rolls.
The dish can be assembled up to several hours before baking.
The cooked rolls will keep in the fridge for up to 1 week.  Although the dish is best served fresh, you can freeze up to 2 months before baking.  Reheat in the oven for 30 minutes, or until heated through and bubbly. 

Nutrition

Calories: 319kcal | Carbohydrates: 32g | Protein: 14g | Fat: 12g | Saturated Fat: 5g | Cholesterol: 67mg | Sodium: 162mg | Potassium: 612mg | Fiber: 5g | Sugar: 16g | Vitamin A: 510IU | Vitamin C: 61mg | Calcium: 93mg | Iron: 2mg

POST UPDATE: The recipe was originally published in October 2016, but was updated with improved tweaks to the recipe and tips, new photography, and a fabulous new video in November 2024!

  • « Previous Page
  • 1
  • …
  • 12
  • 13
  • 14
  • 15
  • 16
  • …
  • 21
  • Next Page »

Welcome!

Kris & Wesley (The Loon) live for fun, food, and fabulousness. "How to Feed a Loon" is a celebration of just that. Come join us on this joyous culinary ride.

More about us

Thanksgiving Favorites

  • A straight-on view of a glazed Cornish hen sitting on a bed of wild rice pilaf all on a white dinner plate with a fork nearby and another plate of the same in the background.
    Glazed Cornish Hens with Wild Rice Stuffing
  • A large oval platter holding five twice baked sweet potatoes that are topped with toasted marshmallows
    Twice Baked Sweet Potatoes
  • A Roast Turkey Breast with Herbs resting on a white platter garnished fresh sage leaves and lemon wedges and a large carving knife nearby.
    Roast Turkey Breast with Herbs
  • A large white platter of cooked and carved spatchcocked turkey with cranberries next to it.
    Spatchcocked Turkey
  • An overhead view of a square white baking dish filled with cornbread dressing and sausage and cranberries.
    Cornbread Dressing with Sausage and Cranberries
  • An overhead view of a large black oval baking dish that is filled with an untouched gourmet green bean casserole that is topped with fried onion strips.
    Gourmet Green Bean Casserole

Popular Recipes

  • best-ever chicken salad recipe
    Best-Ever Chicken Salad
  • A white soup filled with roasted tomato basil soup next to sliced grilled cheese sandwiches.
    Roasted Tomato Basil Soup
  • Mahi Mahi tacos on a wooden table in a taco holder
    Amazing Mahi Mahi Tacos
  • A lemon wedge being squeezed onto a platter of chicken francese
    Chicken Francese
  • Southern Shrimp and Cheesy Grits recipe
    Southern Shrimp and Cheesy Grits
  • Slow Roasted Pork Shoulder on a platter with a side of gravy
    Slow Roasted Pork Shoulder

Footer

↑ back to top

Explore

  • Recipe Index
  • About Us
  • Subscribe

About

  • Privacy Policy
  • Contact

Copyright © 2025 How to Feed a Loon • This website contains affiliate links, which means that if you click on a product link, we may receive a commission in return. How To Feed a Loon is a participant in the Amazon Services LLC Associates Program, an affiliate advertising program designed to provide a means for sites to earn advertising fees by advertising and linking to Amazon.com.

Rate This Recipe

Your vote:


A rating is required
A name is required
An email is required