• About Us
  • Recipe Index
    • Appetizers
    • Asian
    • Breads and Doughs
    • Cajun / Creole / Louisiana
    • Breakfast / Brunch
    • Comfort Food
    • Delectable Desserts
    • Entrees / Mains
    • Instant Pot
    • Italian
    • Pizza
    • Rubs, Spices and Sauces
    • Soups & Salads
    • Sides
    • Seafood
    • Southern
    • Mexican / Tex-Mex / Cal-Mex
    • Thanksgiving
    • Vegetarian
  • Videos
    • Recipe Videos
    • Web Stories
  • Work With Us
  • Contact
  • **Premium Access**
  • Recipes
menu icon
go to homepage
  • Thanksgiving
  • Recipes
  • About Us
  • Work With Us
  • Premium
subscribe
search icon
Homepage link
  • Thanksgiving
  • Recipes
  • About Us
  • Work With Us
  • Premium
×
Home » Recipe Index

Classic Pumpkin Pie

November 1, 2019 by Kris Longwell 8 Comments

A slice of pumpkin pie on a white plate next to a whole pumpkin pie.

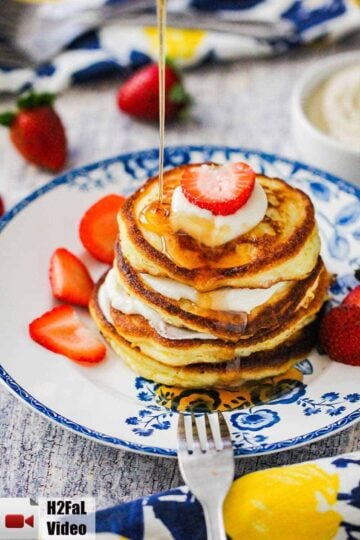
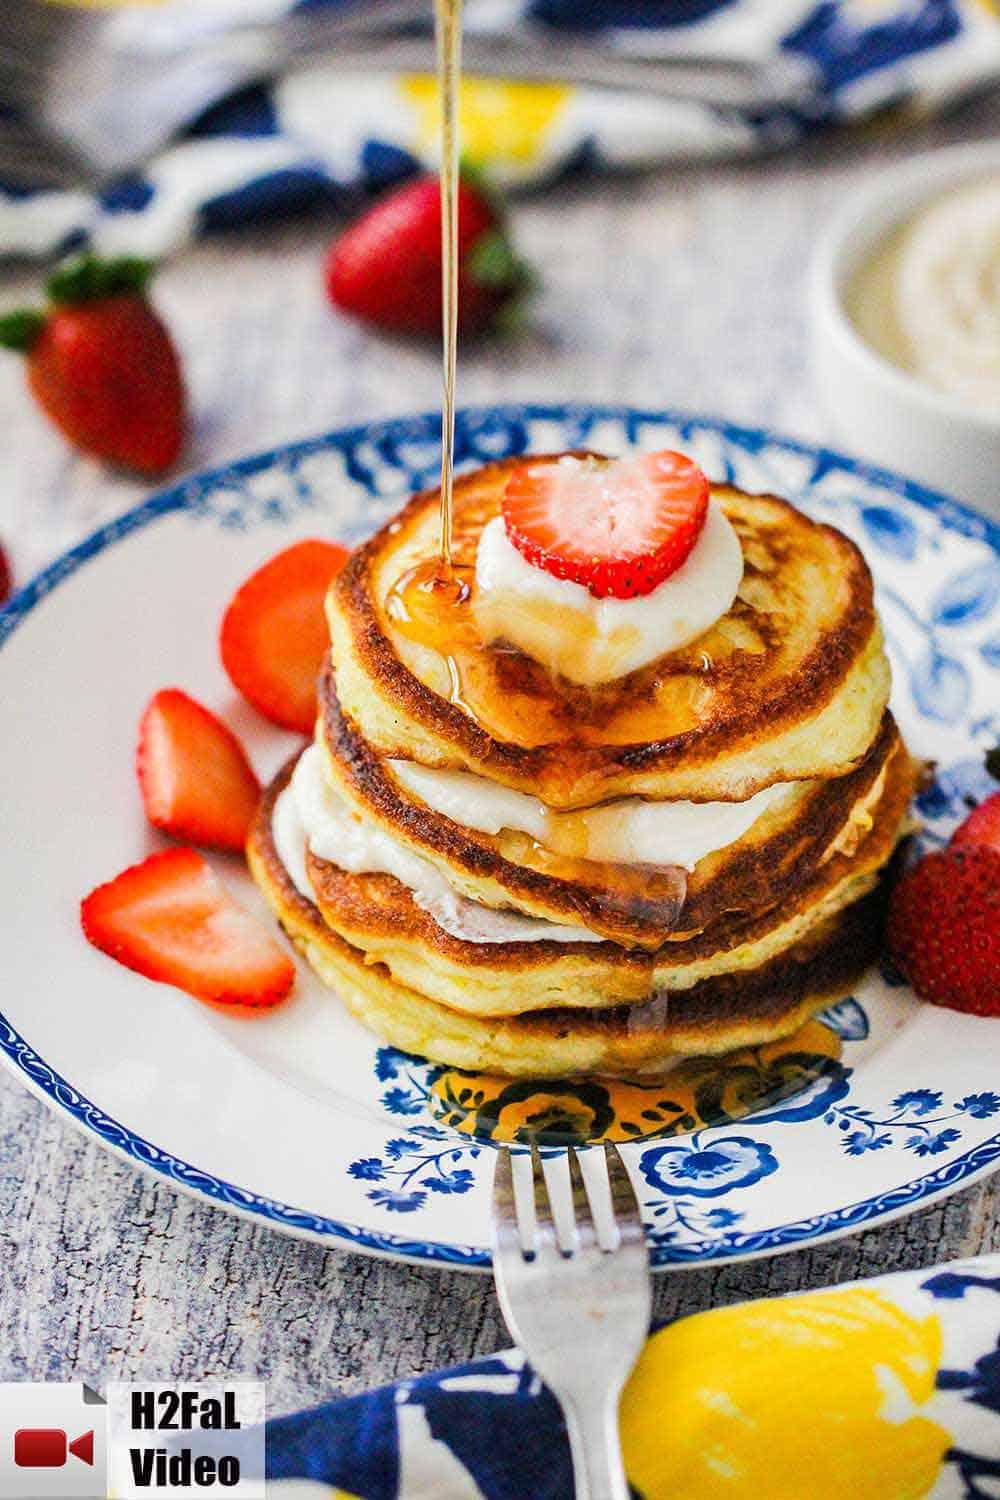
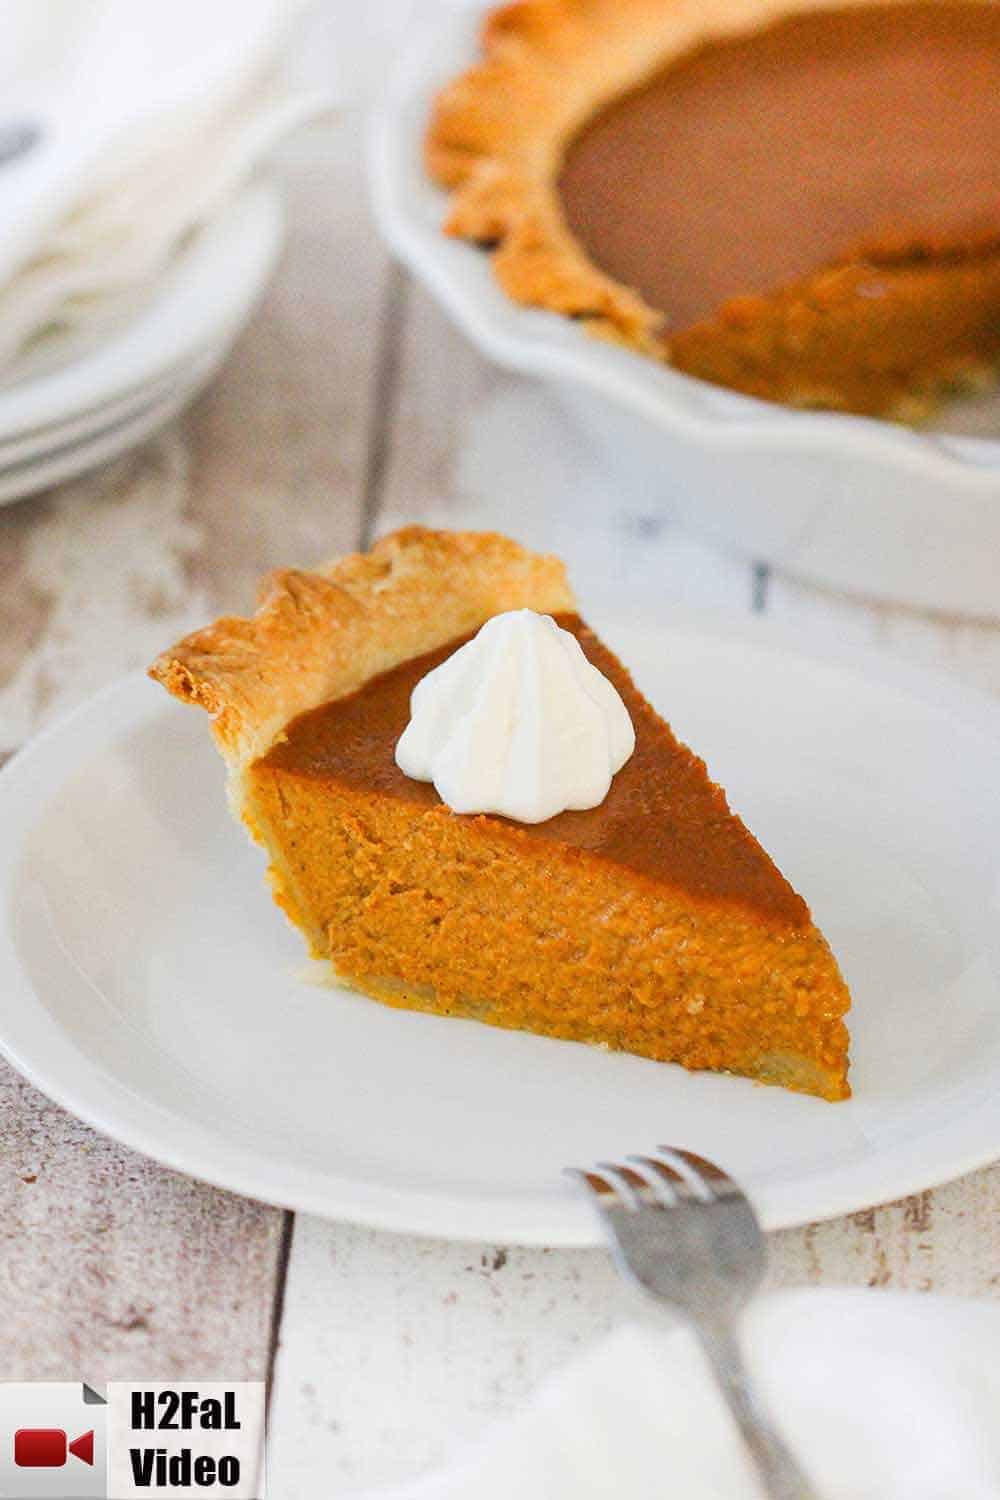
Classic Pumpkin Pie. The most classic pie of them all.

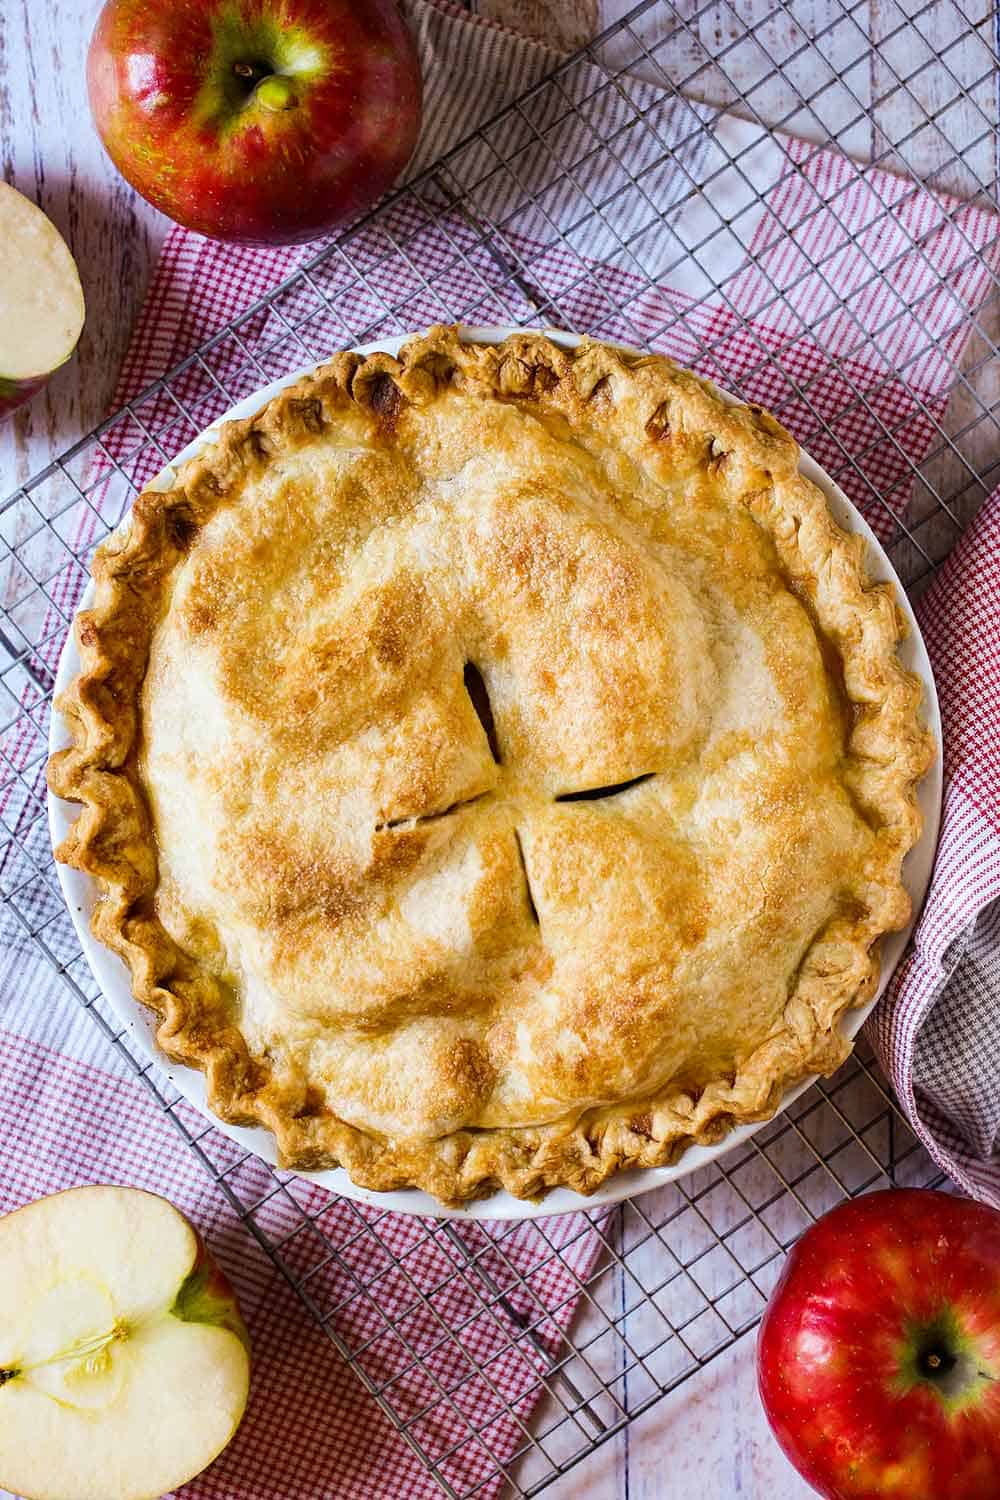
We love all kinds of pie, from Homemade Apple Pie to Classic Pecan Pie, Sweet Potato Pie with Pecan Topping, and even Pecan Pie Cheesecake. But if there’s one pie to make this holiday, you’ve just got to go with Classic Pumpkin. And you won’t believe how easy it is to prepare!

A slice of pumpkin pie on a white plate next to a whole pumpkin pie.

CLASSIC PUMPKIN PIE IS SIMPLE TO MAKE AT HOME

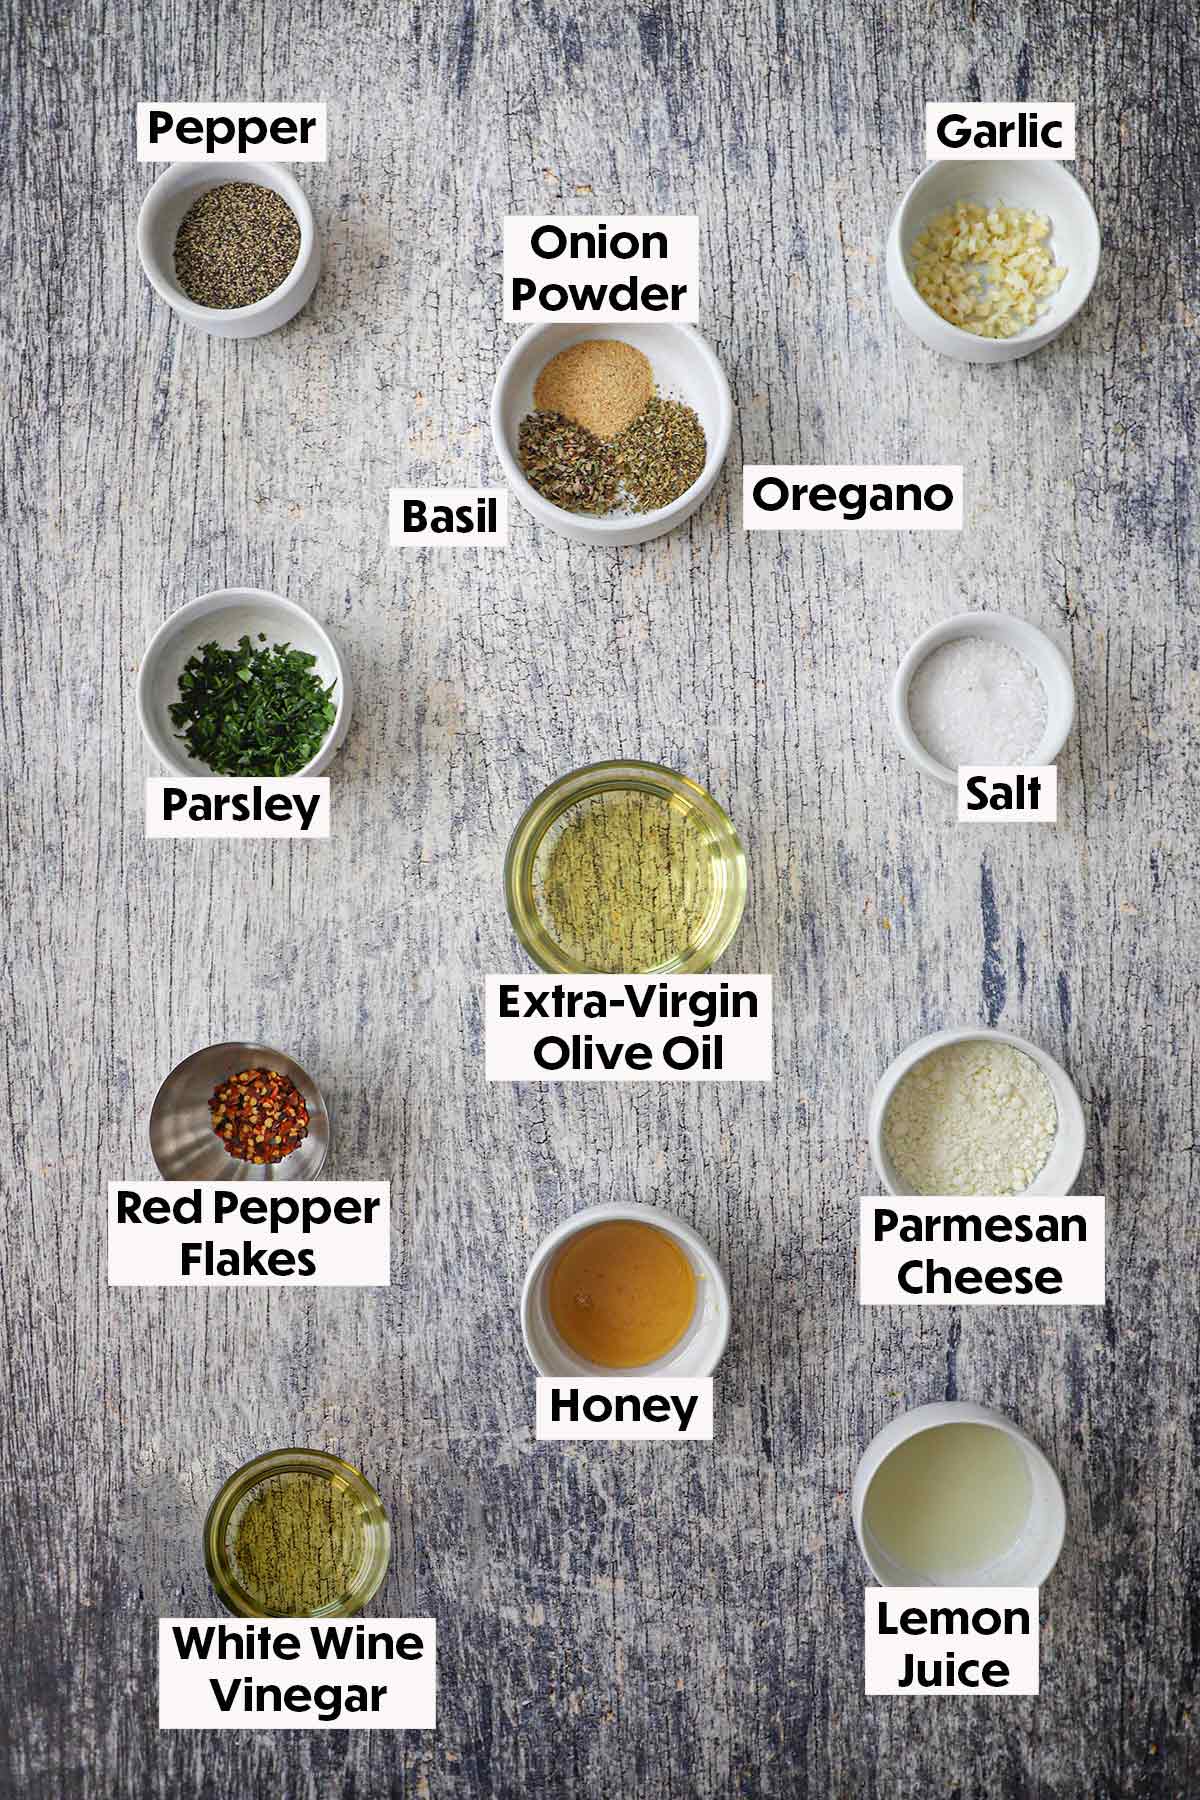
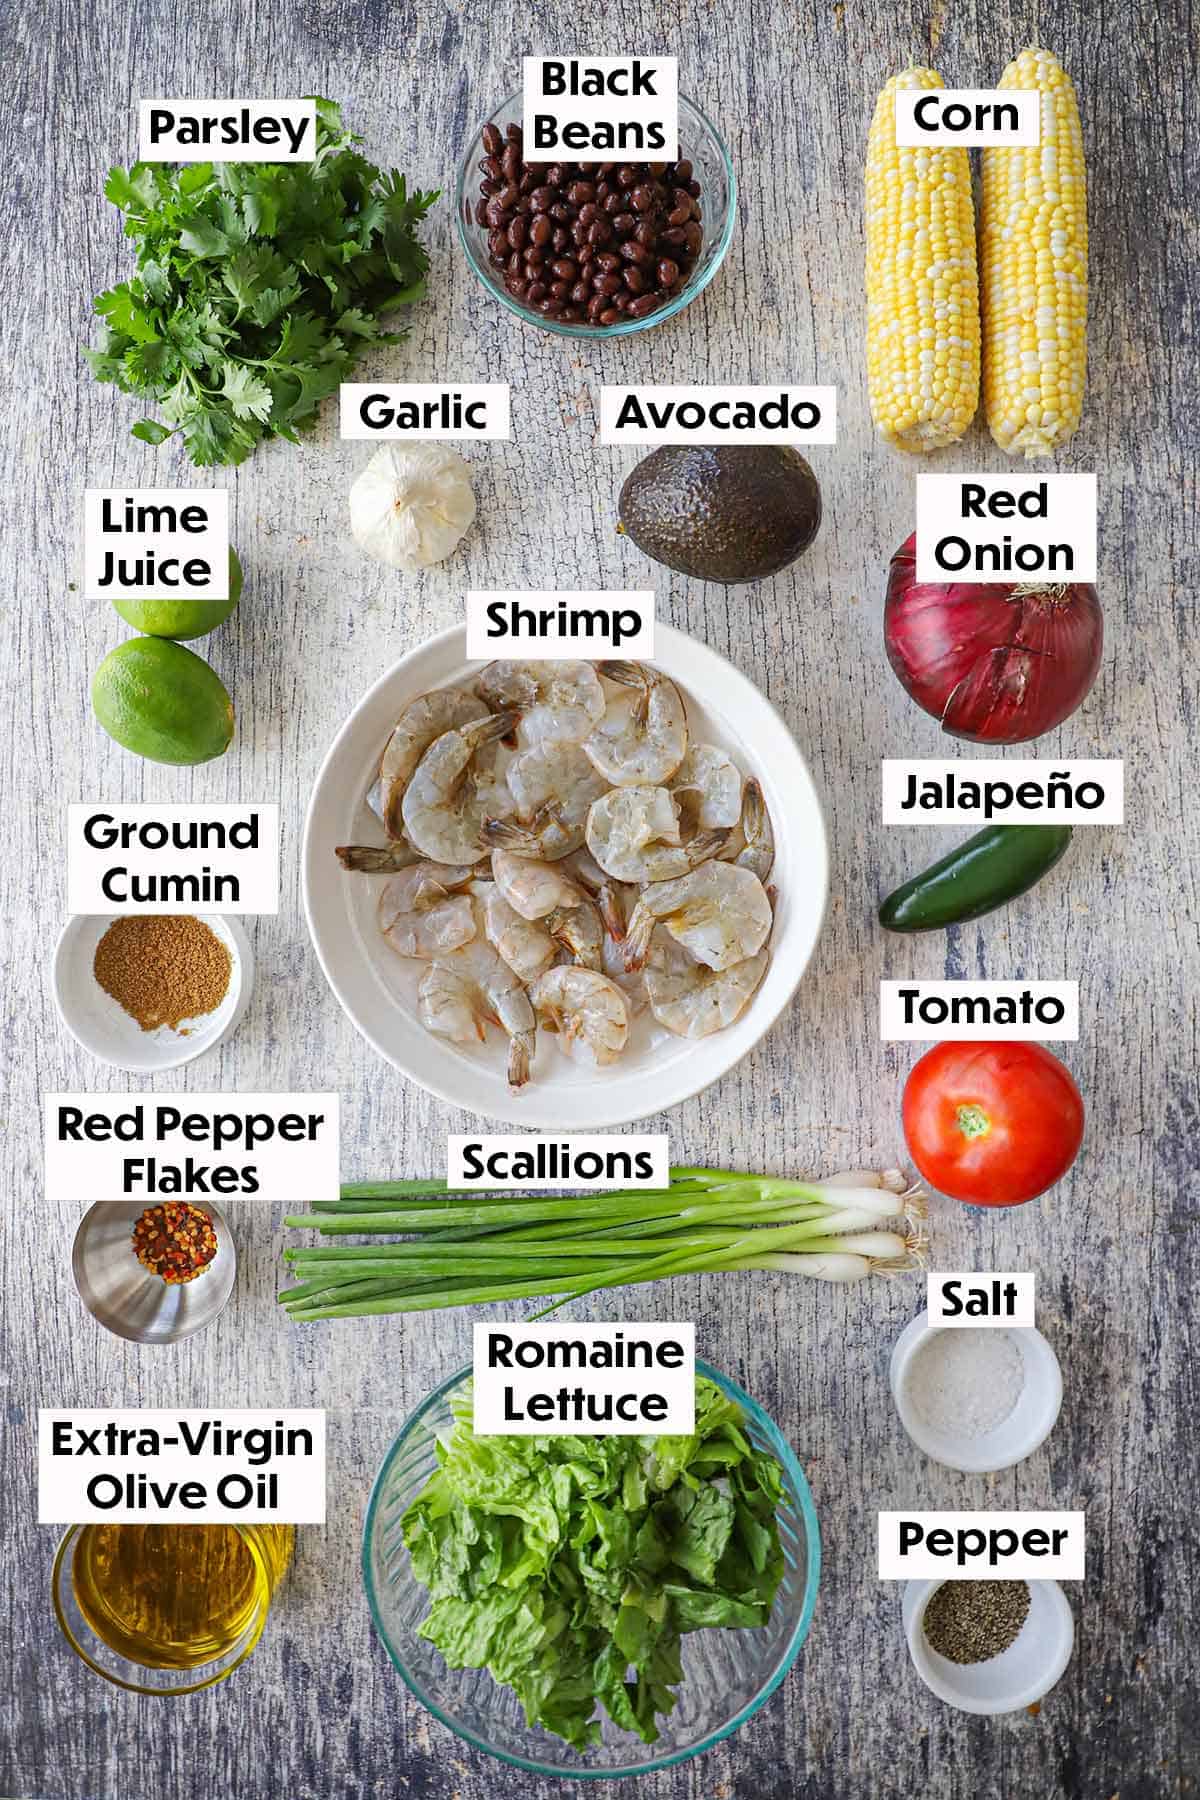
The ingredients list is not extensive for homemade pumpkin pie.

Blending the ingredients in stages helps to produce a smooth, luxurious pie.

Watch us show you how easy it is to make Classic Pumpkin Pie in your own kitchen!

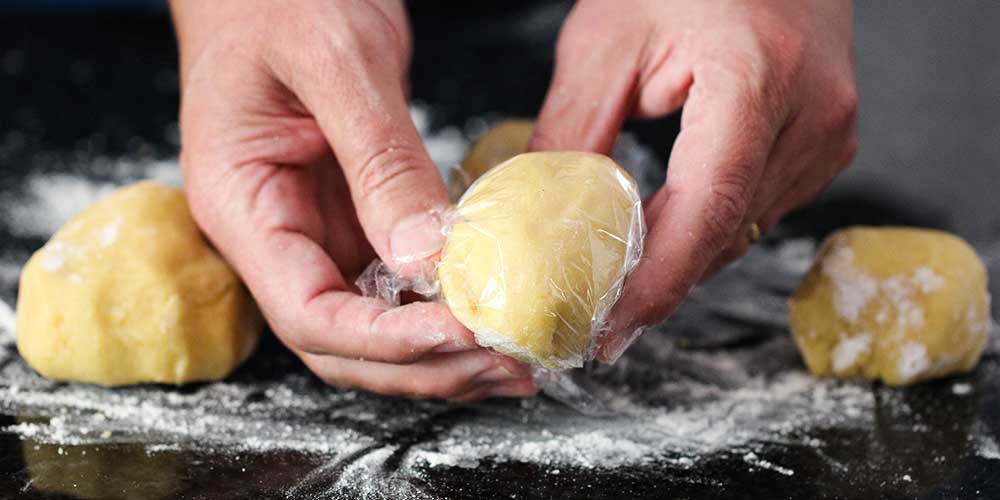
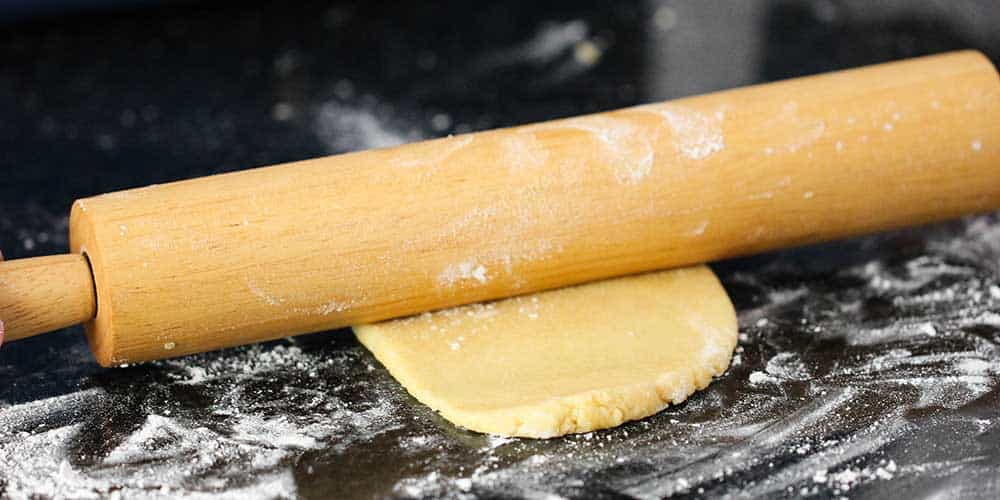
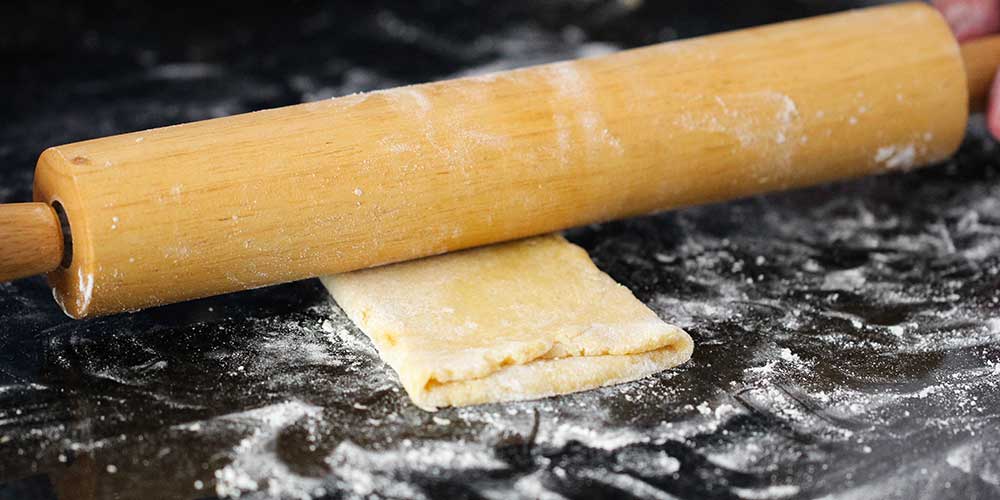
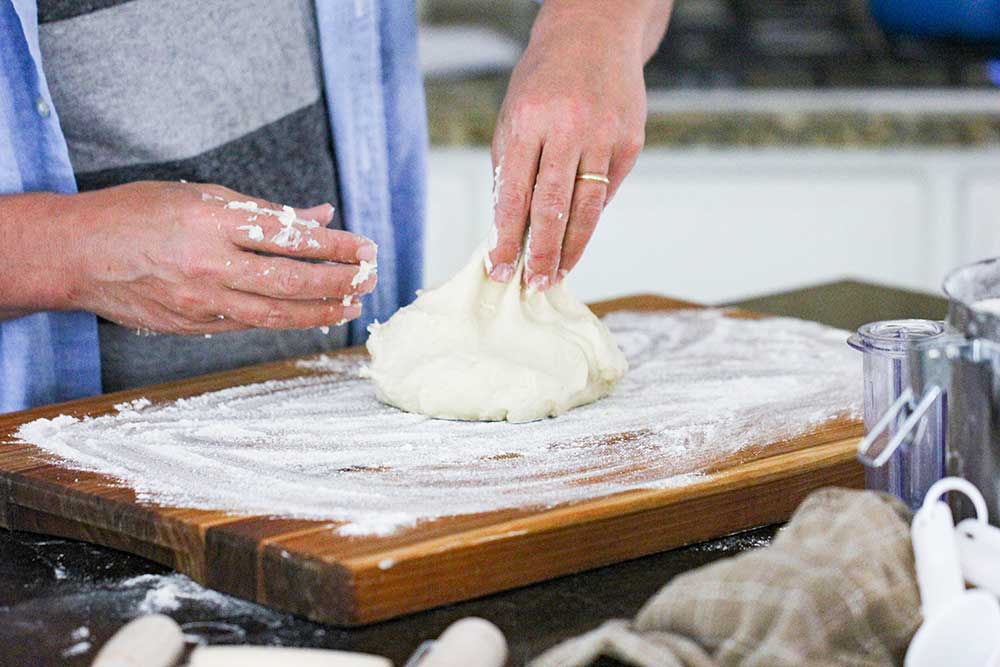
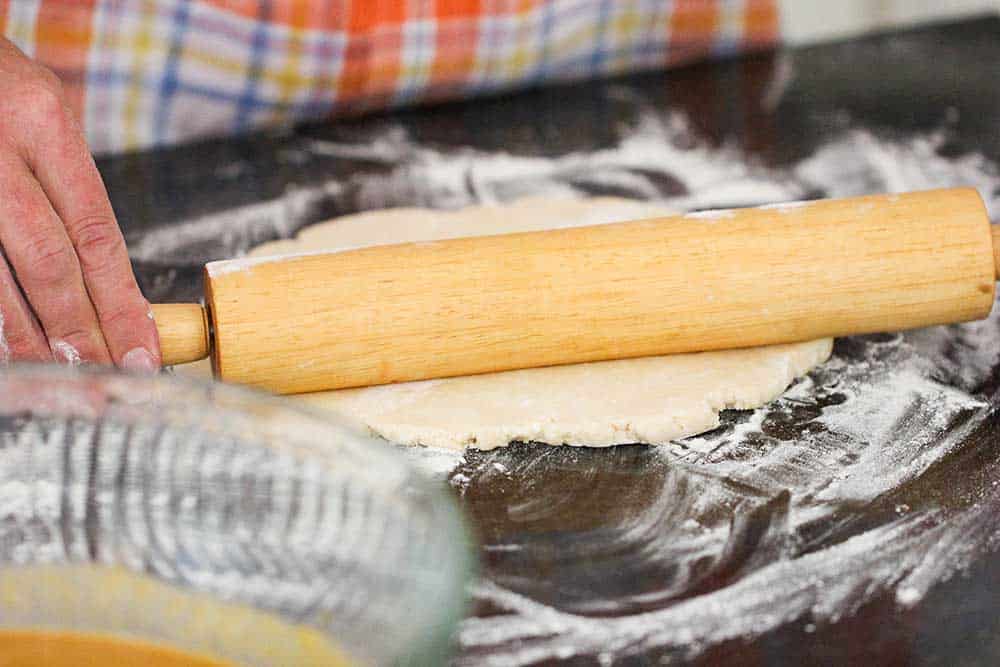
MAKE THE DOUGH FOR THE CRUST AHEAD OF TIME

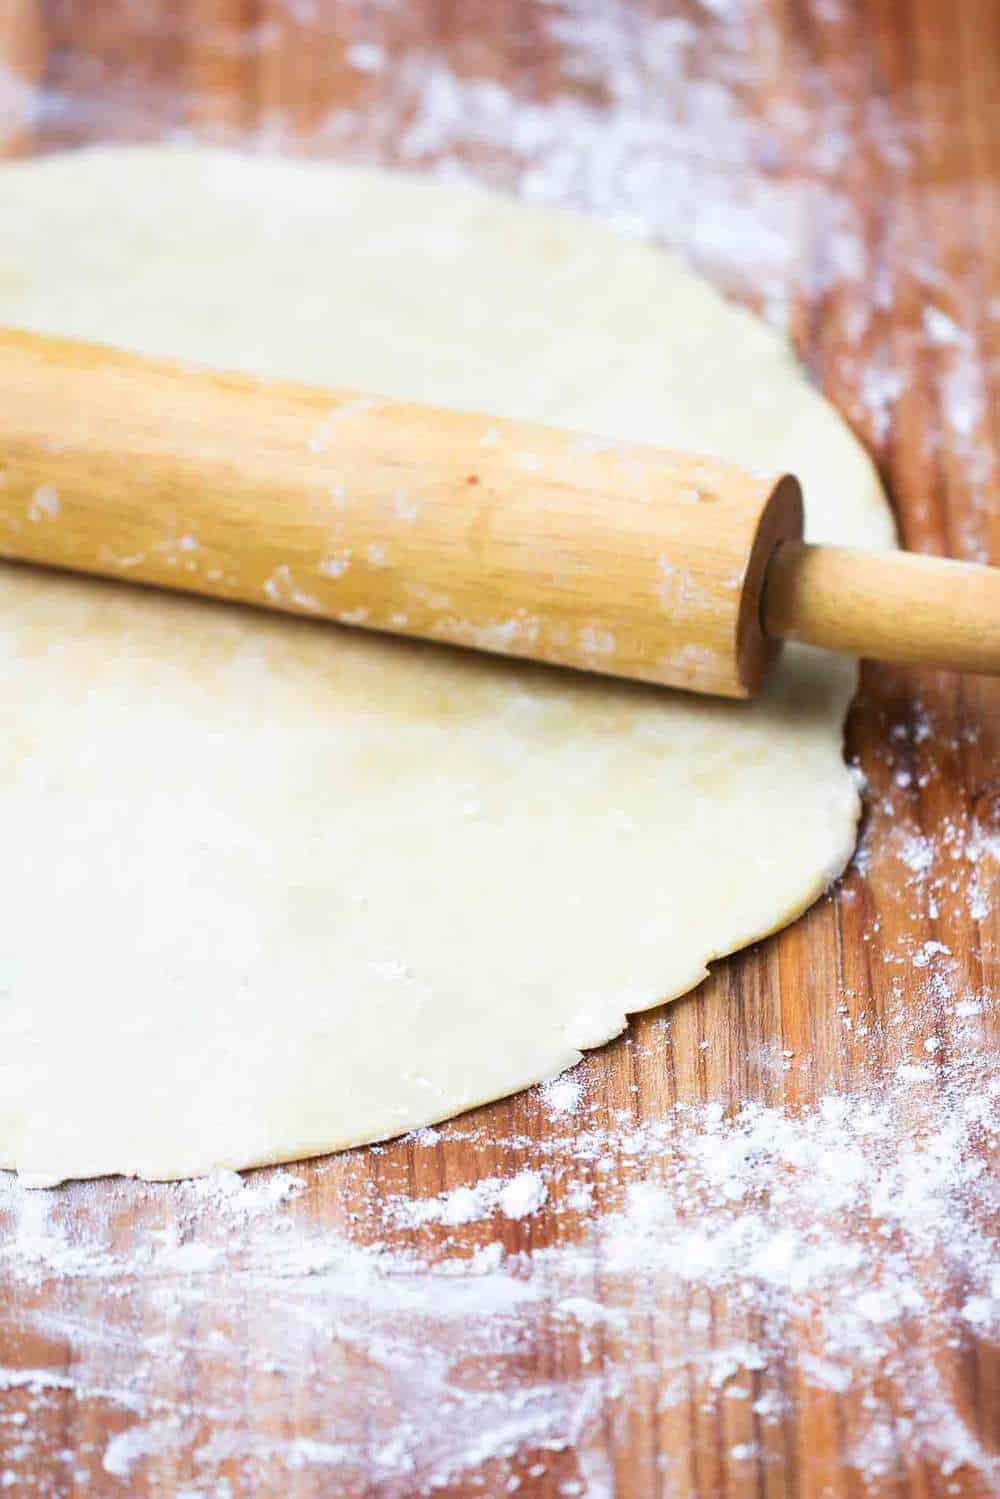
Homemade crust is a must when you’re making pumpkin pie from scratch.

You can make the dough up to 2 days in advance, or even 1 month when frozen.

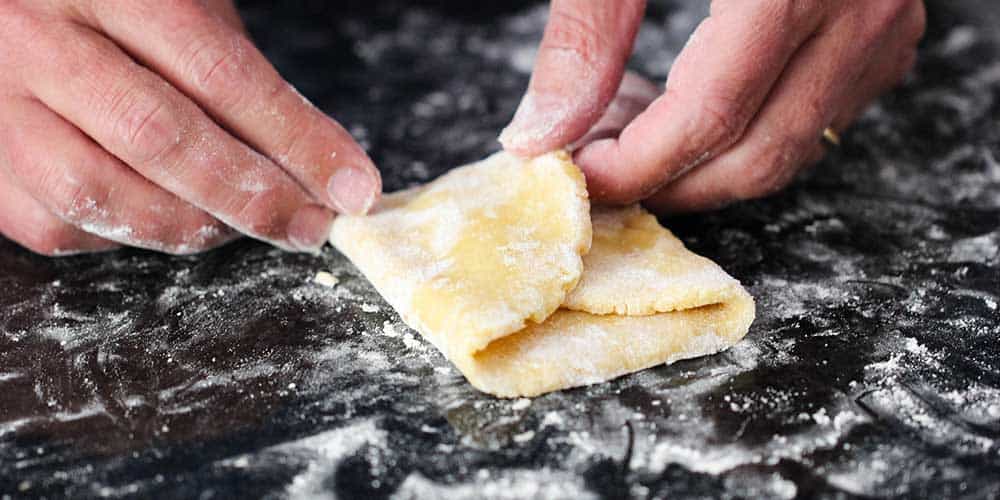
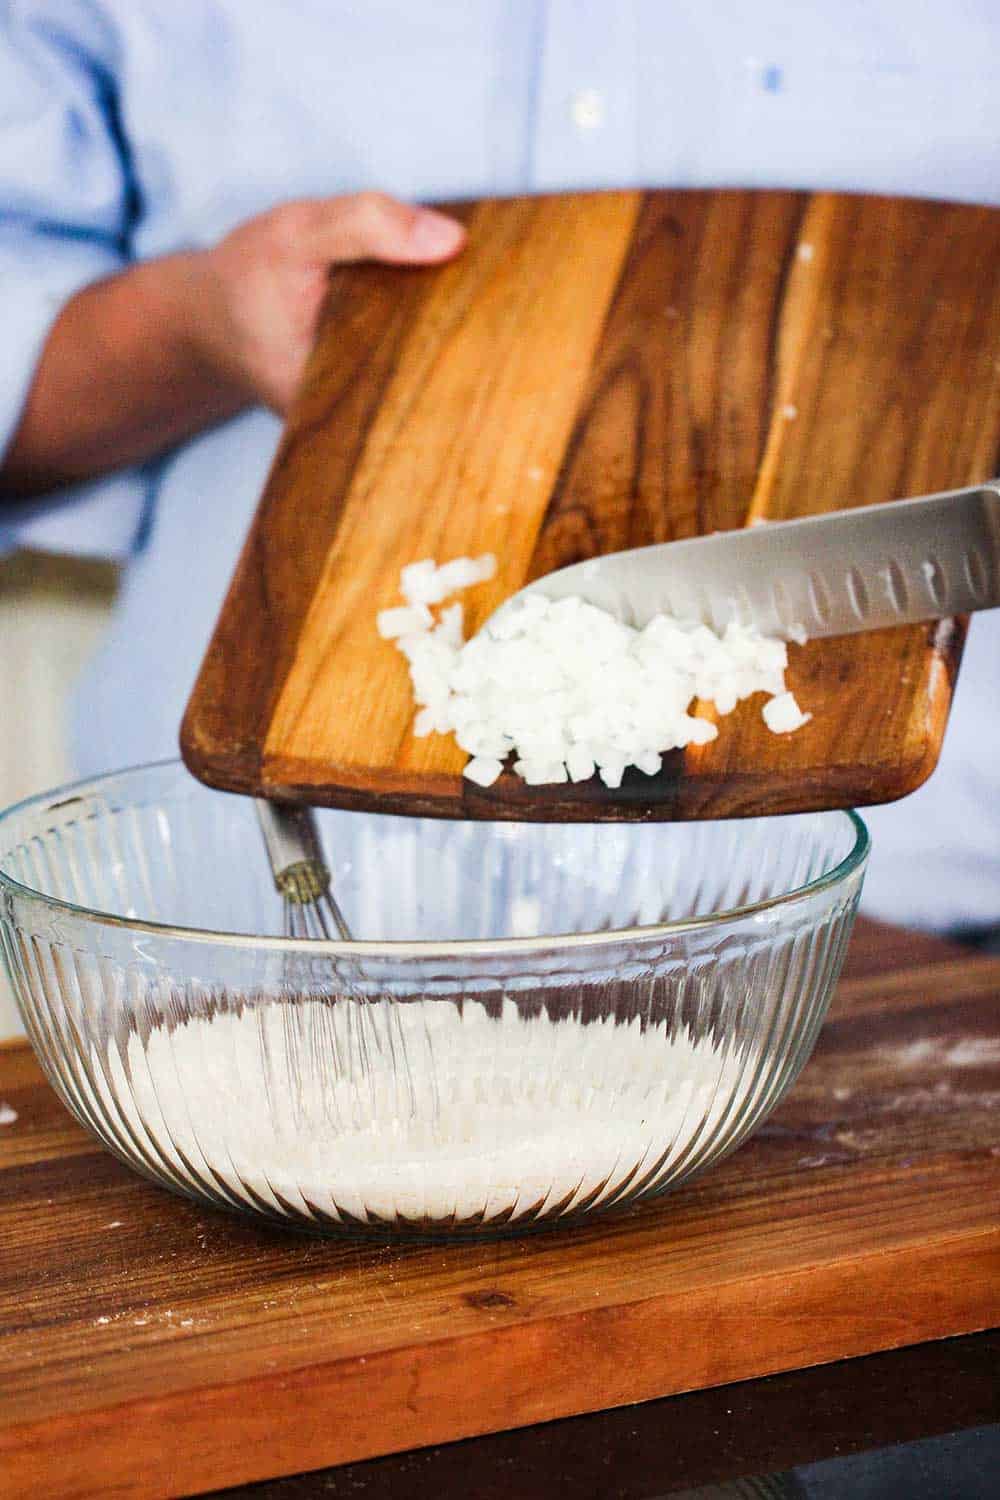
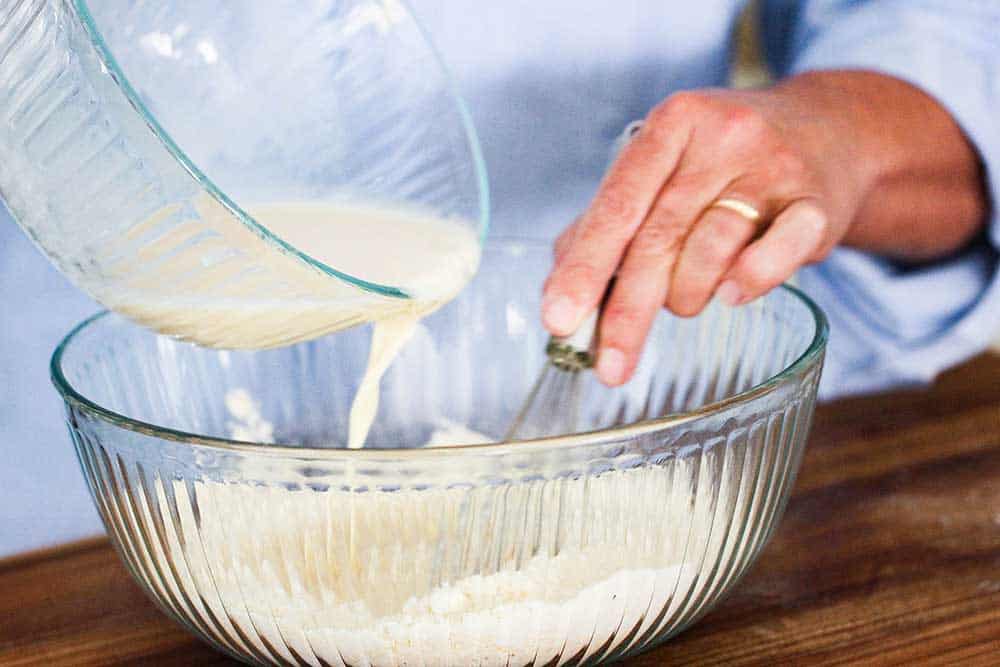
EXPERT TIP: Be careful not to overwork the dough. And also, don’t handle the dough too much. The warmth from your hands will warm the butter in the dough, which will not make the dough as flaky as we like. Folding the dough into quarters makes it easier to transfer to the pie dish.

Two hands rolling out pie dough for classic pumpkin pie.

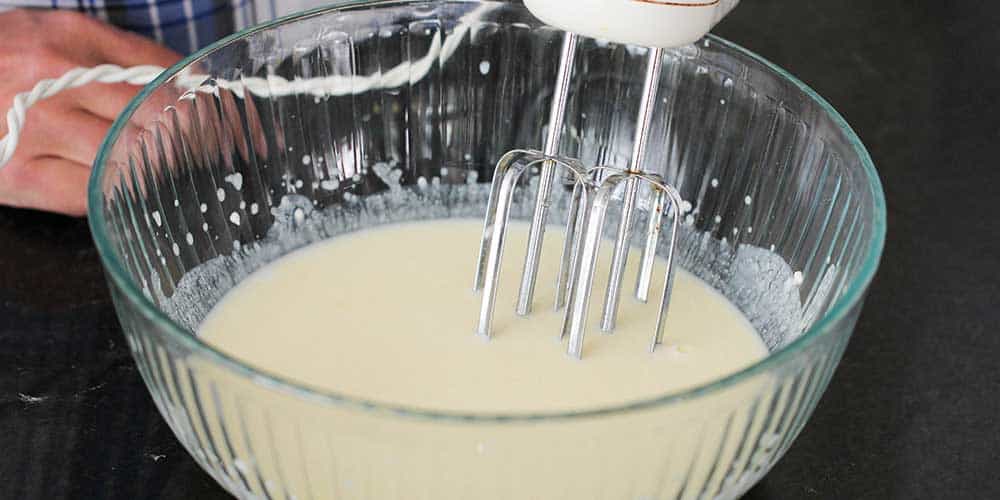
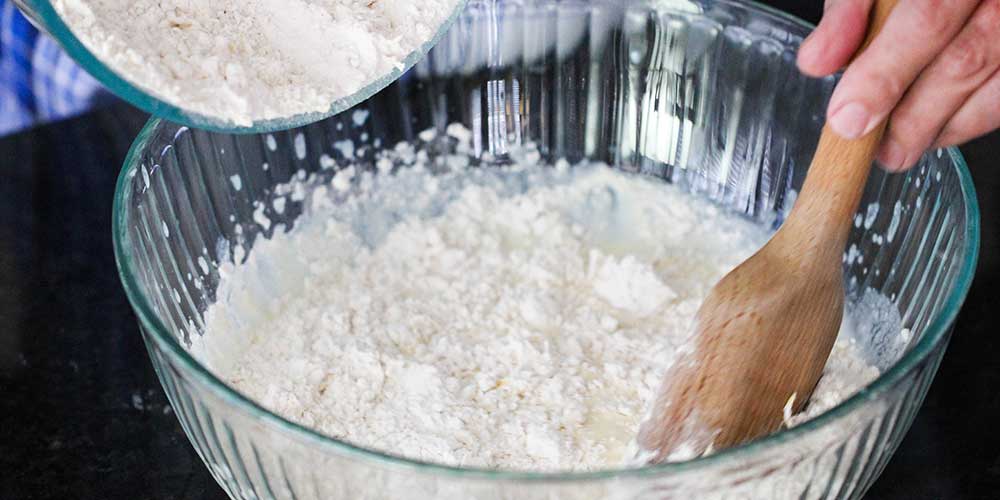
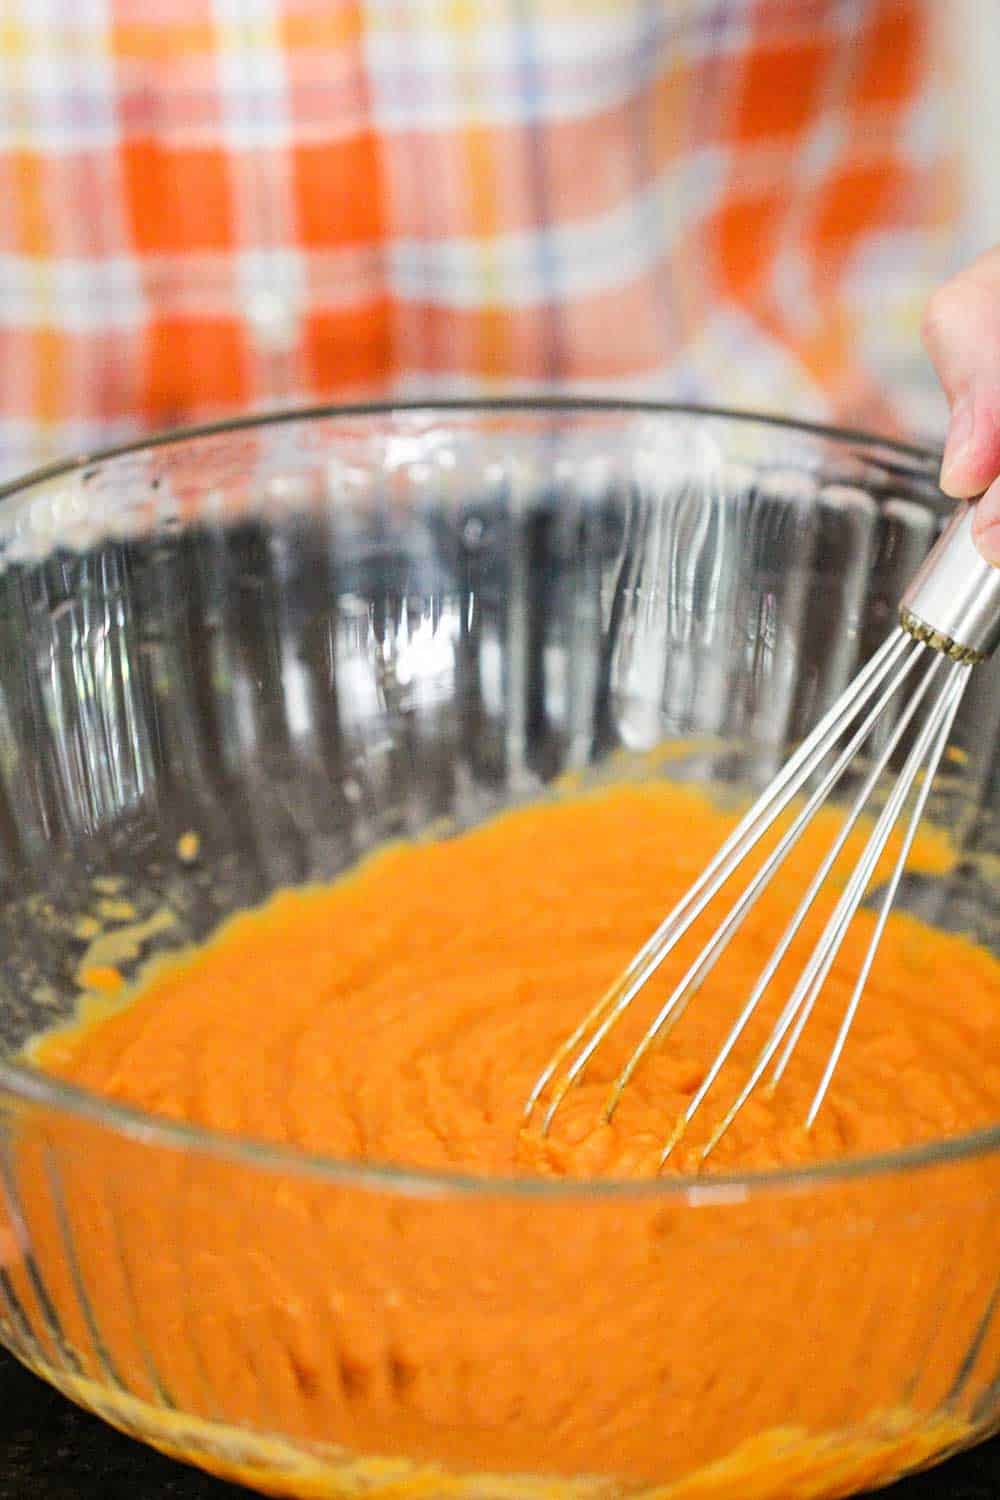
In a large bowl, thoroughly mix together the eggs with the pumpkin puree.

We like to add one egg at a time and fully incorporate the mixture before adding the next egg.

EXPERT TIP: Make sure to get 100% pumpkin puree from the market, not pumpkin pie mix. If you want to cook and puree your own pumpkin, don’t use field pumpkins (used for jack-o-lanterns), go with the sugar pumpkins or Long Island cheese pumpkins. Honestly…we find the canned variety is delicious and works perfectly.

A large bowl filled with pumpkin puree, with a hand holding a whisk in the bowl.

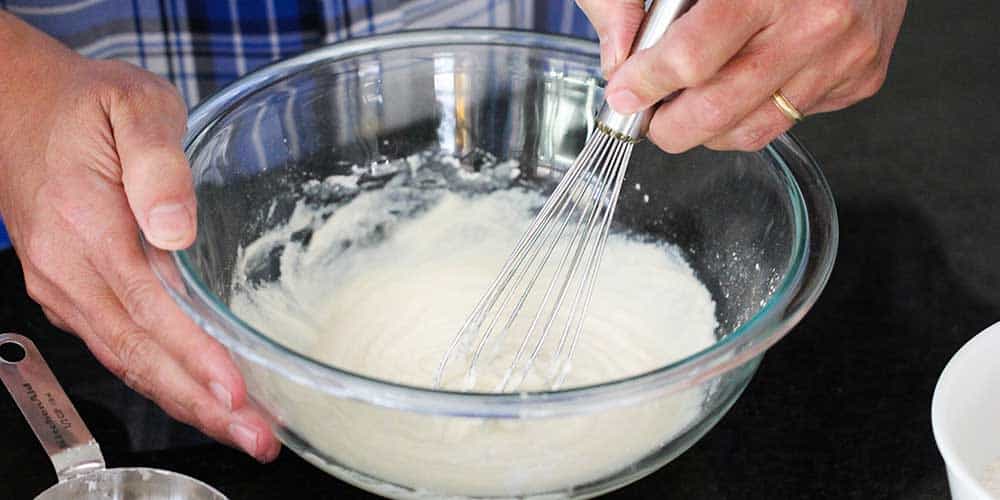
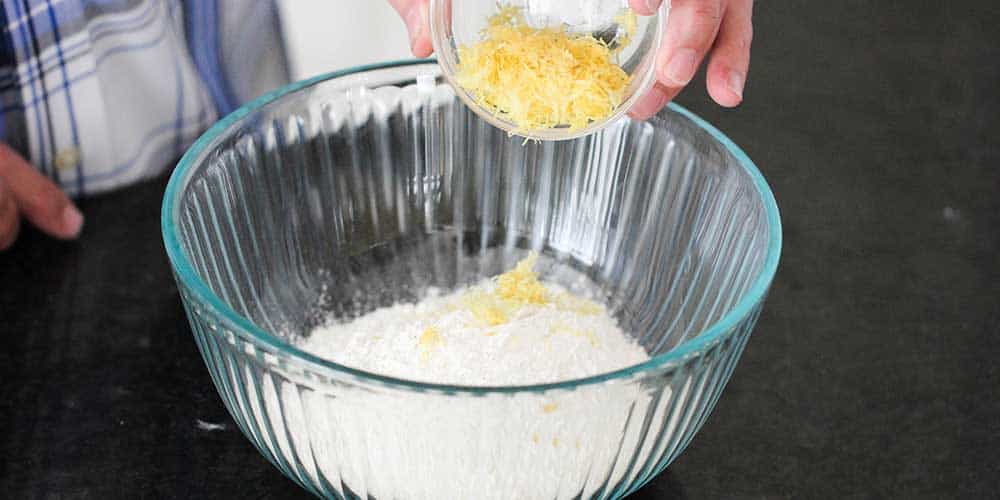
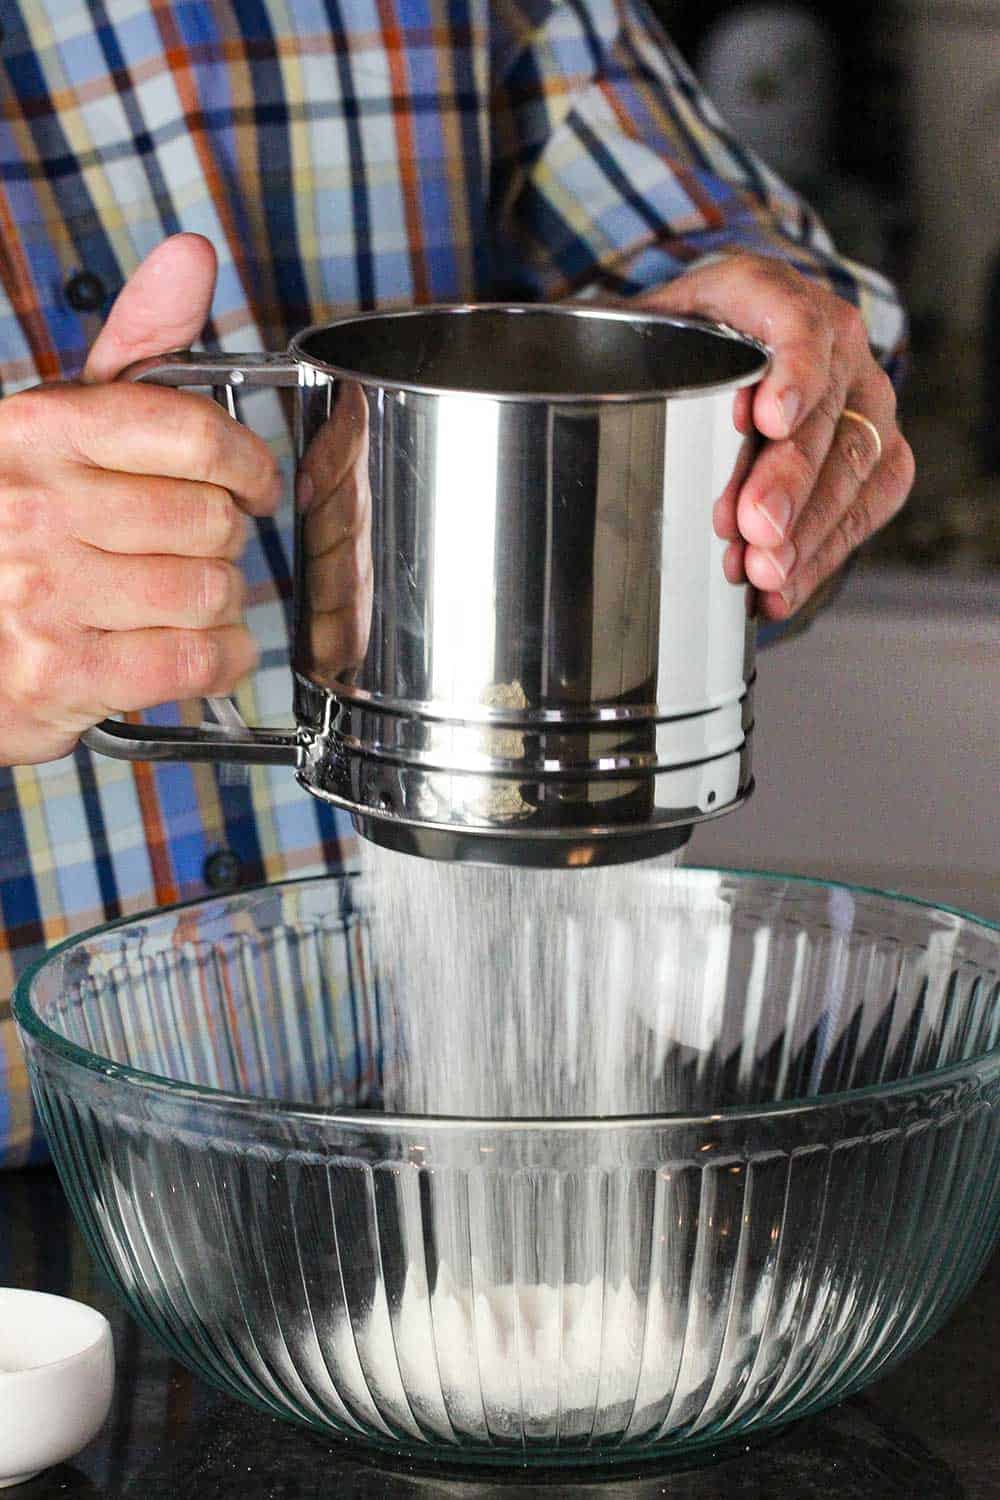
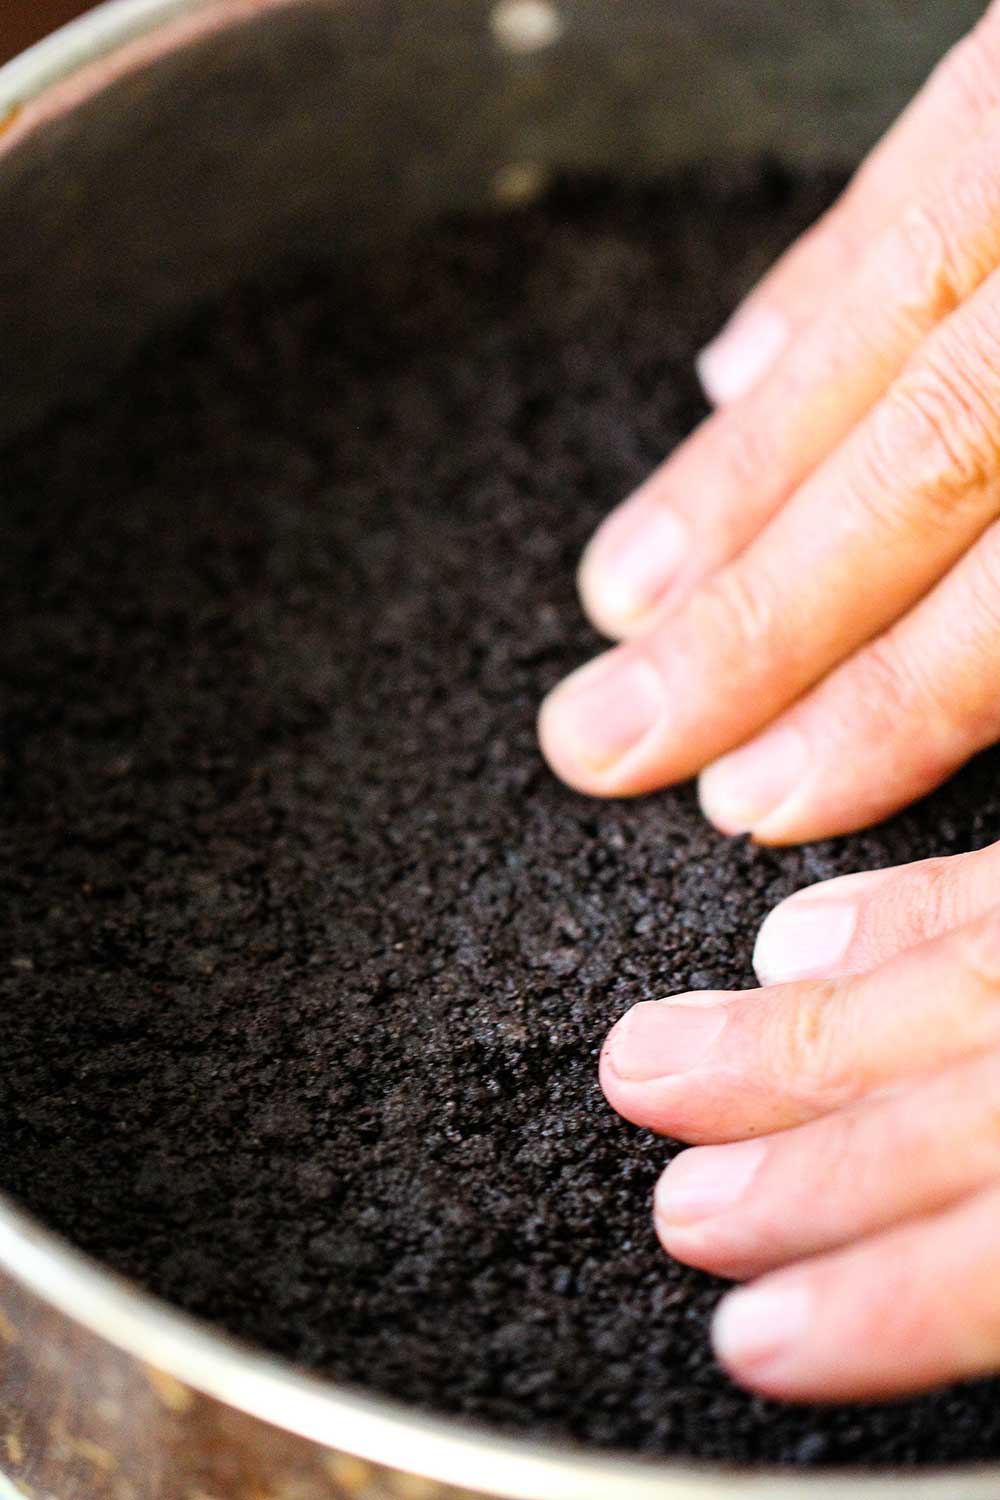
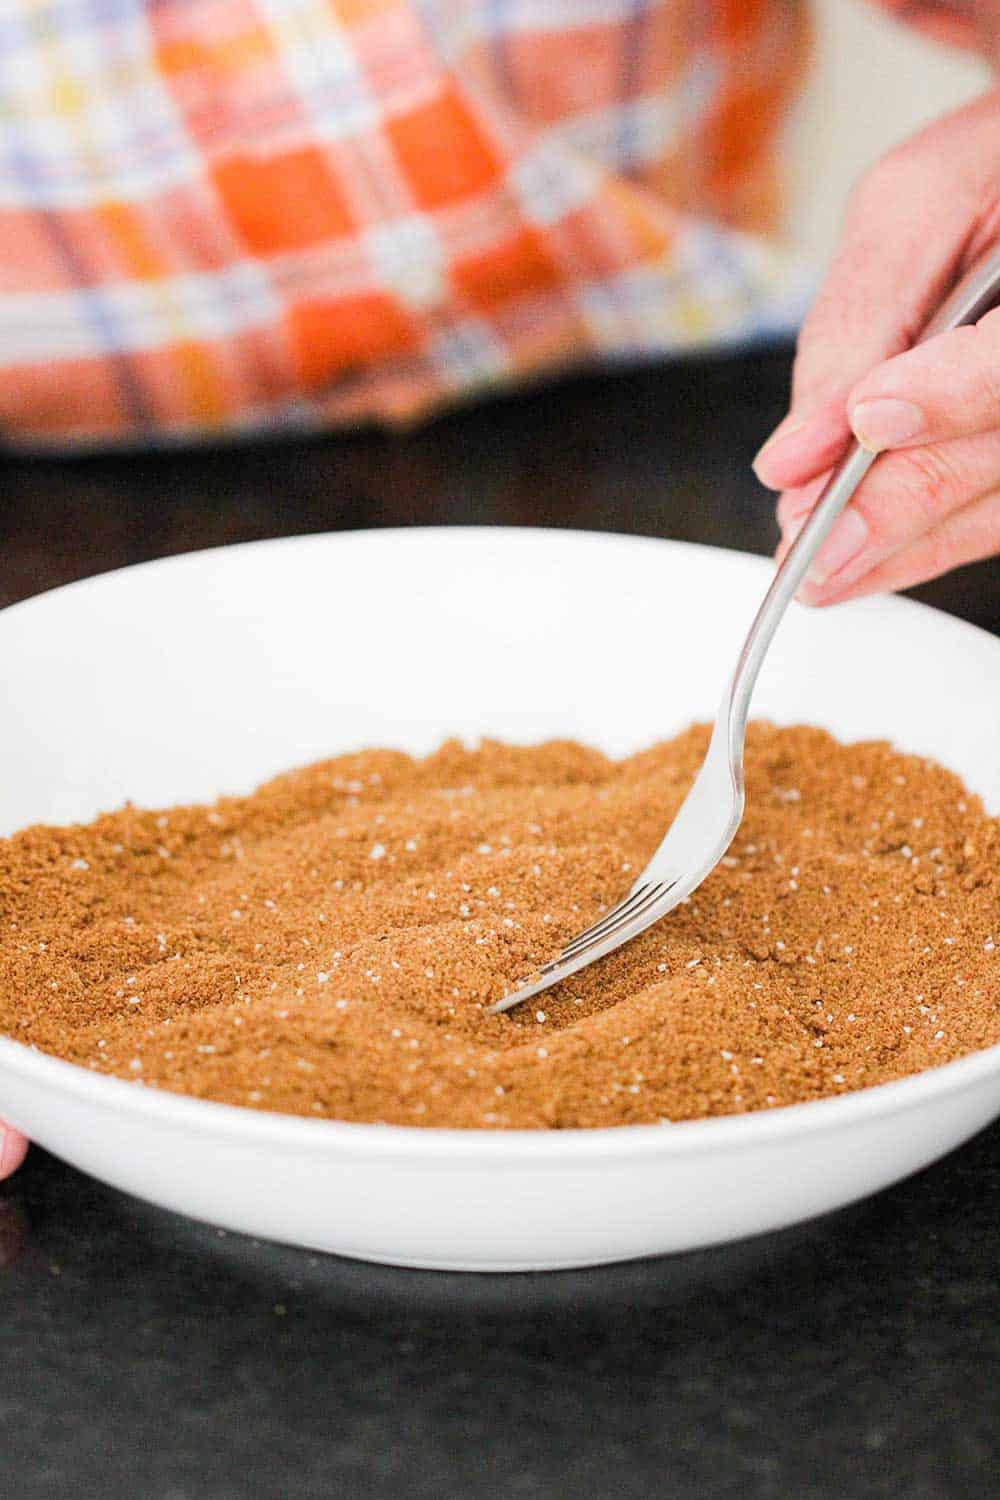
WORK OUT ANY LUMPS IN THE SPICE MIXTURE

We love using either dark or light brown sugar in this Classic Pumpkin Pie.

Sometimes, however, small chunks of the brown sugar will be present. This is just a little moisture that has caused the sugar to clump.

Use a fork to work the spices until they are uniformly fine.

A hand using a fork in a white bowl to blend together spices for classic pumpkin pie.

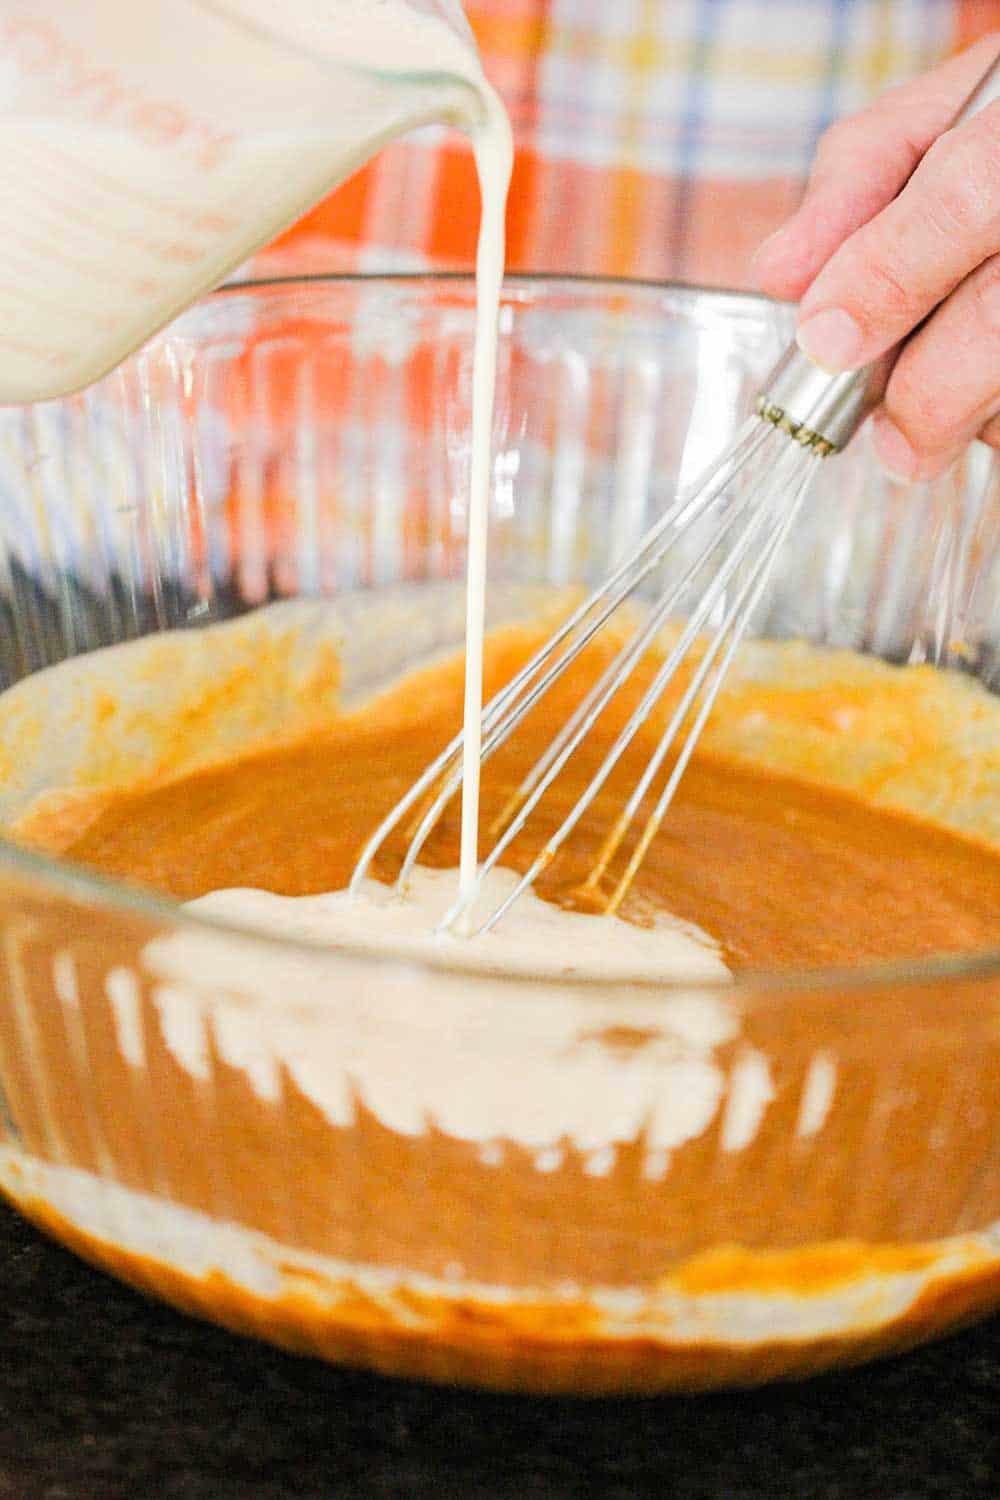
Evaporated milk can be found in the baking section of almost all supermarkets.

We think the taste and texture are perfect for this pie, but you could also use half-and-half or light cream.

EXPERT TIP: Be sure to fully incorporate each round of ingredients as you are building the batter. If you see clumps of pumpkin or spices, use a fork, or your fingers, to fully mix them with the other ingredients. This results in a perfectly smooth and uniform-appearing pie.

A hand pouring in cream into pumpkin pie batter in a large glass bowl.

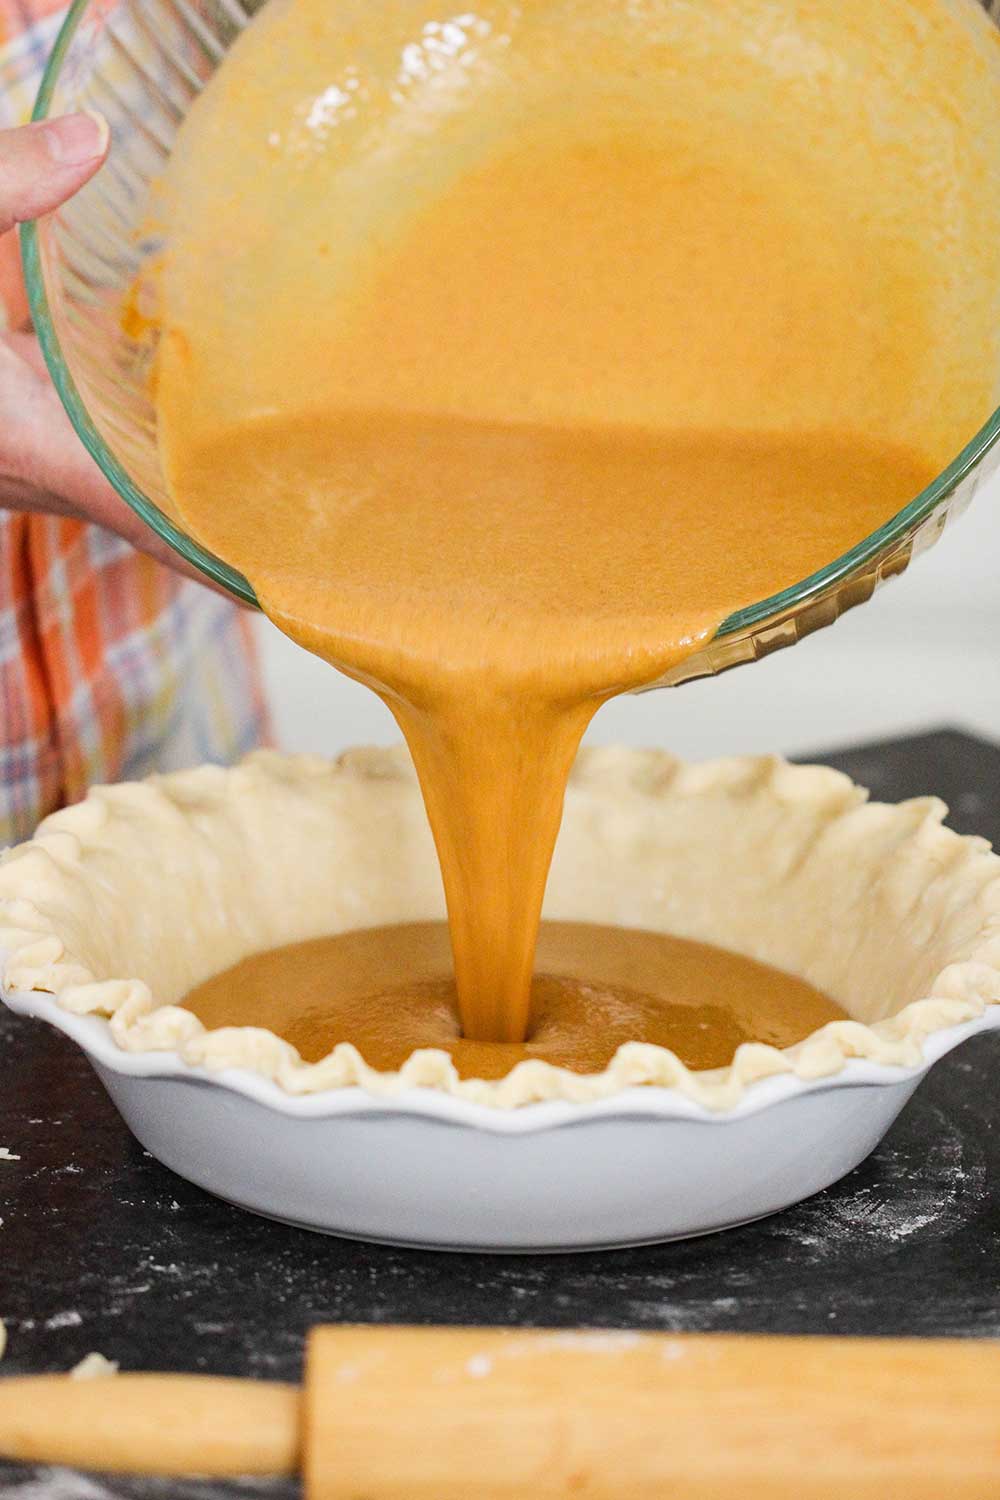
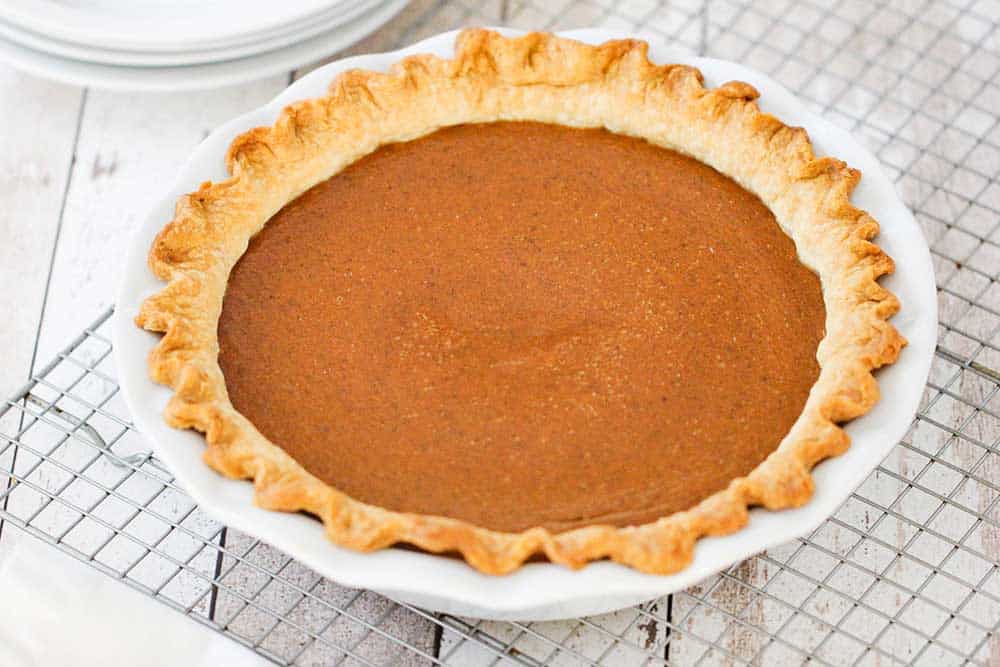
Be sure to spray the pie dish with cooking spray before laying in the pie dough.

No need to blind or pre-bake the dough.

Just pour the gorgeous batter directly into the prepared pie dish.

Two hands pouring pumpkin pie batter into a pie dish lined with pie dough.

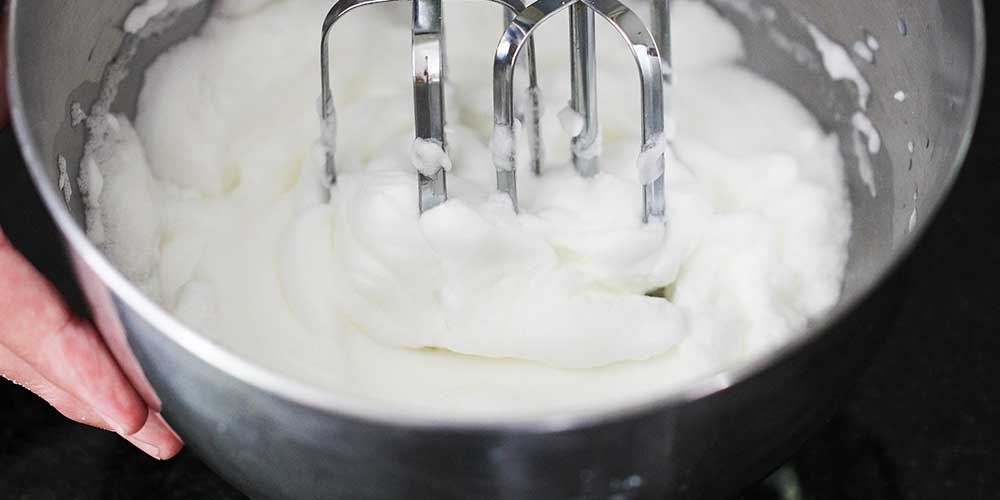
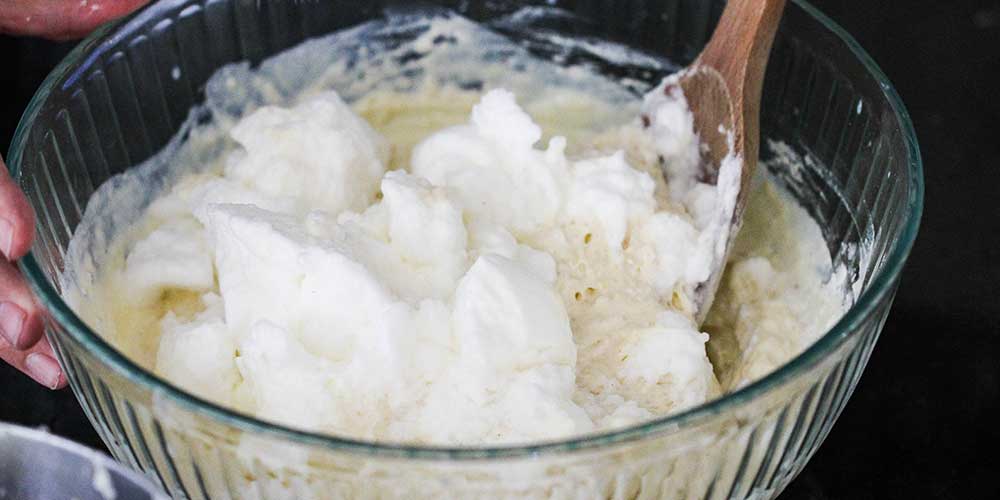
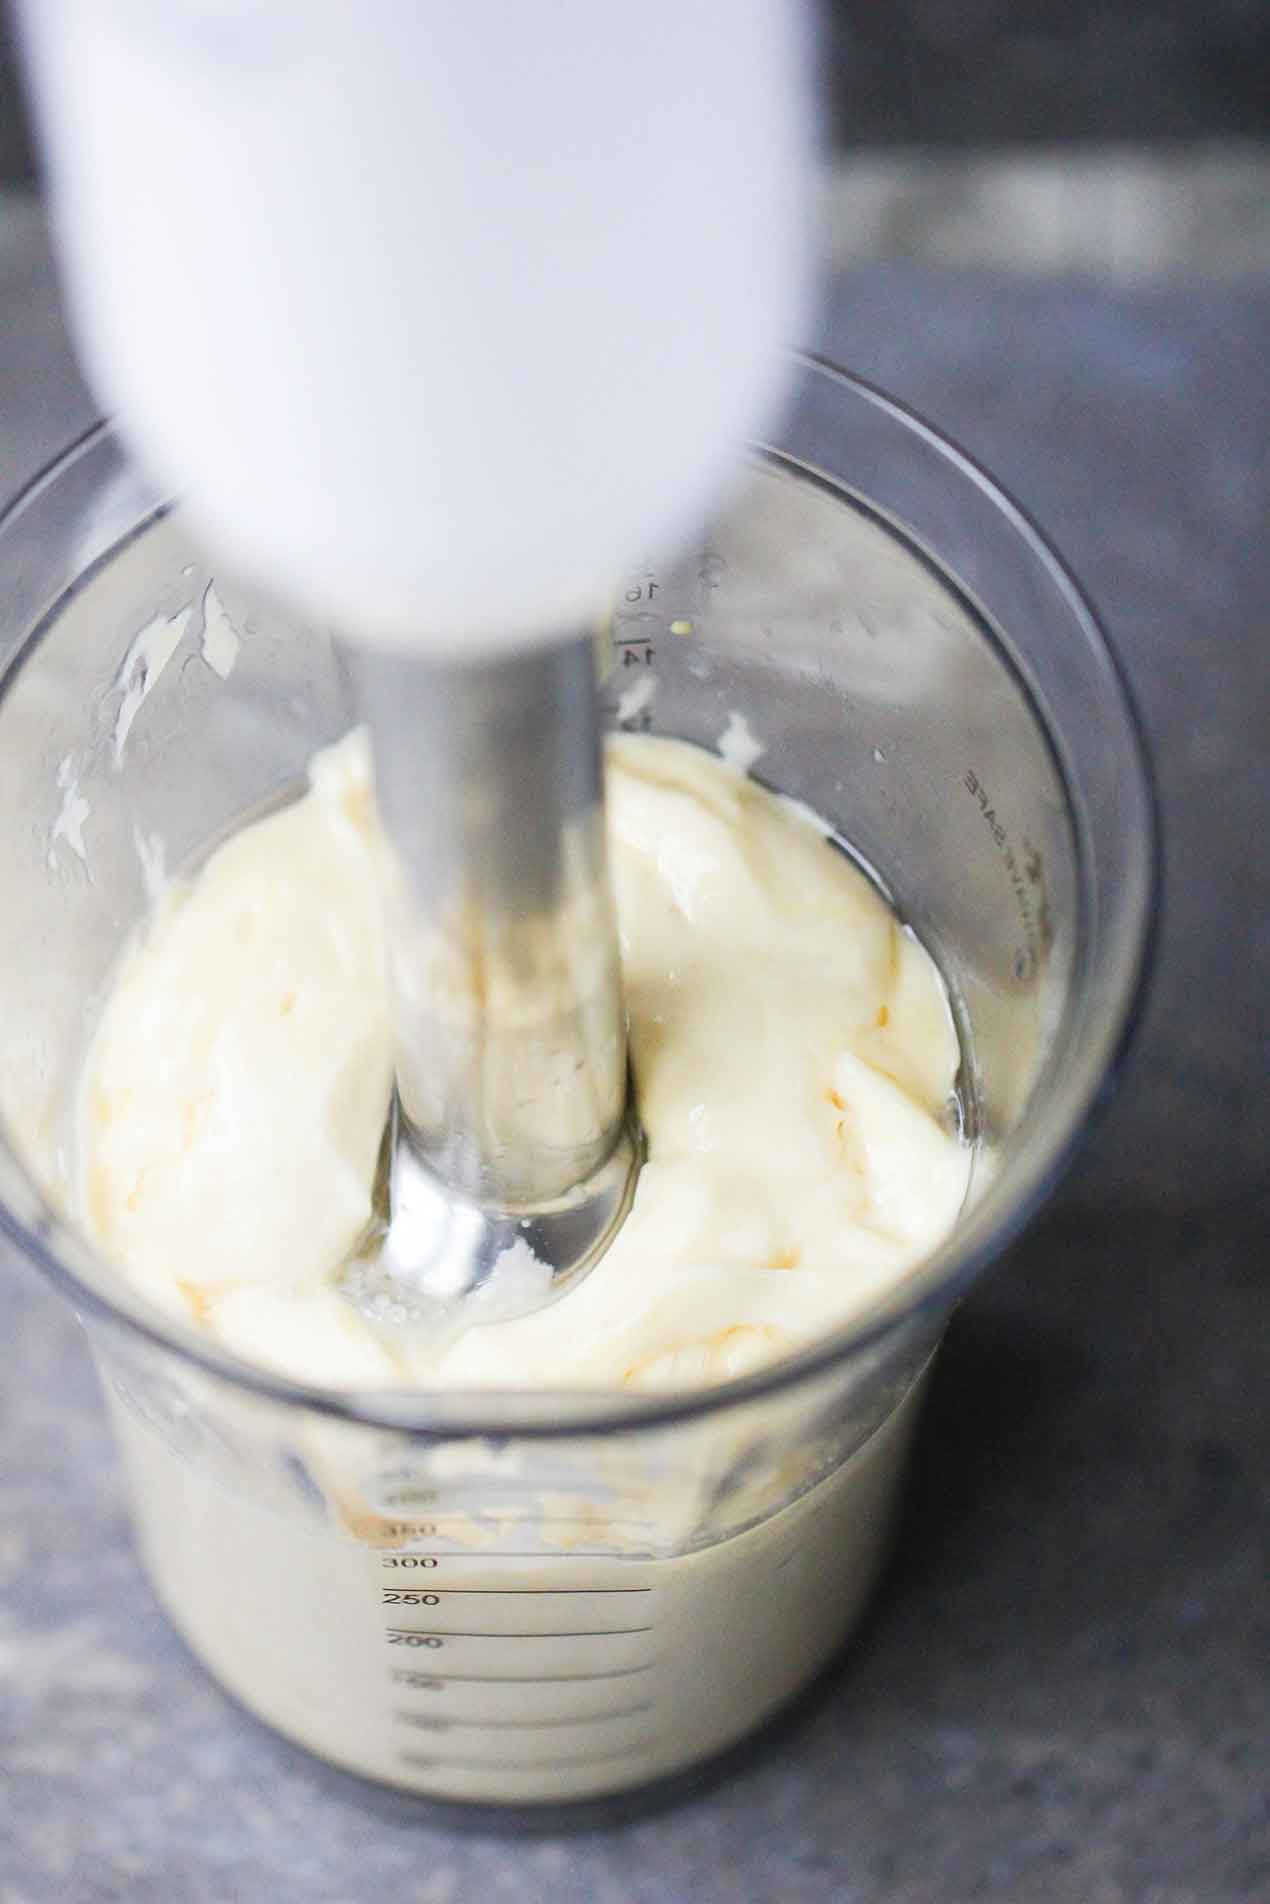
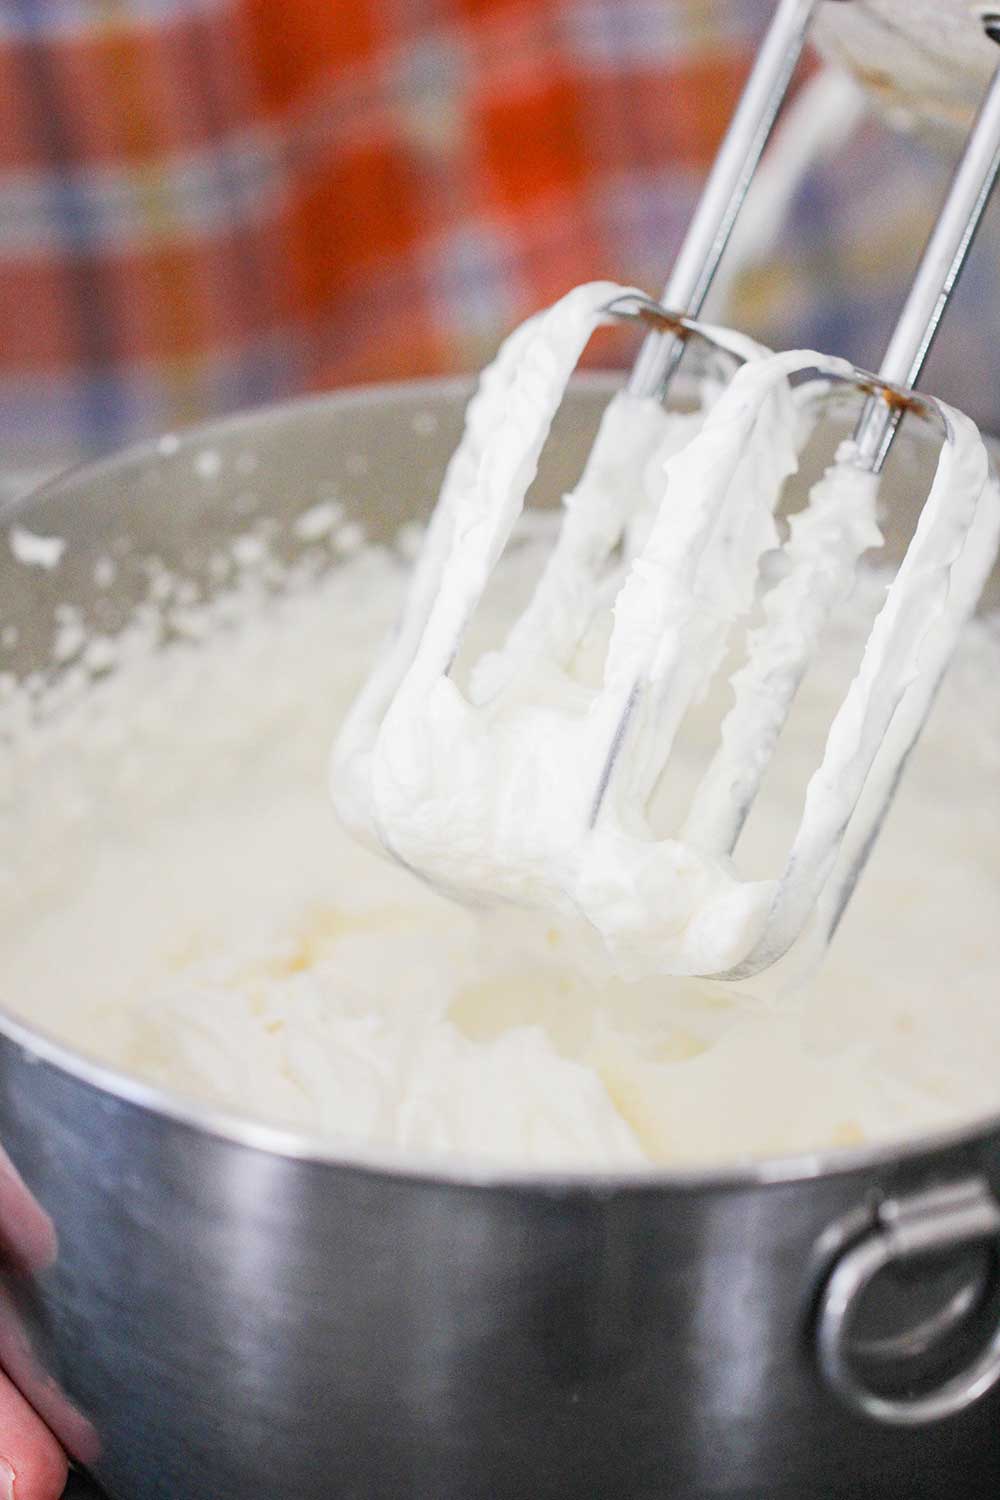
HOMEMADE WHIPPED CREAM IS AWESOME

So folks, you can’t have Classic Pumpkin Pie without whipped cream topping, right?

Well, if you’re making the pie and the crust from scratch, let’s make the topping, too! It’s so easy!

All you need are a couple of cups of heavy cream, some sugar, and a dash of vanilla extract.

EXPERT TIP: Placing a metal bowl in the freezer for 15 minutes before mixing the cream helps it become nice and thick, and quicker, too. We use a hand mixer on high to blend it all together, and within minutes, you’ve got the best-tasting whipped cream you’ll ever taste!

A mixer with whipped cream covering the attachments.

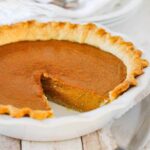
BAKE CLASSIC PUMPKIN PIE ON HIGH AT FIRST

You’ll want to bake the pie in an oven pre-heated to 425°F for just 15 minutes.

This begins the process of cooking the pie and helps to set the filling.

After lowering the temperature to 350°F and cooking for another 40 to 45 minutes, it’s time to take the pie out of the oven.

EXPERT TIP: Though it’s tempting to eat the pie right out of the oven, it still needs to cool, which will allow the pie to set and become the silky pie that we all know and love.

A fully cooked classic pumpkin pie in a white pie dish sitting on a baking rack.

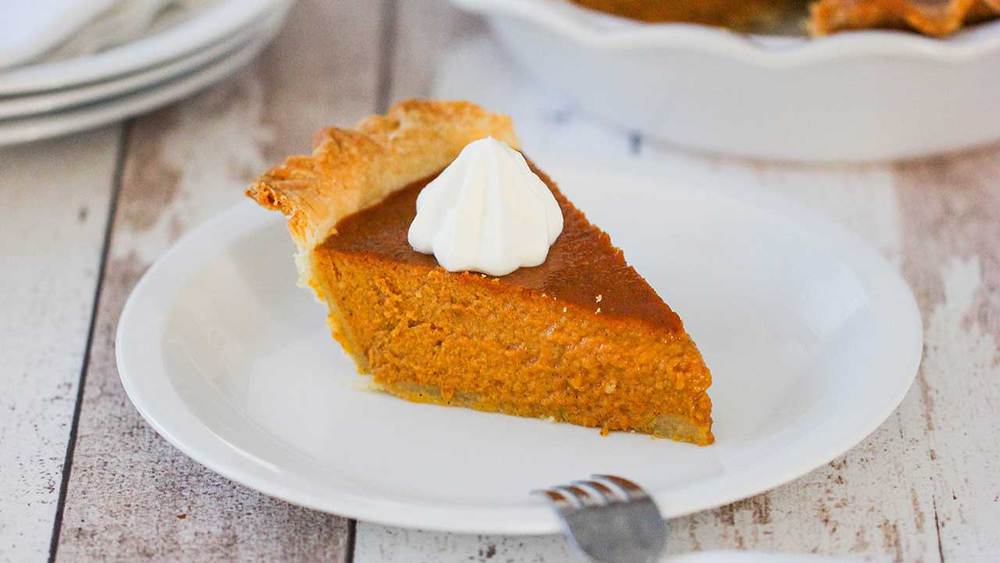
THE PERFECT HOLIDAY DESSERT

There is just something so comforting and heart-warming about enjoying a slice of Classic Pumpkin Pie with loved ones after a beautiful Thanksgiving or any kind of holiday feast.

The spices and the whipped cream topping, along with the flaky homemade crust, all work together to make a dessert that is truly magnificent.

And the pie can easily be prepared 1 to 2 days in advance. You can even freeze the pie for up to 1 month before thawing and serving. Other great pumpkin recipes are our Easy Pumpkin Bread, Pumpkin Whoopie Pies, and our Pressure Cooker Pumpkin Bread Pudding!

A slice of pumpkin pie with a dollop of whipped cream on top on a white dessert plate.

A pumpkin pie with a slice missing in a white pie dish.
Print Recipe
5 from 4 votes

Classic Pumpkin Pie

This Classic Pumpkin Pie is about as classic as they come. The Loon could eat this pie year round. It is really good, and surprisingly easy to make! Be sure to use plain pumpkin puree, and not pumpkin pie filling. Enjoy!
Prep Time15 minutes mins
Cook Time55 minutes mins
Resting time2 hours hrs
Total Time3 hours hrs 10 minutes mins
Course: Dessert
Cuisine: American
Servings: 8 people
Calories: 341kcal
Author: Kris Longwell

Ingredients

  • 1 9-inch Perfect Pie Crust or store bought

For the Pie Filling

  • 1 15 oz. can pumpkin puree not pumpkin pie filling
  • 3 large eggs
  • ¾ cup brown sugar light or dark
  • ½ teaspoon salt
  • 1 ½ teaspoon cinnamon
  • 1 teaspoon ground ginger
  • ¼ teaspoon ground allspice
  • ¼ teaspoon ground nutmeg
  • 1 12 oz. can evaporated milk

For the Cream Topping

  • 2 cups heavy cream
  • 4 tablespoon sugar
  • ¼ teaspoon vanilla extract

Instructions

  • Preheat the oven to 425°F.
  • Make the Perfect Pie Crust (or use store-bought) and place it in a lightly greased pie dish.
    1 9-inch Perfect Pie Crust
  • In a medium mixing bowl, stir together the pumpkin and the eggs, one at a time, until evenly combined.
    1 15 oz. can pumpkin puree, 3 large eggs
  • In a separate bowl, using a fork, stir together the sugar, salt, cinnamon, ginger, allspice, and nutmeg until completely mixed. Use the back of a fork, or your fingers, to break apart any clumps.
    ¾ cup brown sugar, ½ teaspoon salt, 1 ½ teaspoon cinnamon, 1 teaspoon ground ginger, ¼ teaspoon ground allspice, ¼ teaspoon ground nutmeg
  • Stir the sugar/spice mixture into the pumpkin/egg mixture. Stir until completely combined.
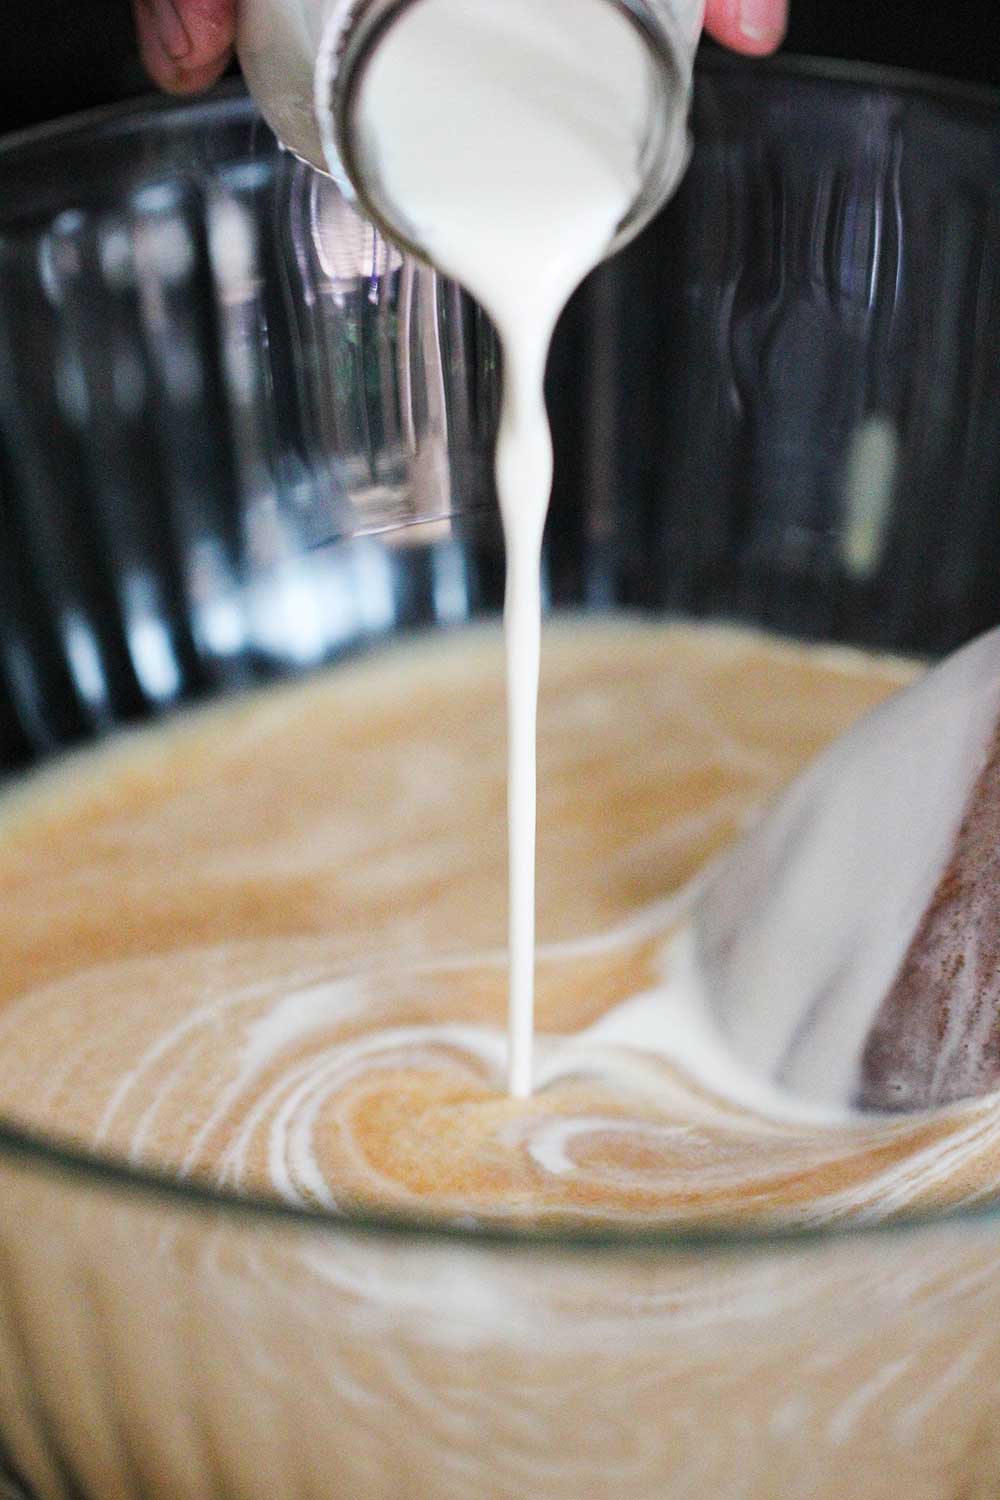
  • Add the evaporated milk and stir again until smooth and fully combined.
    1 12 oz. can evaporated milk
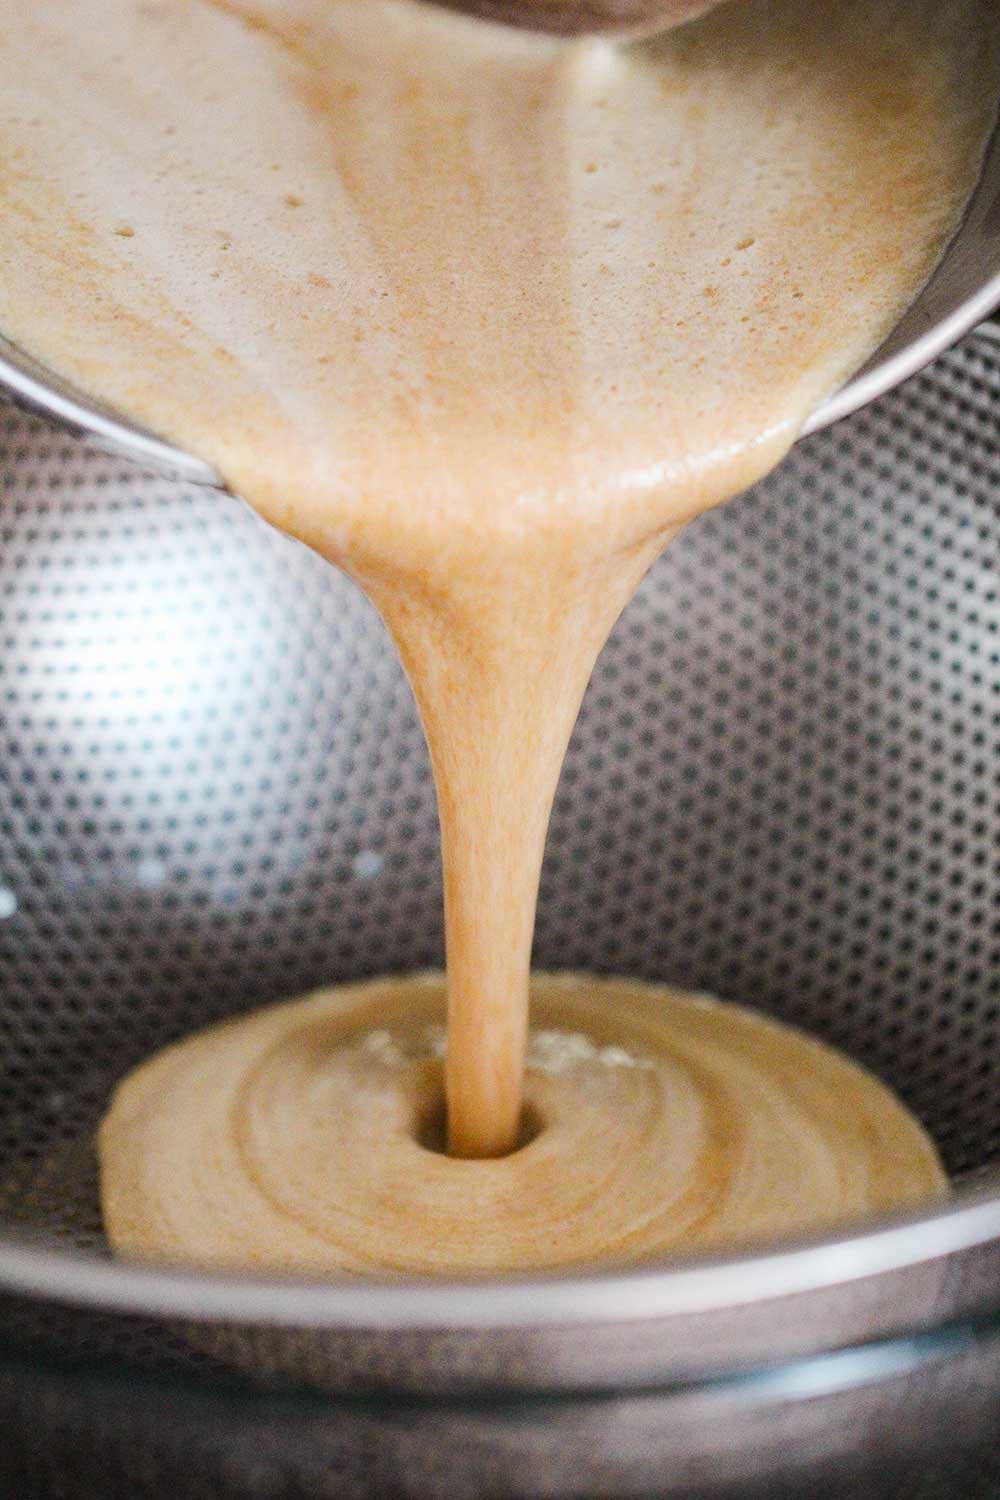
  • Pour the filling into the unbaked pie shell.
  • Bake for 15 minutes and then reduce the temperature to 350°F and bake for an additional 40 to 45 minutes, until the filling is set around the edges, but still soft in the middle (The pie will firm up as it cools).
  • Remove the pie from the oven and place it on a rack to cool. Let cool for at least 2 hours.
  • Meanwhile, prepare the topping by placing a large metal bowl in the freezer for 15 minutes.
  • Then, remove the bowl and add the cream, sugar, and vanilla extract.
    2 cups heavy cream, 4 tablespoon sugar, ¼ teaspoon vanilla extract
  • Using a handheld mixer, mix on high until stiff peaks form, about 3 to 5 minutes.
  • Use a pastry bag to pipe the whipped cream along the edges of the pie, or slice, and spoon a dollop of cream on top of each slice.

Video

Notes

Be sure to use pureed pumpkin and not pumpkin pie filling.
If you can't find ground allspice, simply increase the nutmeg to ½ tsp.
Be sure to work any clumps out of the sugar/spice mixture before adding to the pumpkin/egg mixture.
Adding the ingredients in stages helps to ensure everything is completely blended, which yields a luxurious and uniform-looking pie.
Store the pie in an airtight container for up to 3 days to 1 week.  The pie will also freeze nicely for up to 1 month.  
The whipped cream can be made up to 4 hours in advance.  Keep chilled in the refrigerator. 

Nutrition

Calories: 341kcal | Carbohydrates: 29g | Protein: 4g | Fat: 24g | Saturated Fat: 14g | Cholesterol: 160mg | Sodium: 204mg | Potassium: 101mg | Fiber: 1g | Sugar: 26g | Vitamin A: 1008IU | Vitamin C: 1mg | Calcium: 71mg | Iron: 1mg

Homemade Croutons

October 30, 2019 by Kris Longwell 2 Comments

A scratched metal baking sheet filled with homemade croutons with a wooden spatula holding some of the croutons.

There is just something so comforting about homemade croutons.  They are amazing on top of Classic Caesar Salad, Warm Spinach and Bacon Salad, or Roasted Butternut Squash Soup.  And they only take about 20 minutes to make! They truly will take your favorite salad or soup to the next level!

A scratched metal baking sheet filled with homemade croutons with a wooden spatula holding some of the croutons.
[feast_advanced_jump_to]

🥖 The Ingredients

With just a handful of easy-to-find ingredients, you can make unforgettable, restaurant-quality homemade croutons right in your own kitchen. Find ingredient notes (including substitutions and variations) below.

An arrangement of ingredients for homemade croutons on a grey wooden background including sliced bread, olive oil, Parmesan cheese, spices, and fresh parsley.

🌿 Substitutions and Variations

  • Bread – Go with your favorite bread. We love either an Italian or a French loaf. Baguettes work well, but you’ll have a more dense crouton. Sourdough is delicious, and also a bit denser. Sandwich bread works great, as well. All types!
  • Flavor enhancers – We find dried herbs, such as oregano and basil, add a subtle flavor. Experiment with other herbs, such as marjoram, thyme, or rosemary.
  • More flavor options – If you like garlic, toss the croutons with finely minced garlic right after baking. Or, add 1 teaspoon of garlic powder into the oil mixture before tossing with the bread.

See the recipe card (with video) below for a full list of ingredients and measurements.

Expert Tip

Cut the bread into approximately ¾-inch slices. Then cut those slices into strips, and then cube. We usually cut the bottom layer of the crust away, but leave the crust on the side and top edges. The crust adds a little more texture to some of the croutons, which we like. If you want crustless, uniform croutons, then cut away all the crust before cubing.

👩🏼‍🍳 How To Make Homemade Croutons

A person using a small whisk to mix oil oil with spices and dried herbs in a small white bowl on a wooden cutting board.
  1. Step 1: In a small bowl, mix together the olive oil, garlic, and oregano. 
A person using a large serrated knife to slice an Italian loaf of bread into 1-inch thick slices on a wooden cutting board.
  1. Step 2: Cut the bread into 1-inch slices. 
A person using a large serrated knife to cut sliced Italian bread into small cubes with a glass bowl nearby filled with previously cubed bread.
  1. Step 3: Cut away the crusts and cube the bread into 1-inch pieces.
A person pouring seasoned oil from a small white bowl into a large glass bowl filled with cubed pieces of Italian bread.
  1. Step 4: Pour the oil mixture over the cubed bread and toss to coat.
Freshly toasted homemade croutons that have been lightly seasoned and are resting on a scratched metal black baking pan.
  1. Step 5: Bake until golden and crunchy, about 15 minutes at 400°F.
A person sprinkling grated Parmesan cheese over freshly baked homemade croutons that also have fresh chopped parsley sprinkled on them, too.
  1. Step 6: Toss the warm croutons with chopped fresh herbs and grated Parmesan cheese.

👉 How To Store

  • Homemade croutons will stay perfectly crunchy and delicious in a bowl on your counter for a couple of days. You can store them in a baggie or an airtight container for up to 1 week (no need to refrigerate).
  • Our favorite way to keep them, though, is to freeze them. They thaw very quickly and are perfect when you need them for a warm bowl of soup or a delicious salad.
  • When they are fresh out of the oven, we hit them with just another sprinkle of salt.

🙋🏽‍♂️ Frequently Asked Questions

What type of bread is best for making homemade croutons?

Fresh, or even better, stale or day-old bread like French baguette, sourdough, or Italian bread works best because it holds up well when toasted and absorbs flavors nicely.

How do I long will homemade croutons stay fresh?

Homemade croutons stay fresh and crispy for up to two weeks when stored in an airtight container at room temperature.

Can I make homemade croutons gluten-free?

Yes, simply use gluten-free bread to make croutons that are safe for gluten-sensitive diets without sacrificing flavor or crunch.

A person sprinkling coarse Kosher salt onto freshly baked homemade croutons that are resting on a black baking pan.

🥗 Recipes with Homemade Croutons

  • Grilled chicken Caesar salad in a large wooden bowl with homemade croutons scattered over the dressed lettuce and sliced chicken.
    Grilled Chicken Caesar Salad
  • A white soup filled with roasted tomato basil soup next to sliced grilled cheese sandwiches.
    Roasted Tomato Basil Soup
  • Warm Spinach and Bacon Salad in a bowl next to two forks on top of a beige napkin
    Warm Spinach and Bacon Salad
  • A small crock of roasted butternut squash on a small white plate with croutons on it.
    Roasted Butternut Squash Soup

Ready to make croutons from scratch! Go for it! You’ll be so glad that you did.

And when you make them, be sure to take a picture, post it on Instagram, and tag @HowToFeedaLoon and #HowToFeedaLoon!

homemade croutons on a scraped black baking sheet with a wooden spoon.
Print Recipe
No ratings yet

Homemade Croutons

Homemade Croutons are so easy to make and truly take your favorite salad, soup, or stew to the next level. They freeze beautifully for up to 2 months!
Prep Time10 minutes mins
Cook Time15 minutes mins
Total Time25 minutes mins
Course: American / French
Cuisine: American / French
Servings: 6
Calories: 118.69kcal
Author: Kris Longwell

Equipment

  • 1 Baking sheet

Ingredients

  • 1 loaf bread Italian loaf or French baguette
  • 2 tablespoon unsalted butter melted
  • 1 tablespoon olive oil
  • 1 clove garlic minced
  • ½ teaspoon Kosher salt
  • ½ teaspoon black pepper freshly ground
  • ½ teaspoon oregano dried
  • 1 tablespoon Italian parsley chopped, optional
  • 2 tablespoon Parmesan cheese grated, optional

Instructions

  • Preheat oven to 400°F.
  • After cutting the bread into approximately ¾-inch slices, cut into ½-inch strips, and then cube. If desired, cut away the crusts.
    1 loaf bread
  • Add the melted butter, oil, garlic, and seasonings to a medium-sized bowl. Stir until mixed.
    2 tablespoon unsalted butter, 1 tablespoon olive oil, 1 clove garlic, ½ teaspoon Kosher salt, ½ teaspoon black pepper, ½ teaspoon oregano
  • Add the bread cubes and toss until fully coated.
  • Spread the coated bread cubes onto a baking sheet. Drizzle any leftover butter/oil/garlic mixture over the bread.
  • Bake for 10 minutes, or until just starting to brown. Open the oven and stir the cubes around with a wooden spoon. Close the door and bake for another 5 to 10 minutes, or until the croutons are golden
  • Remove from oven and transfer croutons to a plate lined with paper towels. Sprinkle with a little more salt, if desired. Toss with chopped parsley and grated Parmesan, if desired.
    1 tablespoon Italian parsley, 2 tablespoon Parmesan cheese
  • Store in an airtight container for up to 1 week, or freeze for up to 2 months.

Video

Notes

NOTE: Watch the video near the top of the recipe for visual guidance.
Using an unsliced loaf of bread works best. Slightly stale works wonderfully, but fresh is great, too. We love Italian or a French baguette. White, sourdough, pumpernickel, or whole wheat are all great choices. Cubed sliced sandwich bread will work in a pinch.
Use a combination of your favorite herbs, either dried or fresh. About 1 teaspoon for fresh, and ½ teaspoon for dried. Grated parmesan cheese is a great addition, too. We’d recommend about 1 tablespoon if using grated cheese.
This recipe is easily doubled or tripled. If you like your croutons extra crunchy, leave them in the oven longer until they’ve reached the desired texture.  
These will keep on the counter in a bowl for up to 2 days, in an air-tight container or baggie, for up to 1 week, and frozen in a freezer bag for up to 2 months. 

Nutrition

Calories: 118.69kcal | Carbohydrates: 11.93g | Protein: 2.52g | Fat: 4g | Saturated Fat: 2g | Cholesterol: 10.03mg | Sodium: 315.61mg | Potassium: 42.47mg | Fiber: 1.09g | Sugar: 1.43g | Vitamin A: 116.62IU | Vitamin C: 0.16mg | Calcium: 34.86mg | Iron: 0.88mg

Teriyaki Chicken Wings

October 27, 2019 by Kris Longwell 15 Comments

A close up view of a blue platter holding teriyaki chicken wings with sesame seeds sprinkled over the top.

Simply stated, these wings are a true taste sensation.

These wings are so good, they don’t even need a dipping sauce! Baked, instead of fried, and exploding with flavor. Perfect party fare! Perfect with Fried Mozzarella, Tex-Mex Queso, and Classic Spinach & Artichoke Dip!

A blue platter holding a batch of teriyaki chicken wings.

How To Make Teriyaki Chicken Wings


NOTE: If you liked this video, please subscribe to our YouTube channel. Remember to click the little ‘bell’ icon so you’ll never miss a new video. Thank you!

The Ingredients You Will Need

For the Chicken and Marinade

Chicken wings – Flats and drumettes, sometimes called “party wings.” See the EXPERT TIP below.
Seasonings – Salt and pepper.
Garlic – Minced.
Ginger – Fresh, minced.
Soy sauce – Regular or low-sodium are both good.
Sesame oil – Found in the Asian section of most supermarkets, at Asian food markets, or online.

For the Sauce

Garlic – Minced.
Ginger – Fresh, minced.
Soy sauce – Regular or low-sodium.
Sesame oil – Regular or toasted. See the note above regarding where to find it.
Oil – Olive oil or extra-virgin olive oil.
Pineapple juice – You don’t need much, grab a small bottle or can, if available.
Mirin – Sweet Asian cooking wine, found in the Asian section of most supermarkets.
Brown sugar – Dark or light is fine.
Cornstarch – Plus water to make a slurry for thickening the sauce a bit.
Sesame seeds – For garnish.

EXPERT TIP: When looking for wings, you’re going to want to go with drumettes and wingettes (or flats), and you’ll want them separated. There is a third part of the wing, called the tip, which is pointy and has very little meat. Most well-stock supermarkets carry the drumettes and wingettes/flats packaged and labeled as such, sometimes they’re called “party wings.”

Two hands holding a baking rack on a baking sheet filled with uncooked teriyaki chicken wings.
Two hands with oven mitts holding a baking sheet of baked chicken wings.

Tips for Perfect Teriyaki Chicken Wings

Allow Time for the Marinade – You can only let the wings chill in the marinade for an hour and they’ll be delicious, but marinating overnight produces deeper flavor. Move the wings around every couple of hours, if possible.

Fresh is Best – For best results, go with freshly minced garlic and ginger. Bottled and/or jarred won’t provide the best results.

Serve Piping Hot – Those wings are addictively delicious at room temperature, they are best served piping hot fresh out of the oven, and tossed with the warm sauce. You’ll want to serve them immediately.

EXPERT TIP: A combination of corn starch and cool water, mixed together, is called a ‘slurry.’ This will slightly thicken the sauce, which is ideal. Use equal amounts of cornstarch and water, typically 1 tablespoon each. After adding the slurry to the sauce, stir constantly until slightly thickened. If you prefer a thicker sauce, make another slurry, and add more. Be careful, it can thicken up quickly. If it gets too thick, thin with a little water.

A sauce pan pouring teriyaki sauce over baked chicken wings.

How To Serve

Be sure to leave plenty of the sauce to brush another layer on the wings once they are ready to serve.

The sesame seeds add a little texture and taste and give them a beautiful appearance.

These wings are truly so deep in flavor, no dipping sauce is needed, unless you double up on the teriyaki sauce. It’s so good, you’ll want to drink it!

A brush adding a layer of teriyaki sauce to baked teriyaki chicken wings.

Other Amazing Wing Recipes to Try

We love all kinds of wings, without a doubt. Here are some of our all-time favorites that we’re pretty certain you and your loved ones will love, too:

Classic Buffalo Wings with Homemade Blue Cheese Dressing
Grilled Buffalo Wings
Italian-Style Chicken Wings with Gorgonzola Dipping Sauce
Grilled Curry Chicken Wings
Garlic Parmesan Chicken Wings
Bourbon Maple Wings

All of these wings are amazing in their own way. But, in the meantime, aren’t these wings calling your name?

A close up view of a blue platter holding teriyaki chicken wings.

Teriyaki Chicken Wings FAQs

  • Where do I find Mirin? Mirin is a Japanese sweet cooking wine that can be found in the Asian section of most well-stocked supermarkets. It can certainly be ordered online, too. You could use sake in place of Japanese mirin, or combine 1 tablespoon of sugar with sherry or chardonnay, before adding it to the sauce.
  • Can this recipe be used for other types of chicken? Absolutely! You can marinate chicken pieces (legs, thighs, breasts) and then roast or grill them, finishing them off with the sauce. You’ll need to adjust cooking times to make sure the chicken reaches 165°F.
  • Can these be made in advance? Most of it! Marinate the chicken in advance. Make the sauce up to a day in advance. Roast up to several hours in advance. And then do the final round of baking (with the sauce applied), just before serving. These are best served hot, right out of the oven.
  • Do these need a dipping sauce? You will most likely have some of the teriyaki sauce left over, so you can serve them with that. But honestly, these are so loaded with flavor, that they are dynamite by themselves!

A hand holding a baked chicken wing with sesame seeds on it.

Ready to make some of the most scrumptious chicken wings of all time? Go for it!

And when you do, be sure to take a picture, post it on Instagram, and tag @HowoToFeedaLoon and #HowToFeedaLoon!

An overhead view an oval blue platter filled with a pile of teriyaki chicken wings.
Print Recipe
5 from 4 votes

Teriyaki Chicken Wings

These Teriyaki Chicken Wings are always a crowd favorite. Be sure to marinate the wings for at least 1 hour (or up to overnight) to ensure the best flavor. Then bake, apply the incredible sauce, and then bake again until cooked through and nice and crispy on the outside. Incredible. Be sure to leave extra sauce for a final basting just before serving.
Prep Time20 minutes mins
Cook Time1 hour hr 5 minutes mins
Marinating1 hour hr
Total Time2 hours hrs 25 minutes mins
Course: Appetizer
Cuisine: asian, Asian / American
Servings: 6 people
Calories: 386kcal
Author: Kris Longwell

Ingredients

  • 2 lbs chicken wings drumettes and wingettes (flats) only
  • 1 teaspoon Kosher salt
  • 1 teaspoon black pepper freshly ground
  • 2 tablespoon garlic minced, divided (1 tablespoon for the marinade and 1 for the sauce)
  • 2 tablespoon ginger fresh, minced, divided (1 tablespoon for the marinade and 1 for the sauce)
  • 1 cup soy sauce divided, ½ cup for marinade and ½ cup for sauce
  • 1 tablespoon sesame oil
  • 1 tablespoon olive oil
  • ¼ cup pineapple juice
  • ½ cup mirin
  • ¼ cup brown sugar
  • 1 to 2 tablespoon cornstarch
  • Sesame seeds for garnish

Instructions

  • Season the wings with salt and pepper.
  • In a large bowl, stir together the garlic (1 tbsp), ginger (1 tbsp), soy sauce (½ cup) and sesame oil.
  • Add the seasoned wings and turn to fully coat.
  • Transfer to a wide dish, cover and refrigerate for at least 1 hour, or up to overnight.
  • Preheat oven to 350°F.
  • Remove the chicken wings from the marinade and place on a large rimmed baking sheet, preferably on a baking rack.
  • Bake for 50 minutes.
  • Meanwhile, heat the olive oil in a medium saucepan over medium-high heat.
  • Add the garlic (1 tbsp) and ginger (1 tbsp) and saute until soft, about 2 minutes.
  • Add the soy sauce (½ cup), pineapple juice, mirin and brown sugar. Bring to a boil then reduce heat to medium.
  • Make a slurry by adding the corn starch in a small bowl and add 1 tablespoon of cold water. Stir until combined.
  • Add the cornstarch slurry to the sauce and cook until reduces to the consistency of syrup. About 10 to 15 minutes. Cover and reserve until the wings are done baking. Add more slurry if thicker sauce is desired.
  • Remove the wings from the oven and increase the temperature to 425°F.
  • Pour half of the sauce into a large bowl and carefully add the wings to the bowl and gently stir to coat.
  • Place the wings onto the baking sheet, put them back into the oven, and bake for another 10 to 15 minutes. Wings should start to brown a little on the edges.
  • Remove from the oven and coat with the remaining sauce with a small brush.
  • Plate the wings and then sprinkle sesame seeds over the top.  Serve at once. 

Video

Notes

See the video near the top of the blog post for visual guidance. If you liked the video, please subscribe to our YouTube channel. 
Look for drumette and wingette/flats chicken wings. They are usually packaged in the poultry section in the meat dept. of most well-stocked markets. Sometimes they are called 'party wings.'
Mirin can be found in the Asian section of most supermarkets. Japanese sake can be substituted. Or, add 1 to 2 tablespoon of sugar to white wine and mix, and then add to the sauce with the other ingredients.
The wings are best if marinated for several hours, or overnight. The sauce can be made up to 1 day in advance. The marinated wings can be baked several hours before serving. Bake with the sauce just before serving. The wings are best served piping hot, fresh from the oven.
Snipped chives also make a nice garnish, in addition to the sesame seeds. 

Nutrition

Calories: 386kcal | Carbohydrates: 23g | Protein: 27g | Fat: 8g | Saturated Fat: 2g | Cholesterol: 94mg | Sodium: 2791mg | Potassium: 298mg | Fiber: 1g | Sugar: 15g | Vitamin A: 180IU | Vitamin C: 2mg | Calcium: 33mg | Iron: 2mg

POST UPDATE: This recipe was originally published in September 2016, but was updated with improved tweaks to the recipe with new tips and photography and a fabulous new video in September 2023.

Roasted Chicken Stock

October 23, 2019 by Kris Longwell 5 Comments

Three jars filled with roasted chicken stock with a stock pot and vegetables around them.

Roasted Chicken Stock has the ability to elevate your recipes to amazing heights.

Next time you use a rotisserie chicken, or enjoy a batch of chicken wings…don’t throw away those bones! You won’t believe the difference roasted chicken stock will make in your Chicken Pot Pie, Chicken and Dumplings, and White Chili with Roasted Tomatillos & Chicken!

Three jars filled with roasted chicken stock with a stock pot and vegetables around them.

ROASTED CHICKEN STOCK IS EASY TO PREPARE

All you need is a few hours to make this recipe that the Loon refers to as “liquid gold.”

Roasting the bones deepens the flavor of the stock, which greatly enhance any recipe that calls for chicken stock. Bone broth has bee utilized for many generations throughout the ages.

Watch us show you how easy it is to make Roasted Chicken Stock!

THE INGREDIENTS YOU WILL NEED

The beauty of roasted chicken stock is that the ingredients are not that numerous and are truly farm-to-table in nature.

We like to roast the bones at a high temperature (450°F) with a combination of roughly chopped onions, carrots and celery for 40 minutes. After 20 minutes, use a wooden spoon to move the bones and veggies around in the pan.

EXPERT TIP: For this recipe, you’ll need between 3 to 4 lbs of bones. That’s usually the carcass of two rotisserie chickens, and a handful of chicken wings or legs. You can easily remove the chicken meat from a couple rotisserie chickens and freeze until ready to use. Get in the habit of not throwing away chicken bones. Freeze them and then use them for making stock! Don’t worry if a little meat is left on the bones. It will all roast beautifully and just add to the flavor.

Below, see pre-roasting, and then post-roasting. This is getting really good!

Two hands holding a roasting pan filled with chicken bones and vegetables.
Two hands holding a large roasting pan of roasted chicken bones and vegetables.

SIMMER WITH HERBS AND AROMATICS

Now, it’s time to make the stock.

Simply transfer the roasted bones and vegetables to a large stock pan and add enough water to cover by a couple inches.

EXPERT TIP: For even more flavor, add a couple cups of water to the roasting pan after you’ve transferred the bones and veggies to the stock pan. Use a sturdy spatula to scrape up the stuck-on bits on the bottom of the pan. If there are deeply burnt or charred bits, don’t scrape them up, as they may impart a slightly burnt taste to the stock.

We like to add fresh herbs (such as thyme) and black peppercorns for even deeper flavor.

Two hands holding a small bowl of peppercorns and a bunch of herbs over a large stock pan for roasted chicken stock.

HOW TO STRAIN THE ROASTED CHICKEN STOCK

As the stock simmers, you may notice some frothy impurities bubbling on the surface. Simply grab a small sieve, or even a large spoon, and skim until it is no longer there.

It’s important to strain the stock once it has simmered for several hours. We first very carefully strain the stock through a fine-mesh colander into another pot.

A second straining isn’t 100% necessary, but we find staring the liquid one more time through a colander lined with cheese cloth, or using a Chinoise, helps to get a beautiful, silky stock.

A large stock pan pouring roasted chicken stock into a colander over another pot.

ROASTED CHICKEN STOCK FAQs

  • Can I use turkey bones? Yes! Use the same recipe with you Thanksgiving turkey! Or, use a combination of turkey and chicken bones. You will get an amazing, rich stock.
  • Can I use the stock immediately after it has been strained? We recommend letting the stock completely cool in the refrigerator, usually overnight. A thin layer of congealed fat will most likely form on the surface of the stock. Use a spoon to remove the fat. At this point, the stock is ready for use.
  • What types of recipes are best for this stock? Soups and gravies, without a doubt. Any recipe that calls for chicken stock or broth is the perfect time to pull out your roasted chicken stock!
  • How long will the stock keep? You can keep the cooled stock in the refrigerator for up to 1 week. The stock freezes beautifully for up to 3 months. Depending how much water you add to the stock pan, the amount of stock you’ll get will vary, but you should have enough to freeze multiple containers of it for future use.

Three varied-sized jars holding roasted chicken stock in front of a large stock pan next to vegetables and herbs.

Ready to take your favorite soups and anything that calls for chicken stock to the next level? Go for it!

And don’t forget, when you make this amazing Roasted Chicken Stock, be sure to take a picture, post on Instagram, and tag @howtofeedaloon and #howtofeedaloon!

Several jars filled with roasted chicken stock in front of a large stock pan with vegetables and herbs nearby.
Print Recipe
5 from 1 vote

Roasted Chicken Stock

This recipe for roasted chicken stock delivers such a deeply flavored broth for your favorite soups, gravies, or any recipe calling for stock/broth. Be sure to save those poultry bones and freeze until ready to make this incredible stock!
Prep Time15 minutes mins
Cook Time4 hours hrs
Chill time4 hours hrs
Total Time8 hours hrs 15 minutes mins
Course: Stock
Cuisine: Various
Servings: 12
Calories: 40kcal
Author: Kris Longwell

Equipment

  • Large roasting pan.
  • Large stock pot (preferably 12 to 16 quart) - or a couple smaller pots

Ingredients

  • 3 to 4 lbs chicken bones or turkey, roughly broken down
  • 3 onions quartered, skins left on
  • 2 large carrots roughly cut, no need to peel
  • 3 stalks celery roughly cut
  • Kosher salt
  • Black pepper freshly ground
  • 2 tablespoon olive oil
  • 4 sprigs thyme fresh
  • 1 bunch flat-leaf parsley fresh, stems only
  • ¼ cup peppercorns whole, black

Instructions

  • Pre-heat oven to 450°F.
  • Place bones, onions, carrots, and celery in a large roasting pan. Generously sprinkle salt and pepper all over. Add the oil and toss until well coated.
  • Place in the oven and roast for 40 minutes, stirring the contents of the pan once after 20 minutes.
  • Transfer the roasted bones and vegetables to a large stock pot. Add enough cool water to cover by 2 inches.
  • Add 2 cups water to the roasting pan and use a spatula to scrape up bits that are stuck to the bottom of the pan. Pour into the stock pot. (If the bits are extremely burnt and charred, skip this step)
  • Add the thyme, parsley stems, and peppercorns to the pot.
  • Simmer over medium heat for 4 hours, skimming any impurities that may appear on the surface.
  • Carefully strain the stock into another large pot through a fine-mesh seive. Discard the solid items.
  • If desired, strain again through a very fine mesh Chinoise, or colandar lined with cheese cloth.
  • Place in the refrigerator and let cool for 4 hours, or overnight. Use a large spoon to skim off congealed fat that has formed on the surface of the stock.
  • Use at once, or store in airtight containers. Store in the refrigerator for up to 1 week, or freeze for up to 3 months.

Video

Notes

You can also use a turkey carcass, or turkey bones, or a combination of chicken and turkey. Or, just use all chicken bones.
Be sure to stir the bones and veggies at least once during the roasting process. This will help to eliminate burnt bits on the bottom of the pan, which you don't want when you deglaze the pan with water before adding to the stock pan. If you do have overly-burnt bits, then skip the de-glazing step.
If you prefer your stock to be salted, add salt, 1 teaspoon at a time, after you have strained the liquid. Taste and add more until desired seasoning is reached.
We like to strain the stock twice. Once through a regular colander, and then a second time through a fine-mesh sieve, Chinoise, or colander lined with cheesecloth.  This second straining isn't 100% necessary, but ensures a smooth and silky stock.  
To prevent messy spillage, we place a pot in a large pan, or sink, before pouring the stock through the strainer. Just in case some of the stock doesn't make it into the 2nd pot, the pan will catch the spillage. 
We divide the stock into several different containers, usually about 2 to 3 cups each. This way, you only have to thaw the amount you need for your next recipe, rather than thawing out the entire batch, which will most likely be more than you will need.
Keep stock in the refrigerator for up to 1 week and in the freezer for up to 3 months. 

Nutrition

Calories: 40kcal | Carbohydrates: 4g | Protein: 1g | Fat: 2g | Saturated Fat: 1g | Sodium: 20mg | Potassium: 131mg | Fiber: 1g | Sugar: 2g | Vitamin A: 2466IU | Vitamin C: 10mg | Calcium: 22mg | Iron: 1mg

Provençal Chicken Stew

October 20, 2019 by Kris Longwell 21 Comments

A large black slow-cooker filled with Provençal chicken stew on a floral place mat.

This post is kindly sponsored by Crock-Pot®, but the recipe, photography, and opinions are 100% ours

Provençal Chicken Stew. It just sounds comforting, right?

Trust us on this one, we turned to our beloved Crock-Pot to create one of the most comforting autumnal (or really anytime) dishes we’ve ever made.  We start things off with a large skillet, and then simply slow-cook everything for about 4 to 5 hours!  Bring the amazing taste of the South of France into your very own kitchen!

A large black slow-cooker filled with Provençal chicken stew on a floral place mat.

PROVENÇAL CHICKEN STEW IS EASY TO MAKE IN YOUR CROCK-POT®

We are so very thrilled to have partnered with one of our favorite brands in the world, Crock-Pot®, to bring you this delicious and hearty stew.

This dish is amazing any time of the year, but when fall comes around, it doesn’t get much better than this stew. We love it so much, we call it: Crocktober!

Watch us use our awesome Crock-Pot® 6-Quart Programmable Cook & Carry™ Slow Cooker to make this incredible stew:


PROVENÇAL COOKING IS VERY SEASONAL

Provence is a region in Southern France that draws its cuisine from the rich countryside and Mediterranean Sea. When we travelled through the South of France a few years back, we loved it all, but there is something even extra magical about Provence, if that’s even imaginable.

During the fall months, dishes are created using hearty mushrooms, rich tomatoes, and harvested vegetables, all locally sourced, of course.

For this stew, we knew chicken would be the perfect protein.

EXPERT TIP: When cooking chicken in your Crock-Pot, we recommend going with bone-in, but no skin. The bone imparts unbeatable flavor, but the skin becomes a bit rubbery during the slow-cooking process. We simply remove the skin, then dredge the chicken in flour, and sear in a nice large skillet before adding to your Crock-Pot.

Two hands using a knife to remove skin from chicken thighs in front of a Crock-Pot.
Two hands dredging skinless chicken thighs in a flour mixture for Provençal chicken stew.
A pair of tongs flipping a seared chicken thigh in a large Dutch oven.

THE BEST VEGETABLES TO USE FOR PROVENÇAL CHICKEN STEW

First and foremost, choose the vegetables for the stew that look best at your local farmer’s market or food store.

You can never go wrong with a beautiful mirepoix consisting of chopped onion, carrots and celery.

When we visited Nice, France a few years back, we had a mushroom risotto that to this day will be forever remembered as one of the greatest (and simplest) culinary dishes we ever consumed. We love mushrooms for this Provençal stew so much. Everything gets beautifully sautéed in the same dish as the seared chicken.

EXPERT TIP: We like to keep the vegetables somewhat ‘chunky’ for the stew. Though they don’t slow-cook for as long as a beef stew, you don’t want them to become too soft. Cutting them a little larger than you normally might, helps them to maintain the perfect texture. This is true for the mushrooms, too.

A wooden spoon moving around sautéed vegetables and mushrooms in a blue Dutch oven.

SLOW-COOK THE STEW FOR 4 TO 5 HOURS

After searing off the chicken and then sautéing the vegetables in wine and crushed tomatoes, it’s time to bring it all together in your Crock-Pot.

Bone-in chicken will become perfectly tender after slow-cooking in the Crock-Pot after 4 to 5 hours. You can cook the stew for up to 8 hours, but after 6 or so hours, the chicken will become so tender it will fall off the bones, and sometimes leave unwanted bone fragments in your stew.

The awesome thing about our Crock-Pot is that it does the thinking for us, we simply set the timer to 5 hours and then go about our other business. As soon as the cooking time is up, it shifts to WARM to keep it at the perfect temperature until we are ready to serve.

A pair of tongs nestling seared chicken thighs into a stew sauce in a crock-pot for Provençal chicken stew.

PROVENÇAL CHICKEN STEW IS IDEAL FOR SERVING AT A GATHERING

This recipe is perfect when entertaining. The stoneware from the Crock-Pot® 6-Quart Programmable Cook & Carry™ Slow Cooker looks beautiful for serving right at the table.

We also love that this particular Crock-Pot features the Cook & Carry™ locking lid that makes it easy to travel with your meal. Simply lock the lid in place before you leave, and your food will stay secure while you travel to your final destination. The large, durable side handles make carrying easier than with other slow cookers.

EXPERT TIP: This stew is very hearty and filling. We think creamy mashed potatoes are the perfect side. That sauce on the potatoes is to die for! Cooked linguine or creamy polenta works very well, too.

A French dish filled with seared chicken with a tomato, mushrooms and vegetables with a bottle of white wine next to it.

CELEBRATE CROCKTOBER WITH THIS HEARTY STEW

We just can’t rave enough about Crock-Pot®. If you know us at all, you know we have a special relationship with our recipes that are slow-cooked in this iconic kitchen tool.

If you don’t have one, there has never been a better time of the year to get your hands on one and make incredible Crocktober recipes! We have numerous sizes and styles of Crock-Pots in our kitchen and we always pick ours up at Target!

By the way…have you tried our incredible BBQ Brisket Sandwiches? They are the bomb and so easy in your Crock-Pot!

In the meantime, it’s time to celebrate Crocktober with one of our all-time fall recipes: Provençal Chicken Stew!

A small bowl of Provençal Chicken Stew in front of a stainless steel Crock-Pot.

Okay, folks! It’s the perfect time of the year to get your Crock-Pot out make one of the most comforting stews ever!

And don’t forget, when you make the Provençal Chicken Stew, be sure to take a picture, post it on Instagram, and tag: #howtofeedaloon and #CrockPotxTarget and #CrockPotRecipes!

An overhead view of Provençal Chicken Stew in a large black slow cookers.
Print Recipe
5 from 6 votes

Provençal Chicken Stew

This Provençal Chicken Stew is so heart-warming and perfect for enternaining, especailly in the fall months. Start things off with a nice sear and saute in a large vessel, and then bring it all home in your slow-cooker. Crock-Pot is ideal!
Prep Time20 minutes mins
Cook Time5 hours hrs 30 minutes mins
Total Time5 hours hrs 50 minutes mins
Course: Entree / Slow Cooker, Soup or Stew
Cuisine: French
Servings: 8
Calories: 398kcal
Author: Kris Longwell

Equipment

  • Crock-Pot® 6-Quart Programmable Cook & Carry™ Slow Cooker

Ingredients

  • 8 chicken pieces bone-in, skin removed
  • 1 cup all-purpose flour
  • 2 teaspoon Kosher salt divided
  • 1 teaspoon black pepper
  • 2 tablespoon olive oil divided
  • 1 medium onion yellow, chopped
  • 1 medium carrot sliced, about ¼-inch thick
  • 2 stalks celery sliced, about ¼-inch thick
  • 2 cloves garlic minced
  • 8 oz. mushrooms button, quartered
  • 1 tablespoon herbs de Provence dried
  • ½ cup white wine dry
  • ½ cup chicken stock
  • 1 14 oz. can crushed tomatoes
  • 1 bay leaf
  • 1 cup black olives pitted
  • 2 tablespoon flat-leaf parsley fresh, chopped for garnish

Instructions

  • Sprinkle salt and pepper all over the chicken pieces. Add the flour to a large platter or bowl and dredge the chicken pieces until fully coated. Shake off excess and set aside.
  • In a large skillet, or Dutch oven, heat 1 tablespoon of the oil over medium-high heat. Add the chicken and sear until browned on both sides, about 8 minutes total. You will probably need to do this in batches. Add a little more oil for the second batch, if necessary. Set aside.
  • In the same skillet, heat another tablespoon of oil and add the onion, carrots, and celery and saute until starting to soften, about 4 minutes. Add the garlic and cook for another minute. Stir occassionally with a wooden spoon, scraping up the chicken pieces at the bottom of the pan.
  • Add the mushrooms and herbs de Provence and cook until mushrooms start to release liquid. About 4 more minutes.
  • Add the white wine and simmer for 3 minutes until slightly reduced. Add the chicken stock and tomatoes and simmer for another 3 to 4 minutes. Stir in 1 teaspoon of salt and a ½ tsp. black pepper.
  • Place the seared chicken in the bottom of the Crock-Pot and the pour the tomato mixture all-over the top. Nestle in the bay leaf.
  • Cook on the Low setting for 4 to 5 hours. Stir in the olives in the last 10 minutes of cooking. Taste and stir in more salt, if desired. Remove the bay leaf and discard.
  • Garnish with chopped parsley.

Video

Notes

You can use a whole chicken that has been cut into 8 pieces, or use a variety of bone-in chicken pieces.  Removing the skin is critical, otherwise, it will become rubbery during the slow-cooking process.
Cut the vegetables and mushrooms a little larger than you normally would.  The stew stands up to 'chunkier' pieces and they will reduce in size as they slow cook.
If you can't find Herbs de Provence, use a combination of dried thyme and rosemary.  
We don't recommend slow-cooking the stew for more than 4 or 5 hours.  If you do, the meat will be extremely fall-off-the-bone tender, but may leave chicken bone fragments in the stew.
We love serving the stew along side a bowl of hot, creamy mashed potatoes.  Cooked linguine or creamy polenta are accompaniments, too. 
The stew can be prepared up to 2 days in advance.  Re-heat in the Crock-Pot on Low for 1 to 2 hours, or on Warm for several hours.  The stew can be frozen for up to 2 months. 

Nutrition

Calories: 398kcal | Carbohydrates: 17g | Protein: 25g | Fat: 12g | Saturated Fat: 3g | Cholesterol: 87mg | Sodium: 964mg | Potassium: 435mg | Fiber: 2g | Sugar: 2g | Vitamin A: 1646IU | Vitamin C: 6mg | Calcium: 47mg | Iron: 3mg

Homemade Apple Pie

October 17, 2019 by Kris Longwell 4 Comments

A slice of homemade apple pie on a white plate with a fork and another plate of pie behind it.

Homemade Apple Pie are three magical words.

This classic pie is one of the best pies around. Simple, yet so incredibly flavorful. And surprisingly easy to prepare. This ranks right up there with Classic Pecan Pie, Classic Pumpkin Pie, Apple Brown Betty, and Southern Chess Pie.

A slice of homemade apple pie on a white plate with a fork and another plate of pie behind it.

HOMEMADE APPLE PIE IS EASY TO MAKE

You will really be surprised how easy it is to make authentic apple pie from scratch.

Of course, we highly recommend making the pie dough, too, but in a pinch, you can use store-bought.

Watch us show you how easy it is to make Homemade Apple Pie in your own kitchen!


CHOOSING THE RIGHT APPLES

We’ve tested numerous apples for baking homemade apple pie, and to be honest, you really can’t go wrong.

Here are the apples we recommend:

  • Honeycrisp (Sweet)
  • Granny Smith (Tart)
  • Golden Delicious (Sweet)
  • Fuji (Sweet)
  • Cortland (Tart)
  • Golden Delicious (Sweet)
  • Jonathan (Tart)
  • Crispin/Mitsu (Sweet)

EXPERT TIP: The best apples are a combination of sweet and tart. But again, we had a large basket of honeycrisp, and made our pie with just those apples…and good heavens, was it great!!

Two hands peeling a honeycrisp apple over a large bowl of slice apples.

HOMEMADE PIE DOUGH IS IDEAL

Making homemade apple pie is so much fun and the end result is truly something special.

So, if you’re going to make apple pie from scratch, why not make it even more special and make the pie dough from scratch?

EXPERT TIP: You’ll need to make two batches of pie dough, one for the bottom layer of crust and one for the top. Gently form each ball of dough into a disk, wrap it with plastic wrap, and keep it in the refrigerator until ready to use. You can make the dough up to 3 days in advance! Or freeze up to 2 months in advance!

Perfect pie crust on board with rolling pin

THE ESSENTIAL INGREDIENTS FOR HOMEMADE APPLE PIE

We like to toss the sliced apples with a small portion of apple cider and lemon juice. Not only does the lemon juice add flavor, but it will prevent the apples from starting to brown from oxidation.

The spices are simple and deliver that classic apple pie taste. Ground cinnamon is a must. Ground nutmeg is really great, also.  And we love ground allspice, too. If you can’t find allspice, just stick with cinnamon and nutmeg, and you’ll be just fine.

EXPERT TIP: Allspice will lose its flavor after several months of shelf-life. We recommend getting a fresh jar if you haven’t used your allspice in a number of months, or in some cases, years!

Sprinkle the dry mixture over the apples after you have tossed them with the cider and lemon juice. You’ll notice how the spices adhere nicely to the apples.

A hand holding a small bowl of spices and sprinkling over another bowl full of sliced apples for homemade apple pie.

NO NEED TO PRE-BAKE THE PIE DOUGH

There is no need to pre-bake (aka ‘blind bake’) the pie dough before adding the pie filling.

Simply layer the apples into a 9-inch pie dish that you have already lined with the first pie dough.

We recommend not ‘dumping’ the apple mixture into the prepared pie dough, because you don’t need all the liquid from the apple cider and lemon juice. Use a slotted spoon, or even your fingers, to grab the apples. Add a couple tablespoons of the remaining liquid over the apples in the pie dish.

A hand layering spiced apple slices into a pie dish lined with homemade pie dough.

CUT SLITS INTO THE TOP DOUGH

We love to pile the apples high in our homemade apple pie.

Next, gently place the 2nd rolled-out pie dough (rolled out to roughly 13 inches) over the top and crimp the sides, working to seal the bottom layer of dough with the top layer.

Before you start to crimp, or flute, the edges of the pie, use a pair of scissors to clip away excess dough.

EXPERT TIP: As the pie bakes, steam will need to release. That’s why we recommend making four slits in the top of the pie, or if you’re feeling up to it, slice the top layer of dough into strips and make a lattice top!

Two hands adding a top layer of pie dough over a pie dish filled with apples.
A hand using a knife to cut slits in the top of an uncooked homemade apple pie.

HOMEMADE APPLE PIE IS PERFECT FOR THE HOLIDAYS

Homemade Apple Pie is the quintessential dessert during the holidays.

We do recommend letting the pie cool completely before serving. If you prefer your slice of apple pie warmed, just heat it for a short bit in the microwave.

There is something truly transformative that happens when these simple ingredients are brought together and baked to pie perfection.

An overhead view of a freshly bake homemade apple pie.

Ready to make everyone’s favorite holiday dessert? Go for it!!

And when you make this awesome pie, be sure to take a picture of it, post it on Instagram, and tag @howtofeedaloon and #howtofeedaloon!

A close-up view of a slice of homemade apple pie next to a glass cup of coffee.
Print Recipe
5 from 1 vote

Homemade Apple Pie

This is about as all-American as they come. And this is a classic version of a classic pie. Homemade apple pie...yum, yum, yum.
Prep Time20 minutes mins
Cook Time1 hour hr
Resting time2 hours hrs
Total Time3 hours hrs 20 minutes mins
Course: Dessert
Cuisine: American
Servings: 8 people
Calories: 428kcal
Author: Kris Longwell

Ingredients

  • 2 discs pie dough
  • 9 whole apples such as Cortland or Granny Smith, peeled, cored, and sliced (about 10 to 12 cups)
  • 2 tablespoon apple cider
  • 1 tablespoon lemon juice
  • 1 teaspoon vanilla extract
  • ¾ cup sugar plus extra for dusting the top of the pie
  • ¼ cup cornstarch
  • ½ teaspoon salt
  • 1 teaspoon cinnamon
  • ¼ teaspoon ground nutmeg
  • ¼ teaspoon allspice
  • ½ cup milk
  • 1 egg lightly beaten

Instructions

  • Pre-heat oven to 425°F.
  • In a large bowl, mix together the apples, cider, lemon juice and vanilla.
  • In another bowl, whisk together the dry ingredients.
  • Stir the dry ingredients into the apples to coat them evenly.
  • Roll one piece of the pie crust discs to about 13 inches, and then place into a 9-inch pie plate.
  • Use a slotted spoon to transfer the apples into the pie dish. Sprinkle 2 to 3 tablespoon of the liquid over the apples.
  • Roll out the other pie crust, and lay it atop the pie.
  • Seal and crimp the edges.
  • Add the egg to the milk, and gently mix.
  • Brush the top with milk/egg bath and sprinkle with sugar.
  • Cut four slashes in the middle of the crust to vent steam.
  • Bake the pie for 15 minutes.
  • Reduce heat to 375 F, and bake for an additional 45 minutes.
  • Let completely cool on baking rack. At least two hours.

Video

Notes

The pie dough can be made up to 3 days in advance.  Keep wrapped in plastic in the refrigerator. 
Almost any type of apple will work for this pie, but we recommend a combination of sweet and tart.  See blog post for more details on the types of apples to select. 
This recipe creates a little sauce and may 'ooze' a bit when cutting the first slice.  If you want no liquid at all, omit adding the 2 tablespoon of the apple cider/lemon juice liquid.
Keep an eye on the pie when baking at the higher temperature for the first 15 minutes, if browning too quickly, cover with foil, and then remove when you lower the temperature for the remainder of the baking process. 
We recommend allowing the pie to cool completely before serving.  If you would like to serve it warm, heat the pie (or pie slices) for about 30 seconds in the microwave first.
Wonderful served with vanilla ice cream or whipped cream!

Nutrition

Calories: 428kcal | Carbohydrates: 24g | Protein: 1g | Fat: 22g | Saturated Fat: 8g | Polyunsaturated Fat: 6g | Monounsaturated Fat: 2g | Trans Fat: 2g | Cholesterol: 22mg | Sodium: 450mg | Potassium: 41mg | Fiber: 0.2g | Sugar: 221g | Vitamin A: 56IU | Vitamin C: 1mg | Calcium: 26mg | Iron: 0.2mg

POST UPDATE: This recipe was originally adapted from King Arthur Flour in January, 2014, but has been updated with tweaks to the recipe, brand new photography and a fabulous new video in October, 2019. 


Instant Pot Smoked Sausage Stew

October 15, 2019 by Kris Longwell 22 Comments

A large white bowl filled with smoked sausage stew and a piece of toasted bread stuck in the side with carrots in the background.


Instant Pot Smoked Sausage Stew is such a comforting fall dish.

This stew is a meal in-and-of-itself and with the help of your Instant Pot, it is on the table within about 40 minutes! Loaded with flavor, this is one recipe you’ll want to make time and time again!

A large white bowl filled with smoked sausage stew and a piece of toasted bread stuck in the side with carrots in the background.

SIMPLE, GOOD-QUALITY INGREDIENTS ARE BEST

You hear us say this a lot, but we truly feel that the best dishes we put on the table use simple and straight-forward techniques and rely on fresh and quality ingredients.

This Instant Pot Smoked Sausage Stew is absolutely no exception. We knew we needed a super flavorful smoked sausage that was loaded with traditional spices and packed with flavor.

That was easy…our go-to choice is always Hillshire Farms Smoked Sausage. We’ll round out the incredible flavors with fresh vegetables, chicken stock, apple cider and sauerkraut. Now that’s a stew worth writing home about!

A package of smoked sausage with fresh vegetables in front of an Instant Pot.

HOW TO MAKE SMOKED SAUSAGE STEW

Making Instant Pot Smoked Sausage Stew is incredibly easy, but the end result is just amazing.

There is just something so satisfying about being able to create a stew that is this flavorful in all of 40 minutes from start to finish!

Watch us show you how easy it is to make this incredible Instant Pot Smoked Sausage Stew!


We find that slicing the Hillshire Farm Smoked Sausage into large chunks makes for a more hearty stew.

We also like to cut the vegetables a little larger than you normally might, because this helps them not get too soft when they cook in the high heat of the pressure cooker.

Smoked sausage and fresh vegetables are the key ingredients in this awesome Smoked Sausage Stew, but we’re just getting started!

Two hands using a chef's knife to cut thick slices of smoked sausage and potatoes on a cutting board.

SEARING THE HILLSHIRE FARM SMOKED SAUSAGE LOCKS IN FLAVOR

To get the party going, we turn our Instant Pot to SAUTE on High and get it nice and hot.

Then we add the sausage chunks and cook them until they are nicely browned.

EXPERT TIP: Searing the smoked sausage not only helps to lock in delicious flavor, it also creates a layer of goodness on the bottom of the pan that gets soaked into the stew magic.

A large pot of sliced and seared smoked sausage pieces for smoked sausage stew.

Next is an easy sauté of the onion, celery, carrots, and garlic. A healthy pinch of dried thyme is always a nice touch.

Next we add in the chicken stock, apple cider, bay leaves, and potatoes.  If you can, using homemade chicken stock makes this stew even better!

And then back in goes the seared smoked sausage. This is so easy…and is already looking amazing!

A wooden cutting board with sliced seared smoked sausage that is being transferred into an Instant Pot with chicken stock and bay leaves.

THE STEW ONLY PRESSURE COOKS FOR 4 MINUTES

Now it’s time to pressure cook the Instant Pot Smoked Sausage Stew!

Secure the lid in place, turn the valve to ‘Sealing’, and then set the Instant Pot on the Pressure Cook or Manual or Stew setting on High to just 4 minutes!

Soon the valve will seal, the right high-pressure temperature is reached, and in just a few minutes, it’s ready to release the steam!

Once all the pressure has been released, and the little valve has lowered again, it’s time to lift the lid and behold the beauty of the stew.

But wait!! You’re not finished, it’s time to stir in the prepared, drained sauerkraut!

A pair of tongs getting ready to lower sauerkraut into a pot of smoked sausage stew.

HOW TO SERVE THE STEW

You won’t believe the incredible smell as the Instant Pot is releasing steam.

The broth is just incredible, and we love to serve it with thickly sliced, toasted bread.

Perfect for sopping up all the deliciousness! And wait until you bite into the incredible Hillshire Farm Smoked Sausage.  Mmmm.

A close up view of a bowl full of stew with sausage, potatoes and carrots.

We just love this Instant Pot Smoked Sausage Stew so much. And as you can see (and practically smell), the star of this dish is Hillshire Farm Smoked Sausage.

The flavors simply are the best around and work wonderfully in the stew.

We always pick up our Hillshire Smoked Sausage at our local Kroger family of brands store. We love Kroger! Click here to add them to your cart or list!

An overhead view of a package of smoked sausage next to a bowl of smoked sausage stew surrounded by vegetables on a white board.

Ready to get comfy this fall with one of the most delicious stews you’ll ever serve? Go for it!

And when you make this awesome dish, be sure to take a photo, post on Instagram, and tag: @howtofeedaloon and @Krogerco and @hillshirefarm!

Instant Pot Smoked Sausage Stew in a white bowl
Print Recipe
5 from 6 votes

Instant Pot Smoked Sausage Stew

This Instant Pot Smoked Sausage Stew is so heart-warming and feels like it has been slow-cooked for hours. But actually is ready to eat in only about 40 minutes with the use of your Instant Pot!
Prep Time15 minutes mins
Cook Time25 minutes mins
Total Time40 minutes mins
Course: Appetizer or Side Dish, Soup or Stew
Cuisine: American, German
Servings: 6
Calories: 159kcal
Author: Kris Longwell

Equipment

  • Instant Pot

Ingredients

  • 2 teaspoon olive oil divided
  • 1 14 oz. Hillshire Farm Smoked Sausage Cut into 1½-inch pieces
  • 1 medium onion chopped
  • 4 cloves garlic minced
  • 2 ribs celery chopped
  • 2 carrots sliced into ½-inch rounds
  • 1 lb potatoes small gold, cut into halves or quarters
  • 3 bay leaves
  • 1 teaspoon thyme dried
  • 4 cups chicken stock
  • 1 cup apple cider
  • 1 teaspoon Kosher salt
  • ½ teaspoon black pepper freshly ground
  • 1 cup sauerkraut drained
  • whole grain mustard for garnish, optional

Instructions

  • Using the SAUTE function, add the oil into the Instant Pot. Once hot, add the sliced smoked sausage, stirring occassionally, until lightly browned all over. Remove from Instant Pot.
  • Add the onion and saute until soft, using a wooden spoon to scrape up any of the sausage bits that are stuck to the bottom of the pan, about 4 minutes.
  • Next, add the celery and carrots and cook for about 1 minute. Add the garlic and cook for another minute.
  • Hit CANCEL. Now, add the potatoes, bay leaves, thyme, chicken stock, apple cider, salt pepper, and finally, the sautéed sausage. Cover and set Release Valve to Sealing. Select PRESSURE COOK or MANUAL or STEW on High for 4 minutes.
  • When pressure cooking has finished, hit CANCEL. Naturally Release for 5 minutes, and then very carefully move the Release Valve to Venting for Quick Release.
  • Once the valve drops, carefully remove the lid. Stir in the sauerkraut. Taste and add more salt, if desired.
  • Remove the bay leaves and serve at once, with whole grain mustard on the side, if desired.

Video

Notes

Cutting the sausage and vegetables into larger pieces will keep them somewhat firmer as they pressure cook, and not be too soft when served. 
We love using small Yukon gold potatoes, but red potatoes work great, too. 
If you can't find apple cider, regular apple juice can be used as a substitute. 

Nutrition

Calories: 159kcal | Carbohydrates: 25g | Protein: 7g | Fat: 4g | Saturated Fat: 1g | Cholesterol: 5mg | Sodium: 809mg | Potassium: 695mg | Fiber: 4g | Sugar: 9g | Vitamin A: 3457IU | Vitamin C: 17mg | Calcium: 58mg | Iron: 3mg

Ricotta Lemon Pancakes with Vanilla Sauce

October 13, 2019 by Kris Longwell 6 Comments

An antique plate holding ricotta pancakes with a strawberry on top and syrup being poured on top.

Ricotta Lemon Pancakes with Vanilla Sauce are incredible!

These pancakes are the stuff dreams are made of. We’ll show you how to make the pancakes light, airy, and so flavorful. With an incredible vanilla sauce. All in about 30 minutes, or less!

An antique plate holding ricotta pancakes with a strawberry on top and syrup being poured on top.

HOW TO MAKE RICOTTA LEMON PANCAKES

Making the perfect pancake from scratch is truly much easier than you might think.

We’re going to show you a few tricks to make sure these Ricotta Lemon Pancakes with Vanilla Sauce come out perfect every single time!

Watch us show you how to make these incredible pancakes from scratch!


CAN PANCAKE BATTER BE MADE AHEAD OF TIME?

We always love giving you recipes that can be made ahead of time, and although there are portions of this that can be made ahead of time, we suggest cooking the pancakes as soon as the batter comes together. More on the later.

These pancakes are not overly sweet. The lemon zest and ricotta deliver a wonderful flavor without giving you a toothache.

The vanilla sauce is a bit on the sweet side, and works perfectly against the pancakes. Mix it together in a small bowl and add a tablespoon of milk if it’s too thick.

EXPERT TIP: The baking soda and baking powder are called leavening agents and they are what make the pancakes light and fluffy. The longer they sit in the fully incorporated batter, the less and less ability they will have to produce amazingly fluffy pancake ahead of. The vanilla sauce, on the other hand, can be be up to 1 day in advance.

Two hands holding a bowl and whisking a batch of vanilla sauce .

EGG WHITE PEAKS MAKE THE PANCAKES EVEN FLUFFIER

You’ll need three egg yolks for the batter for the ricotta lemon pancakes.

That leaves you with three egg whites.

Perfect. Pull our your hand mixer (or stand mixer) and beat them until stiff peaks form.

EXPERT TIP: Egg whites naturally bring even more airiness to the pancakes as they cook.

A close-up view of a hand mixer making stiff peaks from egg whites in a metal bowl.

HOW TO MAKE PANCAKE BATTER FROM SCRATCH

As with most batters, you’ll need a dry mixture and a wet mixture, eventually bringing them together just until they are incorporated.

We like to start with a nice large bowl and add all the wet ingredients. A hand mixture mixes them together in a snap, but a wooden spoon and some elbow grease will work, too.

For a real flavor boost, we add lemon zest into the dry mixture (in a separate bowl). Then, gently use a large wooden spoon to mix the wet mixture into the dry.

EXPERT TIP: Gently stir the wet and dry mixtures until they are just combined. It’s perfectly okay (and good) for the batter to be a bit lumpy. The key is to not over-mix, because if you do, gluten will begin to form which result in a chewier pancake. No chewy pancakes here, please!

A hand mixer in a large bowl of lemon ricotta pancake batter.
A hand dropping a small bowl of lemon zest into a glass bowl of a flour mixture.
A wooden spoon mixing in a dry mixture into a wet mixture for ricotta lemon pancakes.

Now, just to make sure we’re going to have the fluffiest, most delicious pancakes on the planet, it’s time to gently fold in the stiff peak egg whites.

Be sure not to stir too hard, you don’t want the whites to break down.

This is looking good, folks…

A wooden spoon folding stiff peak eggs whites into a pancake batter in a large glass bowl.

HOW TO COOK THE PERFECT PANCAKE

If you have a griddle, perfect! Griddles are great because they are completely flat and you can cook more than one pancake at a time.

If you don’t have a griddle, no worries! Pull out a medium-sized skillet/pan (preferably non-stick) and you’ll be just fine.

Heat your griddle or pan to medium heat and a little oil. Scoop out ¼ cup of the batter and add to the hot pan. Within about a minute, you’ll start to see bubbles form. Don’t flip yet! Wait until those bubbles open up and form little holes. Now is the time to flip. If a little of the batter splatters, just use your spatula to scooch it back in place.

EXPERT TIP: Although we love cooking with butter, we don’t recommend frying the pancakes in it. Butter burns easily and can affect the taste of the pancakes. Because of the extended time needed for cooking all the pancakes, we recommend using good ole vegetable oil, or if you do use butter, clean the pan (or griddle) after every couple rounds of pancakes.

A circular shape of pancake batter on a hot skillet.
A perfectly cooked ricotta lemon pancake in a skillet with a spatula underneath it.

ASSEMBLING THE RICOTTA LEMON PANCAKES WITH VANILLA SAUCE

After you make a batch of pancakes, place them on a baking rack over a cooke sheet and keep them warm in a low-temp (200°F) oven.

Once all the pancakes have been prepared, remove them from the oven and start assembling the pancakes!

We love to smear a thin layer between two, or three, or four pancakes.

A knife smearing vanilla sauce onto lemon ricotta pancakes on a decorative plate.

PANCAKES ARE ALWAYS FAMILY FAVORITE

We have loved just about any kind of pancake since we were both kids. I think most families share this same phenomenon.

A few of our other breakfast favorites are Norwegian Pancakes, Buttermilk Waffles with Blueberry Syrup, and Cinnamon Raisin Bread.

But let us tell you, these Ricotta Lemon Pancakes with Vanilla Sauce have become a true family favorite at our house. Can you see why?

A stack of lemon ricotta pancakes with vanilla sauce on a antique plate with a fork nearby and strawberries.

RICOTTA LEMON PANCAKES FAQs

  • Can the pancakes be made in advance? Yes, they can. We absolutely DO NOT recommend making the batter ahead of time. It’s best to cook the pancakes soon after the batter comes together for fluffiest pancakes possible. You can, however, make the pancakes in advance, then wrap them individually in foil. When ready to serve, heat oven to 350°F, unwrap the pancakes, and place on a lightly greased baking sheet and warm for about 5 to 8 minutes. The sauce can be made several days in advance.
  • Should these be served with syrup? They are spectacular with just the pancakes and sauce, but a little warmed maple syrup is heavenly, too. Just use 100% maple syrup, not imitation pancake syrup! An assortment of berries is a nice addition, too.
  • Oil or butter for frying? Butter easily burns, so we recommend cooking the pancakes in vegetable oil.

Just look at that…

A stack of lemon ricotta pancakes that have been half eaten, with a fork nearby and strawberries on the plate, too.

Okay folks, ready to make a show-stopper breakfast (actually, these are amazing any time of the day or night) in about 30 minutes? Go for it!

And don’t forget, when you make it, be sure to take a photo, post it to Instagram, and tag #howtofeedaloon and @howtofeedalon!

A stack of lemon ricotta pancakes with syrup being drizzled on top with strawberries nearby.
Print Recipe
5 from 1 vote

Ricotta Lemon Pancakes with Vanilla Sauce

The hint of lemon, mixed with the ricotta cheese, buttermilk, nutmeg bring these to incredible levels. The stiff peaks of the eggs whites make these pancakes amazingly light, yet so flavorful. And the vanilla sauce brings it all together!
Prep Time15 minutes mins
Cook Time15 minutes mins
Total Time35 minutes mins
Course: Brunch
Cuisine: Brunch
Servings: 8
Calories: 361kcal
Author: Kris Longwell

Equipment

  • Hand mixer, or stand mixer
  • Griddle, or medium-sized non-stick skillet

Ingredients

RICOTTA VANILLA SAUCE

  • 1 cup ricotta cheese
  • ½ cup confectioners' sugar
  • 1 teaspoon vanilla extract
  • ¼ teaspoon Kosher salt

PANCAKE BATTER

  • 3 large eggs separated
  • 1 ½ cups buttermilk
  • 3 tablespoon sugar
  • 1 cup ricotta cheese
  • 1 ½ cups unbleached-all purpose flour
  • 1 teaspoon baking soda
  • 1 teaspoon baking powder
  • 2 tablespoon lemon zest
  • ¼ teaspoon nutmeg
  • ½ teaspoon salt
  • ½ cup vegetable oil for frying

FOR SERVING

  • 4 tablespoon unsalted butter optional
  • 1 cup maple syrup, warmed optional
  • 1 cup mixed berries optional

Instructions

MAKE THE SAUCE (Can be done 1 day in advance)

  • Mix all of the ingredients until smooth in a small mixing bowl. For super smooth sauce, blend in a blender or food processor. Refrigerate until needed. Thin with 1 tablespoon of milk if the sauce is too thick.

MAKE THE PANCAKES

  • In a medium mixing bowl, beat together the egg yolks, buttermilk, sugar, and ricotta cheese.
  • In a separate bowl, whisk together the flour, baking soda, baking powder, lemon zest, nutmeg and salt.
  • In a third bowl, beat the egg whites (I use an electric hand mixer), beat the egg whites until stiff peaks start to form.
  • Mix the dry ingredients into the buttermilk mixture with a few quick strokes. A few lumps remaining are okay.
  • Fold in the egg whites.
  • Pour in a little oil (about 1 tbsp) into a medium sized non-stick skillet...or griddle.
  • Once hot, drop about ¼ cup of the batter on the skillet/griddle.
  • Bubbles should rise...cook for about 1 & ½ minutes and then flip.
  • Cook for about another minute on the 2nd side. Pancakes should be light golden brown.
  • Remove...place each cooked pancake on a cookie rack on a baking sheet and keep warm in a 200°F oven.

ASSEMBLE

  • Place one pancake on a plate, then add a layer of the sauce. Repeat.
  • Top with slice of butter and warm maple syrup (optional)
  • Serve with fresh berries (optional)

Video

Notes

Mix the wet mixture into the dry mixture and stir until just incorporated.  Don't over-mix.  A slightly lumpy batter is okay.
Cook the pancakes until small holes form on the top of the pancake, then flip.  About 1 to 1 ½ minutes on one side, and then another minute on the other.  Pancakes should be golden brown in color.
Keep the vanilla sauce chilled until ready to use.  A thin layer between each pancake is all that's needed.  If more is desired, we recommend doubling the vanilla sauce recipe. 
Pancakes can be cooked and then wrapped individually in foil for up to one day. Re-heat in a 375°F oven, unwrapped, on a slightly greased baking sheet for 5 to 8 minutes, or until warmed through. 
Butter, pure maple syrup, and fresh berries are all nice additions, but not required. 

Nutrition

Calories: 361kcal | Carbohydrates: 37g | Protein: 14g | Fat: 11g | Saturated Fat: 4g | Cholesterol: 131mg | Sodium: 507mg | Potassium: 253mg | Fiber: 1g | Sugar: 16g | Vitamin A: 649IU | Vitamin C: 2mg | Calcium: 227mg | Iron: 2mg

Cream of Mushroom Soup

October 10, 2019 by Kris Longwell 21 Comments

A white bowl filled with cream of mushroom soup on a white background with a spoon and a sprig of thyme next to it.

Cream of Mushroom Soup, when done right, is nothing short of amazing.

We’re going to show you how to make the best cream of mushroom soup in the world. Whether you like it extra thick and creamy, or loaded with mushroom pieces, or silky smooth, we’ve got you covered. And this iconic soup comes together in only about 40 minutes! 

A white bowl filled with cream of mushroom soup on a white background with a spoon and a sprig of thyme next to it.

HOW TO MAKE CREAM OF MUSHROOM SOUP

Cream of Mushroom soup is actually much easier than you might think.

The key ingredients, of course, are mushrooms. But rounding out the flavors with a few other important ingredients is critical in putting this soup over the top in yumminess.

Watch us show you how to make cream of mushroom soup in your own kitchen!

CHOOSING THE BEST MUSHROOMS

As mentioned, you want your cream of mushroom soup to taste like mushrooms. We love using a variety of fresh mushrooms.

Here a some of our favorites to use:

  • Cremini
  • Shiitake
  • Oyster
  • White button
  • Baby portobello
  • Porcini (see Tip, if using dried)

EXPERT TIP: We use a combination of any of the mushrooms listed above. We typically go with fresh mushrooms, but if you want to try dried mushrooms, then you’ll need to reconstitute them in warm water for about 20 to 30 minutes. The soaking liquid can then be substituted (or included with) the vegetable broth called for in the recipe.

Fresh mushrooms being sliced on a wooden cutting board with two hands and chef's knife.

You’ll want to start the flavor profile by sautéing chopped onions and garlic.

Next, it’s time to add in the mushrooms.

EXPERT TIP: After cooking over medium-high heat, the mushrooms will begin to exude liquid. They will seem dry at first, but be patient, as they soften, they will no longer look and feel dry. This typically takes about 5 to 10 minutes, depending on the size of the mushroom pieces. After they have softened, we like to take a slotted spoon and remove about 1 cup of the cooked mushrooms to use later as garnish.

Sliced mushrooms being scraped off a cutting board into a Dutch oven of sautéed onions and garlic.

HOW TO THICKEN CREAM OF MUSHROOM SOUP

After the mushrooms have begun to soften and release their liquid, it’s time to create a roux. This is done by adding and coating the vegetables with flour before adding sherry and then vegetable stock and letting simmer for about 20 minutes until reduced somewhat and slightly thickened.

This is Step 1 for thickening the cream of mushroom soup.

EXPERT TIP: We like our soup to be thick, but not so thick that it’s like gravy. To achieve this thickness, we add ¼ cup of all-purpose flour to create the roux. If you like your soup to be a little thicker, then increase the flour amount to ⅓ cup, or ½ cup for a thick texture.

We’ll show you Step 2 for thickening in just a moment.

A hand dumping flour into a Dutch oven with sautéed mushrooms for cream of mushroom soup.

Now…Step 2 for thickening the soup. After the mushrooms have cooked in the stock and the liquid has reduced and thickened, we remove the mixture from the heat, and ladle about half into either a blender or food processor.

Puree the mixture until smooth and silky. The pureed mushrooms act as a natural thickener, but also, once added back with the reserved mixture, you will still have plenty of sautéed mushroom pieces in the soup.

If you prefer your cream of mushroom soup to have no mushroom slices in the final dish, then puree the entire mushroom mixture, not just half of it. If you prefer the soup to be silky smooth, then after pureeing the entire mushroom mixture, pass through a fine-mesh sieve, or colander lined with cheesecloth, using a wooden spoon to help.  And then continue with the recipe.

A blender of pureed mushroom soup with two hands holding it in place.

FINISHING THE SOUP

Okay, folks, we’re almost there.

All we need to do now is gently pour in the cream. We recommend a heavy whipping cream, as it adds a luxurious texture and truly creamy taste to the soup.

It’s just about time for homemade Cream of Mushroom Soup!  And you know another great recipe that uses our cream of mushroom soup?  The classic Broccoli, Cheddar and Rice Casserole!

A cup of cream being poured into a large blue Dutch oven of sautéed mushroom and sauce.

CREAM OF MUSHROOM SOUP FAQs

  • What can be substituted for the sherry? You can certainly substitute a dry white wine, or even a nice port in place of the sherry. If you do not want to add anything with alcohol, then we suggest omitting it altogether. Although 99% of the alcohol will evaporate during the cooking process, we understand for some, no alcohol is preferred at all. The sherry adds flavor, but the soup will still be delicious without it.
  • How can I make this soup vegan? You can substitute non-sweetened, non-flavored almond milk for the cream. Obviously, the taste and texture won’t quite be the same as with cream, but the taste will still be outstanding. Also, most types of Worcestershire sauce are made with anchovies, which makes it neither vegetarian or vegan, and can simply be omitted from this recipe if that is what you desire. 
  • Can I use dried mushrooms? Yes! Just be sure to re-constitute them in warm water first for 20 to 30 minutes. If doing so, be sure to use the soaking liquid in place of, or along with, the stock for the recipe!
  • How long will the soup keep? The finished soup will keep in the refrigerator for up to 1 week and can be frozen for 2 months.

OTHER FAVORITE SOUP RECIPES TO TRY

  • Roasted Butternut Squash Soup
  • Creamy Irish Potato Soup
  • Roasted Tomato and Basil Soup
  • Homemade Chicken and Dumplings

In the meantime, let’s make this amazingly delicious and restaurant-quality Cream of Mushroom Soup!

A close up view of a white soup bowl holding cream of mushroom soup with sautéed mushrooms on top.

Ready to make a soup that is so good your guests will swear you got it from a 5-star restaurant? Go for it!

And when you make the soup, be sure to take a picture, post it on Instagram, and tag #howtofeedaloon and @howtofeedaloon!

A close-up view of a white bowl holding cream of mushroom soup.
Print Recipe
5 from 8 votes

Cream of Mushroom Soup

This cream of mushroom soup is so good, we swear, it's as good as you'll get at a top-notch restaurant. And it comes together in about 40 minutes!
Prep Time10 minutes mins
Cook Time30 minutes mins
Total Time40 minutes mins
Course: Appetizer, Soup
Cuisine: American
Servings: 10 people
Calories: 136kcal
Author: Kris Longwell

Equipment

  • Blender or food processor

Ingredients

  • 2 teaspoon butter unsalted
  • 1 medium onion yellow,chopped
  • 2 cloves garlic minced
  • 1 ½ lbs mushrooms sliced
  • 1 tablespoon Worcestershire sauce
  • ¼ cup all-purpose flour
  • 2 teaspoon Kosher salt divided
  • 1 teaspoon pepper freshly ground black
  • 1 tablespoon thyme fresh, chopped
  • ¼ cup sherry
  • 6 cups vegetable stock
  • 1 cup heavy cream
  • ½ teaspoon nutmeg ground

Instructions

  • In a large pot (i.e., Dutch oven), melt the butter over medium heat. Add the onions and cook until softened, about 4 to 5 minutes. Add the garlic and cook for 1 minute more.
  • Add the mushrooms, Worcestershire sauce, 1 teaspoon salt, ½ teaspoon pepper, and the thyme. Cook until mushrooms are softened and starting to release their liquid, about 8 to 10 minutes, stirring with a wooden spoon frequently.
  • If desired, use a slotted spoon to remove about 1 cup of the sauteed mushrooms. Set aside for garnish to the finished soup.
  • Add the flour to the pot and stir until the mushrooms are fully coated. Cook for about 1 minute.
  • Add the sherry and cook until reduced by about half, about 3 to 4 minutes.
  • Add the stock and another ½ teaspoon of salt and bring to a strong simmer. Cook for 20 minutes, or until the liquid has reduced somewhat and has thickened slightly.
  • Remove from heat and use a ladle to add half of the mushroom mixture to a blender or food processor, or bowl with an immersion blender. Puree the mixture until smooth.
  • Add the pureed mixture back into the pot with the reserved mushroom mixture. Turn the heat back on to medium.
  • Add the cream and nutmeg and stir until incorporated. Bring just to a simmer and then turn off the heat. Taste and add more salt, if desired.
  • Serve at once in individual soup bowls.
  • Garnish with reserved mushrooms, thyme, and grated nutmeg (if desired).

Video

Notes

Use a variety of mushrooms, if possible.  We like a combination of button, shiitake, and baby Bella.  Cut the stems from the shiitake before slicing, as they can sometimes be a little rubbery in the final dish.
You can substitute a dry white wine or port for the sherry.   If you prefer no alcohol at all, simply omit it.  It adds a depth of flavor, but the soup will still be delicious without it. 
If using dried mushrooms, be sure to soak in warm water for at least 20 to 30 minutes before adding to the pot.  Use the soaking liquid along with the stock when simmering the mushrooms.
If you feel the soup is too thin, then just before adding the cream, take 1 tablespoon of cornstarch and 1 tablespoon of cold water and mix together, then pour into the soup. Stir until thickened.  This will take a couple of minutes to thicken.  If still not thick enough, repeat this process.  Be careful not to add too much of the slurry, it will thicken up too much if you do!
If you feel the soup is too thick, simply thin with a little more stock until the desired consistency is reached. 
The soup will keep in the refrigerator for up to 1 week and freezes nicely for up to 2 months. 

Nutrition

Calories: 136kcal | Carbohydrates: 9g | Protein: 3g | Fat: 10g | Saturated Fat: 4g | Cholesterol: 35mg | Sodium: 1066mg | Potassium: 272mg | Fiber: 1g | Sugar: 3g | Vitamin A: 708IU | Vitamin C: 4mg | Calcium: 26mg | Iron: 1mg

POST UPDATE: This recipe was originally posted in November, 2016, but the recipe was improved with new photography and awesome video in October, 2019. 

Pasta Pomodoro

October 6, 2019 by Kris Longwell 5 Comments

A white pasta bowl with a wide lip is filled with a serving of pasta pomodoro.

Pasta Pomodoro transforms a handful of simple ingredients into an incredible Italian pasta dish in just 30 minutes, showcasing the beauty of fresh flavors and straightforward preparation. This classic dish stands alongside favorites like Pasta Carbonara and Bucatini all’Amatriciana, proving that sometimes the simplest recipes yield the most delicious results.

A white pasta bowl with a wide lip is filled with a serving of pasta pomodoro.
[feast_advanced_jump_to]

🍅 The Ingredients

The simple ingredients come together harmoniously to create an unforgettable dish that captures the essence of Italian cuisine with its fresh flavors and comforting appeal. Find ingredient notes (including substitutions and variations) below.

An arrangement of ingredients for Pasta Pomodoro on a white background, featuring tomatoes, fresh basil leaves, garlic cloves, olive oil, and pasta, highlighting the vibrant colors and textures of each component.

🌿 Substitutions and Variations

  • Pasta – We love going with spaghetti for this dish. Dried is great, but to put it over the top, homemade fresh pasta is incredible. Linguine, fettuccine, or angel hair are all great options, too.
  • Wine – We recommend a decent white wine, such as a Chardonnay or Sauvignon Blanc. We don’t recommend cooking wine. If you don’t want to cook with wine, you can substitute chicken broth or vegetable broth.
  • Herbs – Look for bright green and fresh parsley and fresh basil in your produce area. Dried herbs can be used, but you’ll only want to use half the amount.
  • Tomatoes – Seek out San Marzano tomatoes. They can be found in the canned tomatoes section of most well-stocked supermarkets. The can should say “Certified.” Roma tomatoes that are in peak season can be used, too.

See the recipe card (with video) below for a full list of ingredients and measurements.

Expert Tip

We like to thinly slice the garlic, rather than mince it. Sautéing the garlic slices will scent the oil, and cooking it until it is slightly golden mellows the garlic, which is perfect for this dish. Be careful not to burn the garlic, however, as this will cause it to be very bitter tasting.

👩🏼‍🍳 How To Make Pasta Pomodoro

Slices of garlic being sautéed in oil in a large stainless steel skillet with a wooden spatula in the skillet.
  1. Step 1: Sauté the garlic in hot oil until lightly browned. 
A skillet filled with simmering garlic, prosciutto, herbs, and a bay leaf.
  1. Step 2: Stir in the prosciutto, basil, bay leaf, and parsley and sauté. 
White wine being poured from a small carafe into a skillet filled with sautéed garlic, prosciutto, and herbs.
  1. Step 3: Pour the wine into the skillet and simmer until nearly evaporated. 
A person squeezing canned tomatoes into a skillet filled with simmering garlic, prosciutto, and herbs.
  1. Step 4: Squeeze the tomatoes into the skillet, season with salt and pepper, and simmer. 
Dried spaghetti standing upright in pasta pot filled with boiling water.
  1. Step 5: Boil the pasta to al dente. 
A person using a pair of metal tongs to toss cooked pasta with sautéed tomatoes and herbs.
  1. Step 6: Drain the pasta and toss with the sauce in the skillet, and then serve!

🍝 How To Serve

  • This dish is best served fresh from the skillet. And it comes together so quickly, we don’t recommend preparing the dish in advance.
  • For an Italian dinner party, this would be a wonderful first course (“primo”) followed by a protein such as classic chicken marsala, Italian bistecca (porterhouse), or Mediterranean red snapper.
  • For a quick weeknight dinner, simply leave the pasta in the skillet. For serving guests, we recommend transferring to a large pasta bowl with plenty of grated Parmesan available for passing at the table.

🔥 How To Store and Reheat

  • Though this dish is at its best right after it comes together in the skillet, leftovers are still very delicious.
  • Keep leftovers in an air-tight container with a lid in the refrigerator for 5 to 6 days.
  • Reheat on the stove in a skillet over medium heat. You’ll need to loosen the sauce up with a splash or two of chicken (or vegetable) broth.
White wine being poured into a large saucepan filled with sautéed garlic, prosciutto and herbs.

🙋🏽‍♂️ Frequently Asked Questions

Can Pasta Pomodoro be made in advance?

We think the dish is best served right after it comes together. And since it only takes about 30 minutes to prepare, it’s ideal for serving to guests. However, it can be made up to 2 hours in advance. Reheat on the stove and add a splash of broth (or pasta water) to loosen up the sauce.

Is Pasta Pomodoro vegetarian?

If you omit the prosciutto, yes.

Why are San Marzano tomatoes best for Pasta Pomodoro?

Make sure the can says “certified.” San Marzano tomatoes are cultivated in the land near the bottom of Mount Vesuvius in Italy. They are deep in flavor and are canned while at their peak.

A large stainless skillet filled with pasta pomodor with a wooden slotted spoon stuck in the side.

🇮🇹 Other Classic Italian Pasta Recipes

  • A large, deep skillet filled with Bucatini all’Amatriciana with a block of cheese nearby.
    Bucatini all’Amatriciana
  • A large colorful pasta bowl filled with creamy pasta carbonara.
    Classic Pasta Carbonara
  • A large patterned Italian pasta bowl filled with Pappardelle Bolognese and a small bowl of Parmesan cheese next to it.
    Pappardelle Bolognese
  • An overhead view of a large stainless steel skillet filled with spaghetti all vongole with opened clams resting on top of the cooked pasta and two serving utensils inserted into the side of the dish.
    Spaghetti alle Vongole (Pasta with Clam Sauce)

Ready to make the best (and easiest) pasta dish this side of Rome? Go for it!

And when you do, be sure to take a photo of it, post it on Instagram, and tag @HowToFeedaLoon and hashtag #HowToFeedaLoon!

A white pasta bowl with a wide lip is filled with a serving of pasta pomodoro.
Print Recipe
5 from 2 votes

Pasta Pomodoro

Pasta Pomodoro is Italian cuisine at its best. Simple yet bold flavors bring the classic dish to life. Easy for a weeknight, but special enough for guests on the weekend. This is one of our all-time favorite pasta dishes.
Prep Time15 minutes mins
Cook Time20 minutes mins
Total Time35 minutes mins
Course: Italian
Cuisine: Italian
Servings: 4 people
Calories: 487kcal
Author: Kris Longwell

Ingredients

  • ¼ cup olive oil
  • 8 cloves garlic thinly sliced
  • 1 oz. prosciutto thinly sliced
  • 7 fresh basil leaves chopped
  • 1 bay leaf
  • 2 tablespoon Italian parsley chopped
  • ¼ cup dry white wine
  • 1 28 oz. can whole tomatoes drained (San Marzano are good)
  • Kosher salt and black pepper
  • 12 oz spaghetti or bucatini

Instructions

  • In a large saute pan, heat the olive oil over medium-high heat.
    ¼ cup olive oil
  • When hot, reduce the heat and add the garlic, and cook it, stirring, for about 2 minutes until it is golden brown, taking care to not let it burn.
    8 cloves garlic
  • Add the prosciutto, basil, bay leaf and 1 tablespoon of the parsley and cook the mixture, stirring, for 1 minute.
    1 oz. prosciutto, 7 fresh basil leaves, 1 bay leaf, 2 tablespoon Italian parsley
  • Raise the heat to high, add the wine, and cook it for about 30 seconds.
    ¼ cup dry white wine
  • Use your hands to squeeze the tomatoes into the skillet. Use a wooden spoon to break them apart as they cook.
    1 28 oz. can whole tomatoes
  • Bring the sauce to a boil, reduce the heat slightly, and simmer for 3 minutes, or until the liquid reduces by half.
  • Season with salt (1½ teaspoons) and pepper (1 teaspoon).
    Kosher salt and black pepper
  • Meanwhile, in a large pot filled with boiling salted water, cook the pasta until is al dente, about 8 – 9 minutes. (Cooking time will vary depending on the type of pasta you use).
    12 oz spaghetti
  • Drain the pasta, reserving 1 cup of the pasta water.
  • Heat a clean skillet over medium heat and add about half of the sauce. Stir in the pasta until coated. Add the rest of the sauce and stir, adding some of the reserved pasta to reach the desired consistency. Serve at once, garnishing with the remaining chopped parsley.

Video

Notes

NOTE: Watch the video near the top of the recipe for visual guidance.
The recipe can easily be doubled if feeding more than 4 guests. 
Leftovers can be stored in an air-tight container with a lid in the refrigerator for up to 5 days. Reheat on the stove with a splash of broth. 

Nutrition

Calories: 487kcal | Carbohydrates: 66g | Protein: 12g | Fat: 7g | Saturated Fat: 1g | Cholesterol: 5mg | Sodium: 55mg | Potassium: 249mg | Fiber: 3g | Sugar: 3g | Vitamin A: 252IU | Vitamin C: 5mg | Calcium: 34mg | Iron: 1mg

 POST UPDATE: This was originally published October 2019, but was updated with improved tweaks to the recipe with new tips and photography (and video) in March 2025.

Apple Cider Doughnuts

October 3, 2019 by Kris Longwell 2 Comments

A white plate with three apple cider doughnuts on it with an apple and a glass of cider next to it.

Apple Cider Doughnuts are the perfect fall sweet treat.

When fall arrives, so do those glorious apple-picking days. And big jugs of unfiltered apple cider are easy to come by. This technique is easy to follow and only takes about 30 minutes to make!

A white plate with three apple cider doughnuts on it with an apple and a glass of cider next to it.

HOW TO MAKE APPLE CIDER DOUGHNUTS

Making apple cider doughnuts at home is really easier than you might think.

You don’t need a deep-fryer, a sturdy pot with a candy thermometer will work just fine. But…a deep-fryer is great because it maintains the correct temperature as the doughnuts quickly cook.

Watch us show you how easy it is to make homemade apple cider doughnuts!


HOW TO ACHIEVE THE PERFECT CAKE DOUGHNUT

Apple cider doughnuts are cake doughnuts and should be moist, but a little more dense than regular “old fashioned” yeast doughnuts. There are so many types of doughnuts, and we love them all.

But there is something so satisfying about a cake doughnut. Combining the dry ingredients into the wet ingredients brings together the moist wonderful batter.  Another favorite doughnut of ours is Jelly and Custard-Filled Doughnuts!

EXPERT TIP: Measure out the dry ingredients first in a small bowl, and then add them to your sifter to sift into a larger bowl. Sifting the dry ingredients makes them lighter and easier to mix into the wet ingredients, therefore, preventing your batter from being lumpy.

Two hands holding a large sifter while sifting flour into a glass bowl.

We use our stand mixer to incorporate the dry mixture into the wet, but you can certainly use an electric hand-mixer, or a non-electric hand mixer (with a lot of elbow grease!).

You’ll need to first cream the softened butter with the sugar. That simply means to mix the two together until they are completely combined, and fluffy in texture, about 3 to 4 minutes.

With the motor running, add the flour mixture to the creamed butter and sugar.

A bowl of flour and cinnamon being poured from into a large stand mixer for apple cider doughnuts.

The combination of egg yolks, apple cider, apple butter, and buttermilk results in a deliciously moist cake doughnut.

Simply add the wet ingredients to the mixture until you have a sticky batter.

EXPERT TIP: Once the batter has come together, you can chill the batter for up to 1 day before frying the doughnuts. If not frying immediately, let the batter return to room temperature before proceeding.

A hand pouring two eggs yolks in a glass bowl into a stand mixer.

HOW TO SHAPE THE APPLE CIDER DOUGHNUTS

It’s now time to make the doughnuts!

There are several ways you can do this. Using lightly oiled fingers, you can remove the dough from the bowl and roll it out on a lightly floured cool surface, then use a 2-½-inch cutter to cut out the doughnuts, and then use a bottle top to cut out the centers of the doughnuts.

Or..the way we do it, is just pull out about a ¼ cup of the dough, and, again, with oiled fingers, slightly flatten the dough on your counter, and use your thumb to create a hole in the middle.

EXPERT TIP: Don’t worry if your apple cider doughnut is not perfectly shaped. Just make sure you make a whole that’s at least ¾-inch to 1-inch in diameter. As the dough cooks, the doughnuts will expand and even crack a little. They’re not meant to be perfectly circular in shape.

Two hands holding a doughnut shaped piece of batter for apple cider doughnuts.

HOW TO COOK THE DOUGHNUTS

We think a quick fry in 350°F oil produces the best tasting doughnut. Again, you can do this in a deep-fryer or in a sturdy skillet or pot (a Dutch oven works very well). It’s important that the oil is at the correct temperature.

If the oil is not hot enough, the doughnuts will absorb oil and not be pleasing in taste. If the oil is too hot, the outside will burn and the inside won’t be cooked through.

Fry the doughnuts for only 2 to 4 minutes, flipping halfway through. They will become somewhat dark in color, which is normal.

EXPERT TIP: Don’t overcrowd the doughnuts in the oil! Fry the doughnuts in batches and let them rest on a rack placed on a baking sheet to slightly cool before proceeding.

Apple cider doughnuts on a baking rack and baking sheet just after being fried.

The perfect apple cider doughnut has a delicious cinnamon-sugar coating all over it.

Simply take a medium-sized bowl and mix together 1 cup of sugar and 2 tablespoons of ground cinnamon.

We love to add in a teaspoon of pumpkin pie spice, but that’s completely optional. After the doughnuts have cooled somewhat, just dredge them in the sugar mixture until beautifully coated.

A hand dredging an apple cider doughnut in a bowl of a cinnamon sugar mixture.

APPLE CIDER DOUGHNUTS FAQs

  • What kind of oil is best for frying? Peanut oil is good, but vegetable oil works perfectly fine, as well. These fry at 350°F, which either of these oils can handle with no problem. Canola is another option. Don’t use any type of fragrant oil, including olive oil, as it will impart that flavor to the doughnut.
  • Can I bake the doughnuts instead of frying? Yes. Place the formed doughnuts on a baking sheet and bake for about 25 minutes until golden. We can’t guarantee they will still have that classic apple cider doughnut texture and taste, but they will still be yummy.
  • What if I can’t find apple cider? No problem! In a pinch, you can substitute apple juice. The apple butter helps to bolster the apple taste, too.
  • How long do the doughnuts keep? Place the cooked (and cooled) doughnuts in an air-tight container, and they will stay delicious for up to 1 week! You can freeze them for up to 2 months, but they won’t be as delicious once thawed as fresh, but you probably knew that already.

Just look at this apple cider doughnut, just begging for a dunk in a hot cup of coffee or a cold glass of milk!

A hand holding an apple cider doughnut that has been split in half.

OTHER FALL BAKING FAVORITE RECIPES

How about:

  • Cream Cheese Apple Bars
  • Sweet Potato Bundt Cake with Brown Sugar Icing
  • Classic Pumpkin Pie
  • Classic Pecan Pie
  • Grandma’s Homemade Cinnamon Rolls

And when you make a batch of these apple cider doughnuts, be sure to take a picture, post it to Instagram, and tag @howtofeedaloon and #howtofeedaloon!

Three apple cider doughnuts on a white plate with an apple and apple cider next to it.
Print Recipe
No ratings yet

Apple Cider Doughnuts

These Apple Cider Doughnuts are sinfully delicious. Crunchy on the outside and soft and moist on the inside. Perfect weekend treat to make for family and loved ones. Don't forget to set your butter out to soften before you begin. You can make the dough up to a day ahead, just keep covered and refrigerated until ready to fry. So good!
Prep Time20 minutes mins
Cook Time15 minutes mins
Total Time40 minutes mins
Course: Breakfast
Cuisine: Breakfast
Servings: 8 people
Calories: 313kcal
Author: Kris Longwell

Equipment

  • Stand-mixer, or electric hand-mixer, or hand-mixer
  • Deep fryer, or Dutch oven and candy (high temperature) thermometer

Ingredients

  • 1¾ cups all-purpose flour
  • ¼ cup whole wheat graham flour
  • 3½ teaspoon cinnamon ground, divided: 2 teaspoon for batter, 1½ teaspoon for dusting
  • 2 teaspoon baking powder
  • 1 teaspoon baking soda
  • ½ teaspoon Kosher salt
  • 2 tablespoon unsalted butter softened
  • 1½ cups sugar divided: ½ cup for batter, 1 cup for dusting
  • 2 large eggs yolks
  • ¼ cup apple cider
  • ¼ cup apple butter
  • ¼ cup buttermilk
  • 1 teaspoon vanilla extract
  • Vegetable oil for frying and oiling fingers
  • ½ teaspoon pumpkin pie spice optional

Instructions

  • Place the flours, 2 teaspoon cinnamon, baking powder, baking soda, and salt in a bowl. Scoop the mixture into a sifter, and sift into a separate large bowl. Set aside.
  • Using a stand mixer, or electric hand-held mixer, or hand-mixer, beat the butter with ½ cup of sugar until creamed. It should be light and fluffy, about 3 to 4 minutes, stopping halfway through and scraping down sides.
  • Add yolks, cider, apple butter, buttermilk, and vanilla and mix until fully incorporated.
  • Continue mixing, and slowly add the flour mixture until a slightly wet, sticky batter comes together.
  • Heat the oil in a deep-fryer or Dutch oven to 350°F.
  • Using slightly oiled fingers, pull about a ¼ cup of batter from the bowl and roll it into a small ball. Gently flatten the ball with the palm of your hand on your work surface. Use your thumb to make a hole that is about 1½-inches wide. Repeat several more times.
  • Working in batches, gently lift the formed doughnuts, one at a time, and carefully lower them into the hot oil. Fry, flipping once, until somewhat darkened and cooked, about 3 minutes in total.
  • Use a metal spatula or two forks to carefully remove the cooked doughnuts from the oil to a baking rack on top of a baking sheet. The doughnuts are somewhat soft when they first come out of the oil, but then firm up as they cool. Continue this process with the remaining batter.
  • Meanwhile, combine the 1 cup of sugar, 1½ teaspoon of cinnamon, and the pumpkin pie spice (if using) in a shallow bowl.
  • After the doughnuts have cooled, gently toss them in the sugar/cinnamon mixture until fully coated.
  • Serve at once or store in an air-tight container for up to 1 week.

Video

Notes

If you can't find whole wheat graham flour, you can substitute whole wheat flour.
Beat the softened butter with the sugar until light and fluffy.  It won't be creamy, at this point.
If you can't find apple cider, then go with apple juice.
Make sure you have a small bowl of vegetable oil to dip your fingers into.  This makes handling the sticky dough much easier. 
If you do not have a deep-fryer, use a large sturdy skillet or pot (a Dutch oven is ideal), and pour in about 2 inches of oil.  Heat over medium-high heat and use a candy thermometer to gauge and maintain a temperature of 350°F. 
You can bake the doughnuts rather than frying them by placing the formed doughnuts on a large baking sheet and bake at 350°F for 25 minutes, or until golden brown.  They won't have the exact same texture as fried doughnuts, but will still be delicious. 

Nutrition

Calories: 313kcal | Carbohydrates: 65g | Protein: 4g | Fat: 5g | Saturated Fat: 2g | Cholesterol: 55mg | Sodium: 317mg | Potassium: 191mg | Fiber: 1g | Sugar: 42g | Vitamin A: 162IU | Calcium: 84mg | Iron: 2mg

POST UPDATE NOTE: This recipe was originally posted in February, 2016, but was updated with slight improvements to the recipe, new photograph, and an awesome new video in October, 2019!

Homemade Pasta

October 1, 2019 by Kris Longwell 4 Comments

Two hands holding homemade pasta.

Homemade Pasta is beautiful thing.

Making homemade pasta from scratch is easier than you might think. We’re going to show you the food processor method, but we’ll also review other methods as well. This pasta only has a handful of ingredients and comes together in about 30 minutes!

Two hands holding homemade pasta.

HOW TO MAKE HOMEMADE PASTA

Making pasta from scratch at home is easier than you might think.

We use our food processor and then a couple of pasta attachments on our KitchenAid stand mixer to make the pasta-making fast.

Watch us show you how to make pasta from scratch at home!

WHAT YOU NEED TO MAKE THE BEST HOMEMADE PASTA

The beauty of pasta is in its simplicity. Only a handful of ingredients come together to make one our most beloved foods ever created.

The history of pasta is a bit muddled, but one thing is certain, life without pasta almost wouldn’t be worth living!

All you need to make pasta is flour, a bit of salt, eggs, oil and water. That’s it!

EXPERT TIP: We love using semolina flour when making homemade pasta. It consists of 12 to 13% protein and has a low elasticity than other flour used for pasta. This is ideal for making pasta at home. It helps the pasta retain its shape and the texture and taste is what you want in fresh pasta. It’s also ideal when making homemade pizza dough.

We combine the semolina with a little all-purpose flour and salt. And then gently pulse in 2 eggs, olive oil, and then water. Usually 2 tablespoon oil and 3 tablespoon of water.

Two views of a food processor with eggs and then oil being poured into the bucket with flour.

HOW TO PREPARE PASTA DOUGH FOR ROLLING

After a ball has formed in the base of your food processor, feel the pasta. It should be sticky to the touch, but not wet, but also not dry. If the dough feels dry, add a little more water and pulse again until fully incorporated.

Remove the dough from the food processor and form it into a ball with your hands. Take a large, sharp knife, and cut the sphere into 4 pieces.

Wrap the 4 pieces in plastic wrap and let sit for 15 to 30 minutes.

Two hands form pasta dough into a ball on a floured work surface.
A knife cutting homemade pasta dough into 4 pieces on a floured work surface.
Two hands wrapping a piece of homemade pasta dough in plastic wrap.

ROLLING OUT HOMEMADE SEMOLINA PASTA

Now, it’s time to start rolling out pasta! Take one of the pieces and remove the plastic wrap.

Use the palm of your hand to flatten the ball into approximately a 2×4-inch rectangle. It should be about ⅛-inch thick.

Turn the left side in towards the middle, and then do the same for the right side. As if you are folding a letter to go into an envelope.

EXPERT TIP: Use a rolling pin to help you flatten the dough, both before folding and then again after folding, back down to about ⅛-inch in thickness.

A rolling pin rolling out a piece of homemade pasta dough on a floured workspace.
Two hands folding in the sides of a piece of pasta dough on a floured workspace.
A rolling pin flattening a folded piece of pasta dough.

KNEADING THE PASTA DOUGH

It’s now time to knead the pasta dough. This can be done with two hands and a rolling pin, but a hand-cranked pasta maker or a pasta sheet attachment to a stand-mixer makes this process much simpler.

Place your pasta attachment on its widest setting. In most cases, this is either a ‘0’ or a ‘1’ on the dial located on the pasta roller.

Either start cranking the pasta machine, or turn your mixer on medium speed, and gently start feeding the folded pasta through the roller.

EXPERT TIP: Don’t worry if the pasta starts to shred, or come a part at this point. Simply press it back together into a rectangle, fold in the sides again, and roll through again on the widest setting. Repeat this 3 to 4 times until the pasta sheet is smooth.  Each time you place the folded pasta back into the roller, turn it 90°.  This will help reduce jagged edges on the pasta.

Once you have finished kneading the pasta, by putting it through the roller on the widest setting, change the setting to the next tightest level, usually on “1” or “2.” Put the pasta through again, helping it through with your hands as it rolls out. Continue tightening the setting to the desired thickness for the pasta and continue feeding the dough through. We recommend not exceeding a setting of “3” or “4” for cut pasta such as spaghetti or linguine.  For lasagna pasta, if you desire thin sheets, then go as low as a “1” or “2” setting.

A sheet of homemade pasta being put through a pasta roller on a stand mixer.

HOW TO MAKE PASTA WITHOUT A FOOD PROCESSOR

This technique is not too difficult, and is how it’s done traditionally. Simply place the flour on your work space and using your fingers, form a well in the center of the flour.

Add the eggs, oil, water and salt in the middle, and then use a wooden spoon to gently begin incorporating the flour into the wet ingredients. Once a dough starts to form, use your hands to knead the dough until smooth and elastic, about 15 to 20 minutes. At this point, you are ready to begin the kneading and rolling portion of making homemade pasta.

If you are making cut pasta, such as spaghetti, angel hair, or linguine, you’ll need to remove the main pasta roller and add the appropriate pasta attachment. Place the pasta through the pasta cutter, again using your hands to catch the pasta as it is being cut.

Pasta dough being cut by a pasta attachment on the side of a stand mixer.

HOW TO COOK FRESH PASTA

After the pasta has reached the desired thickness and is ready to be cooked, get a large baking sheet and sprinkle semolina flour all over the pan. Gently place the pasta on the pan and then cover with a kitchen towel.

Repeat the entire process with the other pieces of pasta until you have them all ready to go. Meanwhile, bring a large pot of heavily salted water to a boil.

Fresh pasta only takes about 2 minutes until it is perfectly cooked.  Drain and use immediately, or place in a bowl and add a dash or two of olive oil to prevent the pasta from sticking together. Or dry (see FAQs for more on this).

Two hands placing pasta sheets on a baking sheet sprinkled with semolina flour.

HOMEMADE PASTA FAQs

  • What if I can’t find semolina flour? You can use all-purpose flour instead. We find that flour labelled as “00” is great for making pasta and pizza dough, but regular flour will work, too.
  • Can I roll out the pasta without a pasta roller? Yes, you can, by using your hands for kneading and a rolling pin (or bottle) for rolling the dough. It takes practice to know once the dough as reached the right consistency and transform from flour, eggs and oil, to pasta dough. If you are really excited about making homemade pasta, we encourage you to look into purchasing a pasta machine or pasta attachments for your stand-mixer.
  • Can I dry fresh pasta? Yes! We recommend placing the pasta on a pasta rack, or just a large baking sheet in a dry, non-humid area of your home. After about 24 hours, it will be dry. You can store the dried pasta in large zipper bags at room temperature. Some of the pasta may break a little after drying, but that’s okay, it will still cook perfectly. Dried pasta will keep for up to 6 months. You’ll need to cook dried pasta for 4 to 6 minutes.
  • Can I freeze homemade pasta? Yes! Place the baking sheet with the cut pasta on it in your freezer for about 10 minutes (this keeps the dough from sticking together). Then, transfer to a large zipper bag and place back in the freezer for up to 3 months. Cook, frozen, for about 3 to 5 minutes.
  • What are the best dishes to serve with fresh pasta? We honestly think good-quality, commercially dried pasta works better on heavier dishes such as Spaghetti and Meatballs. But we LOVE using homemade pasta on our Fresh Fettuccine with Creamy Sausage Sauce, Spaghetti with Pesto, Pasta Pomodoro, or even just tossed with a little olive oil, salt, pepper and grated parmesan cheese. We also love making Homemade Fresh Spinach Pasta!

In the meantime, let’s make an amazing batch of Homemade Pasta!

Two hands holding homemade pasta.

Ready to make fresh semolina pasta at home? You can do it!! Go for it! We find it delicious, but also therapeutic when transforming these simple ingredients into gorgeous pasta!

And when you make it, be sure to take a picture, post on Instagram, and tag @howtofeedaloon and #howtofeedaloon!

Two hands holding homemade pasta strands.
Print Recipe
5 from 3 votes

Homemade Pasta

Homemade Pasta is the ideal choice for your favorite Italian dish. Making fresh pasta at home is easier than you might think! Take a handful of simple ingredients, and transform them into one of the most beloved foods ever created!
Prep Time15 minutes mins
Cook Time3 minutes mins
Resting time15 minutes mins
Total Time33 minutes mins
Course: Italian
Cuisine: Italian
Servings: 6 people
Calories: 207kcal
Author: Kris Longwell

Equipment

  • Food processor, or hands and a rolling pin (see post for more)
  • Pasta roller attachments with stand mixer, or hand-cranked pasta roller

Ingredients

  • 1 cup semolina flour
  • ½ cup all-purpose flour
  • ½ teaspoon salt
  • 2 large eggs lightly beaten
  • 2 tablespoon olive oil
  • 2 to 3 tablespoon water

Instructions

  • Using your food processor, mix together the flours and salt....pulsing a few times.
  • Slowly add the eggs to the food processor.
  • Slowly add the oil, and then water with the food processor on.
  • Once the dough turns into a ball, stop the food processor.
  • Flour your hands, and pull out the dough
  • On a floured surface, roll the dough into a ball. With a knife, divide the dough into quarters and cover with plastic wrap. Let rest for 15 minutes.
  • Take one dough quarter at a time, and on a floured surface, using a rolling pin, gently roll out the dough into about a 2-inch by 4-inch rectangle, about ⅛-inch thick.
  • Fold the sides into each other, like folding a letter.
  • Roll smooth again with a roller and then fold the sides in again. Flatten to ⅛-inch with roller.
  • Place your pasta roller on the widest setting (0) or (1). Feed the folded pasta through. If the pasta shreds, press the dough back together and form into a rectangle again. Fold in sides, and put through roller again. Repeat this process 3 to 4 times, until pasta is smooth.
  • Trim the egdes of the pasta to make a smooth sheet of pasta.
  • Begin tightening the pasta settings.
  • Continue putting the pasta though the roller until you've reached the 3 setting.
  • If you want cut pasta, such as spaghetti, angel hair, linguine, or fettucine, replace the pasta roller with the desired pasta cutter attachment.
  • Put the pasta through the roller, catching the pasta with your hands as it is fed through.
  • Place the pasta on a large baking sheet, sprinkled with semolina. (this will keep the pasta from sticking to each other).
  • Bring a pot of water to a boil, with about a tablespoon of Kosher salt.
  • Once boiling, add the pasta.
  • Cook, stirring, for about 2 to 3 minutes.
  • Drain.
  • Serve immediately, or dry for 24 hours before storing, or freeze. (See FAQs for more on this).

Video

Notes

If you do not have a food processor, simply add the flours on your counter, and make a well in the center of the flour.  Add the remaining ingredients into the well, and then use a wooden spoon, to begin incorporating the flour into the wet ingredients.  Once a dough as begun to form, use your floured hands to knead until elastic and smooth, about 15 to 20 minutes.
If you cannot find semolina, you can use all regular all-purpose flour.  The consistency won't be the same, but will still produce good pasta.
Be sure to only cook the pasta for 2 to 3 minutes, if fresh!  
If you want to dry the pasta, then use a pasta dryer, or simply place on a baking sheet, in a non-humid location and let set out for 24 to 36 hours, until dried.  A fan helps to expedite this.  Place in a large baggie, sealed, at room temperature for up to 6 months. 
If you want to freeze the pasta, place the pasta while still on the baking sheet into the freezer for 10 to 15 minutes.  Then place in a large freezer bag and freeze for up to 3 months. 

Nutrition

Calories: 207kcal | Carbohydrates: 28g | Protein: 7g | Fat: 4g | Saturated Fat: 1g | Cholesterol: 70mg | Sodium: 221mg | Potassium: 89mg | Fiber: 1g | Sugar: 1g | Vitamin A: 102IU | Calcium: 15mg | Iron: 2mg

POST UPDATE: This recipe was originally published in March, 2014, but the recipe was tweaked (improved), new photography was taken, and fabulous new video was added in October, 2019. 

Classic Fish and Chips

September 29, 2019 by Kris Longwell 27 Comments

Classic Fish and Chips are just that: Classic.

This authentic recipe is the classic beer-battered fish and chips recipe. Serve it with homemade tartar sauce and Southern hush puppies and a little malt vinegar, and you’ll think you’re in the best pub in England!

A close-up view of a plate of classic fish and chips with a small vessel of tartar sauce nearby.

CHOOSING THE RIGHT BEER

Okay, you really can’t go wrong when choosing the right beer for our Classic Fish and Chips.

It’s all about the carbonation, the pH, and other factors that make beer such a perfect ingredient for making delicious and crunchy batter.

That means you can really choose your favorite beer, anything from dark stout to amber to ale. During the fall months, we love going with our favorite Oktoberfest Lager!

A bottle of beer being poured into a batter for fried fish.

CHOOSING THE RIGHT FISH FOR FISH N CHIPS

You want to go with a firm-flesh white fish for that classic English fish and chips. The three most commonly used filets are:

  • Cod
  • Pollock
  • Haddock

Cod is our favorite and is the most commonly used fish. It’s flaky and just delicious. And after a quick dredge in flour, simply dip the filet into the beer batter and then let the excess drip off.   That’s all that’s needed to prep the fish!

EXPERT TIP: Ask your fishmonger for fish “filets”, not fish “steaks.” These filets are rectangular in shape and are ideal for making Classic Fish and Chips.

A filet of cod being dipped into a bowl of batter for fish and chips.

START WITH THE FRENCH FRIES, FIRST

To get the perfect crispy-on-the-outside and soft-on-the-inside chip, or French fry, you’ll need to employ the 2-fry technique.

You give the fries a quick fry at a lower temperature for the oil at 330°F. Then, you’ll crank the oil temperature up to 365° to 370°F.

This is the temperature you’ll cook the fries at for the 2nd fry, which makes them golden and crisp, and it’s also the temperature you’ll need to fry the fish at. You can use two different vessels of oil to do this, or just one, and adjust the temperature after the initial quick fry of the chips.  Using two vessels, though a little more effort, helps you to finish the fish and the fries at about the same time, which is ideal!

EXPERT TIP: We strongly suggest using either peanut oil or vegetable oil for frying. Also, having the correct temperature for the oil is critical. This is easily done with a deep-fryer, but also achievable with a sturdy pot (i.e., Dutch oven), oil, and a high-temperature thermometer (i.e., candy thermometer).

Homemade French fries in a basket of a deep fryer.

Two fried pieces of cod in a fryer basket.

HUSH PUPPIES ARE THE CLASSIC ACCOMPANIMENT

If you’re going to make the best fish ‘n chips this side of Big Ben, you’ve got to round out the dish with an American favorite, Southern Hush Puppies!

Make these just before you fry the chips and fish, and keep them warm in a low-temp oven.

Hush puppies are best served soon after they’ve come out of the fryer, so don’t make them too far in advance.

A basket of homemade Southern hush puppies.

OTHER CLASSIC FRIED FISH RECIPES

We love seafood prepared in so many ways, from searing to poaching, to grilling, to sautéing. But there’s something pretty magical about a crispy fried piece of fish: Here are some of our favorites:

  • Fantastic Fried Fish Sandwich
  • New England-Style Crab Cakes
  • Southern Fried Shrimp
  • Fried Littleneck Clams
  • BLT with Fried Oysters
  • Fried Catfish Po-Boy

But in the meantime, you can’t get much more classic than these incredible English Pub-Style Fish ‘n Chips!

A plate of fish and chips with a small bowl of homemade tartar sauce and a bowl of hush puppies and a beer in the background.

CLASSIC FISH AND CHIPS FAQs

  • What is the best type of fish to use? As mentioned, we love Cod because it’s so flaky and not ‘fishy’ tasting at all. Haddock is used by a lot of chefs because there is a little more of a sweet flavor to the meat, but it’s considered not as flaky. Pollock is another type of Codfish, and is good, too, just a little harder to find and a little more expensive.
  • Do the fries really have to be fried twice? We know it sounds like an extra step, but YES! Following the 2-fry method produces restaurant-quality fries. Letting them sit in cold water for at least 30 minutes before frying helps to remove starch and, again, helps to produce the best possible chip.  Be sure to dry them off completely before hitting the hot oil!
  • Can the batter be made in advance? Yes! You can prepare the batter up to 1 day in advance. We recommend bringing the batter back to room temperature before coating the fish. Once the fish and chips have been fried, however, you’ll want to serve them immediately!
A piece of fried fish on a fork being dipped into a small bowl of homemade tartar sauce next to a lemon wedge.

Folks, if you love classic fish ‘n chips as much as we do, then you’ve got to make this recipe. And to truly make it special, be sure to make the Homemade Tartar Sauce, too. It’s so easy and truly spectacular.

Looking for another British classic?  How about our amazing Shepherd’s Pie or Pub-Style Guinness and Beef Pie, our Classic Meat Pies!

Now…go make our U.K. friends proud and make this dish! And when you do, be sure to take a picture, post it to Instagram, and tag @howtofeedaloon and #howtofeedaloon!

A plate of classic English fish and chips with homemade tartar sauce.
Print Recipe
5 from 10 votes

Classic Fish and Chips

Classic Fish and Chips are comfort food at it's very best. Serve with Homemade Tartar Sauce and Southern Hush Puppies and you'll be eating like a king (or a queen).
Prep Time45 minutes mins
Cook Time30 minutes mins
Total Time1 hour hr 15 minutes mins
Course: Entree / Seafood
Cuisine: British, English
Servings: 6 people
Calories: 259kcal
Author: Kris Longwell

Equipment

  • Deep fryer, or sturdy pot (i.e., Dutch oven) with a candy thermometer

Ingredients

  • 4 large potatoes preferably Russet, sliced into 2 ¼ x ⅜ strips (a mandolin makes this really easy)
  • Vegetable oil for frying
  • 1 cup all-purpose flour
  • 1 teaspoon baking powder
  • ¼ teaspoon onion powder
  • 1 teaspoon salt
  • ½ teaspoon ground black pepper
  • 1 bottle beer your favorite ale, stout or lager
  • 1 large egg lightly beaten
  • 8 pieces cod
  • Tartar sauce for serving

Instructions

  • Place the potatoes in a bowl of ice water for about 30 minutes.
    4 large potatoes
  • Heat the oil in a deep heavy skillet, or deep fryer, to 330°F.
    Vegetable oil
  • Drain the potatoes and dry them well with a kitchen towel.
  • Carefully, drop the potatoes, about 1 cup at a time, into the hot oil and fry for about 3 minutes.
  • Remove with a slotted spoon and drain on paper towels.
  • Repeat until all potatoes have gone through the 1st round of frying.
  • Increase the oil temperature to 365°F to 370°F.
  • Meanwhile, in a large bowl, stir together the flour, baking powder, onion powder, salt, and pepper. Next, add the egg and beer. Stir to mix.
    1 cup all-purpose flour, 1 teaspoon baking powder, ¼ teaspoon onion powder, 1 teaspoon salt, ½ teaspoon ground black pepper, 1 bottle beer, 1 large egg
  • Add a little more flour on a platter and dredge the fish fillets.
    8 pieces cod
  • Add the floured fillet to the batter and let the excess batter drip off.
  • Carefully add the fish to the hot oil.
  • Cook until the fish is golden.
  • Drain on paper towels.
  • To finish the chips, fry the pre-cooked potatoes in the hot oil.
  • Fry until they are golden brown and crisp, about 4 more minutes.
  • Drain on paper towels.
  • Serve fish with the chips and accompany with tartar sauce, lemon wedges, malt vinegar, and hush puppies (make ahead and keep warm in the oven).
    Tartar sauce

Video

Notes

NOTE: Watch the video near the top of the recipe for visual guidance. If you liked the video, please subscribe to our YouTube channel.
Be sure to use the 2-fry method for the chips.  Fry first at the lower temp (330°F) for 2 minutes, and then at a high temperature (365°F) for another 4 minutes.
You can use the same vessel to fry the fish and the fries in.  Do NOT fry the fish with the potato fries.  Small pieces of the batter will come off the fish as it fries.  If you are planning on frying additional fish or fries, you may want to consider using two different frying vessels, one for the chips and the other for the fish. Those small batter chunks will start to burn if they are in the hot oil for too long. 
Use your favorite type of beer for the batter; almost all types will help make the fish crispy, the flavor/taste is up to you, and what you like most. 
The batter can be made 1 day in advance. Fish and chips are best served soon after they come out of the fryer!

Nutrition

Serving: 6g | Calories: 259kcal | Carbohydrates: 49g | Protein: 10g | Fat: 10g | Saturated Fat: 1g | Cholesterol: 36mg | Sodium: 430mg | Potassium: 1151mg | Fiber: 7g | Sugar: 1g | Vitamin A: 51IU | Vitamin C: 28mg | Calcium: 121mg | Iron: 9mg

POST UPDATE: This was originally published in April, 2014, but was updated with improvements to the recipes, new photography and an awesome new video in September, 2019!

Chicken and Sage Casserole

September 26, 2019 by Kris Longwell 24 Comments

A large oval baking dish of baked chicken and sage casserole.

Chicken and Sage Casserole is so deeply satisfying.

The flavors work together beautifully in this heart-warming dish. With sautéed mushrooms and a wild and long grain rice mix in the casserole, it’s perfect for a weeknight meal, or for serving guests. And it comes together in about an hour!

A large oval baking dish of baked chicken and sage casserole.

HOW TO MAKE CHICKEN AND SAGE CASSEROLE

Preparing this dish is really not hard at all. If you prep most of the ingredients ahead of time, then assembly is a snap.

The meal is hearty and feeds a hungry family or gathering of friends.

Watch us show you how to make this amazing chicken casserole!

HOW TO SEAR THE CHICKEN BREASTS

Searing the chicken breasts before baking the casserole is one of the keys to getting super, juicy chicken that isn’t dry.

First, season the boneless and skinless breasts generously with salt and pepper, then heat the butter in a large skillet over medium-high heat.

Sear the breasts (in batches) until the outside is nice and brown. Set aside and continue preparing the casserole. NOTE: The chicken will not be cooked through at this point, but the searing will add flavor to the casserole and helps to lock in the juiciness we want with each bite.  The breasts will finish cooking while baking in the oven.

A pair of tongs placing seared chicken breasts on a platter.

THE BEST MUSHROOMS FOR CHICKEN AND SAGE CASSEROLE

Sautéed mushrooms provide such a deep, comforting taste and texture to this chicken and rice casserole. Have we mentioned how much we love everything mushrooms? We do!

You’ll need a total of 1 lb. of sliced mushrooms, we love using a variety of any of the following:

  • White button
  • Baby bella
  • Shiitake
  • Oyster
  • Porcini
  • Cremini

Some of our favorite dishes starring our favorite fungi include: Soppressatta, Mushroom, Black Olive Pizza, German Schnitzel with Mushroom Gravy, Best-Ever Meatloaf with Mushroom Gravy, and Sausage-Stuffed Mushrooms!

EXPERT TIP: As the mushrooms cook down, they will be come much smaller in size. Slicing the mushrooms into large slices (or quarters), allows for an even better texture for the chicken and sage casserole. They will still be soft and delicious, but a bit more robust in the finished dish.

Two hands using a knife to slice mushrooms for chicken and sage casserole.

Sautéing the mushrooms in a large skillet, before baking the casserole, will ensure the deepest flavor.

Shallots and garlic round out the perfect taste for the mushrooms. We add a couple splashes of Worcestershire sauce for even more flavor.

And the Sherry truly compliments the mushroom so much.

A large skillet with sautéed mushrooms in it being stirred by a wooden spoon.

ASSEMBLING THE CHICKEN AND SAGE CASSEROLE

Next, in a separate pan (or skillet), melt the butter and then add the flour to make a roux. Add the chicken stock and whisk in the flour.  After simmering for 3 minutes, remove from the heat and add the rice, cheese, fresh herbs, the mushroom mixture, and salt and pepper.

Now, it’s time to put the casserole together.

Use a large baking dish that will comfortably hold 5 to 6 chicken breasts. A 13×9″dish will work just fine. Grease it first with softened cooking spray, butter, or oil. Pour in the stock with the rice and mushrooms and then nestle the seared breasts evenly in the dish.

A pair of tongs nestling seared chicken breasts into a casserole dish of sautéed mushroom, rice and chicken stock.

CHICKEN AND SAGE CASSEROLE IS A ONE-DISH MEAL

As the casserole bakes, the liquid will cook the rice perfectly.

We love adding thinly sliced almonds to the top of the casserole.  It adds a wonderful texture and taste that we think is just perfect.

Another sprinkling of fresh sage over the top after the casserole comes out of the oven adds even more flavor.

Chicken and sage casserole in a large yellow baking dish.

OTHER FAVORITE CHICKEN DISHES

  • Creamy Pasta with Chicken and Broccoli
  • King Ranch Casserole
  • Instant Pot Honey Balsamic Chicken with Carrots
  • Amazing Chicken Pot Pie
  • Fantastic Chicken Florentine

In the meantime, you are going to love this incredible Chicken and Sage Casserole!

An antique plate holding a single serving of chicken and rice casserole.

Ready to make one of the most comforting chicken and rice casseroles in the world? Go for it!

And when you make the dish, be sure to take a picture of it, post it to Instagram, and tag @howtofeedaloon and #howtofeedaloon!

A single serving in an antique plate of chicken and sage casserole.
Print Recipe
4.34 from 6 votes

Chicken and Sage Casserole

This Chicken and Sage Casserole blends so many amazing flavors. Perfect for a weeknight, or serving to guests on a special occasion. It's that good!
Prep Time20 minutes mins
Cook Time40 minutes mins
Total Time1 hour hr
Course: Entree
Cuisine: American
Servings: 6 people
Calories: 587kcal
Author: Kris Longwell

Ingredients

  • ½ cup butter unsalted
  • 6 chicken breasts boneless, skinless
  • 2 shallots chopped
  • 2 cloves garlic minced
  • 1 lb mushrooms sliced
  • 1 teaspoon Worcestershire sauce
  • ¼ cup sherry
  • 3 tablespoon all-purpose flour
  • 3 cups chicken stock
  • 1 6 oz. long-grain and wild rice package, save seasoning pack for another use
  • ½ cup Parmesan cheese grated
  • 2 tablespoon flat-leaf parsley chopped
  • 1 tablespoon sage fresh, chopped, plus 1 more teaspoon for garnish
  • ½ teaspoon Kosher salt
  • ½ teaspoon black pepper
  • Vegetable cooking spray
  • ½ cup almonds sliced

Instructions

  • Pre-heat oven to 375°F.
  • Sprinkle salt and pepper over the chicken breasts
  • Melt 1 to 2 tablespoons butter in a large skillet over medium-high heat.
  • Add half of the chicken, and cook 5 minutes, or until browned, turn and cook for another 3 minutes.
  • Transfer to a plate (chicken will not be cooked completely at this point).
  • Repeat procedure with 1 tablespoon butter and remaining chicken. Wipe the skillet clean.
  • Melt 2 tablespoons butter in skillet over medium-high heat.
  • Add shallots, and saute 3 minutes or until translucent.
  • Add garlic, and saute for 1 minute.
  • Add mushrooms and cook, stirring, 8 minutes, or until tender.
  • Stir in sherry and cook, stirring often, 2 minutes.
  • Melt remaining 3 tablespoon butter in a different large saucepan over medium-high heat.
  • Whisk in flour; cook, whisking constantly, about 2 minutes.
  • Gradually whisk in stock and bring to a boil. Cook and whisk until slightly thickened, about 3 minutes.
  • Remove from heat and add rice (reserve the flavor packet for another use) and the cheese, parsley, sage, salt, pepper, and shallot/mushroom mixture.
  • Lightly grease a 13/9-inch baking dish with cooking spray.
  • Spoon mixture into dish and then top with chicken.
  • Bake for 45 minutes, or until chicken reaches 165 F on an meat thermometer.
  • Remove from oven, and let stand 10 minutes.
  • Sprinkle with almonds and sage.

Video

Notes

You can sear the chicken and make the shallot/mushroom mixture up to 1 day in advance.    Simply refrigerate and then pick up where you left off with the recipe once ready.
Depending on the size of the chicken breasts, you may only be able to fit 5 breasts into the baking dish.  Try not to overcrowd the dish too much with the chicken, as this may cause the chicken to bake unevenly. 
The entire casserole can be assemble before baking up to a day in advance.  The chicken will finish cooking in the oven.  If chilled, bake for an additional 10 to 15 minutes.  The internal temperature of the baked chicken should be 165°F. 
The casserole can be frozen for up to 1 month. 

Nutrition

Calories: 587kcal | Carbohydrates: 15g | Protein: 60g | Fat: 18g | Saturated Fat: 6g | Cholesterol: 195mg | Sodium: 912mg | Potassium: 1344mg | Fiber: 3g | Sugar: 5g | Vitamin A: 712IU | Vitamin C: 7mg | Calcium: 165mg | Iron: 2mg

Note: This recipe was adapted from Southern Living. 

Post Update Note: This recipe was originally posted in January, 2017, but recipe was improved, new photos were taken, and an awesome video was added in September, 2019!

Slow Cooker Chopped Brisket Sandwiches

September 24, 2019 by Kris Longwell 10 Comments

A close-up view of a slow cooker chopped brisket sandwich with barbecue sauce drizzled over the top of the meat with a couple of pickle slices and a thinly slice of onion on top, too.

If you’re in the mood for authentic BBQ flavor, you’ve come to the right place.

Just because you don’t have a smoker, that doesn’t mean you can’t still make a chopped BBQ beef sandwich that will honestly rival any BBQ joint, just about anywhere! The BBQ Beef Rub and Homemade BBQ Sauce are key to delivering the classic taste. And your slow cooker does most of the work for you!

A close-up view of a slow cooker chopped brisket sandwich with barbecue sauce drizzled over the top of the meat with a couple of pickle slices and a thinly slice of onion on top, too.

How To Make Slow Cooker Chopped Brisket Sandwiches


NOTE: If you liked this video, please subscribe to our YouTube channel. Remember to click the little ‘bell’ icon so you’ll never miss a new video. Thank you!

The Equipment and Ingredients You Will Need

Once you’ve put together the BBQ rub and the BBQ sauce, it’s smooth sailing! Make the rub and sauce up to several days in advance. Better yet, make a double batch, so you won’t have to make it again when you are ready for another round of sandwiches! Here’s what you’ll need to have on hand

Slow-Cooker – You’ll need a large 6 or 7-quart capacity, which are the most common sizes.
BBQ rub – You can go with store-bought, but homemade is easy and is perfect for that classic BBQ flavor.
Brisket – You’ll want the flat portion of a beef brisket. Trimmed of excess fat. It’s okay to cut the brisket in half and place the two pieces on top of each other in the slow cooker.
BBQ Sauce – Like the rub, homemade makes all the difference.
Beef stock – Or broth.
Buns – If you’re feeling adventurous, you could make hamburger buns from scratch, or, just pick up a quality brand from the supermarket. Lightly toasted adds amazing taste and texture.
Toppings – Hamburger pickles and thinly sliced onion are traditional and so good!

EXPERT TIP: Use your fingers to press the rub into the meat. You may not use all of the rub. The meat should be nicely coated with the rub before placing it in the slow cooker.

A person wearing black cooking gloves pressing a barbecue rub into a brisket flat that has been cut into two pieces.

Tips for Making Perfect Slow Cooker Chopped Brisket Sandwiches

Well-Marbled Brisket Is Best – The marbling is streaks of fat and adds amazing flavor to the brisket. No need to get an expensive cut (get “Choice” not “Prime”) because it will cook down and become melt-in-your-mouth tender.

“Low And Slow” Delivers Amazing Results – Cook on LOW for 10 to 11 hours. After about 8 hours, check the pot, you may need to add some more beef broth to keep the bottom from burning. You should be able to easily shred the meat with two forks.

Prepare Homemade BBQ Sauce – Homemade is the way to go for this brisket. You’ll probably want to double the recipe so you’ll have plenty on hand to allow guests to add as much sauce as they want to their sandwiches.

Shred, Toss, and Cook Some More – After you’ve shredded and chopped the cooked brisket, you’ll want to add it back into the slow cooker with more BBQ sauce. Cook on HIGH for 30 minutes to infuse the BBQ flavor into the brisket.

A person pouring a barbecue sauce mixture over a large seasoned brisket that is sitting in a large slow cooker.

How To Serve

After the brisket has been shredded and placed back in the slow cooker with the BBQ sauce, it’s getting close to serving time.

After 30 minutes of cooking on HIGH, turn the setting WARM.

It’s not necessary, but we find toasting the buns adds a wonderful texture and complements the meat wonderfully. Be sure to have plenty of BBQ sauce for guests to add even more to their sandwiches if they desire. Warming the sauce is a nice touch, and is how most beloved BBQ joints do it.

Two images with the first being a person using a large knife to chop cooked and shredded brisket and then another image of the chopped brisket in a slow cooker with that person pouring barbecue sauce over the meat.

Other Amazing Slow Cooker Recipes To Try

If you love cooking in your slow cooker as much as we do, then we feel certain you and your family will absolutely adore this collection of recipes:

Classic Beef Stew
Italian Beef Braciole
Mississippi Pot Roast
Baby Back Ribs
Pulled Pork
Dublin Coddler (with Sausage, Potatoes, and Bacon)
Provencal Chicken Stew
Coconut Chicken Curry
Chicken Chow Mein
Baked Beans
Corn on the Cob

These are all slow cooker gems, for sure. But, in the meantime, isn’t this catching your eye?

Homemade barbecue sauce being drizzled out of a glass bottle onto chopped brisket that is sitting on a toasted bun.

As Texans who have consumed a lot of top-notch BBQ over the years, we can honestly say this slow cooker chopped brisket comes about as close to the flavor you’ll get from a slow-cooked smoked piece of top-notch brisket every single time.

It’s perfect for tailgating, a game day gathering of friends, or a scrumptious Sunday dinner.

These truly are about as delicious of a sandwich as you will ever find. Try adding the chopped brisket to the middle of a grilled cheese sandwich.

But, in the meantime, just look at these sandwiches! Epic!

An overhead view of two slow cooker chopped brisket sandwiches that are topped with pickles and sliced onion and a glass of beer nearby.

Ready to make the best BBQ sandwich this side of the Alamo? Go for it!

And when you do, be sure to take a photo of it, post it on Instagram, and tag @HowToFeedaLoon and hashtag #HowToFeedaLoon!

A close-up view of a slow cooker chopped brisket sandwich with barbecue sauce drizzled over the top of the meat with a couple of pickle slices and a thinly slice of onion on top, too.
Print Recipe
5 from 2 votes

Slow Cooker Chopped Brisket Sandwiches

These BBQ sandwiches are truly the real deal. Make the beef rub and the BBQ sauce in advance and then the rest is so easy. You simply won't believe the authentic BBQ flavor of these amazing sandwiches.
Prep Time15 minutes mins
Cook Time10 hours hrs
Make ahead - BBQ Sauce20 minutes mins
Total Time10 hours hrs 35 minutes mins
Course: lunch, Sandwich
Cuisine: BBQ, Southern
Servings: 12 people
Calories: 463kcal
Author: Kris Longwell

Equipment

  • 6 to 7 quart slow cooker

Ingredients

  • 2 ½ cups BBQ sauce make ahead of time
  • ½ cup perfect BBQ rub
  • 4 lb brisket trimmed of excess of fat
  • 1 cup beef stock
  • 8 hamburger buns toasted
  • 1 medium onion sliced (optional, for garnish)
  • pickles sliced (optional, for garnish)

Instructions

  • Prepare the easy BBQ sauce as directed and set aside.
    2 ½ cups BBQ sauce
  • Mix together the perfect BBQ rub and set aside.
    ½ cup perfect BBQ rub
  • Use your fingers to rub the perfect BBQ rub all over the brisket.
    4 lb brisket
  • Place the brisket into the slow cooker. You may need to cut the roast into 2 pieces. It's okay if they overlap.
  • In a medium bowl, whisk together 1 cup of the prepared BBQ sauce and the beef stock (1 cup). Pour over the meat.
    1 cup beef stock
  • Cover and cook on LOW for 10 to 11 hours.
  • Carefully remove the meat from the slow cooker and place it on a large cutting board. Use two forks to shred the meat. Save 1 to 2 cups of the cooking liquid from the slow cooker and discard the rest. Set aside.
  • Use a large knife to roughly chop the shredded brisket.
  • Add the meat back into the slow cooker and add another cup of the BBQ sauce along with the reserved cooking liquid. Mix until combined.
  • Cook on HIGH for 30 minutes.
  • Serve warm with toasted buns, additional BBQ sauce, sliced onions, and sliced pickles.
    8 hamburger buns, 1 medium onion, pickles

Video

Notes

See the video near the top of the blog post for visual guidance. If you liked the video, please subscribe to our YouTube channel. 
This chopped brisket can easily be made in advance and kept in the refrigerator for up to 3 days, or frozen for up to 2 to 3 months.  Reheat in the slow cooker (or on the stove or in the oven) until heated through.  Keep on the WARM setting when serving. 
We often double the batch of the homemade BBQ sauce, because it's just so good, and folks usually like to add more to their sandwiches when they assemble them. 

Nutrition

Calories: 463kcal | Carbohydrates: 47g | Protein: 37g | Fat: 13g | Saturated Fat: 3g | Cholesterol: 94mg | Sodium: 986mg | Potassium: 742mg | Fiber: 2g | Sugar: 23g | Vitamin A: 133IU | Vitamin C: 2mg | Calcium: 105mg | Iron: 5mg

Southern Hush Puppies

September 21, 2019 by Kris Longwell 8 Comments

A basket of homemade Southern hush puppies next to a bowl of tartar sauce.

These crunchy-on-the-outside and fluffy-on-the-inside balls of yumminess are truly magical and delicious.

If you are looking for the perfect addition to your favorite seafood meal, such as Fish n Chips, Southern Fried Shrimp, or Fantastic Fried Fish Sandwich, you’ve come to the right place. And they come together in about 20 minutes!

A basket of homemade Southern hush puppies next to a bowl of tartar sauce.

How to Make Hush Puppies

This hush puppies recipe with cornmeal is the real deal.

Homemade hush puppies are easier than you might think to make in your very own kitchen!

Watch us show you how to make them!

What are Hush Puppies Made Of?

We love using coarse (medium ground) yellow cornmeal in our version. This provides the amazing corn taste with a wonderful texture.

Granulated sugar provides just enough sweetness to make you keep going back form more of these little balls of deliciousness. For the wet ingredients, you can never go wrong with buttermilk, an egg, and a few dashes of hot sauce.

And the addition of finely chopped onions is key to authentic taste.

Chopped onions being scraped into a bowl of hush puppies batter.

Tips for Creating the Batter

Once you’ve got the dry mixture and the wet mixture ready, it’s time to form the batter.

Pour the wet into the dry, and gently mix. Next is the beer (see below).

EXPERT TIP: Don’t over mix the batter! Don’t worry if the batter is a little lumpy. This is good! It will make the texture of the Southern Hush Puppies exactly the way you want them! Fluffy and moist on the inside!

A bowl of wet ingredients being poured into a bowl of dry ingredients for batter.

We absolutely love the addition of beer into the batter.

The alcohol cooks out, but the beer deepens the taste and makes the hush puppies extra crunchy on the exterior.

You’ll only need about a quarter cup of your favorite beer. We think you’ll know what to do with the leftover beer.

A person pouring a beer from a bottle into a bowl of hush puppies batter.

How To Achieve the Perfect Texture

We like to use our deep fryer when making Southern Hush Puppies, but you can certainly use a large, sturdy pot (i.e., Dutch oven) with enough oil to reach about 3 inches in depth.

If heating oil on the stove-top, we strongly encourage the use of a candy thermometer to maintain the correct temperature for frying, which for these babies is 350°F.

EXPERT TIP: Peanut oil is excellent for deep-frying because it can easily handle high heat. However, you can also use vegetable oil or shortening. Do NOT use olive oil.

Use a spoon to simply (and carefully) drop a small mound of batter into the hot oil.  Cook the puppies in batches until golden brown, about 7 to 8 minutes, flipping in the oil occasionally.

A spoon with hush puppies batter on it over a deep fryer.

What would a down-home fish-fry be without the incredible gems?

And of course, if you’re going to make this easy hush puppy recipe, then you’ve got to have Homemade Tartar Sauce.

The two were made for each other!

A hand holding a fried hush puppy that has been dipped into tartar sauce.

Frequently Asked Questions:

  • Can these be baked instead of fried? Absolutely! They will be more like cornbread, but still very delicious. Simply spray a mini muffin pan with cooking spray, and then fill the cups about ⅔-full and bake at 400°F for 20 minutes, until inserted toothpick comes out clean.
  • What is the best cornmeal to use? We find a yellow coarse (medium) that produces the best texture and taste.
  • What kind of oil is best for frying? Peanut oil is great. Vegetable oil or shortening will work. Canola will work, too. We do not recommend any fragrant oils, such as olive oil.
  • How long will they stay fresh? They are best when served soon after cooking. You can keep them warm in an oven, but the longer they sit, the less crunchy they will be on the outside and less fluffy on the inside.

A close up view of a basket of homemade hush puppies.

Now, you may be wondering why are hushpuppies called hush puppies?  Well, the story has it that is does have something to do with everyone’s favorite 4-legged furry friend.  Read more about it here.

Just look at these! Splitting one open while they are still warm is sublime.

Are you craving them yet?

A small white plate holding freshly made Southern hush puppies that has been split open.

Ready to make the best seafood accompaniment in the world? Go for it!!

And when you make them, be sure to take a picture, post on Instagram, and tag @howtofeedaloon and #howtofeedaloon!

A basket of homemade Southern hush puppies.
Print Recipe
5 from 4 votes

Southern Hush Puppies

These hush puppies are a Southern classic. Serve them with classic fish and chips with homemade tartar sauce, and maybe a few good dashes of malt vinegar...and are the super tasty!
Prep Time15 minutes mins
Cook Time16 minutes mins
Total Time31 minutes mins
Course: Side Dish
Cuisine: American
Servings: 8 people
Calories: 253kcal
Author: Kris Longwell

Equipment

  • Deep fryer, or large sturdy pot (i.e., Dutch oven)

Ingredients

  • 1 ½ cup self-rising flour
  • 1 ½ cup corn meal yellow ground, medium-coarse
  • ¼ cup sugar
  • ½ teaspoon baking powder
  • ½ teaspoon Kosher salt
  • ½ onion finely chopped
  • 1 cup buttermilk
  • ¼ beer
  • 1 egg lightly beaten
  • 3 dashes hot sauce
  • Peanut oil or vegetable, for frying
  • Tartar sauce for dipping
  • lemon wedges for garnish

Instructions

  • Heat the oil to 350°F.
  • Mix the flour, corn meal, sugar, baking powder and salt in a medium bowl.
  • Mix in the onions.
  • In a separate bowl, combine the buttermilk, egg and hot sauce.
  • Add the dry ingredients with the wet, and mix with a large wooden spoon. Don’t over mix! Its okay for there still to be some lumps.
  • Mix enough beer until batter just comes together, about ¼ cup.
  • Use a spoon to scoop a small mound of batter, just large enough to cover the spoon.
  • Drop the dough into the hot oil. Continue with more, but don't overcrowd. You will most likely fry in batch.
  • Fry until golden brown on the outside…about 7 to 8 minutes (varies depending on the size of the puppies!). Use a metal slotted spoon, or spider, to remove the hush puppies to a plate lined with paper towels.
  • Repeat process with remaining batter.
  • Serve warm with lemon wedges and tartar sauce.

Video

Notes

Coarse (medium ground) yellow cornmeal is best, however, fine ground will work, too.
A deep fryer helps keep the oil temperature constant (350°F), but a large sturdy pot (i.e., Dutch oven) will work, too, with a candy thermometer.  You will need to adjust the heat on the stove once the batter goes into the oil, and then before the next batch goes in.
Peanut oil works best, but vegetable oil or shortening will work, too.  Do NOT use olive oil.
Hush puppies are best served soon after frying.
You can bake these instead of frying (see FAQs), but they will be more similar to baked cornbread. 

Nutrition

Calories: 253kcal | Carbohydrates: 47g | Protein: 7g | Fat: 4g | Saturated Fat: 1g | Cholesterol: 24mg | Sodium: 188mg | Potassium: 209mg | Fiber: 3g | Sugar: 9g | Vitamin A: 79IU | Vitamin C: 1mg | Calcium: 58mg | Iron: 1mg

POST UPDATE: The recipe was originally published in April 2014, but was updated with improvements to the recipe, new photography and fabulous new video in September 2019.

Perfect Homemade French Fries

September 17, 2019 by Kris Longwell 17 Comments

A silver pan holding homemade French fries next to a small container of ketchup.

Perfect Homemade French Fries are not as challenging to make as you might think!

There are just a few simple, but important, steps and techniques to follow when you are ready to make restaurant-quality French fries from scratch! And after soaking, they are ready to eat in minutes! We also love our Poutine, Garlic Parmesan Steakhouse Fries, Steakhouse Onion Rings, Asparagus Fries, and Cross Hatch Sweet Potato Chips

A silver pan holding homemade French fries next to a small container of ketchup.

HOW TO MAKE PERFECT HOMEMADE FRENCH FRIES

The key to perfect French fries is what is referred to as the 2-fry method.

This can be achieved in a temperature-controlled deep fryer, or on the stove with a high-temperature thermometer.

Watch us show you how easy it is to make homemade French fries!


HOW TO CUT THE POTATOES

Before we cut the potatoes, let’s talk about the best potato to use for homemade French fries. Well, that’s easy: Russet (Idaho) is the way to go. They are ideal because they contain less moisture, which ultimately produces a French fry that’s not soggy in the middle.

We love big ole French fries, so we seek out the large Russet potatoes, but smaller ones will work just fine, too.

EXPERT TIP: To cut potatoes, we use our trusty mandolin, set on the ‘julienne’ setting at ⅜.” No mandolin? Not to worry. Using a large, sharp knife, simply turn the potato on its side, and cut about approximately ⅜″ slices. Next, turn the slices so they are flat, and cut them into strips.  Easy peasy.

A large russet potato being cut on a mandolin for homemade French fries.

THE SECRET TO CRISPY FRIES

There are several factors to ensure your homemade French fries are crispy on the outside and soft on the inside.

In addition to choosing the right potato (Russet, please!), you’ll want to soak the cut potatoes in cold water for about 30 minutes.

EXPERT TIP: The chilled exterior of the cut spuds keeps the outside from browning too quickly. Swish the potatoes around, this helps to remove starch, which also helps to make a crispier fry.

A hand holding cut potatoes in a bowl of ice water.

You can leave the potatoes in the water for more than 30 minutes, but if you do, we recommend placing the bowl in the refrigerator to keep them chilled.

Once you are ready to fry, then it’s time to thoroughly dry the cut potatoes.

We take a clean, dry kitchen towel and dry the potatoes in batches, and then place them on a large dish. You don’t want excess water on the potatoes when they hit the oil.

Two hands pressing a towel over cut potatoes for homemade French fries.

FRY THE POTATOES IN TWO STAGES

Probably the most important step in producing perfect homemade French fries is to fry the potatoes in two stages. A quick 2-minute fry at 330°F starts the cooking process and produces a soft fry.  You’ll most likely need to fry the potatoes in batches.

Next, after increasing the temperature of the oil to 365°F, you’ll fry the partially cooked fries again. Cook until nicely browned and crisp. Typically between 3 and 4 minutes.

EXPERT TIP: The first stage can be done in advance of serving. Place partially cooked potatoes on a platter lined with paper towels up to several hours in advance. Do the 2nd fry just before serving.

Side-by-side view of a deep fryer holding French fries, at different temperatures.

PERFECT HOMEMADE FRENCH FRIES FAQs

  • What is the best oil to use? Peanut oil is a vegetable oil with a mild taste and high smoke point, which makes it a great choice for frying French fries. You can also use regular vegetable oil or canola oil. Olive oil is NOT recommended.
  • How long do you soak the potatoes before frying: At least 30 minutes, in cold (with ice) water. We let the potatoes soak for several hours and still had perfect fries when we cooked them. Just be sure to keep them cold (in the refrigerator) if soaking for more than 30 minutes.
  • Can French fries be made in advance? These fries are best when they are fresh out of the frier. They are still delicious later on for munching, but they eventually will lose their crispiness. You can do the 1st round of frying several hours in advance and then finish them off with the 2nd fry just before serving.
  • When do you know the French fries are ready? The fries will turn a brownish color and have a “crispy” look to them. The first fry is for 2 minutes, and the second fry is usually around 4 minutes.

Homemade French fries in a basket of a deep fryer.

We love serving these amazing Perfect Homemade French Fries alongside our:

  • BLT Sandwich with Garlic Basil Aioli
  • Rockin’ Black and Bleu Burger
  • Steak au Poivre
  • Mussels with Garlic and White Wine
  • Kickin’ Remoulade

Or, by themselves, with good ole’ ketchup!

 A hand dipping homemade French fries into a dish of ketchup.

Ready to make the most amazing, restaurant-quality French fries at home? You now know the secrets to perfect fries every time! Go for it!

And when you make them, take a picture, post it to Instagram and tag @howtofeedaloon and #howtofeedaloon!

A small silver pale holding homemade French fries with a small bowl of ketchup nearby.
Print Recipe
4.50 from 6 votes

Perfect Homemade French Fries

Now you can make restaurant-quality french fries in your very own kitchen! If you don't have a deep-fryer, simply get a large sturdy pot (a Dutch oven works well) and add a couple of inches of oil, and use a candy thermometer to maintain the correct temperature. And then fry in 2 stages!
Prep Time10 minutes mins
Cook Time12 minutes mins
Soaking in Ice Water30 minutes mins
Total Time52 minutes mins
Course: Appetizer, Appetizer or Side Dish
Cuisine: American / French
Servings: 6 people
Calories: 363kcal
Author: Kris Longwell

Equipment

  • Deep fryer, or heavy pot (ie, Dutch oven) with high-temperature thermometer

Ingredients

  • 4 large potatoes large or medium sized
  • Peanut oil or vegetable or canola, enough to fill 3-inches of vessel
  • Kosher salt

Instructions

  • Wash and dry the potatoes and then using a mandolin, or a large knife, cut (julienne) into ⅜-inch strips.
  • Place the cut potatoes into a bowl of ice water for 30 minutes.
  • Remove the potatoes and dry them completely with a towel.
  • Heat the oil to 330°F.
  • Using a fry basket, or a metal spatula, carefully lower the cut potatoes into the oil and fry for 2 minutes. You will probably need to do this in batches.
  • Increase the oil temperature to 365°F. Fry the partially cooked potatoes again until browned and crisp, 3 to 4 minutes. Carefully remove the fries with a fry basket or spatula and shake off excess oil, turn the fries onto a plate lined with paper towels. Fry the remaining fries following the same process.
  • Sprinkle with salt and serve at once.

Video

Notes

If you do not have a deep fryer, heat the oil in a large Dutch oven (or heavy pot) using a candy thermometer to maintain the correct temperature.
The first round of frying of the potatoes can be done up to several hours before serving.  You will want to serve the fries after the 2nd fry immediately.
You can use vegetable oil, shortening, or canola oil in place of peanut oil.  Although, we recommend peanut oil for best results.  Do NOT use olive oil.
Soak the uncooked potatoes for 30 minutes in an ice bath.  They can soak longer, but you'll need to keep them in the fridge while they soak.  Don't soak for longer than 3 hours. 

Nutrition

Calories: 363kcal | Carbohydrates: 31g | Protein: 6g | Fat: 8g | Saturated Fat: 2g | Sodium: 25mg | Potassium: 1016mg | Fiber: 6g | Vitamin C: 28mg | Calcium: 74mg | Iron: 8mg

Authentic Steak Fajitas

September 15, 2019 by Kris Longwell 13 Comments

A cast iron fajita skillet of steak fajitas with limes and green onions nearby.

Authentic Steak Fajitas have become legendary in our house, and for good reason.

You’ll want to marinate the steak overnight. Before grilling, make sure you have the classic fajita accompaniments: best-ever guacamole, pico de gallo, refried beans, and homemade flour tortillas. These fajitas are the real deal!

A cast iron fajita skillet of steak fajitas with limes and green onions nearby.

HOW TO MAKE AUTHENTIC STEAK FAJITAS

We’ve got a few tricks up our sleeves to truly put these steak fajitas over the top on the delicious meter.

We’ll go over them in detail, but we feel a good steak fajita is better than the sum of its parts. Stay with us…you’ll see what we mean.

Watch us swho you how to make authentic steak fajitas at home!


CHOOSING THE RIGHT MEAT FOR STEAK FAJITAS

Skirt steak is the traditional (and original) cut of meat that was used when steak fajitas were first developed by Mexican ranchers in South and West Texas in the early 1930s. It was an inexpensive piece of meat that was high in flavor but not tender.

As fajitas made the quantum leap from obscure campfire fare in South Texas to universal appeal in the 1970s and 80s, different types of meat began to appear on restaurant menus.

Though skirt steak was still the most common, other tender cuts of meat were used as well, ranging from ribeye, and sirloin to strip. When prepared properly, we still love the original…skirt.

Two large cuts of skirt steak on a butting board next to cut limes and scallions.

MARINATING THE MEAT IS ESSENTIAL

In order to break down the connective tissue in skirt steak, it is imperative to marinade the meat in a citrus-based marinade for hours, preferably overnight.

We use fresh lime juice as the basis for our marinade. Fresh aromatics such as scallions (green onions), garlic, cilantro, and coriander deepen the flavor as it marinates.

EXPERT TIP: If you can, turn the meat over at least once while marinating. Maybe once before bedtime and then again the next morning. This will help to completely re-distribute the marinade and further help to tenderize the meat.

A pair of tongs lifting a cut of skirt steak up that has been marinating in a white dish.

INGREDIENTS NEEDED FOR THE FAJITA SEASONING

Authentic steak fajitas are nicely seasoned. You can certainly purchase decent fajita seasoning from most well-stocked markets, but when you make your own, you know EXACTLY what’s going on with your steak.

For our homemade fajita seasoning, we simply mix together:

  • Chili powder
  • Smoked paprika
  • Beef bouillon cube, crushed
  • Onion and garlic powders
  • Cayenne pepper
  • Cumin
  • Corn starch

A hand holding a scoop of homemade fajita seasoning over a glass bowl.

HOW TO CARAMELIZE ONIONS

One of the key components of our authentic steak fajitas is caramelized onions.

Start these early. Simply take two large white, or yellow onions, and slice them. Don’t worry, two may seem like a lot, but they cook down considerably.

Cook them in a large skillet with oil for about 20 to 30 minutes, until very, very soft and turning a nearly dark golden brown.

EXPERT TIP: To bring out the umami taste in these onions, add a few splashes of low-sodium soy sauce while they are cooking. Trust us on this. The taste, matched against the sweetness of the caramelized onions is off-the-charts delicious.

A large skillet with a wooden spoon stirring caramelized onions

When you are ready to cook the meat, we recommend firing up your gas or charcoal grill to be nice and hot. Alternatively, you can cook the meat in a large (preferably cast iron skillet).

Remove the meat from the marinade and you can generously sprinkle the fajitas seasoning all over the meat before you place it on the grill, or right after it hits the grates (or pan).

You want the meat to get a nice char on the outside, but stay pink on the inside. Internal temp of 140°F is a beautifully medium-cooked steak. And the smell….um…

Two cuts of marinated skirt steak cooking on a gas grill for authentic steak fajitas.

HOW TO SLICE STEAK FAJITA MEAT

This is important for creating a tender bite of fajita, every time. Cut against the grain.

You will see the strands of meat that run the length of the steak, this is called ‘the grain.’ You want to cut the meat in the opposite direction of the grain.

You will probably need to cut the skirt steak in half, before slicing it against the grain.

A large knife cutting a cooked skirt steak against the grain on a cutting board.

Before you slice the meat, be sure you’ve got the fajita accompaniments ready to go and on the table. We always serve our authentic steak fajitas with:

Easy refried beans
Guacamole
Sour cream
Shredded cheddar cheese
Pico de gallo
Salsa
Homemade flour tortillas

HOW TO SERVE AUTHENTIC STEAK FAJITAS

It’s almost showtime, folks! After you’ve got all the fixins’ ready to go, and you’ve sliced your meat, and the onions are cooked…heat a fajita skillet/pan, or any sturdy skillet, over medium-high heat for about 5 minutes. We want that pan hot! (But be careful when handling! Don’t burn yourself!).

Next, transfer the onions to the hot skillet and then top with meat and immediately bring to the table.

You want these fajitas to sizzle! The meat mixed in with the sizzling hot onions just adds even more flavor!

Steak fajitas on a bed of caramelized onions on a fajita pan.

AUTHENTIC STEAK FAJITAS FAQs

  • What if I can’t find skirt steak? You can certainly use ribeye, sirloin, or a strip steak, but that’s going to cost a little more but won’t require as long as a marinating period (only about 2 to 4 hours would be needed). Flank steak works really well, and should be marinated for at least 6 hours. Avoid London broil or brisket for steak fajitas.
  • Can I do chicken or shrimp instead of steak? Of course! We love our chicken fajitas and our shrimp fajitas! It’s a similar recipe, just requires less marinating. You can also grill deveined and cleaned shrimp to use, or go completely vegetarian with grilled mushrooms and peppers!
  • How far in advance can I marinate the meat? We wouldn’t recommend more than 18 hours. Otherwise, the meat will begin to break down and not have the desired texture. You can make the marinade up to several days in advance.
  • Can the recipe be doubled or tripled? Of course! Just plan accordingly! You may not use all of the fajita seasoning, but what you don’t use will keep for weeks in a container with a tight-fitting lid.

Ready for authentic steak fajitas? YES!!

A hand holding an authentic steak fajita filled with beans, guacamole, sour cream, steak and pico de gallo.

All right folks, it’s fajita time! This is hands-down one of our very favorite meals to prepare, and we get massive rave reviews every time we serve it.

And when you make them, be sure to take a picture, post on Instagram, and tag @howtofeedaloon and #howtofeedaloon!

Authentic steak fajitas on a large fajita pan with sliced limes and scallions nearby.
Print Recipe
4.34 from 6 votes

Authentic Steak Fajitas

These Authentic Steak Fajitas are the real deal. Be sure to use skirt steak, marinate it overnight, saute the onions until nicely caramelized, and use fresh flour tortillas with homemade pico de gallo. Just amazing.
Prep Time45 minutes mins
Cook Time35 minutes mins
Marinating time8 hours hrs
Total Time9 hours hrs 20 minutes mins
Course: Entree
Cuisine: Asian / Mexican, TexMex
Servings: 6 people
Calories: 432kcal
Author: Kris Longwell

Ingredients

  • Juice of 3 limes you'll need about ½ cup
  • 2 scallions diced
  • 3 cloves garli minced
  • 3 tablespoon cilantro fresh, choped
  • 2 teaspoon vegetable oil
  • 1 teaspoon red pepper flakes
  • ¼ teaspoon coriander ground, optional
  • 1 ½ lbs skirt steak
  • 3 tablespoon vegetable oil or lard
  • 2 large onions sliced
  • 1 tablespoon soy sauce

Fajita Seasoning

  • 1 tablespoon cornstarch
  • 2 teaspoon chili powder
  • 1 tablespoon salt
  • 1 teaspoon smoked paprika
  • 1 beef bouillon cube crushed
  • ½ teaspoon onion powder
  • ½ teaspoon garlic powder
  • ¼ teaspoon cayenne pepper
  • ¼ teaspoon cumin ground

The Fixin's

  • 10 flour tortillas warmed
  • Refried beans warmed
  • Sour cream
  • Guacamole
  • Shredded cheddar
  • Pico de gallo
  • Salsa

Instructions

  • Whisk together the lime juice, scallions, garlic, cilantro, oil, red pepper flakes, and coriander.
    Juice of 3 limes, 2 scallions, 3 cloves garli, 3 tablespoon cilantro, 2 teaspoon vegetable oil, 1 teaspoon red pepper flakes, ¼ teaspoon coriander
  • Place the meat in a large dish, flat. Pour the marinade over the steak, cover, and refrigerate for 8 to 12 hours, flipping 1 or 2 times.
    1 ½ lbs skirt steak
  • Heat the oil (or lard) in a large non-stick skillet. Add the onions.
    2 large onions, 3 tablespoon vegetable oil
  • Cook for 15 minutes, stirring occasionally,
  • Add the soy sauce and cook for another 20 minutes, caramelizing the onions. They should turn soft and a nice brownish color. Set aside.
    1 tablespoon soy sauce
  • Mix together all the ingredients of the fajita seasoning in a medium bowl. 
    1 tablespoon cornstarch, 2 teaspoon chili powder, 1 tablespoon salt, 1 teaspoon smoked paprika, 1 beef bouillon cube, ½ teaspoon onion powder, ½ teaspoon garlic powder, ¼ teaspoon cayenne pepper, ¼ teaspoon cumin
  • Prepare a medium-hot grill.
  • Remove the steak from the marinade and liberally sprinkle the seasoning all over the meat.
  • Use tongs to place the seasoned meat over direct heat. Cook until lightly charred on the outside, but still pink on the inside. Approximately 4 minutes per side. Internal temperature should be between 135°F and 145°F.
  • Bring in the steak and cut it into ¼-inch strips against the grain.
  • Place your fajita pan (or sturdy skillet) on the stove over medium-high heat to heat completely, about 4 to 5 minutes.
  • Add the caramelized onions to the hot pan (be careful...they will sizzle!)
  • Then place the meat on the onions. Bring to the table and squeeze fresh lime over the fajitas.
  • Serve with warmed tortillas and all the fixin's.
    10 flour tortillas, Refried beans, Sour cream, Guacamole, Shredded cheddar, Pico de gallo, Salsa

Video

Notes

If using skirt steak, marinate for at least 8 hours, preferably overnight.  If using a more tender cut of meat, such as ribeye, you will only need to marinade for a couple hours.
The onions can be made in advance (up to 1 day) and re-heated in a large skillet.
Cut the cooked meat against the grain.  Look for strand in the meat.  You'll want to cut perpendicular to these strands.  You may need to cut the steak in half first.  You don't want the strips to exceed 1 to 2 inches. 
Re-heat fajitas and onions in a skillet over medium heat.  They are delicious the next day!

Nutrition

Serving: 8g | Calories: 432kcal | Carbohydrates: 34g | Protein: 30g | Fat: 9g | Saturated Fat: 4g | Cholesterol: 71mg | Sodium: 1932mg | Potassium: 536mg | Fiber: 3g | Sugar: 5g | Vitamin A: 624IU | Vitamin C: 5mg | Calcium: 80mg | Iron: 4mg

Homemade Flour Tortillas

September 10, 2019 by Kris Longwell Leave a Comment

A person pulling back a festive-color napkin to reveal a stack of homemade flour tortilla

Homemade Flour Tortillas are about as comforting as it gets.

Simple ingredients and a simple process make this a universal favorite.
Perfect for steak fajitas, chicken fajitas, and chicken quesadillas.
And these come together in only about 30 minutes! Make these along with our homemade corn tortillas!

A person pulling back a festive-color napkin to reveal a stack of homemade flour tortilla

How To Make Flour Tortillas


NOTE: If you liked this video, please subscribe to our YouTube channel. Remember to click the little ‘bell’ icon so you’ll never miss a new video. Thank you!


The Ingredients You Will Need

We find that using pork lard and softened butter for our flour tortillas yields the softest and best-tasting tortilla.

However, you can substitute shortening, if you can’t find lard.

How To Handle the Dough

After a shaggy dough comes together, it’s time to briefly knead the dough.

A cook pulling a piece of flour tortilla dough on a floured cutting board.
A hand holding a ball of dough for homemade flour tortillas.
A damp kitchen towel being lowered over flour dough balls on a cutting board.

How Thick to Roll the Flour Dough

After the dough has rested for 15 minutes, grab one of the balls and use the palm of your hand to flatten the dough. Press, then turn the dough 90°, and press again. This will help keep the tortilla round.

Use a pastry roller (small or large) to gently roll the dough out to the thickness of about a dime and a diameter of about 6 inches.  NOTE: The tortilla will get thicker once it cooks in a hot skillet.

We like to roll all the dough balls out before we start to cook them. However, do NOT stack the uncooked tortillas because they will stick to each other.  We recommend stacking them with a piece of wax paper, or parchment paper, between each layer of dough.

Cook in a hot skillet just until air pockets start to form, usually about 1 minute. Flip and cook for another minute. Small brown spots should appear on both sides, too.

A pastry roller stretching out dough for homemade flour tortillas.
A flour tortilla cooking in a black skillet.

How To Keep Homemade Flour Tortillas Soft

As soon as you have finished cooking each tortilla, transfer them to an insulated tortilla warmer, preferably lined with damp paper towels.

We find that letting the tortillas sit for a few minutes before eating them allows them to soften even more and taste even better.

The homemade tortillas are perfect as they are, but get even better with:

  • Butter
  • Fresh pico de gallo
  • Best-ever guacamole
  • Restaurant-quality salsa
  • Classic Tex-Mex queso!

A knife spreading butter onto a warm homemade flour tortilla.

Homemade Flour Tortillas FAQs

  • How do you keep the tortillas from breaking? Don’t over-process, knead, or roll the dough. Also, let the dough balls rest for 15 minutes under a damp kitchen cloth. Your skillet should be hot enough so that the tortillas start to get air bubbles along with small brown spots after 1 minute of cooking on each side. All this adds up to soft, tortillas that won’t break.
  • How long can you keep tortilla dough? You can keep the prepared dough in the refrigerator for 1 day, and you can freeze it for up to one month. In both cases, let the dough come back to room temperature before rolling out the tortillas and cooking.
  • How do you reheat homemade flour tortillas? Simply wrap them in a slightly damp paper towel, or a kitchen towel, and microwave in 30-second intervals until warmed through.
  • What can I use in place of lard? Pork lard is the most authentic way to make homemade flour tortillas, and we find produces the best taste and texture. However, you can substitute shortening, and still get nice tortillas. You can also use soft butter, or vegetable oil, though the end result won’t be quite as fluffy.

A hand holding a stack of homemade flour tortillas in a colorful cloth.

Looking for corn tortilla recipes? Try our Authentic Tex-Mex Enchiladas, Pork Carnitas, or Mahi-Mahi Tacos! In the meantime, whip up a batch of these incredible homemade flour tortillas!   And you might also want to make our amazing Corn Tortillas!

When you make them, be sure to take a picture, post on Instagram, and tag @howtofeedaloon and #howtofeedaloon!

Hands holding a stack of homemade flour tortillas in a colorful cloth.
Print Recipe
No ratings yet

Homemade Flour Tortillas

These Homemade Flour Tortillas are so fresh and velvety soft and amazing, especially with fajitas. These are simple to make, but as with just about anything, practice makes perfect. If you can't find pork lard, you can go with all shortening or all room-temperature butter.
Prep Time15 minutes mins
Cook Time15 minutes mins
Resting time10 minutes mins
Total Time40 minutes mins
Course: Appetizer, Mexican
Cuisine: Mexican, Tex-Mex
Servings: 8 people
Calories: 256kcal
Author: Kris Longwell

Equipment

  • Pastry roller
  • Tortilla warmer
  • Sturdy skillet cast-iron or non-stick is preferable.

Ingredients

  • 3 cups all-purpose flour
  • 2 teaspoon baking powder
  • 1 teaspoon Kosher salt
  • 3 tablespoon pork lard or shortening
  • 2 tablespoon unsalted butter room temperature
  • 1 cup water warm (heat in the microwave)

Instructions

  • In a large bowl, whisk together the flour, baking powder, and salt. Use a wooden spoon to make a well (or indention) in the flour mixture.
    3 cups all-purpose flour, 2 teaspoon baking powder, 1 teaspoon Kosher salt
  • Fold in the lard and softened butter, and then slowly start working the warm water into the mixture. Continue working the dough until most of the flour mixture has been absorbed. At this point, it will be a 'shaggy' dough.
    3 tablespoon pork lard, 2 tablespoon unsalted butter, 1 cup water
  • Turn the dough out onto a lightly floured surface. Use the palm of your hands to knead the dough until a soft, pliable dough is formed. Place a bowl over the top of the dough and let it rest for 15 to 20 minutes.
  • Divide the dough into 16 pieces and cover them with a lightly dampened kitchen towel. Working one piece of dough at a time, use your hands to form it into a ball.
  • Take the dough ball and gently flatten it with the palm of your hand, turning to a 90° angle, and pressing again, to keep the dough round. Use a pastry roller (or a rolling pin) to roll out the dough to about 6 inches in diameter and very thin, about the thickness of a dime.
  • Heat a non-stick, or cast iron skillet, or comal pan (flat cast iron griddle), over medium-high heat.
  • Carefully place the tortilla into the hot skillet.
  • Cook until air pockets, or bubbles, begin to form. Usually about 1 minute. Flip the tortilla. Small brown spots should appear on the cooked side. Cook for about another 15 to 30 seconds then transfer to a tortilla warmer lined with a slightly damp cloth. Repeat with the remaining dough. Allow the tortillas to rest for about 5 to 10 minutes, at least.
  • Serve at once, or re-heat the tortillas in the microwave wrapped in a damp cloth in 30 second intervals.

Video

Notes

If you do not have food processor, you can follow the steps using a stand mixer or a hand mixer.  
Shortening can be substituted for the lard, however the taste and texture will not be quite as authentic.
Do not over process, or over knead, or roll the dough.  Over handling the dough will result in a chewier tortilla.  Be sure to let the balls of dough rest for 15 minutes under a damp kitchen towel before rolling them out. 
We find that letting the cooked tortillas rest for about 5 minutes before serving allows them to soften even more. 

Nutrition

Calories: 256kcal | Carbohydrates: 42g | Protein: 6g | Fat: 3g | Saturated Fat: 1g | Sodium: 293mg | Potassium: 185mg | Fiber: 2g | Sugar: 1g | Vitamin A: 75IU | Vitamin C: 1mg | Calcium: 66mg | Iron: 3mg

POST UPDATE NOTE: This was originally posted June, 2017, but was updated with tweaks to the recipe, new photography, and new video in September, 2019.

Gourmet Beef Stroganoff

September 8, 2019 by Kris Longwell 34 Comments

A large silver saucepan filled with gourmet beef stroganoff

Gourmet Beef Stroganoff is one dish you and your guests will not soon forget.

We like to say: “This isn’t your mama’s beef stroganoff!” Sorry, mama…no offense, but this version is nothing short of spectacular. And it comes together in about 30 minutes!

What makes this version so delicious? The ingredients: Beef tenderloin (filet mignon), fresh mushrooms, crème fraîche, fresh dill, cognac and deeply flavorful Pacific Foods Organic Low Sodium Beef Broth.

A large skillet containing gourmet beef stroganoff on a white background.

HOW TO MAKE GOURMET BEEF STROGANOFF

The trick to making a beef stroganoff truly spectacular doesn’t require any special equipment or highly skilled culinary techniques.

Plan accordingly and arm yourself with the best ingredients available, and we’ll show you how easy it is to elevate this simple dish to amazing heights.

Watch us show you how simple it is to prepare Gourmet Beef Stroganoff!


KEEP IT SIMPLE, CLEAN & NOURISHING

The key to making this gourmet beef stroganoff stellar is in the quality of the handful of ingredients that are used. Which is why we always turn to Pacific Foods for so many of our recipes.

For this recipe, we need a deeply hearty beef broth that will complement the beef tenderloin. Pacific Foods Organic Low Sodium Beef Broth is the perfect choice because it has been simmered with onions and garlic, capturing a flavor so rich and complex, there’s no need for extra salt.

And since we know we’re going to have a deeply flavorful sauce thanks to the broth, we need to make sure we’ve got quality beef. We’re going the extra distance here and using beef tenderloin that we’ve cut into bite-sized pieces. Just a little salt and pepper is all that’s needed for this incredibly flavorful and melt-in-your-mouth tender cut of meat.

A pepper grinder being twisted over beef tenderloin for beef stroganoff

COOK THE MEAT IN TWO BATCHES

After cutting the beef tenderloin into bite-sized pieces, and then lightly salting and peppering the meat, you’ll need to give the meat a quick sear.

EXPERT TIP: Sear the meat until just browned all over then set aside. The meat will finish cooking to a gorgeous medium while it gently simmers in the sauce. Cooking the meat usually is done in a couple batches.

After you have browned the meat, pour out any excess fat that has accumulated in the pan.

A wooden spoon stirring cooked beef pieces in a large silver skillet on a stove.

TRY A COMBINATION OF MUSHROOMS IN GOURMET BEEF STROGANOFF

We love all types of mushrooms and we love mixing things up when making this incredible dish. Try a combo of any of the following (you’ll need a total of 16 oz.)

  • Shiitake
  • Oyster
  • Cremini
  • White Button
  • Portobello
  • Porcini

When sautéing ‘shrooms, just a few twists of fresh black pepper is all that’s needed to enhance the flavor.

A pepper grinder being twisted into a pan of mushrooms on a stove.

PACIFIC FOODS IS COMMITTED TO QUALITY

There are so many reasons we love cooking with Pacific Foods products. Pacific Foods’ delicious, nutritious foods are inspired by traditional recipes made convenient for busy, health-conscious consumers.

We love using their Organic Low Sodium Beef Broth for this gourmet beef stroganoff because it’s just so rich and delicious. Pacific’s commitment to unmatched quality truly makes it as good as it gets.

We’re pretty sure you’re starting to see why this is considered by many to be the best beef stroganoff recipe on the planet. Right? Just wait…we’re not done yet.

Beef broth being poured into a skillet of gourmet beef stroganoff.

EXTRA-WIDE EGG NOODLES ARE IDEAL FOR STROGANOFF

We are getting so close now. After adding in the crème fraîche, fresh dill and Cognac (optional), back along with the browned beef and accumulated juices, it’s time to cook the noodles.

EXPERT TIP: Crème fraîche is very similar to sour cream, however it is a little creamier with a little less tanginess. Although we call for it here in this recipe, you can certainly use sour cream and still get fantastic results. Because sour cream could curdle if simmered too long, we recommend stirring it into the sauce just before you are ready to serve.

For the ever-important noodles, we go with extra-wide egg noodles. Once cooked, we toss with a little unsalted butter for added flavor and to keep the noodles from sticking to each other.

A spoon in a large skillet of gourmet beef stroganoff.

QUALITY INGREDIENTS IS KEY TO GOURMET BEEF STROGANOFF

We can’t stress enough that what takes this beef stroganoff to the highest of culinary heights is the quality of ingredients used.

This is a “special occasion” dish, no doubt. That’s why we say go with the best of the best: Beef tenderloin, fresh mushrooms, high-quality Congac (if using), fresh dill, egg noodles…and of course Pacific Foods Organic Low Sodium Beef Broth.

This is a dish that you will cherish forever and so will the lucky people you serve it to!

A white bowl of gourmet beef stroganoff with a box of beef broth in the background.

Ready to impress your loved ones with this amazing Gourmet Beef Stroganoff? Go for it!

And when you make the dish, be sure to take a picture, post it to Instagram and tag @howtofeedaloon and @PacificFoods!

Print Recipe
5 from 9 votes

Gourmet Beef Stroganoff

This Gourmet Beef Stroganoff recipe brings the old school dish to epic, modern flavors. Prepare this for a special occasion, and you will be a super star!
Prep Time20 minutes mins
Cook Time30 minutes mins
Total Time50 minutes mins
Course: Entree
Cuisine: Entree / Russian
Servings: 8
Calories: 388kcal
Author: Kris Longwell

Ingredients

  • 1 2 lb beef tenderloin trimmed and cut into 1" strips
  • Kosher salt and ground black pepper
  • 2 tablespoon olive oil
  • 6 tablespoon unsalted butter
  • ½ cup shallots diced
  • 1 lb white button mushrooms sliced
  • 2 teaspoon Worcestershire sauce
  • 2 tablespoon all-purpose flour
  • 2 cups Pacific Foods Low Sodium Beef Broth
  • 2 fresh bay leaves
  • 1 tablespoon smoked paprika plus extra for garnish
  • 1 tablespoon Dijon mustard
  • ¼ cup Cognac optional
  • 2 tablespoon fresh dill chopped
  • 1 ½ cups sour cream or cream fraiche, or whipping cream
  • 12 oz egg noodles

Instructions

  • Pat meat dry with paper towels and sprinkle with salt and pepper.
  • Heat oil, preferably in a large Dutch oven, or heavy skillet, over medium-high heat.
  • Working in batches, add meat in a single layer and cook until just brown, then stir. Cook for a total of about 3 minutes.
  • Transfer to a large platter.
  • Drain pan.
  • Add 4 tablespoons of butter to the same pan over medium-high heat.
  • Add chopped shallots and saute until tender, about 4 minutes.
  • Add mushrooms and sprinkle with pepper and Worcestershire sauce.
  • Saute until liquid has nearly evaporated, about 15 minutes.
  • Add flour and stir until mushrooms are coated. Cook for a 2 to 3 minutes.
  • Add beef stock, bay leaves, paprika, mustard, then Cognac.
  • Simmer until the liquid thickens slightly.
  • Add meat and accumulated juices from the platter.
  • Simmer over medium-low heat until meat is heated through, about 3 to 5 minutes.
  • Stir in 1 tablespoon dill and all of the crème fraîche (or sour cream).
  • Season to taste with salt (1 tsp) and pepper (½ tsp).
  • Remove the bay leaves.
  • Meanwhile, bring a pot of salted water to a boil.
  • Add the egg noodles and cook until tender, drain. Place noodles back in pot.
  • Add the remaining 2 tablespoons of butter to the noodles, mix.
  • Add the buttered noodles to a large serving dish.
  • Pour the meat mixture over the noodles and stir to combine.
  • Garnish with remaining dill and a sprinkle more of smoked paprika.

Video

Notes

Sour cream can easily be substituted for the crème fraîche.  
Sauce can be made up to 1 day in advance.  Re-heat and mix with cooked noodles just before serving. 
Finished dish can be frozen up to 1 month.  To serve, allow to thaw and then heat in a saucepan over medium heat.  Add more beef broth, if necessary. 

Nutrition

Calories: 388kcal | Carbohydrates: 34g | Protein: 9g | Fat: 17g | Saturated Fat: 4g | Cholesterol: 81mg | Sodium: 70mg | Potassium: 365mg | Fiber: 2g | Sugar: 3g | Vitamin A: 1000IU | Vitamin C: 2mg | Calcium: 69mg | Iron: 1mg

Homemade Blue Cheese Dressing

September 4, 2019 by Kris Longwell 9 Comments

A person transferring homemade blue cheese dressing from a spoon onto a wedge salad that includes iceberg lettuce, chopped tomatoes, crumbled bacon, and chopped onion.

Making homemade blue cheese is easier than you might think, and the rich, tangy flavor far surpasses anything you’ll find at the store. This creamy cheese is perfect for elevating a classic steakhouse wedge salad or adding bold flavor to your favorite classic buffalo wings, bringing a fresh, gourmet touch to your meals.

A person transferring homemade blue cheese dressing from a spoon onto a wedge salad that includes iceberg lettuce, chopped tomatoes, crumbled bacon, and chopped onion.
[feast_advanced_jump_to]

🍶 The Ingredients

The simple, everyday ingredients in this homemade dressing blend perfectly to create a rich and irresistible flavor that’s anything but ordinary. Find ingredient notes (including substitutions and variations) below.

An arrangement of ingredients for homemade blue cheese dressing on a grey wooden background including mayonnaise, sour cream, buttermilk, lemons, blue cheese parsley, garlic, vinegar, onion, salt, and pepper.

👉 Substitutions and Variations

  • Cheese – We highly recommend starting with a top-notch block of blue cheese. Pre-crumbled cheese includes anti-caking additives and doesn’t yield as creamy a dressing. However, pre-crumbled can be used in a pinch. Gorgonzola is a great substitute.
  • Mayonnaise – Homemade mayonnaise is wonderful, but a quality store-bought variety is great.
  • Sour cream – We don’t recommend low-fat sour cream, but it can be used, if desired. Plain Greek yogurt is a fine substitution.
  • Flavor enhancers – Fresh garlic and onion impart a subtle flavor, but garlic powder (1 teaspoon) and onion powder (1 teaspoon) can be used as substitutes. Champagne vinegar, distilled white vinegar, or apple cider vinegar can be used as substitutes for white wine vinegar.

Refer to the recipe card (with video) below for a full list of ingredients and measurements.

👩🏼‍🍳 How to Make Homemade Blue Cheese Dressing

A person pouring buttermilk from a small white bowl into a glass bowl that contains small mounds of mayonnaise and sour cream.
  1. Step 1: Add the mayonnaise, sour cream, and buttermilk to a bowl.
A person transferring chopped Italian parsley from a small white bowl into a glass bowl filled with mayonnaise, sour cream, buttermilk, lemon juice, and seasonings.
  1. Step 2: Next, add the lemon juice, vinegar, garlic, salt, pepper, and parsley.
A person using his fingers to crumble a block of blue cheese into a glass bowl filled with mayonnaise, buttermilk, sour cream, herbs, and seasonings.
  1. Step 3: Use your fingers to crumble the blue cheese into the bowl.
A person using a fork to mix together the ingredients for homemade blue cheese dressing in a glass bowl on a wooden cutting board.
  1. Step 4: Use a fork to stir and flatten some of the blue cheese
A spoon being used to transfer homemade blue cheese dressing from a large glass bowl into a glass jar on a wooden cutting board.
  1. Step 5: Transfer to a jar and refrigerate for at least 1 hour.
A person lifting a buffalo chicken wing out of small jar filled with homemade blue cheese dressing.
  1. Step 6: Serve chilled with your favorite salad or as a dipping sauce.

🙋🏽‍♂️Frequently Asked Questions

What is the best kind of blue cheese to use for Homemade Blue Cheese Dressing?

Here are our favorites: Stilton, Maytag, Gorgonzola, and Cabrales.

How long will Homemade Blue Cheese Dressing it stay fresh?

The dressing will stay deliciously fresh in your refrigerator for up to 2 weeks. You can freeze for up to 2 months.

Can I make Homemade Blue Cheese Dressing healthier?

Of course! You won’t get the same luxurious taste, but you can substitute non-fat Greek yogurt for the mayonnaise and even the sour cream.

Are there health risks with homemade mayonnaise?

Our homemade mayo contains raw eggs. Therefore, very young children, the elderly, and anyone with a compromised immune system should take caution before consuming. Consult your doctor if you’re unsure. 

A person plunging a grilled buffalo wing into a small glass jar filled with homemade blue cheese dressing.

😋 Other Classic Homemade Dressings

  • A hand pouring homemade ranch dressing onto a green salad in a brown wooden bowl.
    Homemade Ranch Dressing
  • A Mason jar filled with homemade Italian dressing with a small pile of grated parmesan cheese, dried herbs, and fresh parsley around the jar.
    Homemade Italian Dressing
  • A Mason jar filled with homemade balsamic vinaigrette next to a wooden salad bowl filled with salad.
    Balsamic Vinaigrette
  • A spoon drizzling avocado lime over the top of a chopped salad in a white bowl topped with grilled corn, cherry tomatoes, and pinto beans.
    Avocado Lime Dressing

Ready to make the best blue cheese dressing in the world? Go for it!

And once you make it, be sure to take a picture, post it to Instagram, and tag @HowtoFeedaLoon and #HowToFeedaLoon!

A spoon filled with homemade blue cheese dressing being held over a jar filled with the dressing.
Print Recipe
5 from 2 votes

Homemade Blue Cheese Dressing

This homemade blue cheese dressing is so easy and so good. Awesome on a wedge salad, or perfect for dipping with your favorite wings.
Prep Time10 minutes mins
Chill in the refrigerator1 hour hr
Total Time1 hour hr 10 minutes mins
Course: Dressing, Salad
Cuisine: French or American
Servings: 8
Calories: 221kcal
Author: Kris Longwell

Ingredients

  • 1 cup mayonnaise
  • ½ cup sour cream
  • ¼ cup buttermilk
  • lemon juice juice of ½ a lemon
  • 1 tablespoon white wine vinegar
  • ¼ cup onion finely chopped
  • 2 cloves garlic minced
  • ¼ cup Italian parsley finely chopped
  • Pinch Salt and pepper each
  • 4 oz blue cheese use block, not pre-crumbled

Instructions

  • Place all the ingredients, except the blue cheese, into a medium-sized bowl.
    1 cup mayonnaise, ½ cup sour cream, ¼ cup buttermilk, lemon juice, 1 tablespoon white wine vinegar, ¼ cup onion, 2 cloves garlic, ¼ cup Italian parsley, Pinch Salt and pepper
  • Use your hands to crumble the blue cheese into the mixture.
    4 oz blue cheese
  • Use a fork to stir until mixed. Flatten some of the cheese with the fork against the side of the bowl.
  • Cover and refrigerate for at least an hour.

Video

Notes

NOTE: Watch the video near the top of the recipe for visual guidance.
We find that crumbling a block of blue cheese with your fingers is better than going with pre-crumbled cheese.  The texture is creamier.
The blue cheese will stay good in the refrigerator for up to 2 weeks.  It can also be frozen for up to 2 months.
This blue cheese is spectacular poured over a crisp, cold wedge of iceberg lettuce and then topped off with cooked, crumbled bacon and sliced cherry tomatoes.
It’s also the perfect dip for Classic Buffalo Wings. 

Nutrition

Calories: 221kcal | Carbohydrates: 2g | Protein: 3g | Fat: 23g | Saturated Fat: 6g | Cholesterol: 25mg | Sodium: 316mg | Potassium: 64mg | Fiber: 1g | Sugar: 1g | Vitamin A: 183IU | Vitamin C: 1mg | Calcium: 82mg | Iron: 1mg

POST UPDATE NOTE: This recipe was originally published in January 2014, but was updated with recipe improvements, new photography, and awesome video in September 2019. 

Classic BLT with Garlic Basil Aioli

September 1, 2019 by Kris Longwell 4 Comments

A classic BLT sandwich with garlic aioli on a white plate with two tomatoes in the background.

Classic BLT with Garlic Basil Aioli is truly something to behold.

We’ve taken the sandwich everyone knows and loves and elevated it a few notches to quite possibly be the most delicious sandwich we’ve ever created.

And it all comes together in about 20 minutes, from start to finish!

A classic BLT sandwich with garlic aioli on a white plate with two tomatoes in the background.

HOW TO MAKE A CLASSIC BLT WITH GARLIC BASIL AIOLI

Some of our favorite sandwiches that have come out of the H2FaL kitchen are:

  • Grilled Honey Mustard Sandwich
  • Marinated Steak Sandwich
  • Fantastic Fried Fish Sandwich
  • Instant Pot Pulled Chicken Italian Sandwich

And don’t get us, those are without a doubt, some of the best sandwiches around. But there is something the BLT that gets us so excited.

Watch us make our Classic BLT with Garlic Basil Aioli!

WHAT YOU NEED TO MAKE THIS SANDWICH

  • Bread slices (we love sourdough)
  • Tomatoes (we love heirlooms – in the summertime!)
  • Bacon (can we get an ‘amen’ for smoked black pepper bacon!)
  • Arugula (you can’t be the peppery taste)
  • Garlic Basil Aioli (you gotta make this, folks)
  • Salt, pepper & butter (you’ll see what we mean soon)

An heirloom tomato, basil, bread slices, bacon and aioli on a wooden cutting board.

COOK THE BACON IN ADVANCE

Obviously, bacon is a vital part of the classic BLT. Nowadays, you can find many varieties in many well-stocked supermarkets and your local butcher.

Go with your favorite type of bacon, but our favorite is smoked, black-pepper bacon. Incredible.

EXPERT TIP: Skip the skillet! Preheat your oven to 400°F. Take out 1 or 2 rimmed baking sheets and place the bacon flat in rows, trying not to overlap. Bake the bacon for about 8 to 10 minutes (depending on thickness), and then flip until perfectly crisp. Drain on a paper towel. The bacon cooks evenly and stays perfectly flat!

A pair of tongs holding up 5 or 6 slices of cooked black pepper bacon over a baking sheet.

HEIRLOOM TOMATOES ARE PERFECT FOR A BLT

When they are in season, and you can find them, we absolutely the taste and texture of a beautiful heirloom tomato.

We love the variety of heirlooms, some with slightly different tastes and often different beautiful colors. They have very delicate skin, so be careful when transporting and handling them.

If you can’t find heirlooms, then go with your favorite variety. Tomatoes at their peak are always best, when possible.

A knife slicing into a red heirloom tomato for classic BLT with garlic basil aioli

GARLIC BASIL AIOLI IS THE PERFECT ADDITION

Folks, you just won’t believe how making your own garlic basil aioli will, dare we say, transform your life.

Okay, maybe that’s a bit dramatic, but it’s no exaggeration to say it takes this Classic BLT to astronomical culinary heights.

We also love our Balsamic Rosemary Aioli and our Kickin’ Remoulade for sandwich spreads!

A knife smearing on garlic basil aioli onto a toasted piece of bread.

CLASSIC BLT WITH GARLIC BASIL AIOLI FAQs

  • What is the best bread for a BLT? You can use whatever kind you prefer. Our favorite is sliced sourdough. To get the perfect texture and flavor, we heat up a skillet and toss in about 1 tablespoon of butter. Once melted, add 1 or 2 slices of the bread, and move around in the skillet until coated with butter. Cook until perfectly toasted, about 2 minutes. Flip and repeat, adding a bit more butter if necessary.
  • Can cheese be added to the BLT? Of course! Cheese can be added to practically anything! You can even place a cheese slice (cheddar is nice) on top of the tomatoes and bacon and then place it under the broiler just to melt the cheese melts. Assemble the sandwich as directed.
  • Can I use regular store-bought mayonnaise for the aioli? Absolutely! Get a good quality mayo and stir in the basil and garlic. Or, just use good ole plain mayo. For a less calories, omit the aioli completely, although it will no longer be the best-ever BLT…just sayin’.

Just look at this sandwich and tell us you’re not craving it right now!

Classic BLT with Garlic Basil Aioli on a white plate next to a glass of iced tea.

Are you ready to make what we think is one of the very best sandwiches in the entire world? Go for it!

And when you make it, be sure to take a picture, post it to Instagram and tag @howtofeedaloon and #howtofeedaloon!

A classic BLT with garlic basil aioli on a white plate.
Print Recipe
No ratings yet

Classic BLT with Garlic Basil Aioli

This isn't just any ole BLT...this Classic BLT with Garlic Basil Aioli is about as good as they come. Especially good when tomatoes (we love heirloom) are at their peak. The garlic basil aioli puts this iconic sandwich over the top!
Prep Time20 minutes mins
Cook Time25 minutes mins
Total Time45 minutes mins
Course: lunch
Cuisine: American
Servings: 4 people
Calories: 570kcal
Author: Kris Longwell

Ingredients

  • 1 cup garlic basil aioli click for recipe
  • 8 slices bacon
  • 3 heirloom tomatoes sliced ¼" thick
  • Salt and pepper
  • 4 cups baby aruglula
  • 8 slices sourdough bread cut into eight ½" thick slices, toasted

Instructions

  • Make the garlic basil aioli. Set aside in the fridge.
  • Bake the bacon in a 400°F. pre-heated oven for about 20 to 25 minutes flipping once, half-way through. Alternatively, cook in skillet, until crisp. Transfer to paper-towel lined plate. Reserve.
  • Meanwhile, heat a large skillet over medium-high heat, add 1 tablespoon of butter and swirl untl melted. Add 1 to 2 slices of bread, moving around to coat with butter. Cook until toasted on the bottom-side, about 2 to 3 minutes. Flip, add more butter, if necessary, and cook the other side until toasted, about 1 to 2 minutes more. Set aside and continue with other slices.
  • Spread the aioli one side of each slice of toast.
  • Arrange the tomatoes ontop of the aoil-side of the toast and sprinkle with salt and pepper.
  • Top with bacon and then and the remaining toasts (aioli facing down) for each sandwich. Slice on a diagonal, if desired. Serve with garlic basil aioli on the side.

Video

Notes

We love toasting our sourdough slices in a little butter in a hot skillet, but you can also toast in an oven on a baking sheet for about 5 minutes per side, or in a toaster oven, or, don't toast the bread at all, if you prefer.
Hot house, vine, Campari tomatoes will all work as a substitute for the heirloom tomatoes.
Garlic basil aioli can be made and refrigerated up to 1 week in advance. 
Any type of bacon will work, but we love smoked pepper bacon.  

Nutrition

Calories: 570kcal | Carbohydrates: 76g | Protein: 21g | Fat: 20g | Saturated Fat: 7g | Cholesterol: 29mg | Sodium: 953mg | Potassium: 470mg | Fiber: 4g | Sugar: 6g | Vitamin A: 785IU | Vitamin C: 13mg | Calcium: 66mg | Iron: 5mg

POST UPDATE NOTE: This was originally posted in August, 2016, but was updated with new tips, photography and video in August, 2019. 

Cheesy Garlic Bread

August 30, 2019 by Kris Longwell 4 Comments

Two loaves of cheesy garlic bread on a scratched black baking pan.

Cheesy Garlic Bread is a classic Italian-American treat that is so easy to make.

The roasted garlic puts it over the top and is the perfect side dish for your favorite Italian dish, or as an appetizer.

And…after roasting the garlic, it only takes about 20 minutes to prepare!

Two loaves of cheesy garlic bread on a scratched black baking pan.

HOW TO MAKE CHEESY GARLIC BREAD

Cheesy garlic bread is so heart-warming and is easily prepared at home.

We love serving our cheesy garlic bread alongside:

  • Spaghetti and Meatballs
  • Chicken Marsala
  • Shrimp Fra Diavolo
  • Pasta Pomodoro
  • Chicken Parmesan

Watch us show you how easy it is to make this awesome Cheesy Garlic Bread

ROASTED GARLIC ADDS A DEPTH OF FLAVOR

If you’ve never roasted a head of garlic before, boy, oh boy, are you in for a treat. The process is so simple. Simply pre-heat your oven to 400°F and then cut the top off of a head of garlic with a large knife. Don’t worry if a few cloves come un-attached.

Simply place a square piece of foil on your counter, then gather the cut garlic head (with any cloves that came unattached) and drizzle a little olive oil over the top. Gather the foil up around the garlic, and twist to seal. Place in the oven for 40 minutes and then let cool slightly.

Next, squeeze the creamy garlic out of each clove’s shell into a bowl.

EXPERT TIP: The garlic mellows in flavor as it roasts, so an entire head of garlic is the perfect amount for cheesy garlic bread, and won’t be too garlicky in taste.

Two hands squeezing roasted garlic into a bowl of softened butter.

HOW TO SELECT THE BEST BREAD

We find that a nice freshly baked Italian or French loaf, about 12 inches long, works perfectly for Cheesy Garlic Bread.

To split in half, simply take a serrated knife and very carefully cut the loaf down the middle, lengthwise.

Although the butter/garic mixture can be prepare ahead of time, we don’t recommend cutting the bread more than an hour before baking.

A serrated knife slicing an Italian loaf of bread down the middle on a cutting board.

WHAT YOU NEED FOR THE SPREAD

  • Unsalted butter, room temperature
  • Roasted garlic
  • Parmesan and Mozzarella cheese
  • Fresh basil and chives
  • Salt

Mix everything together in a medium-sized bowl.

EXPERT TIP: If you need to soften butter in a hurry, simply fill a measuring cup with hot water, place in the microwave and cook on high for 2 minutes, until the water is very hot. Slice the butter onto a plate and place the plate in the microwave with the hot water and close the door. The heat and steam from the water will make the butter perfectly soft within 10 minutes.

A hand mixing together a butter, herb and garlic mixture for cheesy garlic bread.

Now, it’s time to spread to that amazing roasted garlic butter mixture onto your bread slices!

Place about 4 or 5 equal spoon fulls of the butter mixture on each slice.

Take a knife to carefully spread the mixture all over the bread slices. During this time, you’ll need to pre-heat your oven to 450°F.

A cook using a knife to smear a butter and garlic mixture over two slices of bread.

THE BEST CHEESE TO USE

The rule of thumb you want to remember for selecting a cheese is it needs to be a good-quality melting cheese.

We love using mozzarella, but Gruyere, fontina or smoked gouda would be delicious, too. Or, a combination of any, or all, of them.

We use just enough cheese to top off the bread. But if you want extra cheese, then by all means, double up on the cheese!

A hand sprinkling mozzarella cheese onto garlic bread.

CHEESY GARLIC BREAD FAQs

  • Can this be made ahead of time? You can absolutely make the butter/garlic/herb mixture up to several days before using. Just bring back to room temperature before spreading. You can assemble the bread up to 1 hour before baking, any longer, and the bread could start to dry out.
  • Can the uncooked, prepared bread be frozen? Absolutely! Prepare the recipe as written up to baking. Then, place in a large freezer bag (or wrap in foil) and freeze up to 1 month. When ready to serve, remove from freezer bag (or foil) and bake at 450° for 15 to 20 minutes, until fully cooked with the cheese melted and the edges of the bread just starting to brown.
  • Can dried herbs be substituted for fresh? Yes! We do feel fresh will deliver the best overall taste, but in a pinch, you can certainly go with dried. If using dried, go with half the amount that is called for fresh. A combination of dried basil, oregano, parsley and other herbs is a nice touch.
  • Can I use fresh garlic in place of the roasted?  Of course!  Just fold 3 minced garlic cloves into the butter mixture instead of the roasted garlic.  No problem!

CHEESY GARLIC BREAD IS BEST SERVED HOT

Make sure you time your meal so that the bread is being served just as folks are sitting down to the table.

Slice the bread and serve immediately. Was there ever a better accompaniment to Italian Meatballs than this yummy toasty bread?

And the smell? Heavenly. And then the taste?…What do you think?

Sliced cheesy garlic bread on baking sheet with a knife nearby.

Ready to make the world’s best and most yummy Cheesy Garlic Bread? Go for it!

And when you make it, be sure to take a pic of it, post on Instagram and tag @howtofeedaloon and #howtofeedaloon!

Sliced cheesy garlic bread on a baking sheet.
Print Recipe
5 from 1 vote

Cheesy Garlic Bread

Cheesy garlic bread is the perfect accompaniment, or starter, to a great Italian feast, or for a party...or whatever! It's so easy, and is really, really delicious. Enjoy!
Prep Time10 minutes mins
Cook Time12 minutes mins
Garlic Roasting40 minutes mins
Total Time1 hour hr 2 minutes mins
Course: Appetizer
Cuisine: Italian / American
Servings: 6 people
Calories: 480kcal
Author: Kris Longwell

Ingredients

  • 1 head garlic
  • 1 tablespoon olive oil
  • 6 tablespoon butter unsalted, room temp
  • ¼ cup Parmesan cheese grated
  • 1 to 2 tablespoon basil fresh, chopped
  • 1 tablespoon chives fresh, chopped
  • ¼ teaspoon Kosher salt
  • 1 large loaf bread Italian or French work very well
  • ½ cup mozzarella shredded

Instructions

MAKE THE ROASTED GARLIC

  • Pre-heat oven to 400 F.
  • Use a sharp knife to carefully cut the top of the head of garlic off. It's okay if some of the cloves fall away from the head. No need to peel any of the garlic at this point.
  • Place the garlic head and any loose cloves on a square piece of aluminum foil (about 6"x6"). Drizzle the oil over the top of the garlic and then bring the edges of the foil around the garlic and twist to close.
  • Roast the garlic in the oven for 40 minutes. Remove and let cool.

PREPARE THE CHEESY GARLIC BREAD

  • Pre-heat oven (or increase, if still heated) to 450°F.
  • Place the soft butter, parmesan cheese, basil, chives, and salt into a medium-sized bowl. Using your fingers, squeeze out the creamy roasted garlic of the garlic paper-like shells.
  • Using a fork, mix until the mixutre is blended.
  • Using a serrated knife, cut the bread in half, lengthwise, into two halves. If desired, trim away the top portion of the bread slice that was the top of the original loaf. This will allow the slice to sit evenly, and also bake more evenly with the other slice (see video for referecne).
  • Add about 4 to 5 equal dollops of the butter mixture on each bread slice. Use a knife to carefully spread the mixture over the cut side of each slice.
  • Sprinkle the cheese over the two prepared slices.
  • Place the bread slices on large baking sheet and bake untl cheese has melted and the edges of the bread are golden brown. Slice and serve hot.

Video

Notes

You can roast the garlic up to 2 days in advance.  Keep refrigerated in a covered small bowl. 
Although the roasted garlic has a deeper, yet more subtle flavor, fresh garlic can be substituted for the roasted garlic.  Use 3 cloves, minced.
Add more cheese if a cheesier bread is desired.
Dried herbs can be used in place of the fresh, however, you'll need to cut the amount used in half.  Dried basil, parsley, oregano and marjoram all work well together. 
The bread can be assembled ahead of time and frozen in a large freezer bag for up to 1 month.  When ready to serve, remove from the bag and bake at 450°F for 15 to 20 minutes until bubbly and golden brown on the edges. 

Nutrition

Calories: 480kcal | Carbohydrates: 58g | Protein: 16g | Fat: 21g | Saturated Fat: 10g | Cholesterol: 41mg | Sodium: 913mg | Potassium: 232mg | Fiber: 5g | Sugar: 7g | Vitamin A: 496IU | Vitamin C: 2mg | Calcium: 265mg | Iron: 4mg

POST UPDATE NOTE: This recipe was originally posted in December, 2014, but was updated with recipe improvements, new photography and video in August, 2019.

Grilled Portobello BLT Pizzas

August 27, 2019 by Kris Longwell 4 Comments

Two portobello BLO pizzas resting on a wooden pizza peel with both pizzas topped with melty Fontina cheese, sliced cherry tomatoes, and arugula leaves.

Grilled Portobello BLT Pizzas are nothing short of amazing. We love grilling pizza, including our amazing Grilled Pulled Pork Pizza! The flavor that the grill imparts to the pizza is amazing.  But, for this recipe, we decided to shake things up a bit, and forgo your standard pizza crust, and instead, use the large caps of a portobello mushroom.

Two portobello BLO pizzas resting on a wooden pizza peel with both pizzas topped with melty Fontina cheese, sliced cherry tomatoes, and arugula leaves.
[feast_advanced_jump_to]

🍄 The Ingredients

The fresh ingredients in these “pizzas” combine to create a flavor-packed dish like no other, with the easy pesto sauce adding an irresistible, mouthwatering finish. Find ingredient notes (including substitutions and variations) below.

An arrangement of ingredients for portobello BLT pizzas on a wooden background including portobello mushroom caps, pesto, mozzarella cheese, arugula, pancetta, cherry tomatoes, oil, and salt.

🧀 Substitutions and Variations

  • Crust – There is just something melt-in-your-mouth delicious about the grilled portobello caps. However, this combination of flavors is wonderful with an easy pizza dough, too. Check out our BLT Pizza with Pesto for step-by-step instructions.
  • Sauce – The pesto sauce adds a fresh flavor that complements the portobello and cheese wonderfully. However, traditional sauce, as used in our Thin Crust Pizza with Mushrooms and Sausage, works great, too.
  • Cheese – Mozzarella is traditional, but grated Fontina, smoked gouda, or Swiss (aka Emmental) are all excellent choices. Of them all, Fontina is our favorite. Chop it up in your food processor.
  • Pork – Cubed pancetta is crispy, salty, and a great complement to the peppery arugula and pesto sauce. However, crispy bacon is wonderful too. Another option is to place a layer of prosciutto over the top of the pizzas after they are cooked.
  • Lettuce – Arugula is wonderful, but any type of lettuce will work. Go sparingly.

See the recipe card (with video) below for a full list of ingredients and measurements.

Expert Tip

For the best texture and flavor, we recommend scraping out some of the gills on the underside of the portobello caps. All you need is a spoon to just scrape them right out. Be careful in doing so, though, you don’t want to tear through the cap. Also, it’s perfectly okay to leave some of them intact. They impart an ‘Earthy’ taste to the mushrooms. If you prefer that, then leave them intact!

👩🏼‍🍳 How to Make Grilled Portobello BLT Pizzas

A person sprinkling Kosher salt on the inside of a large portobello mushroom cap that has had the internal gills removed.
  1. Step 1: Remove the gills from the mushroom caps and brush with oil, and sprinkle with salt
Two large portobello mushroom caps being grilled in a grill pan on a gas grill.
  1. Step 2: Place the cap side down on a grill rack (or skillet) and place over direct heat on the grill.
A person using a pair of tongs to flip a couple of grilled portobello mushroom caps that are resting in a grill pan on a wooden cutting board with bowls of pancetta and cheese nearby.
  1. Step 3: After a few minutes of cooking, remove the pan from the grill. Flip the caps over.
A person building grilled portobello blt pizzas on a metal grill pan consisting of pesto sauce, then shredded cheese, crispy pancetta, and topped with sliced cherry tomatoes.
  1. Step 4: Spread on the pesto, then top with cheese, cooked pancetta, and sliced cherry tomatoes.
Two large portobello mushroom caps with cheese, pancetta, and cherry tomatoes being grilled in a circular grill pan on a gas grill.
  1. Step 5: Return to the grill, cover, and cook until cheese is bubbly.
A person using his fingers to sprinkle grated Parmesan cheese over the top of a grilled portobello BLT pizza that is topped with sliced cherry tomatoes and arugula all on melted cheese and crispy pancetta.
  1. Step 6: Remove from the grill and top with arugula and Parmesan cheese

🔥 How To Serve

  • These portobello pizzas are best served piping hot. Soon after being removed from the grill.
  • Use a pizza cutter or a large knife to cut them into quarters.
  • We love to serve these as an appetizer at parties, cookouts, or while watching the big game. For a full spread, we serve them with Restaurant-Style Fried Calamari and Easy Fried Mozzarella with Marinara Sauce.
  • Make it a complete meal with Spinach Salad with Warm Bacon Vineagrette, Cheesy Garlic Bread, and Italian Ricotta Cheesecake.

🙋🏽‍♂️ Frequently Asked Questions

Can I substitute pancetta with bacon for the Grilled Portobello BLT Pizzas?

Yes, crispy bacon works perfectly as a substitute for pancetta and adds a similar smoky, savory flavor.

Can I prepare the grilled portobello mushrooms ahead of time?

Absolutely! You can grill the portobello mushrooms in advance and store them in the refrigerator for up to 2 days, then assemble and cook the pizzas when ready.

How far in advance can I make the pesto sauce for the Grilled Portobello BLT Pizzas?

You can make the pesto sauce up to 3 days in advance. Store it in an airtight container in the refrigerator and drizzle a little olive oil on top to keep it fresh.

How can I make the Grilled Portobello BLT Pizzas vegetarian?

To make the pizzas vegetarian, simply omit the pancetta and add extra veggies like roasted red peppers, caramelized onions, or sun-dried tomatoes for added flavor and texture.

Two portobello BLT pizzas resting on a large pizza peel with one pizza cut into quarters and the other left whole.

🍕 Other Amazing Pizza Recipes

  • A person pulling a slice of homemade New York-style pizza from the entire pie that has been cut into six slices with a small bowl of grated cheese and two glasses of beer nearby.
    Homemade New York-Style Pizza
  • A Chicago-Style Deep Dish Pizza on a cutting board with a slice pulled out next to Parmesan cheese.
    Chicago-Style Deep Dish Pizza
  • An overhead view of a whole Detroit-style pizza in a rectangular steel pan with two parallel stripes of red sauce on top of the pizza.
    Homemade Detroit-Style Pizza
  • Soppressata, mushroom and black olive pizza next to parmesan cheese and red pepper flakes
    Soppressata, Mushroom, and Black Olive Pizza

Ready to impress? Go for it!

And when you make these babies, be sure to take a picture and post it on Instagram and tag @HowToFeedaLoon and #HowToFeedaLoon

Two portobello BLO pizzas resting on a wooden pizza peel with both pizzas topped with melty Fontina cheese, sliced cherry tomatoes, and arugula leaves.
Print Recipe
5 from 1 vote

Grilled Portobello BLT “Pizzas”

Talk about a taste sensation! Using a portobello cap in place of traditional pizza crust and then topping with classic BLT toppings puts this appetizer over the top in delicious taste and texture!
Prep Time20 minutes mins
Cook Time20 minutes mins
Total Time40 minutes mins
Course: Appetizer
Cuisine: American, American / Italian
Servings: 4
Calories: 488kcal
Author: Kris Longwell

Equipment

  • Gas or charcoal grill
  • Grill rack or large cast iron skillet

Ingredients

  • 1 cup pesto sauce homemade or store-bought
  • 4 large portobello mushrooms if desired, scrape most of the gills from the cap.
  • 2 tablespoon olive oil
  • 1 teaspoon Kosher salt
  • 2 cups mozzarella shredded
  • 1 cup pancetta cubed and cooked until crisp
  • 1 cup cherry tomatoes Or grape tomatoes, sliced in half, lengthwise
  • 1 cup fresh baby arugula
  • ½ cup Parmesan cheese grated, for garnish (optional)

Instructions

Do Ahead

  • Prepare the easy pesto sauce up to 5 days in advance. (See link in Ingredients).
    1 cup pesto sauce

Make the Portobello Pizzas

  • Turn your grill to medium-high.
  • Brush the oil all over the prepared mushroom caps and then sprinkle salt all over.
    4 large portobello mushrooms, 2 tablespoon olive oil, 1 teaspoon Kosher salt
  • Place the mushrooms, cap side down, onto a large grill rack or cast iron skillet.
  • Place the mushrooms (on the rack or skillet) directly over the heat and cover the grill. Let cook for 6 minutes. Carefully remove the rack or skillet from the grill.
  • Using a spatula, carefully turn the mushroom cap over, so the underside is facing up, still on the rack or skillet.
  • Spread each cap with ¼ cup of the pesto sauce. Next, to each mushroom cap, add a layer of cheese, then a small handful of cooked pancetta, topped with the sliced tomatoes.
    2 cups mozzarella, 1 cup pancetta, 1 cup cherry tomatoes
  • Place back on the grill and cover. Cook for about 6 to 7 minutes, until cheese has melted and is bubbly
  • Remove from the rack or skillet onto a plate and top with a small handful of arugula. Top with a sprinkle of grated Parmesan, if desired. Serve at once!
    1 cup fresh baby arugula, ½ cup Parmesan cheese

Video

Notes

NOTE: Watch the video near the top of the recipe for visual guidance.
We find the mushrooms retain the best texture when served right after grilling them. However, you can grill them a day (or two) in advance. Store in an air-tight container in the fridge until ready to assemble and cook. 
The pesto sauce can be made up to 5 days in advance. Save leftover pesto for sandwiches, pasta, eggs, and more! 

Nutrition

Calories: 488kcal | Carbohydrates: 10g | Protein: 27g | Fat: 32g | Saturated Fat: 8g | Cholesterol: 92mg | Sodium: 1920mg | Potassium: 360mg | Fiber: 2g | Sugar: 5g | Vitamin A: 1950IU | Calcium: 613mg | Iron: 1mg

Mussels with Garlic and Wine

August 25, 2019 by Kris Longwell 25 Comments

A large silver sauce pan with mussels and garlic and wine in it

Mussels with Garlic and Wine has been a favorite dish of both the Loon and me for many, many years.

The mussels add an incredible briny flavor to the pancetta, garlic, herbs, and wine sauce…with a bit of cream and butter to add some luxuriousness.

This is a dish that is both elegant and comfortable all at the same time. Just amazing. And only takes about 30 minutes to make!

A large silver sauce pan with mussels and garlic and wine in it

MUSSELS WITH GARLIC AND WINE IS EASY TO PREPARE

Like most seafood dishes, these mussels do not take long at all to make at home.

Get your bread nice and toasty, and then quickly steam the mussels in the wine, and you’ve got one of the most delicious appetizers (or entrees) in the world on your hands!

Watch us show you how easy it is to make Mussels with Garlic and Wine!


WHAT YOU NEED TO PREPARE MUSSELS WITH GARLIC AND WINE

This dish is best because of the simple ingredients. Go with quality and freshness, and you will not be disappointed.

What you need:

  • Mussels
  • Garlic
  • Pancetta
  • White Wine
  • Fresh Herbs
  • Lemon
  • Cream and Butter

Fresh mussels, thyme, wine, garlic and cream on a white board.

GRILLED BREAD IS A MUST

The sauce is almost as delicious as the steamed mussels.

Therefore, it’s essential that you have something to soak up all the deliciousness. Sliced French bread is perfect.

EXPERT TIP:Get a medium-sized loaf of bread, and slice length-wise, down the middle. Then either toast the bread on your gas or charcoal grill. Or, grill on a stovetop grill pan. Or, place in 450° F oven for about 6 minutes, until golden brown and toasted.

A stack of grilled bread next to a grill pan.

OTHER AMAZING SEAFOOD DISHES

  • Southern Crab Beignets
  • Grilled Oysters with Tomato Compound Butter
  • Spaghetti Vongole
  • Almond Crusted Cod with Orange Butter Sauce
  • Mediterranean Tuna Steaks
  • Portuguese-Style Clam Chower

For our Mussels with Garlic and Wine, we begin building the flavor with crispy pancetta.

Cooked pancetta in a silver saucepan with a wooden spoon.

USE A QUALITY SAUCEPAN

We feel that this dish is best when not only using top-notch ingredients, but also using high-quality cookware.

We absolutely love our saucepan from Sardel.

All of Sardel cookware is made in Italy and is of the highest quality. Truly something special and perfect for serving these mussels.

A Sardel saucepan turned upside down to see the logo on the bottom of the pan.

MUSSELS WITH GARLIC AND WINE ARE FRENCH

We prepare these mussels following the traditional French recipe.

The only difference is in France, they are typically served with fries (frites).

Although we do love frites, we just can’t get enough of that sauce with the grilled bread for soaking.

A hand dipping grilled bread into a pan of mussels with garlic and wine sauce.

MUSSELS WITH GARLIC AND WINE FAQs

  • What type of mussels are best? We think the most delicious mussels in the world are PEI (Prince Edward Island) that come from an island in eastern Canada. However, if these aren’t available, any type you get from you fish monger will work.
  • How do I prepare the mussels? Make sure you rinse them thoroughly to remove any sand or grit. Also brush them with strong bristle pad to remove the beard on the side of the mussel. You may not see any sand or beard, but it’s always good to rinse and brush anyway. Remember to discard any mussel that didn’t open during the steaming process.
  • What is the best wine to use? A good dry white wine is best. We love a nice Sauvignon Blanc. Remember the rule of thumb, if you wouldn’t drink the wine, then don’t cook with it either.
  • Can the dish be made ahead of time? This is one of those dishes that we feel is best served immediately after preparation.  The sauce loses some of its luxurious texture and the mussels tend to dry out a bit.  The good thing is the dish only takes about 20 minutes to prepare!

We love to finish the dish off with freshly chopped flat-leaf parsley:

A hand sprinkling fresh parsley onto a pan full of steamed mussels.

SERVE MUSSELS AS AN APPETIZER OR ENTREE

This is one dish that every time we serve it we are asked for the recipe.

The sauce alone is to die for. Don’t forget the grilled bread.

Make this dish for a special occasion and you will not be disappointed, we promise you that.

A large saucepan filled with steamed mussels with garlic and wine sauce.

Ready to impress…in only about 20 minutes?

Make these incredible mussels. And don’t forget to take a picture, post to Instagram, and tag @howtofeedaloon and #howtofeedaloon!

mussels with garlic and wine in a large silver saucepan.
Print Recipe
5 from 6 votes

Mussels with Garlic and Wine

It doesn't get much better or more comforting than a big bowl of steamed mussels with garlic and wine. Add some Pancetta, garlic, herbs, with a bit of cream and butter...and you'll be in heaven. PEI mussels are best. Give them a quick scrub and make sure the beards are removed (the dark fuzzy stuff on the edge of the mussel). Any mussels that are opened before cooking, discard. Any mussel that doesn't open after steaming, discard. Serve with toasted slices of thick bread for amazing dipping. Enjoy!
Prep Time10 minutes mins
Cook Time15 minutes mins
Total Time25 minutes mins
Course: Seafood
Cuisine: Seafood
Servings: 6 people
Calories: 410kcal
Author: Kris Longwell

Ingredients

  • 8 - 10 slices bread sliced ½" thick
  • 2 tablespoon extra virgin olive oil
  • 1 oz pancetta chopped
  • 4 cloves garlic minced
  • 1 tablespoon fresh thyme chopped
  • 1 tablespoon fresh oregano chopped
  • 1 lb mussels scrubbed and beards removed
  • ½ cup dry white wine such as Sauvignon Blanc or Pinot Grigio
  • ¼ cup heavy cream
  • 2 tablespoon unsalted butter
  • Juice whole lemon about 1 tablespoon
  • Salt and pepper to taste healthy pinch of both
  • Pinch red pepper flakes
  • 1 tablespoon parsley chopped

Instructions

  • Turn grill on medium-high, or pre-heat oven for 450°F.
  • Brush one side of each bread slice with olive oil.
  • Grill, or bake, until toasted. Set aside.
  • In a large saucepan, heat 1 tablespoon of the olive oil.
  • Add pancetta and cook until crispy, about 5 - 8 minutes.
  • Add another dash of olive oil to the pan. Add garlic and herbs and saute for about 1 minute.
  • Add mussels and white wine, cover the pan, and steam until the mussels open, about 7 minutes.
  • Carefully remove the lid, and add heavy cream, butter, lemon, salt and pepper, and red pepper flakes - stir with a wooden spoon to incorporate.
  • Place mussels and sauce into serving dish. Discard any mussels that did not open during the steaming process.
  • Garnish with parsley, plus another small pinch of salt, pepper and red pepper flakes.
  • Serve with toasted bread.

Video

Notes

Remember to rinse and scrub the mussels before steaming.
Use a good dry white wine.  We prefer a quality Sauvignon Blanc.
Serve immediately after preparing with grilled or toasted bread on the side. 

Nutrition

Calories: 410kcal | Carbohydrates: 45g | Protein: 14g | Fat: 18g | Saturated Fat: 7g | Cholesterol: 38mg | Sodium: 584mg | Potassium: 322mg | Fiber: 4g | Sugar: 5g | Vitamin A: 435IU | Vitamin C: 7mg | Calcium: 143mg | Iron: 5mg

UPDATE NOTE: This recipe was originally posted in April, 2015, but was updated with new images, video and slight tweaks to the recipe in August, 2019.

Classic Spinach and Artichoke Dip

August 22, 2019 by Kris Longwell 11 Comments

A small cast-iron skillet filled with baked spinach and artichoke dip with several small slices of toasted baguette nearby.

Classic Spinach and Artichoke Dip is one of our all-time favorite dips and is perfect for serving on game day, at a party, or just a fun, relaxing day at home with friends and family. Serve with loaded potato skins and homemade fried mozzarella for an amazing, fun-filled spread!

A small cast-iron skillet filled with baked spinach and artichoke dip with several small slices of toasted baguette nearby.
[feast_advanced_jump_to]

🧀 The Ingredients

The ingredients for this classic dip may be simple and familiar, but when combined, they create the ultimate party appetizer that is creamy, flavorful, and irresistible. Find ingredient notes (including substitutions and variations) below.

Three rows of ingredients for classic spinach and artichoke dip including frozen spinach, artichoke hearts, mayonnaise, cream cheese, Parmesan cheese, onion, garlic, olive oil, and a bottle of hot sauce.

🍶 Substitutions and Variations

  • Spinach – Frozen is perfectly acceptable, and what we usually go with. Just be sure to thaw completely and then squeeze out excess water with a kitchen towel over the sink. Fresh spinach is great, too. You’ll need to sauté it first in a little oil or butter. We don’t recommend canned spinach, although it would work in a pinch.
  • Artichokes – Canned artichoke hearts are perfectly acceptable. Frozen is great, too. Thaw and then roughly chop. Bottled artichokes in seasoned oil will work, but it will add additional oil and flavor.
  • Cream – Softened cream cheese and mayonnaise are traditional. For a healthier variety, substitute the mayonnaise with plain Greek yogurt. You could also go with a combination of sour cream and cream cheese for a lighter dip.
  • Cheese – For a cheesier dip, go with half cream cheese and half shredded cheddar, or all cheddar.

See the recipe card (with video) below for a full list of ingredients and measurements.

Expert Tip

We love to serve these in two of our mini cast-iron skillets. However, you can also serve it in an 8 or 9-inch cast-iron skillet or a 2-quart (7×11″) baking dish. The bake time is the same for all sizes.

👩🏼‍🍳 How To Make Classic Spinach and Artichoke Dip

A large wooden spatula stirring chopped onion that is being sautéed in a small cast-iron skillet.
  1. Step 1: Sauté the onion and garlic in oil until soft. 
A large glass bowl with about a cup of sautéed onions in the bottom of it.
  1. Step 2: Transfer to a large bowl to cool a bit. 
A person adding a cup of mayonnaise into a bowl filled with softened cream cheese and sautéed onions.
  1. Step 3: Stir in the cream cheese and mayonnaise.
A person adding splashes of hot sauce from a bottle into a glass bowl filled with a mixture of cream cheese, mayonnaise, and sautéed onions.
  1. Step 4: Stir in the Parmesan cheese and hot sauce. 
A person transferring uncooked spinach and artichoke dip into a small cast-iorn skillet.
  1. Step 5: Transfer to a greased dish and top with more Parmesan cheese. 
A small cast-iron skillet filled with freshly baked spinach and artichoke dip.
  1. Step 6: Bake until bubbly and browned on top.

🎉 How To Serve

  • This dip is wonderful served nice and hot, but we do recommend letting it cool for at least 10 to 15 minutes before serving it to guests.
  • It’s even wonderful after it has cooled off.
  • We love to serve this with toasted thin slices of baguette. It’s also great with crackers, pieces of bread, and veggies.

🙋🏽‍♂️ Frequently Asked Questions

Can I prepare spinach and artichoke dip in advance?

Yes, you can prepare the dip ahead of time by mixing the ingredients and storing it in the refrigerator; simply bake it just before serving.

What can I serve with spinach and artichoke dip?

It pairs well with a variety of dippers, including tortilla chips, toasted pita chips, sliced baguette (toasted or not), or fresh vegetables like carrots and celery.

Can I make spinach and artichoke dip healthier?

Absolutely! You can lighten the dip by using Greek yogurt or low-fat cream cheese instead of regular cream cheese, and by adding more vegetables to increase the nutritional value while maintaining great flavor.

A person lifting a toasted baguette slice out of a cast-iron skillet filled with classic spinach and artichoke dip.

😋 Other Party Dips To Try

  • A colorful bowl filled with a sun-dried tomato and artichoke dip with another bowl filled with crusty pieces of sliced baguette.
    Sun-Dried Tomato and Artichoke Dip
  • An oval black baking dish filled with baked clam dip sitting next to slices of toasted bread.
    Incredible Baked Clam Dip
  • An overhead view of an oval baking dish filled with a partially eaten sausage, bean, and spinach dip with a silver spoon inserted into the side of the dip.
    Sausage, Spinach, and White Bean Dip
  • A bowl of homemade hummus with swirls of olive oil and black pepper on top all surrounded by cut bell peppers and pita chips.
    Easy Homemade Hummus

Ready to make the best dip in town? Go for it!

And when you make it, take a photograph and post it to Instagram and tag @HowToFeedaLoon and #HowToFeedaLoon!

A small cast-iron skillet filled with baked spinach and artichoke dip with several small slices of toasted baguette nearby.
Print Recipe
4.67 from 3 votes

Classic Spinach and Artichoke Dip

This Classic Spinach and Artichoke Dip is so loaded with flavor. Serve this with toasted French baguette slices, or crackers, and watch how fast this appetizer will go as guests arrive. So yummy! A Loon Favorite!
Prep Time15 minutes mins
Cook Time45 minutes mins
Total Time1 hour hr
Course: Appetizer
Cuisine: American
Servings: 10 people
Calories: 378kcal
Author: Kris Longwell

Equipment

  • 7×11" baking dish or 9-inch cast-iron skillet, or 2 mini cast-iron skillets

Ingredients

  • 1 tablespoon extra-virgin olive oil plus more for the baking dish
  • ½ cup yellow onion finely chopped
  • 2 cloves garlic minced
  • 8 oz cream cheese room temp, roughly chopped
  • 1 cup mayonnaise
  • ¾ cup Parmesan cheese grated, plus 2 tablespoons
  • 1 teaspoon red pepper sauce ie, Franks
  • 10 oz spinach frozen and thawed, chopped
  • 9 oz artichoke hearts chopped
  • 1 baguette cut into thin slices, toasted

Instructions

  • Position a rack in the center of the oven and preheat the oven to 350°F.
  • Lightly oil a baking dish that holds about 6 cups.
    1 tablespoon extra-virgin olive oil
  • Heat the oil in a separate small skillet over medium heat.
  • Add the onion and cook, stirring often, until softened, about 3 minutes.
    ½ cup yellow onion
  • Stir in the garlic and cook until fragrant, about 1 minute more.
    2 cloves garlic
  • Transfer to a medium bowl and cool slightly.
  • Add the cream cheese and mayo to the bowl and, using a spatula, mash them together to combine.
    8 oz cream cheese, 1 cup mayonnaise
  • Add the Parmesan cheese (¾ cup) and hot pepper sauce and mix well.
    ¾ cup Parmesan cheese, 1 teaspoon red pepper sauce
  • Squeeze the excess liquid from the spinach, and then add it to the cream cheese mixture.
    10 oz spinach
  • Add the artichoke hearts and mix well.
    9 oz artichoke hearts
  • Spread in the baking dish and sprinkle with the remaining Parmesan (at this point, the dip can be covered with plastic wrap and refrigerated for up to 24 hours.)
  • Bake until the dip is bubbling and browned, about 35 minutes.
  • Serve with toasted baguette slices (brushed with olive oil and sprinkled with a little oregano before toasting under the broiler).
    1 baguette

Video

Notes

NOTE: Watch the video near the top of the recipe for visual guidance.
The dip can be prepared (before baking) up to 2 days in advance.  Bake just before serving.  
You can also serve with sturdy, plain potato chips and/or celery.
Low-fat sour cream, cream cheese, and mayo are okay, but not quite as creamy and delicious.

Nutrition

Calories: 378kcal | Carbohydrates: 17g | Protein: 8g | Fat: 31g | Saturated Fat: 9g | Cholesterol: 39mg | Sodium: 608mg | Potassium: 240mg | Fiber: 2g | Sugar: 2g | Vitamin A: 3291IU | Vitamin C: 14mg | Calcium: 168mg | Iron: 2mg

UPDATE NOTE: This recipe was originally published in September 2018, but the recipe instructions, photographs, and new video were added in August 2019.

Garlic Basil Aioli

August 20, 2019 by Kris Longwell 8 Comments

A small jar of garlic basil aioli with two eggs next to it.

This is the perfect condiment and has such an amazing flavor boost to so many dishes.

You can cheat and start with good-quality mayonnaise, and that’s perfectly fine, but we say make it really special and make it completely from scratch it literally comes together in a matter of minutes and keeps perfectly in the refrigerator for up to 1 week!

A small jar of garlic basil aioli with two eggs next to it.

How To Make Basil Aioli with Garlic

We start with a jar that is just large enough for our emulsion blender to fit into. An emulsion blender is a kitchen tool that I use time and time again. It’s a great addition to your culinary tools!

Adding the garlic and basil after emulsifying the mayonnaise we find works best.

Watch us show you how easy it is to make Garlic Basil Aioli at home!

Other Amazing Spreads, Dressings, and Dips to Try

  • Kickin’ Remoulade
  • Homemade Mayonnaise
  • Homemade Italian Dressing
  • Easy Blue Cheese Dressing
  • White Remoulade

Aioli Ingredients

  • Eggs
  • Neutral Oil
  • Dijon
  • Lemon Juice
  • Vinegar
  • Salt
  • Garlic
  • Basil

basil-aioli-recipe

How To Make Homemade Aioli

EXPERT TIP: It is very important to choose the correct oil when making any type of mayonnaise. Olive oil imparts a pretty distinct olive taste. Go with a neutral oil such as avocado, grape seed, or safflower, or a blend. Coconut oil is good, too, but you’ll need to mix it with another oil because it will harden once it is cooled and refrigerated. Extra-virgin olive oil is often used when making a traditional aioli, but we find for our garlic basil aioli, a neutral oil yields the best taste.

There is so much to learn about different types of cooking oils. Thrilllist provides a nice breakdown of the most commonly used cooking oils and when they are best utilized.

Homemade mayonnaise is the perfect start for garlic basil aioli.

Homemade Mayonnaise recipe

Garlic Basil Aioli FAQs

  • How long will the aioli last? Garlic basil aioli will keep in the refrigerator for up to 1 week. However, we find that it’s at its freshest tasting after 1 day. We don’t recommend freezing aioli.
  • Can dried basil be substituted for fresh? Yes, however fresh will provide more texture and we feel a milder taste. However, dried can absolutely be used. We recommend no more than 1 tablespoon of dried for this recipe.
  • Can I make this without an emulsion blender? Yes. A mixer with a whisk attachment will work, or even a hand whisk. First mix all of the mayo ingredients together. And then very slowly add the oil while continuously whisking. Whisk until the oil and eggs have emulsified. This may take some practice.
  • Can store-bought mayonnaise be substituted.? Of course! Simply blend in the garlic and basil and there you have it. But…homemade is really so much better, and fun to make!
  • What kind of vinegar to use? We love using Champagne vinegar. But white wine vinegar will work, or even just plain distilled white vinegar.

A small jar containing homemade garlic basil aioli next to an egg and garlic.

Simply divine.

When you make this amazing spread, be sure to take a picture and post to Instagram and tag @howtofeedaloon and #howtofeedaloon!

A small jar containing homemade garlic basil aioli with two eggs nearby.
Print Recipe
5 from 1 vote

Garlic Basil Aioli

Garlic Basil Aioli takes good ole mayonnaise and kicks it up several notches on the taste ladder. This isn't real hard to make, and the flavor profile that it adds to your favorite sandwiches and dishes is remarkable. Amazing!
Prep Time15 minutes mins
Total Time15 minutes mins
Course: Condiment
Cuisine: French
Servings: 8 people
Calories: 42kcal
Author: Kris Longwell

Equipment

  • Immersion blender
  • A jar or container that is just wide enough to fit the base of the immersion blender.

Ingredients

  • 1 egg yolk
  • 1 whole egg
  • 1 teaspoon lemon juice
  • 1 teaspoon Dijon mustard
  • ½ teaspoon vinegar Champagne vinegar, white wine vinegar, or distilled white vinegar all work well
  • ½ teaspoon Kosher salt
  • 1 cup oil avocado, grape seed, safflower
  • 2 garlic cloves minced
  • ½ cup fresh basil chopped

Instructions

  • Place the egg yolk, whole egg, lemon juice, Dijon, vinegar, salt, and oil in a jar, or container, just large enough to fit the base of an immersion blender.
  • Turn the immersion blender on high, and gently move the blender in an upward motion. As the emulsification process continues, the mixture will thicken. Continue until you've reached the desired consistency. Usually about 1 minute. Remove blender and set aside.
  • Add the garlic and basil and use a spoon or fork to gently incorporate into the mayonnaise.
  • Cover with lid and refrigerate until ready to use.

Video

Notes

Extra-virgin oil can be used for the oil, but it will impart more of a distinct olive taste, which is traditional for aioli, however, we like the clean taste of a neutral oil.  
If you do not have an immersion blender, you can use the whisk attachment on a mixer, or even a hand mixer.  Add all ingredients (except oil, garlic, and basil), and stir to combine.  Then very slowly add in the oil all the while whisking.  Continue whisking until emulsified.  Then stir in the garlic and basil.  
We love using Champagne vinegar, but you can also use white wine, or even distilled white vinegar.  If you go with a vinegar that is not clear, that is fine, but remember it will change the color of the aioli. 
Homemade aioli will keep in the refrigerator for up to a week.  We do not recommend freezing the aioli. 

Nutrition

Calories: 42kcal | Carbohydrates: 1g | Protein: 1g | Fat: 4g | Saturated Fat: 1g | Cholesterol: 45mg | Sodium: 16mg | Potassium: 12mg | Sugar: 1g | Vitamin A: 141IU | Vitamin C: 1mg | Calcium: 10mg | Iron: 1mg

Update Note: This recipe was originally posted in August, 2016, but was updated in August, 2019 to include new images, recipe updates, and a video tutorial.


Sausage and Peppers Hero

August 18, 2019 by Kris Longwell 6 Comments

This Epic Sausage and Peppers Hero is our hero, no doubt.

This has been a staple favorite sandwich in our house ever since we lived in New York City in the late 80s.  

Take the time to make the marinara sauce, it really makes a huge difference.

This is as authentic as Little Italy in NYC. To do them right, you’ll need about an hour and a half, but it’s worth every single minute.

Sausage and Peppers Hero a checkered napkin.

SAUSAGE AND PEPPERS HERO IS EASY TO MAKE AT HOME

This Italian sausage sandwich is about as delicious as they come.

Some call it a Sausage and Pepper Roll and some call it a hoagie. It’s classic Italian Street Fair Sausage and Peppers.

Watch us show you how easy it is to make this epic Sausage and Peppers Hero at home!


OTHER EPIC SANDWICH RECIPES

We love a good sandwich here at H2FaL. And man, we have some good ones for you to prepare! Check the recipes out for these scrumptious sandwiches!

  • Italian Meatball Sandwich
  • Monte Cristo Sandwich with Mornay Sauce
  • Slow-Cooker Pulled Pork Sandwiches
  • Fried Catfish Po-Boy
  • Marinated Grilled Steak Sandwich
  • Grilled Honey Mustard Chicken Sandwiches

HOMEMADE MARINA IS KEY FOR SAUSAGE AND ONION HERO

We love to make a batch of our homemade marinara ahead of time and freeze what we don’t use.

This is a recipe that we turn to time and time again, and it is essential when making an authentic Sausage and Peppers Hero.

And it’s not hard to make!

Jar of fresh marinara sauce

HOW TO COOK THE SAUSAGES

We love to make our epic Sausage and Peppers Hero just like they make them at New York City’s biggest Italian street festival: Feast of San Gennaro.

The flavors are bold and hold nothing back, just like the Big Apple.

This is why we go with hot Italian sausages, but if you prefer sweet sausage, it is without doubt delicious, too. You could even do a mix of them, too. Simply cook them up in a hot skillet with a little oil until nicely browned on the outside. They’ll finish cooking in the marinara.

Hot Italian sausages cooking a in large skillet with a pair of tongs moving them around.

SIMMER THE SAUSAGES FOR THE BEST FLAVOR

Now this next step is really important.

Simmering the browned sausages in the marinara, with additional onion, garlic, and herbs is what truly makes the Sausage and Pepper Hero one that is epic.

While the sausages simmer, and your stomach starts to grumble, it’s time to make the onions and peppers.

A pair of tongs lowering an Italian sausage into simmering marinara sauce

HOW TO PREPARE THE ONIONS AND PEPPERS

Using the same skillet that you used for browning the sausages, add a little more oil, and toss in the onions and peppers.

After they start to soften, toss in the garlic. Now we’re talking.

Once they are nice and soft, about 15 minutes of cooking, add the fresh basil and parsley, and cook for another minute or so.

EXPERT TIP: You can prepare the sausages and onions and peppers a day in advance. Simply reheat in separate skillets before assembling and toasting the sandwiches.

Red and green peppers and sliced onions simmering in a large black skillet with a wooden spoon.

Red and green bells peppers and sliced onion and herbs cooking in a large skillet with a wooden spoon.

To complete the perfect sausage and peppers hero, we spread a little of the marinara sauce onto an Italian hero roll.

Place a cooked sausage on top of the layer of marinara, and then layer the sausage, then onions and peppers, and then top with sliced mozzarella. Place under the broiler until the cheese has begun to melt and the roll is just getting slightly toasted.

And get ready for the most amazing Sausage and Peppers Hero you will ever try.

SAUSAGE AND PEPPER HERO FAQ’s:

  • Can the marinara sauce be frozen? Yes. We freeze our homemade marinara all the time. Keep in the freezer for up to two months.
  • What are the Sausage and Peppers Hero calories? This is one of those sandwiches that you eat in moderation. One sandwich is 433calories.
  • What is the best type of roll to use? When looking for bread, you want a roll that is slightly crisp on the outside and soft on the inside. A soft hoagie isn’t the classic roll but is still very good.

Sausage and Peppers hero on a checkered napkin.

If you’re looking to make an epic sandwich that friends and family will be talking about for a long time…you’ve come to the right place.

And when you make this epic sandwich, take a pic and then post it on Instagram and tag @howtofeedaloon and #howtofeedaloon!

Sausage and Peppers Hero on a checkered napkin.
Print Recipe
5 from 2 votes

Sausage and Peppers Hero

This Sausage and Peppers Hero is really one to write home about. Be sure to make the homemade marinara, if you can, you won't regret it. Simply amazing! Great with our without melted mozzarella...we, naturally, love it with the gooey melted cheese! So good!
Prep Time20 minutes mins
Cook Time50 minutes mins
Marina Preparation1 hour hr
Total Time2 hours hrs 10 minutes mins
Course: lunch, Sandwich
Cuisine: Italian, Italian / American
Servings: 4 people
Calories: 433kcal
Author: Kris Longwell

Ingredients

FOR THE SAUSAGES

  • ½ cup olive oil
  • 12 3 oz hot Italian sausages
  • 1 ½ tablespoon fresh basil chopped
  • 1 ½ teaspoon flat-leaf parsley chopped
  • 6 cloves garlic minced
  • 2 medium yellow onions peeled and thinly sliced
  • 8 cups fresh marinara sauce click for recipe
  • Kosher salt and ground black pepper

FOR THE PEPPERS AND ONIONS

  • ¼ cup olive oil
  • 6 cloves garlic minced
  • 2 large yellow onions peeled, and cut into about 6 or 7 wedges, each.
  • 2 red bell peppers seeded, cored, and cut into 6 lengthwise pieces
  • 2 green bell peppers seeded, cored, and cut into 6 lengthwise pieces
  • Kosher salt and ground black pepper
  • 1 ½ tablespoon fresh basil chopped
  • 1 tablespoon fresh parsley chopped

FOR THE SANDWICH

  • 2 to 3 cups fresh marinara sauce click for recipe
  • 12 to 14 thin slices of fresh mozzarella
  • 4 crispy Italian hero rolls 6 to 8 inches long (cut the ends off, if you prefer)

Instructions

MAKE AHEAD OF TIME

  • Make the marinara sauce and then re-heat in a large pot, preferably a Dutch oven.

MAKE THE SAUSAGES

  • In a large skillet, heat the olive oil over medium-high heat.
  • When the oil is hot, add the sausages and cook for about 4 minutes, turning occasionally to brown on all sides.
  • Using tongs, remove the sausages from the pan and set them aside on a platter.
  • Add the onions and reduce heat to medium, cooking the mixture, stirring occasionally for about 5 minutes, or until the onions have softened.
  • Add the basil, parsley and garlic to the pan and saute for about 2 minuteS.
  • Transfer the onion mixture the prepared marinara sauce.
  • Place the sausages and any accumulated juices in the pot and mix it well.
  • Simmer, uncovered, for 45 minutes to 1 hour.
  • Season the sauce with a healthy pinch of salt and pepper and then set aside. 

MAKE THE PEPPERS AND ONIONS

  • In a large saute pan, heat the olive oil over medium heat.
  • When the oil is hot, add the garlic and cook it for 1 to 2 minutes, or until starting to brown.
  • Add the onions and peppers and season with a healthy pinch of salt and pepper.
  • Saute them, stirring occasionally, for 5 minutes, or until they soften and start to brown.
  • Add garlic, basil and parsley and cook for 1 to 2 minutes.
  • Reduce the heat to medium, cover the pan, and cook the mixture, stirring occasionally, for about 15 minutes, until the peppers and onions have softened and starting to caramelize. Set aside.

PREPARE THE SANDWICH

  • Turn your broiler onto high.
  • Open the rolls and place on a baking sheet and add a layer of marinara sauce on the bottom half of each roll. Then place a cooked sausage on the layer of marinara, and then a layer of peppers and onions, and then cover with sliced mozzarella.
  • Place under the broiler and cook until the cheese has started to melt and the bread is begining to get toasty on the edges. Remove and serve at once with more marina sauce on the side.

Video

Notes

Homemade fresh marina is always best, but quality store-bought will work, too.
The marinara, sausages and onions can all be prepared a day in advance.  Simply re-heat all component before assembling and toasting the sandwich.
If you can't find Italian rolls, then go with a hoagie or submarine roll.  They are softer and not authentic for an Italian hero, but will still be delicious. 
Watch closely once the hero's are under the broiler.  Don't let them burn!

Nutrition

Calories: 433kcal | Carbohydrates: 16g | Protein: 3g | Fat: 41g | Saturated Fat: 6g | Sodium: 10mg | Potassium: 375mg | Fiber: 4g | Sugar: 7g | Vitamin A: 2268IU | Vitamin C: 133mg | Calcium: 44mg | Iron: 1mg

Update Notes: This post was originally published in December of 2016, but was republished with new photos, step by step instructions, tips, and FAQs in August of 2019.

Caprese Salad with Grilled Peaches

August 16, 2019 by Kris Longwell 3 Comments

Caprese salad with grilled peaches on a white circular dish.

This post is kindly sponsored by Village Farms, but the recipe, photography, and opinions are 100% ours. 


Classic Caprese Salad with Grilled Peaches is a summertime dish at its very best.

We’re so excited to have teamed up with one of our favorite providers of produce on the planet.  We’re talking, of course, about Village Farms®.  And we are featuring their incredible Sinfully Sweet Campari tomatoes.

Caprese salad with grilled peaches on a white circular dish.

In addition to using some of the most delicious tomatoes we’ve ever encountered, we’re taking things even further and adding in sweet and savory grilled peaches and topping it all with a glorious balsamic reduction.

SINFULLY SWEET CAMPARI TOMATOES ARE BURSTING WITH FLAVOR

We absolutely love using produce from Village Farms®. Their produce is distributed throughout the USA and Canada and they truly capture the essence of your local farmer’s market.

As we slice into the Sinfully Sweet Campari tomatoes, they literally burst with freshness.

The only challenge is to not eat them all up before it’s time to assemble the caprese salad with grilled peaches!

Sliced compari tomatoes on a wooden cutting board with basil nearby.

We knew we wanted to create an amazing caprese salad utilizing Village Farm’s campari tomatoes.  That was a no-brainer.

But we couldn’t just leave well enough alone. We decide peaches (grilled peaches, in fact) would elevate this already incredible salad to pretty amazing culinary heights.

We found that slicing the peach from the outside in was the best to get perfectly round, solid slices. Once you come to the pit, turn the peach around, and start slicing the other side. Save the final center slice, with the pit still in it, for snacking!

A chef's knife slicing through a yellow peach.

Grilling the peaches brings out even more of the natural sweetness in the fruit. For this recipe, we love going with firm, yet ripe, yellow peaches.

You’ll need to brush a little olive oil on both sides of the peach slice.  Next, get your grill nice and hot.

We used our charcoal kettle grill this time, but you could use a gas grill, electric grill, or even a hot grill skillet on your stovetop. They only take about 4 minutes per side to get perfectly cooked.

Sliced peaches on a charcoal grill

We just love using Village Farm’s Sinfully Sweet Campari tomatoes for this salad for several reasons. First, and foremost, is taste.

These tomatoes have the perfect combination of sweetness and acidity. They are also just so vibrant, juicy, and beautiful in appearance.

They are larger than a cherry tomato, but smaller than TOV (tomato on the vine). They really work perfectly for this Caprese Salad with Grilled Peaches!

A hand layering a tomato for caprese salad with grilled peaches on a white plate.

THE SECRET TO CAPRESE SALAD WITH GRILLED PEACHES

Caprese salad is a beautiful combination of fresh and simple ingredients. Going with quality is always is your best bet.

Obviously, we went with the best tomato in town with Village Farms®. No question there.  But in addition to that, choosing top-notch fresh mozzarella is recommended. And then slice it to the same thickness as the tomatoes.

We found that firm, yet ripe, yellow peaches worked beautifully. Fresh basil is a must. And then we found that using a high-quality balsamic vinegar really does make a difference in the reduction. Actually, it is amazing and brings the dish all together.

A single serving of caprese salad with grilled peaches on a white cocktail plate.

VILAGE FARMS® DELIVERS QUALITY EVERY TIME

It’s really amazing to see the reaction of friends and family when we serve this Caprese Salad with Grilled Peaches featuring Village Farms® Sinfully Sweet Campari® tomatoes.

The salad is just so beautiful in presentation. And then the taste? We can honestly say it’s our favorite summertime salad of all time. The grilled peaches, along with the best tomatoes in the world, put it over the top.

The Sinfully Sweet Campari® is also a low-calorie source of vitamin C and K, supporting brain health and strengthening bones! Gorgeous, delicious and good for you! How in the world can you ever beat that!

Caprese salad with grilled peaches on a white plate next to a package of campari tomatoes.

PAIR THE SALAD WITH GRILLED PORTOBELLO PIZZAS

While you’ve got the grilled fired up, you should also make our incredible Grilled Portobello BLT “Pizzas”Grilled Portobello BLT “Pizzas”!

We feature Village Farms Heavenly Villagio Marzano tomatoes. The portobello cap replaces the traditional pizza crust, and we use pesto sauce, pancetta, fontina cheese, tomatoes and arugula.

These pair beautifully with the Caprese Salad with Grilled Peaches! Talk about a gorgeous presentation!

Individual servings of caprese salad next to a pizza paddle with portobello pizzas.

Ready to impress with one of the most delicious takes on one of the best summertime salads ever?

Pick up some Village Farms Sinfully Sweet Campari® tomatoes and the other ingredients, and make this amazing Caprese Salad with Grilled Peaches!

And before you devour it, be sure to snap a picture of it and post it to Instagram and tag @howtofeedaloon and @villagefarms!

Caprese Salad with Grilled Peaches on a circular white platter.
Print Recipe
5 from 1 vote

Classic Caprese Salad with Grilled Peaches

Prep Time10 minutes mins
Cook Time18 minutes mins
Total Time28 minutes mins
Course: Appetizer, Salad
Cuisine: American, Italian
Servings: 6
Calories: 186kcal
Author: Kris Longwell

Equipment

  • Charcoal, gas, or electric grill. Or, stovetop grill skillet

Ingredients

  • 1 cup balsamic vinegar
  • 6 Village Farms Sinfully Sweet Campari Tomatoes® cut into ¼" slices
  • 2 tablespoon olive oil
  • 4 yellow peaches cut into ¼" slices (see note below)
  • 12 oz fresh mozzarella cut into ¼" slices
  • 1 cup fresh basil leaves
  • Kosher salt and freshly ground pepper

Instructions

  • Place the balsamic in a small sauce pan and bring to a boil then reduce heat slightly and simmer for 12 to 15 minutes, or until reduced in half and slightly thickened. It will coat the back of a spoon once ready. Set aside.
  • Turn your grill to medium-high heat.
  • Brush oil on both sides of the peach slices and then place on the grill over direct heat. Cook for about 4 minutes per side, or until grill marks begin to appear. Remove from grill.
  • Arrange the salad by starting with a tomato slice on a platter, then place a grilled peach across half of the tomato, then placing a mozzarella slice over half of the peach, then placing a basil leaf over the mozzarella. Repeat until the platter is full and you have used all the ingredients.
  • Drizzle the balsamic reduction over the top and serve at once.

Notes

To slice the peaches, use a sharp knife and carefully slice one side of the peach off, about ¼" thick.  Moving inwards, cut another slice.  Once you reach the pit, turn the peach around and cut slices in the same manner.  Save the peach that is left around the pit for another use (or a quick snack).
We find that using a quality balsamic produces the best tasting reduction.  The reduced balsamic will stay in a container with a lid in the refrigerator for up to 2 weeks. 

Nutrition

Calories: 186kcal | Carbohydrates: 9g | Protein: 13g | Fat: 12g | Saturated Fat: 2g | Cholesterol: 45mg | Sodium: 366mg | Potassium: 102mg | Fiber: 1g | Sugar: 7g | Vitamin A: 594IU | Vitamin C: 1mg | Calcium: 305mg | Iron: 1mg

Classic Pasta Salad

August 13, 2019 by Kris Longwell 3 Comments

A white oval serving bowl filled with classic pasta salad including artichoke hearts, sun-dried tomatoes, black olives, tricolor rotini pasta, basil, tossed in homemade Italian dressing.

This Classic Pasta Salad is a fresh, colorful side dish that’s always a crowd‑pleaser. Made with tricolor rotini, mozzarella balls, basil, olives, and a zesty homemade Italian dressing, it’s light yet satisfying. Perfect served alongside BBQ favorites and grilled dishes, this salad is a must‑have for summer cookouts, picnics, and potlucks.

A white oval serving bowl filled with classic pasta salad including artichoke hearts, sun-dried tomatoes, black olives, tricolor rotini pasta, basil, tossed in homemade Italian dressing.
[feast_advanced_jump_to]

☑️ The Ingredients

Made with simple, fresh ingredients like tricolor rotini, mozzarella balls, basil, olives, marinated artichokes, and a tangy homemade Italian dressing, this pasta salad is bursting with flavor and color. Find ingredient notes (including substitutions and variations) below.

An arrangement of ingredient for Classic Pasta Salad on a grey wooden background including tricolor rotini pasta, basil, artichoke hearts, sun-dried tomatoes, mozzarella balls, olives, salt, pepper, and Italian dressing.

👉 Substitutions and Variations

  • Tricolor Rotini: Any short pasta works well—try penne, farfalle, or fusilli. Whole wheat or gluten‑free pasta can be used too.
  • Mozzarella Balls: Swap with cubed cheddar, provolone, or feta for a different flavor profile.
  • Fresh Basil: Substitute with parsley, oregano, or even baby spinach for a milder taste.
  • Marinated Artichoke Hearts: Roasted red peppers or sun‑dried tomatoes make great alternatives.
  • Black Olives: Use Kalamata olives for a brinier bite, or leave them out if you’re not a fan.
  • Homemade Italian Dressing: Bottled Italian dressing works in a pinch, or try homemade balsamic vinaigrette for a sweeter twist.

See the recipe card (with video) below for a full list of ingredients and measurements.

Expert Tip

For a heartier twist, fold in chopped Italian cured meats like salami, pepperoni, or prosciutto. They add savory depth and turn this classic pasta salad into a satisfying main dish for any cookout or potluck.

⭐️ Tips and Tricks for Perfect Classic Pasta Salad

  • Cook pasta al dente: Slightly undercooked pasta holds up better once tossed with dressing and stored.
  • Rinse after cooking: Rinsing the pasta under cold water stops the cooking process and prevents sticking.
  • Dress while warm: Tossing the pasta with a little dressing while it’s still warm helps it soak up extra flavor.
  • Make ahead: This salad tastes even better after a few hours in the fridge, giving the flavors time to meld.
  • Keep it fresh: If making ahead, reserve some dressing to add just before serving to keep the salad bright and flavorful.
  • Customize it: Mix in extras like cherry tomatoes, cucumbers, bell peppers, or even chickpeas for added color and texture.

👩🏼‍🍳 How to Make Classic Pasta Salad

A person holding a jar with a lid on it that is filled with homemade Italian dressing.
  1. Step 1: Prepare the Homemade Italian Dressing and let it chill for at least one hour. Shake it before adding to the salad.
A person transferring uncooked tricolor rotini pasta into a pot of boiling water on a gas stove.
  1. Step 2: Add the pasta to a pot of salted boiling water.
A person holding cooked tricolor rotini pasta that is fully cooked and has cooled.
  1. Step 3: Cook until soft and then drain in a colander and rinse with cool water until no longer hot.
A person using one hand to transfer of marinated artichoke hearts into a bowl of cooked pasta and his other hand transferring pieces of sun-dried tomatoes into the same bowl.
  1. Step 4: Place the cooled pasta into a large bowl and add the artichoke hearts and sliced sun-dried tomatoes.
A person pouring homemade Italian dressing from a glass jar into a glass bowl filled with cooked rotini pasta, mozzarella balls, chopped basil, artichoke hearts, and halved black olives.
  1. Step 5: Add the remaining ingredients and about a half cup of the dressing.
A person using two large wooden spoons to toss together a classic pasta salad in a large glass bowl.
  1. Step 6: Toss to coat, then cover with plastic wrap and chill for at least one hour.

🙋🏽‍♂️ Frequently Asked Questions

Can I make Classic Pasta Salad ahead of time?

Yes, this salad actually tastes better when made a few hours in advance, since the flavors have time to meld. Toss with a splash more of the dressing just before serving.

How long does Classic Pasta Salad last in the fridge?

It will stay fresh for about 3–4 days when stored in an airtight container in the refrigerator.

Can I use a different type of pasta for Classic Pasta Salad?

Absolutely—short pastas like penne, farfalle, or fusilli all work well in this recipe.

Can I make Classic Pasta Salad gluten‑free?

Yes! Simply swap the tricolor rotini with your favorite gluten‑free pasta. Be sure to cook it al dente and rinse well, since gluten‑free pasta can become sticky.

What other sides go well with Classic Pasta Salad?

Creamy potato salad, slow‑cooker corn on the cob, and Southern baked beans all make excellent companions for a cookout spread alongside this pasta salad.

A close-up view of a classic pasta salad in a white oval serving bowl topped with chopped basil.

😋 Other Classic Side Salads

  • A large white bowl of freshly prepared Cajun Pasta Salad.
    Cajun Pasta Salad
  • A large white serving bowl filled with black bean and corn salad with two gold serving spoons tucked in beside the salad.
    Zesty Black Bean and Corn Salad
  • An oval white serving bowl filled with carrot and raisin salad with a gold serving spoon inserted on the side of the bowl.
    Carrot and Raisin Salad
  • An oval white serving bowl filled with cheddar bacon Ranch pasta salad.
    Cheddar Bacon Ranch Pasta Salad

Ready to make the best pasta salad in town? Go for it!

And when you do, be sure to take a picture, post it to Instagram, and tag @HowToFeedaLoon and #HowToFeedaLoon!

A white bowl containing fresh classic pasta salad.
Print Recipe
5 from 2 votes

Classic Pasta Salad

This Classic Pasta Salad is both delicious and visually stunning. Be sure to use top-notch dressing! If not serving right away, simply add a little more dressing just before serving, and toss gently. This salad is best when served within a few hours (at the most) of preparing. And at room temperature.
Prep Time25 minutes mins
Cook Time10 minutes mins
Chill time for Italian Dressing1 hour hr
Total Time1 hour hr 35 minutes mins
Course: Salad, Side Dish
Cuisine: American, Italian
Servings: 8 people
Calories: 220kcal
Author: Kris Longwell

Ingredients

  • ½ cup Italian Dressing or good-quaity store-bought
  • 12 oz pasta tri-color rotini, or fusilli, bow tie, or elbow
  • ½ cup artichoke hearts, in oil drained, or more, if desired
  • ½ cup sun-dried tomatoes in oil drained and roughly chopped, use more, if desired
  • ½ cup mozzarella balls
  • ½ cup black olives sliced and drained, use more, if desired
  • ¼ cup fresh basil roughly chopped
  • 1 teaspoon Kosher salt
  • ½ teaspoon freshly ground black pepper

Instructions

  • Prepare the Italian dressing and chill for at least one hour.
    ½ cup Italian Dressing
  • Meanwhile, bring a large pot of liberally salted (1 tbsp) water to a boil. Add the pasta and cook until al dente. Usually 9 to 12 minutes. Drain and rinse with cool water until no longer hot. Transfer to a large bowl.
    12 oz pasta
  • Add the artichokes, sun-dried tomatoes, mozzarella balls, olives, basil, salt, pepper, and dressing.
    ½ cup artichoke hearts, in oil, ½ cup sun-dried tomatoes in oil, ½ cup mozzarella balls, ½ cup black olives, ¼ cup fresh basil, 1 teaspoon Kosher salt, ½ teaspoon freshly ground black pepper
  • Gently stir until the pasta is fully coated and all ingredients are evenly distributed. Taste and add more salt and/or dressing, if desired.
  • Serve at once, or cover with plastic wrap and refrigerate for up to 4 hours. If not serving immediately, add several tablespoons of dressing just before serving, and stir.

Video

Notes

NOTE: Watch the video near the top of the recipe for visual guidance.
We strongly suggest using the homemade Italian dressing for this salad.  It really puts it over the top.  However, a quality bottled version will work, too. 
Small to medium bite-sized pasta works well.  Rotini or fusilli are our favorites.  Tri-color is tasty and very beautiful.
This pasta salad is easily adapted to tastes. Other great additions are cucumbers, Italian cured meats, and pepperoncini peppers.
It is best served fresh, but you can make it up to a day in advance. Just add more of the dressing and toss before serving. We find that it’s still perfect after sitting in the fridge for up to 4 hours before serving. Setting the salad out an hour before serving helps the flavor and texture, too.  

Nutrition

Calories: 220kcal | Carbohydrates: 35g | Protein: 6g | Fat: 6g | Saturated Fat: 1g | Sodium: 443mg | Potassium: 215mg | Fiber: 2g | Sugar: 3g | Vitamin A: 161IU | Vitamin C: 7mg | Calcium: 20mg | Iron: 1mg

Grilled Honey Mustard Chicken Sandwich with Bacon

August 11, 2019 by Kris Longwell 10 Comments

A grilled honey mustard chicken sandwich with bacon on a sesame seed bun sitting on a withe dinner plate with a frosty glass of beer in the background.

Grilled Honey Mustard Chicken Sandwich with Bacon is a flavorful and juicy meal that combines tangy honey mustard, smoky bacon, and tender grilled chicken on a toasted bun. Serve it alongside Homemade French Fries or Classic Pasta Salad for the ultimate outdoor feast everyone will love.

A grilled honey mustard chicken sandwich with bacon on a sesame seed bun sitting on a withe dinner plate with a frosty glass of beer in the background.
[feast_advanced_jump_to]

🍯 The Ingredients

Most of the ingredients are likely already in your pantry, yet they come together to create one of the most delicious sandwiches of all time. Find ingredient notes (including substitutions and variations) below.

An arrangement of ingredients for a grilled honey mustard chicken sandwich on a wooden grey background including uncooked chicken breasts, hamburger buns, honey, yellow mustard, Italian dressing, seasonings, bacon, mayonnaise, cheddar cheese slices, and butter.

🧀 Substitutions and Variations

  • Protein – Thin chicken breasts are excellent for this sandwich. Boneless, skinless chicken thighs are wonderful, too. The dark meat is flavorful and grills wonderfully. Slices of pork tenderloin, thin boneless pork chops, or even bratwurst patties can all be substituted for the chicken.
  • Dressing ingredients – We love the tang from classic yellow mustard; however, Dijon mustard, spicy brown mustard, or even Carolina Mustard Sauce are all amazing options. Store-bought Italian dressing is perfectly fine; however, Homemade Italian Dressing is great and always nice to have on hand. For the honey, your favorite brand is perfect.
  • Cheese – You can’t go wrong here. We love sliced cheddar, but sliced Colby, Monterey Jack, Swiss, smoked Gouda, or even mozzarella are all great choices. If you love blue cheese, that will be good, too, but very prominent.
  • Bacon – Thick, center-cut bacon is our first choice. But crispy slices of pancetta or prosciutto. Pan-fried Canadian bacon is a delicious option, too!

See the recipe card (with video) below for a full list of ingredients and measurements.

Expert Tip

Try and find thin, skinless, and boneless chicken breasts from the supermarket or your butcher. Don’t get chicken tenders because they contain a tendon that is tough and not pleasant. If you can’t find thin chicken breasts, purchase the larger cutlets, place them (one at a time) in a large freezer bag, and then use the side of a mallet and pound the meat until about a ¼” thick.

🔥 How To Make Grilled Honey Mustard Sandwiches with Bacon

A person using a whisk to stir a honey mustard sauce and marinade in a shallow white bowl.
  1. Step 1: In a bowl, whisk the honey, mustard, and dressing until combined. Save some for later.
A person using a pair of tongs to lift a thin boneless chicken breast from a shallow white bowl filled honey mustard marinade.
  1. Step 2: Place the chicken cutlets in the marinade and turn until coated.
A person using a pair of tongs to lift crispy bacon from a baking sheet that the bacon was baked on.
  1. Step 3: Bake the bacon in the oven at 400°F until crispy.
A person using a pastry brush to apply a honey mustard sauce onto a thin boneless chicken breast that is being grilled on a gas grill.
  1. Step 4: Grill the marinated chicken until browned, brushing more marinade as they cook.
A close-up view of two layers of grilled chicken and crispy bacon that are topped with melty slices of cheddar cheese.
  1. Step 5: Place the chicken on a baking sheet and top with bacon and cheese, and bake until melty.
A person placing the top half of a toasted sesame seed bun on top of a grilled honey mustard sandwich with bacon on a cutting board.
  1. Step 6: Slather the extra sauce on toasted buns and add the cutlets. Add the top bun and serve!

🙋🏽‍♂️ Frequently Asked Questions

Can the bacon and marinade be made in advance?

Yes, you can cook the bacon and the marinade 4 to 5 hours in advance to save time when assembling the sandwich.

What type of bread works best for a grilled honey mustard sandwich with bacon?

A fluffy, but sturdy bun or roll is recommended. Homemade hamburger buns are perfect! But store-bought are great, too. Bigger buns work best. Brioche or ciabatta rolls are great options, as well.

Can I cook the chicken on a grill pan instead of an outdoor grill?

Absolutely! A grill pan works great and will give the chicken those delicious grill marks and smoky flavor indoors.

Can the chicken be baked instead of grilled?

Yes, the chicken can be baked in the oven at 400°F (200°C) for about 20-25 minutes until cooked through, making it a convenient alternative to grilling.

A grilled honey mustard sandwich consisting of two pieces of chicken, melty cheddar cheese, and multiple strips of crispy bacon on a toasted sesame bun.

🍔 Other Epic Sandwich Recipes

  • A Marinated Grilled Steak Sandwich on a wood cutting board
    Grilled Steak Sandwich
  • A chicken fried steak sandwich topped with sliced tomato and lettuce sitting on a wooden cutting board.
    Chicken Fried Steak Sandwich
  • A buffalo chicken sandwich on a wooden board with blue cheese dressing dripping off the side.
    Buffalo Chicken Sandwich
  • A fried fish sandwich sitting on a black plate next a lemon wedge and potato chips with a glass of beer and another plate of a fish sandwich in the background.
    Best Fried Fish Sandwich

Ready to make the best chicken sandwich on the block? Go for it!

And when you do, be sure to take a picture of it, post it on Instagram, and tag @HowToFeedaLoon and #HowToFeedaLoon!

A grilled honey mustard chicken sandwich with bacon on a sesame seed bun sitting on a withe dinner plate with a frosty glass of beer in the background.
Print Recipe
5 from 4 votes

Grilled Honey Mustard Chicken Sandwiches

This has been one of our favorite sandwiches for many, many years. Double-stack the grilled cutlets for extra-hungry guests! Be sure to save plenty of the honey-mustard sauce for serving with the sandwiches!
Prep Time20 minutes mins
Cook Time20 minutes mins
Total Time40 minutes mins
Course: BBQ
Cuisine: American
Servings: 4
Calories: 846kcal
Author: Kris Longwell

Equipment

  • Gas or charcoal grill

Ingredients

For the Marinade/Dressing

  • ½ cup yellow mustard
  • ½ cup honey
  • ½ cup Italian dressing

For the Sandwiches

  • 8 chicken breasts tskinless and bonelesshin,
  • 16 slices bacon
  • salt and pepper
  • 4 hamburger buns
  • 1 tablespoon unsalted butter for the hamburger buns
  • 4 slices sliced cheddar cheese
  • ½ cup mayonnaise optional, for garnish

Instructions

  • In a medium-sized bowl or dish, whisk together the honey, mustard, and Italian dressing. Reserve about half a cup of the dressing for slathering on the toasted buns when ready to serve.
    ½ cup yellow mustard, ½ cup honey, ½ cup Italian dressing
  • Place the chicken into the marinade are turn until all cutlets are well coated.
    8 chicken breasts
  • Preheat oven to 400°F. Place the bacon on 1 (or 2) baking sheets and bake until crisp, about 8 to 10 minutes (time will vary depending on how thick the bacon is). Flipping halfway through the baking. Set aside.
    16 slices bacon
  • Meanwhile, turn your grill to medium-high heat.
  • Grill the marinated chicken until nicely browned. Sprinkle salt and pepper over the cutlets on each side as they cook. Brush more of the marinade over the cutlets until they are golden brown and the glaze has slightly caramelized. Remove from the grill.
    salt and pepper
  • Smear softened butter on the cut side of the buns. Grill the buns until nicely browned.
    4 hamburger buns, 1 tablespoon unsalted butter
  • On a baking sheet, place 4 chicken cutlets, then criss-cross two slices of cooked bacon, and repeat this. Place cheese slices on top. Turn your broiler on high and then cook just until the cheese has melted, about 1 to 3 minutes. Keep an eye on this…don't let them burn!
    4 slices sliced cheddar cheese
  • Slather a good layer of the reserved honey mustard dressing on the toasted buns. Add mayonnaise, too, if desired. Place the prepared chicken/bacon/cheese on the buns and serve them at once.
    ½ cup mayonnaise

Video

Notes

NOTE: Watch the video near the top of the recipe for visual guidance.
Be sure to use thin, boneless, and skinless chicken breasts.  Don’t purchase the chicken tenders from the supermarket.  If you can’t find thinly sliced breasts, go with the larger cutlets and pound them until about ¼″ in thickness.  You may need to cut the cutlets in half if they are too large.
You can substitute Dijon or spicy brown mustard for the yellow, if you prefer. We think yellow works best, but that’s up to you!
You can also cook the bacon in a skillet, rather than the oven, if you prefer. Drain on a plate lined with paper towels. 
Be sure to save at least half a cup of the dressing BEFORE placing the uncooked cutlets in the marinade.  If desired, double the amount of the marinade/dressing. Discard the marinade after basting the chicken once on the grill. Use the reserved dressing for slathering on the toasted buns!

Nutrition

Calories: 846kcal | Carbohydrates: 63g | Protein: 17g | Fat: 36g | Saturated Fat: 6g | Cholesterol: 77mg | Sodium: 767mg | Potassium: 319mg | Fiber: 2g | Sugar: 41g | Vitamin A: 162IU | Vitamin C: 1mg | Calcium: 103mg | Iron: 3mg

POST UPDATE: This recipe was originally published in May 2014, but was updated with improved tweaks with new tips, and photography, and a fabulous new video in July 2025!

Homemade Italian Dressing

August 7, 2019 by Kris Longwell 6 Comments

A Mason jar filled with homemade Italian dressing with a small pile of grated parmesan cheese, dried herbs, and fresh parsley around the jar.

Homemade Italian Dressing is fresh, zesty, and so easy to make, you’ll never want to buy the bottled version again. With a simple blend of olive oil, vinegar, herbs, and spices, this classic dressing is perfect for tossing with an amazing Italian chopped salad, drizzling over grilled veggies, or a classic pasta salad. It’s bright, flavorful, and ready in minutes!

A Mason jar filled with homemade Italian dressing with a small pile of grated parmesan cheese, dried herbs, and fresh parsley around the jar.
[feast_advanced_jump_to]

🧄 The Ingredients

Fresh parsley, garlic, lemon juice, and Parmesan blend with honey, herbs, and olive oil to create a zesty, tangy-sweet Italian dressing with just the right kick. Find ingredient notes (including substitutions and variations) below.

An arrangement of ingredients on a grey wooden background for homemade Italian dressing including olive oil, garlic, parsley, honey, Parmesan cheese, honey, vinegar, red pepper flakes, and seasonings.

👉 Substitutions and Variations

Substitutions

  • Fresh parsley: Swap with fresh basil, cilantro, or even dried parsley in a pinch.
  • Fresh garlic: Use garlic powder for a milder flavor.
  • Lemon juice: Replace with lime juice or red wine vinegar.
  • Honey: Try maple syrup, agave, or sugar for sweetness.
  • White wine vinegar: Sub with apple cider vinegar, red wine vinegar, or champagne vinegar.
  • Parmesan cheese: Pecorino Romano or Asiago work well too.

Variations

  • Spicy kick: Add extra red pepper flakes or a dash of hot sauce.
  • Creamy version: Whisk in a spoonful of mayonnaise or Greek yogurt.
  • Herby twist: Mix in fresh dill, thyme, or chives for a different flavor profile.
  • Vegan option: Omit Parmesan or use a plant-based alternative.

🇮🇹 Tips & Tricks for the Best Homemade Italian Dressing

  • Emulsify well: Whisk or shake the dressing vigorously in a jar to help the oil and vinegar blend smoothly.
  • Let it rest: Allow the dressing to sit for at least 10–15 minutes before serving so the flavors can meld together.
  • Store properly: Keep in a sealed jar in the refrigerator for up to 5–7 days; shake well before each use.
  • Adjust to taste: Add more honey for sweetness, extra lemon juice for brightness, or red pepper flakes for heat.
  • Grate fresh Parmesan: Freshly grated cheese melts into the dressing better than pre-shredded.

Expert Tip

For the brightest flavor, use freshly squeezed lemon juice and freshly grated Parmesan—these fresh ingredients make the dressing taste restaurant-quality and far more vibrant than bottled versions.

😋 How to Make Homemade Italian Dressing

A person dumping grated Parmesan cheese from a small white bowl into a jar filled with white wine vinegar, Italian parsley, lemon juice, and garlic.
  1. Step 1: Add the parsley, garlic, lemon juice, honey, white wine vinegar, and Parmesan cheese into a glass jar (with a lid).
A person dumping dried herbs and onion powder from a small white bowl into a glass jar filled with the ingredients for homemade Italian dressing without the oil added yet.
  1. Step 2: Next, add the dried herbs and onion powder.
A person pouring extra-virgin olive oil from a small tube into a glass jar that is filled with the ingredients for homemade Italian dressing.
  1. Step 3: Add the extra virgin olive oil.
A person holding a jar of homemade Italian dressing with a lid screwed on and has just been vigorously shaken.
  1. Step 4: Affix the lid tightly and shake vigorously to emulsify.
A person holding a glass jar with lid that is filled with homemade Italian dressing in one hand and is getting ready to open the door of the refrigerator with his other hand.
  1. Step 5: Chill, preferably for at least 1 hour.
A person pouring homemade Italian dressing over the ingredients of a classic pasta salad in a bowl.
  1. Step 6: Serve with pasta salads and tossed salads. Or with grilled veggies.

🍽️ How to Serve

  • Toss with fresh green salads for a light, zesty flavor.
  • Drizzle over roasted or grilled vegetables.
  • Use as a marinade for chicken, shrimp, or pork.
  • Spoon over grain bowls or pasta salads for extra brightness.
  • Serve as a dip with crusty bread or fresh veggies.

🙋🏽‍♂️ Frequently Asked Questions

Can I make Homemade Italian Dressing ahead of time?

Yes, it keeps well in the refrigerator for up to 5–7 days in a sealed jar. Just give it a good shake before serving.

Is Homemade Italian Dressing gluten-free?

Yes, all the ingredients are naturally gluten-free. Just double-check labels on Parmesan and spices to be sure.

Can I make Homemade Italian Dressing without Parmesan cheese?

Absolutely—you can leave it out for a dairy-free version, or substitute with a plant-based Parmesan alternative.

How do I adjust the flavor of Homemade Italian Dressing?

Add extra honey for sweetness, more lemon juice or vinegar for tang, or an extra pinch of red pepper flakes for heat.

A person holding a jar filled with homemade Italian dressing and tilting it sideways so the contents of the jar are visible.

🥗 More Homemade Salad Dressing Recipes

  • A hand pouring homemade ranch dressing onto a green salad in a brown wooden bowl.
    Homemade Ranch Dressing
  • A person transferring homemade blue cheese dressing from a spoon onto a wedge salad that includes iceberg lettuce, chopped tomatoes, crumbled bacon, and chopped onion.
    Homemade Blue Cheese Dressing
  • A Mason jar filled with homemade balsamic vinaigrette next to a wooden salad bowl filled with salad.
    Balsamic Vinaigrette
  • A spoon drizzling avocado lime over the top of a chopped salad in a white bowl topped with grilled corn, cherry tomatoes, and pinto beans.
    Avocado Lime Dressing

Ready to make the best homemade dressing in town? Go for it!

And when you do, be sure to take a picture of it, post it on Instagram, and tag @HowToFeedaLoon and #HowTofeedaLoon!

A mason jar filled with homemade Italian dressing.
Print Recipe
5 from 1 vote

Homemade Italian Dressing

Once you make this Homemade Italian Dressing you will never want to buy the bottle variety again. And you seriously won't believe how simple it is to prepare. And what's so great is that almost all of the ingredients you probably already have in your pantry! So fresh and so delicious. One batch keeps for up 1 week in the fridge. Just give it a good shake before using.
Prep Time10 minutes mins
Resting time1 hour hr
Total Time1 hour hr 10 minutes mins
Course: Salad Dressing
Cuisine: Italian / American
Servings: 10 people
Calories: 141kcal
Author: Kris Longwell

Equipment

  • Jar with tight fitting lid, or blender

Ingredients

  • 1 tablespoon fresh parsley finely chopped
  • 2 cloves garlic minced
  • Juice from 1 lemon
  • 1 tablespoon honey
  • ⅓ cup white wine vinegar
  • 1 teaspoon dried oregano
  • 1 teaspoon dried basil
  • 1 teaspoon onion powder
  • 2 tablespoon Parmesan cheese grated
  • ¼ teaspoon red pepper flakes
  • ½ teaspoon Kosher salt
  • ¼ teaspoon freshly ground black pepper
  • ⅔ cup extra-virgin olive oil

Instructions

  • Add all the ingredients into a large jar with a tight fitting lid.
    1 tablespoon fresh parsley, 2 cloves garlic, Juice from 1 lemon, 1 tablespoon honey, ⅓ cup white wine vinegar, 1 teaspoon dried oregano, 1 teaspoon dried basil, 1 teaspoon onion powder, 2 tablespoon Parmesan cheese, ¼ teaspoon red pepper flakes, ½ teaspoon Kosher salt, ¼ teaspoon freshly ground black pepper, ⅔ cup extra-virgin olive oil
  • Fasten the lid into place and shake the jar vigorously for 1 to 2 minutes in order to emulsify (or blend) the oil with the vinegar.
  • Chill for at least one hour. Shake the jar again when ready to serve.

Video

Notes

NOTE: Watch the video near the top of the recipe for visual guidance.
You can also emulsify the dressing by using a blender or food processor.  Alternatively, slowly pour the EVOO into the other ingredients and whisk vigorously until fully blended.
A top-notch extra-virgin olive oil is recommended for the best taste.
The vigorous shaking may cause the parsley to give the dressing a slightly green hue.  This is no problem and illustrates how fresh the dressing is.
We prefer dried oregano and basil over fresh for this recipe. We’ve tested both versions, and feel the dried delivers the best flavor. 
This dressing can be used for a salad dressing, marinade, and dipping sauce. 

Nutrition

Calories: 141kcal | Carbohydrates: 2g | Protein: 1g | Fat: 15g | Saturated Fat: 2g | Cholesterol: 1mg | Sodium: 135mg | Potassium: 4mg | Fiber: 1g | Sugar: 2g | Vitamin A: 87IU | Vitamin C: 1mg | Calcium: 16mg | Iron: 1mg

Pork Dumplings with Peanut Sauce

August 4, 2019 by Kris Longwell 20 Comments

A white bowl of steamed pork dumplings with a spicy peanut sauce over the top.

Pork Dumplings with Peanut Sauce has been a favorite dish of ours since we met in NYC back in the late 80s.

The filling is savory and classic, and the sauce is velvety and luscious, with a touch of heat.

One word of warning: These dumplings are so delicious, you will find it hard to have just one, or two…or 10.

A white bowl of steamed pork dumplings with a spicy peanut sauce over the top.

PORK DUMPLINGS WITH SPICY PEANUT SAUCE ARE EASY TO MAKE AT HOME

We have been making pork dumplings at home for many, many years, and this recipe has evolved into what we think is the perfect dumpling.

These are fun to make together, and really are not terribly time-consuming.

Watch us show you how to make Pork Dumplings with Peanut Sauce!

INGREDIENTS NEEDED FOR PORK DUMPLINGS

The filling for the pork dumplings has that classic Chinese flavor profile. You will need:

  • Ground pork
  • Fresh garlic and ginger
  • Soy sauce
  • Sesame oil
  • Egg
  • Scallions

TIP: Dumpling wrappers are found in Asian markets and online. If you can’t find them, you can easily substitute wonton wrappers, which are found in the produce section of most supermarkets, near the tofu products.

Ground pork, sesame oil, fresh garlic and ginger, an soy sauce on a grey table.

HOW TO WRAP THE DUMPLINGS

Wrapping the dumplings is actually easier than you might think.

You’ll definitely want to start by wetting the edges of the wrapper with water. Only go with a teaspoon of filling; any more and it may seep out when cooking.

Use your fingers (or thumbs) to create little pleats along the edges of the wrapper once folded over.

A brush applying water along the edges of a dumpling wrapper for pork dumplings with spicy peanut sauce.
Two hands folding over the sides of a pork dumpling wrapper.
Two thumbs creating a pleat in a pork dumpling wrapper.
A hand holding a pork dumpling with pleats along the edges.

HOW TO COOK PORK DUMPLINGS

There are various ways to cook the dumplings for our Pork Dumplings with Spicy Peanut Sauce. You can pan-fry them in a little oil, boil them, or steam them.

We love using our bamboo steamer for cooking them. Be sure not to overcook them, or they will become rubbery.

We find that 20 minutes cooks the filling perfectly and keeps the wrapper soft and melt-in-your-mouth good.

Pork dumplings in a double-stack bamboo steamer.

WHAT TYPE OF PEANUT BUTTER IS BEST FOR THE SAUCE?

You will definitely want to go with a creamy peanut butter for the sauce.  For the perfect sauce, avoid the low-fat variety.

You want a velvety texture that is not too thick, yet not overly runny. You may need to add more water to thin the sauce.  Asian chili oil can be found in many well-stocked supermarkets, Asian markets, and online.

TIP: You can increase or decrease the amount of heat (spiciness) by how much chili sauce you add. Red pepper flakes also increase the heat. Our recipe has just enough spice to make you tingle, but not scream for ice.

Spicy peanut sauce being poured onto steamed pork dumplings.

Pork Dumplings have no doubt made their mark in the world of culinary history.

And we are proud to say we have tested this recipe for many years, a can confidently say these will rival your favorite Chinese restaurant any day of the year.

They are really that yummy. And if you like the looks of these dumplings, you’ll probably also love our Chinese Noodles in a Peanut Sauce. So good!

A pair of chop sticks holding up pork dumplings in a spicy peanut sauce.

OTHER CHINESE FAVORITES

These Pork Dumplings with Spicy Peanut Sauce are absolutely one of our favorite dishes. But folks, you should check out these recipes, too!

  • Sweet and Sour Pork
  • Steamed Vegetable Dumplings
  • General Tso’s Chicken
  • Sesame Chicken
  • Beef and Broccoli Stir-Fry
  • Homemade Egg Rolls

But in the meantime, how about some Pork Dumplings? Yum!

A white bowl of pork dumplings with spicy peanut sauce.

Just look at these dumplings.  Aren’t you getting excited to make them?

The filling is cooked perfectly and has the classic Chinese taste and texture.

And the sauce is to die for. And they are honestly so much fun to make. At home!

A pork dumpling split open with spicy peanut sauce drizzled on top.

Ready to make the most amazing dumplings you’ll ever have? Go for it!!

And be sure to take a picture and post on Instagram and tag @howtofeedaloon and #howtofeedaloon!

A white bowl of pork dumplings with spicy peanut sauce.
Print Recipe
4.88 from 8 votes

Pork Dumplings with Spicy Peanut Sauce

Pork Dumplings with Peanut Sauce are absolutely amazing and not hard to make! Amazing!
Prep Time30 minutes mins
Cook Time30 minutes mins
Total Time1 hour hr
Course: Appetizer
Cuisine: Asian/ Chinese
Servings: 8 people
Calories: 178kcal
Author: Kris Longwell

Equipment

  • Steamer (if steaming)

Ingredients

For the Dumplings

  • ½ lb ground pork
  • 2 cloves garlic minced
  • 2 tablespoon fresh ginger diced
  • 2 tablespoon soy sauce
  • 2 teaspoon sesame oil
  • 1 large egg
  • 2 green onions green and white parts, chopped
  • 2 teaspoon corn starch
  • Salt and pepper a pinch of each

For the Dumplings

  • 25 dumpling dough skins
  • 1 bowl of water
  • 4 large banana leaves, or parchment paper for steaming

For the Sauce

  • 1 tablespoon hot chili oil or more, to taste
  • 1 clove garlic minced
  • ⅓ cup creamy peanut butter
  • ½ cup water plus more, if neccesary to thin sauce
  • 1 tablespoon brown sugar
  • 3 tablespoon soy sauce
  • 1 tablespoon rice wine vinegar

For Garnish

  • ¼ cup scallions chopped, for garnish
  • Red pepper flakes optional, for topping

Instructions

Prepare the Filling

  • Combine the pork, garlic, ginger, soy, sesame oil, egg, green onions, cornstarch, salt, and pepper together in a medium-sized bowl. Mix well and set aside.
    ½ lb ground pork, 2 cloves garlic, 2 tablespoon fresh ginger, 2 tablespoon soy sauce, 2 teaspoon sesame oil, 1 large egg, 2 green onions, 2 teaspoon corn starch, Salt and pepper

Assemble the Dumplings

  • On a work surface, lay out 10 wrappers at a time.
    25 dumpling dough skins
  • With a spoon, scoop 1 teaspoon of the filling into the center of each square.
  • Brush the outer edges of the wrappers with water and then close them over in a triangle, or a half-moon shape.
    1 bowl of water
  • Press the dough around the filling to avoid air bubbles. If desired, use your fingers and thumbs to create small pleats along the edges of the dumplings. (See images in post for reference)
  • Repeat, until filling is all used.
  • Heat about 2 inches of water in your wok.
  • If using, tear the banana leaves so they fit snugly on each level of your steamer. (optional)
    4 large banana leaves, or parchment paper
  • Once the water is simmering, place the dumplings in your steamer, cover the steamer, and then place it in the wok.
  • Steam for 20 minutes.

Make the Peanut Sauce

  • While the dumplings are steaming, make the sauce: In a medium-size saucepan, heat the chili oil over medium-high heat. Add the garlic and cook until softened, about 2 minutes.
    1 tablespoon hot chili oil, 1 clove garlic
  • Add in the remaining sauce ingredients and stir until combined. Simmer gently for about 4 minutes, until slightly thickened. Add more water, a tablespoon at a time, if necessary. The sauce should be velvety, but not too thick.
    ⅓ cup creamy peanut butter, ½ cup water, 1 tablespoon brown sugar, 3 tablespoon soy sauce, 1 tablespoon rice wine vinegar

Assemble the Dish

  • Add the steamed dumplings to your serving bowl.
  • Ladle the peanut sauce over the top.
  • Garnish with chopped scallions and red pepper flakes a drizzle of chile oil, if desired.
    ¼ cup scallions, Red pepper flakes

Video

Notes

NOTE: Watch the video in the recipe card for visual guidance.
Do not cook the pork before steaming; the meat mixture cooks in the dumpling during the steaming (or frying or boiling) process.
Dumpling wrappers and banana leaves can be found at Asian markets and online.  Wonton wrappers can be substituted for the dumpling wrappers, and banana leaves can be replaced with parchment paper.
If you do not have a bamboo steamer, you can steam them in a large pot of water or simply boil them.  You can also pan-fry the dumplings for about 15 to 18 minutes in a large skillet over medium-high heat with a little oil.

Nutrition

Calories: 178kcal | Carbohydrates: 6g | Protein: 10g | Fat: 13g | Saturated Fat: 4g | Cholesterol: 47mg | Sodium: 706mg | Potassium: 209mg | Fiber: 1g | Sugar: 3g | Vitamin A: 99IU | Vitamin C: 2mg | Calcium: 20mg | Iron: 1mg

Banana Blueberry Muffins with Honey Nut Cheerios®

August 1, 2019 by Kris Longwell Leave a Comment

Banana Blueberry Muffins with Honey Nut Cheerios on a white platter.

Banana Blueberry Muffins with Honey Nut Cheerios® have become a staple in our house. After one try, we think they might just become the same in your house!

It is certainly no secret that Wesley (The Loon) and I love to create and devour delicious, yet sometimes slightly decadent, dishes from all types of cuisines.  Okay…sometimes even more than slightly decadent.

We live by the mantra that moderation, combined with thoughtful meal planning, is the key to keeping a healthy culinary lifestyle, while still being able to enjoy yummy dishes all-year long.

That’s why we could not be more thrilled to be teaming up with Honey Nut Cheerios to present one of the most heart healthy AND delicious muffins we’ve ever encountered.

Banana Blueberry Muffins with Honey Nut Cheerios on a white platter.

A MISSION TO INSPIRE HAPPY HEARTS

One of the things we love most about Honey Nut Cheerios is their commitment to inspiring happy hearts!

With Honey Nut Cheerios, you have the best of both worlds. It is the perfect combination of real delicious honey and whole grain oats that makes heart health enjoyable.

We knew in our happiest heart of hearts that we could take the great taste and health benefits of Honey Nut Cheerios, and make a muffin that utilizes other heart healthy ingredients, but also is absolutely delicious to eat at breakfast, or whenever snack time comes calling.

The ingredients for banana blueberry muffins are on display.

Along with being heart healthy conscious, Wesley and I have really gotten into heart healthy activities…like swimming with our dogs, namely Flo (Short for Florence). Her brother, Eb (short for Ebenezer) isn’t such a fan of the pool, but he enjoys playing life guard, keeping a close eye on us in the pool and ready to jump in at any given moment to save the day.

Flo is the blonde.  Eb is brown.  I’m trying to swim.  And Wesley, as usual, is snapping photographs, but is ready to jump in and join the active fun.

We have really enjoyed participating in Whole Heart Challenge MyFitnessPal. You should check it out, too, and join in the heart healthy fun! You’ll even have the chance to win prizes and participate in fun challenges that will help your entire lifestyle.

Keep an active lifestyle, like swimming with your pets.

Okay, back to the best (and heart healthiest) muffins in town!

Our Banana Blueberry Muffin not only includes our favorite cereal in the world, Honey Nut Cheerios, which has whole grain oats as its #1 ingredient, but we add in other healthy and tasty items such as blueberries, bananas, unsweetened almond milk, whole wheat flour and honey!

These muffins are not only loaded with flavor, but also jam-packed with hearty healthy ingredients that can also help to lower cholesterol.

Mix the banana blueberry muffin batter in a large bowl with a wooden spoon.

BANANA BLUEBERRY MUFFINS ARE PERFECT FOR KIDS AND ADULTS

Breakfast on the go is often hard to avoid, especially when kids are running to school and mom and dad are preparing for another hectic day.

These Banana Blueberry Muffins with Honey Nut Cheerios are the perfect healthy breakfast and snack-on-the go. We even make a double batch, and then freeze half of them for future yumminess!

And our favorite part of this recipe is that Honey Nut Cheerios is used as a binder within the muffin as well as a crunch topping for great taste and texture.

Sprinkle roughly chopped Honey Nut Cheerios on top of the banana blueberry muffins.

According to the Centers for Disease Control & Prevention (CDC), nearly 1 in 3 American adults have high cholesterol. People with high cholesterol have about twice the risk of heart disease as people with lower levels.

To help keep hearts healthy, medical experts recommend practicing healthy living habits, like maintaining a healthy weight, getting enough physical activity and eating a heart-healthy diet which can include foods made with whole grain oats, like Honey Nut Cheerios. (2015; cdc.gov).

Just look at these Banana Blueberry Muffins with Honey Nut Cheerios fresh out of the oven. Amazing!

Bake the banana blueberry muffins in a metal muffin tin.

These Blueberry Banana Muffins are as festive as they are delicious.

And you will not believe the smell in your kitchen as they bake.

With Honey Nut Cheerios as a main ingredient, how can you find a tastier muffin?

Place the baked banana blueberry muffins on a platter next to a box of Honey Nut Cheerios.

The muffins are so moist and flavorful by themselves.

But just for fun, we love adding another little drizzle of natural honey to the freshly baked muffins.

We are so thrilled to have partnered with Honey Nut Cheerios to bring you a heart healthy muffin! Stay active. Stay heart healthy. And stay happy!

Drizzle fresh honey on banana blueberry muffins.

Place the baked banana blueberry muffins on a platter next to a box of Honey Nut Cheerios.
Print Recipe
No ratings yet

Banana Blueberry Muffins with Honey Nut Cheerios®

These Banana Blueberry Muffins are loaded with good hearty healthy ingredients. So delicious and so good for you, too! Perfect for breakfast and snacks on the go that you can feel good about!
Prep Time15 minutes mins
Cook Time25 minutes mins
Total Time40 minutes mins
Course: Breakfast
Cuisine: American
Servings: 12
Calories: 123kcal
Author: Kris Longwell

Equipment

  • Medium muffin tin

Ingredients

DRY INGREDIENTS

  • 2 cups Honey Nut Cheerios Divided, 1 cup crushed, 1 cup roughly chopped
  • 1 & ½ cups whole wheat flour
  • 1 teaspoon ground cinnamon
  • 1 teaspoon baking soda
  • ¼ teaspoon salt
  • ¼ cup fresh blueberries

WET INGREDIENTS

  • Cooking spray for spraying the liners or muffin tin
  • 1 whole egg
  • 1 egg white
  • ½ cup honey
  • 2 bananas mashed
  • ⅓ cup nonfat plain yogurt
  • ½ cup almond milk, unsweetened
  • 1 teaspoon vanilla extract

Instructions

  • Pre-heat oven to 350°F.
  • Line muffin tins with good quality muffin liners and then spray with cooking spray. (Can omit the muffin liners, if desired, and simply spray the tin with the cooking spray).
  • In a medim-sized bowl, mix together all the dry ingredients (only 1 cup of the ground Honey Nut Cheerios), taking care to not burst any of the blueberries. Set aside.
  • In a large mixing bowl, mix together the wet ingredients. Use the back of a fork to mash the bananas (a few remaining banana chunks are fine).
  • Slowly add the dry ingredients into the wet mixutre until combined.
  • Use an ice cream scoop, or a large spoon, to carefully fill the muffin liners with the batter. You should have enough to fill 12 liners to the very top.
  • Sprinkle the remainign 1 cup of roughly chopped Honey Nut Cheerios over the tops of each muffin.
  • Bake for 25 minutes. Remove from the oven. Let cool slightly on a rack, and then remove from muffins from the tin to cool completely. The liners will pull away from the muffins easier once they have completely cooled.

Nutrition

Calories: 123kcal | Carbohydrates: 28g | Protein: 3g | Fat: 1g | Saturated Fat: 1g | Cholesterol: 14mg | Sodium: 169mg | Potassium: 159mg | Fiber: 2g | Sugar: 15g | Vitamin A: 32IU | Vitamin C: 2mg | Calcium: 25mg | Iron: 1mg

Yellow Squash Casserole

July 30, 2019 by Kris Longwell 29 Comments

A large black cast iron skillet of yellow squash casserole with a serving spoon inserted in the dish.

Yellow Squash Casserole is such an amazing summertime treat.  The dish is cheesy and creamy and bursting with yellow squash flavor.

And the dish is so easy to prepare and is on the table from start to finish in less than 45 minutes!

This is one dish that even finicky vegetable eaters will devour.

A large black cast iron skillet of yellow squash casserole with a serving spoon inserted in the dish.

HOW TO MAKE YELLOW SQUASH CASSEROLE AT HOME

Yellow squash casserole is very versatile and can be served in a variety of serving vessels.

The dish is best when served hot, but it’s so good, it’s even delicious at room temperature.

Watch us show you how fast and easy it is to make this amazing casserole!


HOW TO SLICE THE SQUASH

Slicing the squash in a uniform fashion is always best. We like to slice the squash to about ¼-inch thickness. But you could go thinner, if you desire.

Ensuring the sliced vegetables are identical in thickness will allow them to all cook evenly. You don’t want some of the squash slices to be overly soft, and some to be tough.

TIP: A sharp knife and a steady hand and eye works just fine, but a mandolin is even better.

A hand slicing a yellow squash on a mandolin over a cutting board.

Cook the squash and onion in a large skillet with a little oil until the vegetables just begin to soften, about 10 minutes.

Be sure not to cook the squash too long or it will be come “mushy” in the final dish.

Yellow squash and chopped onion cooking in a large black cast iron skillet.

Grab a large bowl, and mix together all the remaining ingredients, except the Ritz crackers.  You’ll need:

  • 8 oz. sour cream
  • ¼ cup mayonnaise (want to make it yourself? Click the link! It’s easier than you might think)
  • Salt (we like to use Kosher for a little more texture)
  • 1 & ½ cups good quality shredded sharp cheddar cheese
  • ½ cup grated Parmesan
  • 1 large egg

After these ingredients are mixed together, gently fold in the cooked squash and onion mixture.

A large glass bowl with a cooked yellow squash, cheese and cream mixture for yellow squash casserole.

ADD A BUTTERY AND CRUNCHY TOPPING TO SUMMER SQUASH CASSEROLE

If you’re going to have a luscious, cheesy and somewhat gooey filling, you are going to want to topping with a bit of a crunch (and a little extra butter).

The traditional Southern U.S. version of this recipe always uses crushed Ritz crackers as a topping. Who are we to change something that isn’t broken? We do enjoy stirring in some melted unsalted butter, just to increase the flavor as well as bind the crackers together.

We prefer a topping with texture, which is why we don’t completely pulverize the crackers, we like to leave some of the crackers roughly chopped.

TIP: Place the crackers in a large freezer bag and then crush them with the bottom of a measuring cup, or bottle, or even you hands. Don’t over crush them!

Fingers sprinkling crushed Ritz crackers over the casserole in a large black cast iron skillet.

We love serving this casserole in our large 12-inch cast iron skillet, but any 2-quart casserole dish will work. A 9″ x 9″ dish is ideal.

TIP: The casserole can be assembled up to a day in advance, refrigerated, and then baked for an extra 10 minutes (35 minutes total), before serving.

OTHER SUMMERTIME FAVORITE SIDE DISHES

  • Zucchini Fritters
  • Southern Baked Beans
  • Cucumber and Dill Salad
  • Cajun Pasta Salad
  • Squash and Zucchini Summer Salad

If you’re looking for a lighter, healthier version of a baked squash casserole, be sure to try our Yellow Squash and Tomato Casserole.

This Best-Ever Yellow Squash Casserole is always a crowd-pleasing dish. We find we seldom have left-overs, and be prepared for lots of request for the recipe!

A spoon lifting up a large helping of cooked yellow squash casserole out of the skillet.

CAN ZUCCHINI BE USED IN THIS YELLOW SQUASH RECIPE?

That’s easy to answer…YES! The yellow squash has a bit of sweeter taste, which balances beautifully against the sour cream and cheese, but zucchini is good, also.

You can certainly use a combination zucchini and yellow squash, too.

Either way, you will love the taste and texture of this delicious summertime casserole.

An overhead view of a cooked yellow squash casserole with two plates of food nearby.

Ready to make one of the best summertime recipes of all time? AWESOME!

Be sure to take a photo of the finished dish and tag #howtofeedalon and @howtofeedaloon on Instagram!

An overhead view of yellow squash casserole in a large black cast iron skillet.
Print Recipe
4.91 from 10 votes

Best-Ever Yellow Squash Casserole

Yellow Squash Casserol is a Southern U.S. staple side dish and is cheesy, creamy and loaded with summer squash taste. And what's even better, the dish is on the table from start to finish in less than 45 minutes!
Prep Time15 minutes mins
Cook Time20 minutes mins
Total Time35 minutes mins
Course: Side Dish
Cuisine: American, Southern, U.S.
Servings: 12 people
Calories: 328kcal
Author: Kris Longwell

Equipment

  • Mandolin, or sharp knife

Ingredients

  • 1 tablespoon vegetable oil
  • 2 & ½ lbs yellow squashed sliced
  • 1 cup onion chopped
  • 8 oz. sour cream
  • ¼ cup mayonnaise
  • 1 teaspoon Kosher salt
  • ½ teaspoon freshly ground black pepper
  • 1 1&2 cups cheddar cheese shredded
  • ½ cup Parmesan cheese grated
  • 1 large egg
  • 1 sleeve Ritz crackers crushed, but not completely pulverised
  • 2 tablespoon unsalted butter melted

Instructions

  • Pre-heat oven to 350°F. Lightly spray a 12-inch cast iron skillet or a 9"x9" casserole dish with cooking spray.
  • In a large skillet, heat the oil over medium-high heat. Add the sliced squash and onion and cook, stirring occassionally, until the vegetables have softened, about 10 minutes. Remove from heat and transfer to a colandar in the sink to drain.
  • In a large mixing bowl, stir together the sour cream, mayonnaise, salt, pepper, cheddar cheese, Parmesan cheese, and egg. Carfeully fold in the cooked squash mixture. Transfer to the prepared baking vessel.
  • In a separate medium bowl, use a fork to stir together the crushed crackers with the melted butter. Sprinkle the mixture all over the top of the casserole.
  • Bake for 25 minutes, uncovered, until bubbly and topping is starting to brown slightly. Remove and serve at once.

Video

Notes

Be sure to slice the squash in uniform cuts.  ¼-inch slices are a good thickness.  A mandolin ensures even slicing, but a sharp knife and a steady hand will work just fine.
Don't over sauté the squash and onion.  Cook until just soft.  The vegetables will cook more once the casserole is in the oven.
The casserole can be assembled up to a day in advance and stored in the refrigerator.  Allow to come to room temperature before baking (about 1 hour on the counter), or add an additional 10 minutes to the bake time if no time for bringing to room temperature (total bake time will be 35 minutes).
This casserole is best served hot!

Nutrition

Calories: 328kcal | Carbohydrates: 4g | Protein: 33g | Fat: 52g | Saturated Fat: 32g | Cholesterol: 91mg | Sodium: 846mg | Potassium: 176mg | Fiber: 1g | Sugar: 2g | Vitamin A: 1462IU | Vitamin C: 1mg | Calcium: 958mg | Iron: 1mg

Instant Pot Cheesy Sausage and Ham Frittata

July 23, 2019 by Kris Longwell 2 Comments

A slice of Instant Pot Cheesy Frittata on a white plate

Instant Pot Cheesy Sausage and Ham Frittata is one of our favorites for many reasons!

First, and foremost…it’s delicious!  That’s always priority #1 in the H2FaL test kitchen.

But, thanks to simplicity of a frittata, as well as the added ease of the Instant Pot, this recipe comes together very quickly and produces the most luxurious egg and cheese texture.   Amazing!

Instant Pot Cheesy Frittata

INSTANT POT CHEESY SAUSAGE AND HAM FRITTATA IS SIMPLE TO MAKE

We love everything about this incredible frittata.

And it is so simple in the Instant Pot!

Watch us show you how easy it is to make this amazing Instant Pot Cheesy Sausage and Ham Frittata!

A frittata is basically a crustless-quiche, which makes it super easy to make. This recipe uses some of our favorite breakfast or brunch ingredients and comes together for the perfect morning (or any time of the day!) dish. You can add or subtract any of the add-in ingredients to meet your own likes!

But, how can you go wrong with eggs, cheese, sausage and ham! And maybe a little green onion for a little more boost of flavor!

Another breakfast favorite is our amazing Ham and Gruyere Cheese Popovers! So good!

Instant Pot Cheesy Sausage and Ham Frittata

AN ALUMINUM ‘SLING’ HELPS TO LOWER THE DISH

I like to make a ‘sling’ from aluminum foil to help me lower and remove the dish from the Instant Pot. All you have to do is measure out a piece of sturdy foil about 24″ long, then fold it over, length-wise, halfway. Then fold the other half over.

And now you have a nice sturdy ‘sling’ to help you remove the dish from the Instant Pot, which is good, because the dish is usually piping hot!

Instant Pot Cheesy Sausage and Ham Frittata

A 1.5 quart soufflé dish works perfectly for this recipe. If you don’t have one already, you can easily order one here and have it delivered super fast!

If you’re in the mood for something really delicious for breakfast or brunch, but don’t want to spend a ton of time in the kitchen. This recipe is the one you’re looking for.

It’s so satisfying and just so delicious and literally comes together in about 40 minutes, or less. This is Instant Pot Breakfast Perfect!

Instant Pot cheesy sausage and ham frittata recipe

We love breakfast sausage and the addition of cooked ham is just perfect. You can of course cook up several strips of bacon and add at that in, too. Throw in some cooked broccoli or spinach, if you desire.

The sky is the limit here! Go for it!

Instant Pot cheesy sausage and ham frittata recipe

This Cheesy Sausage and Ham Frittata recipe is truly one of the Loon’s favorites. And I must admit, it’s one of my favorites, too. It’s classic breakfast/brunch fare.

Add some fresh fruit on the side and a nice cold glass of orange juice, and you will be so happy. All in about 40 minutes!!

Instant Pot cheesy sausage and ham frittata recipe

Now, go ahead and make this amazing Instant Pot Cheesy Sausage and Ham Frittata recipe!

A slice of Instant Pot Cheesy Sausage and Ham Frittata on a white plate
Print Recipe
5 from 2 votes

Instant Pot Cheesy Sausage and Ham Frittata

This Instant Pot Cheesy Sausage and Ham Frittata is so incredibly delicious, and thanks to the Instant Pot, so easy! It all comes together in about 40 to 45 minutes. Add or subtract of your favorite ingredients to your own tastes. But, we love this combo so much!
Prep Time15 minutes mins
Cook Time25 minutes mins
Total Time40 minutes mins
Course: Breakfast
Cuisine: American / French
Servings: 4 people
Calories: 296kcal
Author: Kris Longwell

Equipment

  • Instant Pot
  • 1.5 quart circular baking dish

Ingredients

  • 1 cup water
  • Cooking spray for greasing soufflé dish
  • 6 medium eggs lightly beaten
  • 2 tablespoon sour cream
  • ⅓ cup whole milk
  • ½ cup cooked breakfast sausage
  • ½ cup cooked ham cubed
  • ½ cup sharp cheddar cheese grated
  • ¼ cup green onions thinly sliced (optional)
  • 1 teaspoon dried mustard
  • ¼ teaspoon Kosher salt
  • ⅛ teaspoon freshly ground black pepper

Instructions

  • Pout water into the Instant Pot and lower in the steamer rack.
  • Spray a 1.5 qt. soufflé dish with cooking spray.
  • In a medium bowl, whisk the eggs, sour cream and milk together.
  • Add sausage, ham, cheeses, green onions, mustard, salt and pepper and stir until well mixed.
  • Pour the dish into the prepared soufflé dish and cover tightly with foil.
  • Make a foil sling with a 24-inch long piece of aluminum foil by folding one side over, length-wise, and then folding the other side over.
  • Place the dish on the sling and lower into the Instant Pot, folding the ends of the sling over the top of the dish (See image in post for reference).
  • Secure the lid and press MANUAL or PRESSURE COOK on HIGH for 25 minutes.
  • Let naturally release for 5 minutes then QUICK RELEASE the remaining steam.
  • Carefully use the sling to remove the dish from the Instant Pot and then carefully remove the foil.

Video

Nutrition

Calories: 296kcal


Peanut Butter Cup Ice Cream Cake

July 21, 2019 by The Loon 1 Comment

Serve Peanut butter cup ice cream cake on a white platter.

Peanut Butter Cup Ice Cream Cake with Oreo Crust and Caramel Sauce Topping. 

We defy you to find a more exciting string of words than those right there.

Folks, we’re not going to kid you here.  This ice cream cake takes some time to make.  But like most things in life, the goodness with the end result without doubt outweighs the agony of having to wait several days to dig into it.

Serve Peanut butter cup ice cream cake on a white platter.

PEANUT BUTTER CUP ICE CREAM CAKE IS MADE IN STAGES

Once you commit to making the most delicious ice cream cake you’ll ever have in your life, you’ll need to plan a little in advance.

It’s not difficult to make, you just need to allow time for a couple of the ice cream components to chill and then to freeze overnight (or for at least 6 hours, for chilling and then again freezing).

Watch us show you how to prepare this incredible Peanut Butter Cup Ice Cream Cake

PEANUT BUTTER ICE CREAM IS PERFECT FOR THIS CAKE

This peanut butter ice cream is a typical custard-based ice cream.

You’ll start by making an amazing delicious peanut butter custard on the stove.

Once the custard has just thickened enough to coat the back of your spoon, remove from heat and then stir in the cream and vanilla extract.

Pour the cream into the peanut butter custard for the peanut butter ice cream.

Next grab a fine-mesh sieve, or colander, and strain the custard into a large glass bowl.

Use the back of a wooden spoon to help the custard pass through the small holes.

Once you’ve done this, you’ve completed the first stage of this amazing dessert. This will need to chill in the refrigerator for at least 6 hours, or even better, overnight.

Strain the peanut butter custard through a sieve or colander.

AN OREO COOKIE CRUST IS DELICIOUS

Of course, you can make the crust with any cookie you like.

A peanut butter cookie, such as a Nutter Butter, would be delicious. Simply pulverize about 18 to 20 cookies, add some melted butter and vanilla, and the press into the base of a 9-inch springform pan.

But we think a good ole Oreo cookie crust just can’t be beat with this amazing ice cream cake. And you don’t even have to remove the cream filling of the cookies!

Use your hands to press the Oreo cookie crust into the base of the pan.

Now, it’s time for stage 2…Making the ice cream!

Be sure to follow your manufacturer’s instructions for churning ice cream, but all you really have to do is pour the chilled custard into the ice cream chamber, and then churn away!

After about 50 to 60 minutes, you’ll have a soft, but ready-to-eat ice cream. However, you’re not done yet. You’ll need pour this into your prepared pan. And then you guessed it, into the freezer it goes for at least 6 to 8 hours, or even better, overnight!

Pour the churned ice cream into a 9-inch springform pan with an Oreo crust.

PEANUT BUTTER ICE CREAM CAKE IS GREAT FOR BIRTHDAY PARTIES

Want to make that certain birthday person feels extra special when his or her actual birthday comes along? You can never go wrong with an ice cream cake!

Some of our other favorite ice creams flavors are:

  • Strawberry and White Chocolate Ice Cream
  • Sweet Corn and Pistachio Ice Cream
  • Fresh Blueberry Ice Cream
  • Olive Oil Ice Cream with Balsamic Strawberries

But did we mention what our all-time favorite way to eat ice cream is? Just in case you missed it:

Place a slice of peanut butter cup ice cream cake on a small white plate next to caramel sauce.

WARM CARAMEL SAUCE IS THE PERFECT TOPPING

Okay, folks, it’s time to bring this 3-part Ice Cream Cake Opera home.

It’s absolutely fantastic as is. But…once completely chilled, we like to add a little more crushed Oreos on top.

And then…get ready for it…a drizzle of homemade caramel sauce. To. Die. For. This is the ice cream cake of a lifetime.  And this ice cream cake needs to be in your life! Go for it!

Use a spoon to drizzle homemade caramel sauce onto a slice of peanut butter cup ice cream cake.

Peanut butter ice cream cake on a platter.
Print Recipe
5 from 2 votes

Peanut Butter Cup Ice Cream Cake

Peanut Butter Cup Ice Cream Cake. Oreo crust. Homemade caramel sauce. Start this amazing dessert several days in advance of serving, and you will not believe the end result you'll have on your hands. Simply amazing.
Prep Time30 minutes mins
Cook Time30 minutes mins
Chill and Freeze time16 hours hrs
Total Time17 hours hrs
Course: Dessert
Cuisine: Dessert
Servings: 12 people
Calories: 646kcal
Author: Kris Longwell

Equipment

  • Ice Cream Machine

Ingredients

FOR THE CRUST

  • 18 to 20 Oreo cookies No need to remove the centers!
  • 2 tablespoon unsalted butter melted
  • 1 teaspoon vanilla extract

FOR THE ICE CREAM

  • ¾ cup sugar
  • 3 large eggs
  • 1 cup whole milk
  • ½ cup creamy peanut butter
  • 1 & ½ cups heavy cream
  • 2 teaspoon vanilla extract
  • 1 cup chopped miniature chocolate peanut butter cup candies cut in half

FOR THE SAUCE (MAKE AHEAD)

  • Caramel Sauce - melted

Instructions

START THE ICE CREAM

  • Using a stand-mixer or a handheld mixer, beat the eggs with the sugar in a medium bowl until slightly pale and somewhat thickened, about 1 minute.
  • On the stove, in a medium sauce pan, bring the milk to a slight simmer.
  • With the mixer running, carfully beat the warmed milk into the egg/sugar mixture.
  • Pour the mixture back into the pan on the stove and stir continuously with a whisk or a wooden spoon until the custard begins to thicken. About 3 to 4 minutes. Don't let the mixutre boil, or the eggs will scramble. Remove from the heat.
  • Stir in the peanut butter and mix until fully incorporated.
  • Pour the custard through a strainer, or colander, into a large bowl. Stir in the heavy cream and vanilla. Cover with plastic wrap and place the bowl in the refrigerator for 4 to 6 hours, or overnight.

MAKE THE CRUST

  • Place the crushed Oreos, melted butter and vanilla extract in a large bowl, and mix together with a wooden spon.
  • In a 9-inch springform pan, press the Oreo mixture along the bottom, saving about a tablespoon of the mixture for topping the cake with.
  • Place in the freezer.

BACK TO THE ICE CREAM

  • Pour the refrigerated mixture into the bowl of your ice cream machine.
  • Follow the manufacturer's instructions, churning for about 50 to 60 minutes.
  • About 5 minutes before the mixing is complete, add in the chopped peanut butter cup candies.
  • Let mix completely. At this point, the ice cream will be nice and creamy.

ASSEMBLE THE CAKE

  • Take the spring form pan with the crust out of the freezer.
  • Spread the ice cream over the crust. Freeze for at least 6 hours, or, overnight.

TO SERVE

  • Remove the ice cream cake from the freezer for 15 minutes. Sprinkle the reserved Oreo cookies over the top (plus a few more, roughly chopped, if desired).
  • Take a warmed sharp knife, and gently run it along the edges of the pan. Release the pan and remove the side ring.
  • Heat the caramel sauce in a pan. (Or, serve the caramel sauce at room temperature).
  • Slice the cake, drizzle with the caramel sauce. Serve at once!

Video

Nutrition

Calories: 646kcal

Grilled Shrimp Salad with Cilantro-Lime Dressing

July 18, 2019 by Kris Longwell 19 Comments

A large rectangular white platter filled with a grilled shrimp salad with cilantro-lime dressing along with grilled corn, black beans, chopped lettuce, all on torn pieces of romaine lettuce.

Our Grilled Shrimp Salad with Cilantro-Lime Dressing is a vibrant and refreshing dish packed with smoky grilled corn, hearty black beans, and creamy avocado. We love using grilled shrimp in all its delicious forms—whether it’s classic grilled shrimp, spicy grilled buffalo shrimp, or sweet and tangy grilled BBQ shrimp—and this salad, bursting with flavor and perfect for any season.

A large rectangular white platter filled with a grilled shrimp salad with cilantro-lime dressing along with grilled corn, black beans, chopped lettuce, all on torn pieces of romaine lettuce.
[feast_advanced_jump_to]

🍤 The Ingredients

The fresh, vibrant ingredients in this salad come together to create an unforgettable, flavor-packed meal. Find ingredient notes (including substitutions and variations) below. NOTE: Soy sauce is not shown in the image. It is optional, but we think it adds a nice depth of flavor.

An arrangement of ingredients for grilled shrimp salad with cilantro-lime dressing on a grey wooden background including uncooked shrimp, two ears of corn, black beans, avocado, onion, tomato, scallions, lettuce, oil, and spices.

🌿 Substitutions and Variations

  • Protein – Shrimp is the star of this salad, but other proteins will work, too. Use the marinade with chicken breasts (or thighs) for a wonderful grilled chicken salad. For a completely vegetarian salad, use the marinade with tofu and then grill it. For the shrimp, we recommend extra-large shrimp, and it’s up to you if you want to leave the tails on or not.
  • Veggies – The sky is the limit here. The grilled corn adds an incredible depth of flavor. However, you could also use our roasted corn salsa, which is also amazing. Vary up the vegetables! Cucumbers, radishes, and carrots are wonderful additions.
  • Lettuce – We recommend romaine, but green leaf, iceberg, red leaf, or even arugula are all great options.

See the recipe card (with video) below for a full list of ingredients and measurements.

Expert Tip

The marinade/dressing can be made at least 24 hours in advance. Actually, the flavors will develop even more as they chill in the fridge. However, we don’t recommend marinating the shrimp for more than 1 hour. If you let it go too long, the acid from the lime will begin to “cook” the shrimp and start to break it down. 15 to 20 minutes is perfect!

👩🏼‍🍳 How To Make Grilled Shrimp Salad with Cilantro-Lime Dressing

A close-up view of a whisk being used to whisk a cilantro-lime dressing in a small white bowl.
  1. Step 1: Mix the marinade ingredients except for the oil, then whisk in the oil.
Uncooked shrimp piled inside a clear freezer bag also filled with a cilantro-lime marinade.
  1. Step 2: Place the shrimp in a baggie and pour half of the marinade over them. Chill for 1 hour.
A person using a large chef's knife to cut away grilled corn kernels from the cob into a large white platter.
  1. Step 3: Grill the corn and then cut the kernels off when cool enough to handle.
Three rows of marinated shrimp that are being grilled on the grate of a gas grill.
  1. Step 4: Remove the shrimp from the marinade and season them with salt and pepper, then grill until pink.
A person transferring cubed pieces of fresh avocado into a glass bowl of black beans, chopped tomatoes, and diced red onion.
  1. Step 5: Mix the vegetables, beans, and avocado. Add lettuce and remaining dressing. Gently toss.
A person using a spoon to pour a cilantro-lime dressing over a salad of grilled shrimp, corn, black beans, tomatoes, and green leaf lettuce.
  1. Step 6: Place on a platter, top with the shrimp, and drizzle on more of the dressing

Expert Tip

For the dressing, place what you didn’t use for the marinade into a jar with a tight-fitting lid. Vigorously shake the jar. This will emulsify the oil with the other ingredients. Drizzle a few spoonfuls over the salad. You will probably have some of the dressing leftover. It’s great to have on hand for other uses. It will keep in the fridge for 4 to 5 days.

🍽️ How To Serve

  • This salad truly makes for a stunning presentation. We love to mound it onto a large platter and let guests serve themselves.
  • You can also plate the salad individually and serve the dressing on the side.
  • Since it is wonderful served at room temperature, you can make all the components of the salad ahead of time and assemble just before guests arrive!
  • If preparing everything ahead of time, be sure to chill each component separately, and then let them come to room temperature 1 to 2 hours before serving. Don’t cut the avocado until the last minute.

🙋🏽‍♂️ Frequently Asked Questions

What type of shrimp is best for grilling in this grilled shrimp salad?

Large, peeled, and deveined shrimp work best for grilling as they cook quickly and hold up well on the grill. Leave the tails on or remove them; it’s a matter of taste.

Can I make the cilantro-lime dressing ahead of time for grilled shrimp salad?

Yes, the dressing can be prepared a day in advance and stored in the refrigerator to let the flavors meld.

How do I prevent the shrimp from sticking to the grill?

To prevent sticking, make sure the grill is clean and well-oiled before placing the shrimp on it, and avoid moving them too soon while cooking. You can also use a grill skillet for easy cooking.

Is the grilled shrimp salad spicy?

The salad is typically mild, but you can easily add spice by increasing red pepper flakes or a spicy seasoning to the shrimp or dressing.

Can the shrimp be baked or sautéed instead of grilled?

Yes, the shrimp can be baked in the oven or sautéed on the stove for a quick and easy alternative to grilling. Bake at 350°F for about 15 minutes (or until pink). Sauté in olive oil over medium heat for about 10 to 12 minutes (or until pink).

A white salad plate filled with a serving of grilled shrimp salad with cilantro-lime dressing with a stemless glass of rosé wine nearby.

🥗 More Amazing Entrée Salads

  • An overhead view of a grilled chicken salad salad that consists of rows of grilled pesto chicken, asparagus, mushrooms, and salads of cucumbers, tomatoes, and chickpeas.
    Grilled Chicken Salad with Vegetables
  • An oval white platter filled with a large serving of green bean and tomato salad topped with a scallion buttermilk dressing, scallions, and chopped fresh herbs.
    Green Bean and Tomato Salad with Scallion Buttermilk Dressing
  • An overhead view of long oval blue and white platter filled with a colorful Thai beef salad with strips of grilled steak, cherry tomatoes, and herbs in a Thai sauce.
    Thai Beef Salad
  • A shallow white bowl filled with best-ever ham salad surrounded by a plate of green leaf lettuces, slices of bread, plates, and glasses of iced tea.
    Best-Ever Ham Salad

Ready to make the best entrée salad of the summer? Go for it!

And when you do, be sure to take a photo of it, post it on Instagram, and tag @HowToFeedaLoon and hashtag #HowToFeedaLoon!

A white salad plate filled with a serving of grilled shrimp salad with cilantro-lime dressing with a stemless glass of rosé wine nearby.
Print Recipe
4.88 from 8 votes

Grilled Shrimp Salad with Cilantro-Lime Dressing

This salad has been an all-time favorite for many, many years. All components (except cutting the avocado) can be made ahead of time. Simply assemble the salad, placing the cooked shrimp on top, just before serving. Amazingly delicious!
Prep Time15 minutes mins
Cook Time15 minutes mins
Marinating time1 hour hr
Total Time1 hour hr 30 minutes mins
Course: Entree / Seafood, Salad
Cuisine: American Southern, Tex-Mex
Servings: 8 people
Calories: 219kcal
Author: Kris Longwell

Equipment

  • Grill (or can use skillet on stove or in pan in oven)
  • Skewers or grill pan

Ingredients

For the Marinade / Dressing

  • ½ cup fresh lime juice
  • 2 tablespoon soy sauce
  • 1 fresh jalapeño cored with seeds and ribs removed
  • 3 cloves garlic minced
  • Pinch red pepper flakes or more, for added spice
  • 1 tablespoon ground cumin
  • 1 cup fresh cilantro chopped
  • ¾ cup extra-virgin olive oil

For the Salad

  • 1 lb shrimp extra-large, deveined and peeled
  • 2 ears fresh corn shucked and silk removed
  • extra-virgin olive oil for brushing the corn
  • Salt and pepper
  • 1 medium tomato cored and diced
  • 1 15 oz can black beans drained and rinsed
  • ¼ cup red onion chopped
  • ¼ cup green onions green and white parts, chopped
  • 1 jalapeño seeds and ribs removed, finely chopped
  • 1 avocado skin and pit removed, roughly chopped
  • 1 Romaine lettuce roughly chopped

Instructions

  • Make the dressing/marinade in a medium-sized bowl by mixing together the lime juice, soy sauce, jalapeno, garlic, red pepper flakes, cumin, and cilantro. Slowly whisk in the extra-virgin olive oil.
    ½ cup fresh lime juice, 2 tablespoon soy sauce, 1 fresh jalapeño, 3 cloves garlic, Pinch red pepper flakes, 1 tablespoon ground cumin, 1 cup fresh cilantro, ¾ cup extra-virgin olive oil
  • Add the shrimp to a large plastic ziplock bag, or a bowl, and pour enough of the marinade into the bag to fully coat the shrimp. Close the baggie (or cover the bowl with plastic wrap) and place it in the refrigerator for 15 minutes to 1 hour. Save the remaining marinade for the dressing (there should be approximately ½ to ¾ cup left).
    1 lb shrimp
  • Heat your grill to medium heat. Brush the oil over the corn and then sprinkle all over with salt. Add the corn to the grill, over direct heat, and cook until the kernels are starting to brown. About 8 minutes, turning the corn over a time or two while cooking. Remove and set aside to cool.
    2 ears fresh corn, extra-virgin olive oil, Salt and pepper
  • Once the corn is cool enough to handle, set one corn upright on a large platter or a shallow bowl, and then with the other hand, carefully use a large knife to cut the kernels from the cob. Repeat with the other ear of corn. Set aside.
  • Take the shrimp from the marinade and place them on skewers, careful not to overcrowd each skewer with the shrimp (don't squeeze too many shrimp on a skewer: otherwise, they won't cook evenly). Lightly salt and pepper the shrimp before grilling. Alternatively, cook on the grill on a grill pan, or sear in a skillet over medium-high heat on the stove, or in a cast-iron skillet in a 350° oven for about 10 minutes. Discard the marinade.
  • Meanwhile, in a medium bowl, mix together the corn, beans, tomatoes, red and green onions, and pepper. Gently stir in the avocado. Gently toss with about ½ cup of the dressing. Save the rest for serving on the side.
    1 medium tomato, 1 15 oz can black beans, ¼ cup red onion, ¼ cup green onions, 1 jalapeño, 1 avocado
  • Place the chopped romaine on a plate and top with the veggies. Place the shrimp over the top of the salad, drizzle on a little more dressing, and serve at once.
    1 Romaine lettuce

Video

Notes

NOTE: Watch the video near the top of the recipe for visual guidance.
All components (except the avocado) of this salad can be prepared ahead of time and kept chilled in the refrigerator until 2 hours before serving. Let everything come to room temperature, and then assemble the salad as indicated in the recipe.  Peel and chop the avocado soon before serving. Add as you are assembling the salad. 
Sometimes we add the lettuce with the vegetables and then toss it all with the dressing. We usually place the romaine on the platter as the foundation, and then place the dressed veggies over the lettuce, and then top with the shrimp. Either way works great. We think the bed of lettuce version makes a prettier presentation, but that’s up to you. 

Nutrition

Calories: 219kcal | Carbohydrates: 9g | Protein: 14g | Fat: 8g | Saturated Fat: 2g | Cholesterol: 143mg | Sodium: 701mg | Potassium: 317mg | Fiber: 3g | Sugar: 2g | Vitamin A: 397IU | Vitamin C: 12mg | Calcium: 97mg | Iron: 2mg

Classic Gazpacho

July 16, 2019 by The Loon 8 Comments

Pour classic gazpacho into chilled shot glasses for serving outside.

Classic Gazpacho is just that: Classic.

It is the quintessential summer culinary creation.

Go with the freshest produce from your farmer’s market and let Mother Nature deliver the goods. And wow, oh wow…does she ever!

Pour classic gazpacho into chilled shot glasses for serving outside.

CLASSIC GAZPACHO IS EASY TO MAKE AT HOME

Once you gather up the beautiful produce for gazpacho, the work is almost done.

A medium-sized food processor makes this iconic soup come together in minutes!

Watch us show you how to make Classic Gazpacho at home!


SEEK OUT A FARMER’S MARKET FOR MAKING GAZPACHO

We just love hitting our local farmer’s market during the spring and summer months to make classic warm weather dishes, such as gazpacho.

This is one dish you won’t want to skimp on freshness, that’s why seeking out the freshest produce around is worth the effort.

WHAT PRODUCE TO LOOK FOR

  • Tomatoes: We love Heirloom tomatoes
  • Cucumbers: We go with the large variety and not English cukes, though they would work, too.
  • Bell peppers: We love selecting multiple colors: Green, Red, Yellow and Oranage
  • Onion: Yellow or red is just fine!
  • Fresh aarsley: Always go with fresh herbs!
  • Fresh jalapeño: Remove the seeds and ribs to eliminate extra heat
  • Garlic: Minced!

Seek out produce from a farmer's market and place in a basket.

FINELY CHOP, BUT DON’T PUREE

We prep the ingredients in stages for our Classic Gazpacho and we use a food-processor to help us get just the perfect texture.

When you place the various ingredients in the food processor, be sure to pulse until you reach the desired consistency.

We think the perfect gazpacho is still a little chunky, and not completely liquefied. But, that’s a matter of taste and completely up to you and your preferences!

Process the cucumber and bell peppers first. Remove, and then process the onion and the parsley. Remove, and the pulse the tomatoes for about 15 seconds. It’s okay if the tomatoes become almost all liquid…that’s good for gazpacho.

Chop the cucumber and bell peppers in a food processor. Chop the onion and parsley in the food processor. Liquify the tomatoes in a food processor.

SERVE CLASSIC GAZPACHO CHILLED OR AT ROOM TEMP

We find that after mixing all the components together for the gazpacho, the flavors are so amazing, it’s really good to serve as is.

We do suggest, however, that you chill the soup for a couple hours, covered, in the refrigerator.

Even if you want to serve at room temperature, chilling the gazpacho for a couple hours will just help all the flavors meld together and heighten the taste even more.  Just remove after chilled, place on the kitchen counter until it’s room temperature, usually a couple hours.

Served the classic gazpacho in a large chilled bowl.

The fresh produce are the true stars of Classic Gazpacho. Although you can make this anytime of the year that you can get your hands on the produce, but summertime, when the produce is at it’s peak, is when this soup is off-the-charts delicious.

This soup is perfect for brunch, a baby or wedding shower, or easy-breezy Sunday on the patio.  Another amazing chilled soup recipe is our Watermelon Gazpacho with Jalapeño and Mint!

Gazpacho finds its roots in Spanish and Portuguese kitchens, but after one taste, it will be a soup you’ll want to serve time and time again during those gorgeous warm and sunny months!

WHAT TO SERVE ALONG SIDE GAZPAHCO

Best-Ever Chicken Salad
Broccoli and Cheddar Quiche
Cajun Pasta Salad
Blue Lagoon Cocktail

We love to serve our Classic Gazpacho in chilled shot glasses, too.  Talk about a shot of pure deliciousness!

Pour classic gazpacho into chilled shot glasses for serving at a party.

Pour gazpacho into chilled shot glasses for serving.
Print Recipe
5 from 1 vote

Classic Gazpacho

You can't get much more delicious and refreshing than Classic Gazpacho. This recipe is wonderful. The fresh garlic and jalapeno add a bit of a kick. But not too much! Set in the fridge for at least a couple hours to really let the flavors meld. Amazing!
Prep Time20 minutes mins
Chill2 hours hrs
Total Time2 hours hrs 20 minutes mins
Course: Soup
Cuisine: Spanish
Servings: 8
Calories: 126kcal
Author: Kris Longwell

Equipment

  • Food processor

Ingredients

  • 1 medium cucumber peeled, seeded, and coarsely chopped
  • 1 medium green bell pepper cored, seeded and coarsely chopped
  • 1 medium red bell pepper cored, seeded and coarsely chopped
  • 1 medium yellow onion coarsely chopped
  • ⅓ cup fresh parsley chopped
  • 2 ½ lb ripe tomatoes peeled (heat in boiling water for about 1 minute, then peel away the skin), and coarsely chopped
  • 1 cup tomato juice
  • ¼ cup red wine vinegar
  • 3 tablespoon extra-virgin olive oil
  • 3 garlic cloves minced
  • 1 jalapeno seeded and minced
  • 2 teaspoon salt

Instructions

  • In a food processor, finely chop (but don't puree) the cucumber and bell peppers.
  • Add to a large mixing bowl.
  • Add to food processor the onion and parsley. Chop, but don't puree.
  • Add the onion/parsley mixture to the cucumber/pepper mixture.
  • Add to food processor the tomatoes and pulse for about 15 to 30 seconds. (They will be very liquidy).
  • Add tomatoes to the veggies in the bowl.
  • Add to the bowl the tomato juice, red wine vinegar, olive oil, garlic, jalapeno and salt.
  • Stir well and refrigerate for at least 2 hours.
  • Serve in chilled vessels.

Video

Notes

Gazpacho can be served room temperature or chilled.  Serve in a large soup bowl or in individual chilled shot glasses.  Chilling the gazpacho for at least 2 hours helps the flavors to meld.  If you prefer to serve at room temperature, chill the soup, then let it sit out for another couple hours.  

Nutrition

Calories: 126kcal


Carnitas Tacos

July 13, 2019 by Kris Longwell 4 Comments

Place the shredded pork carnitas on a corn tortilla with pico de Gallo, cilantro and fresh lime.

Carnitas Tacos are truly an amazing Mexican treat.

We slow-cook a beautiful boneless pork shoulder for 10 hours until it becomes tender enough to shred with a couple forks.

And then, we assemble one of the best tacos you’ll ever have.

Place the shredded pork carnitas on a corn tortilla with pico de Gallo, cilantro and fresh lime.

CARNITAS TACOS ARE EASY TO MAKE AT HOME

As mentioned, we love to use our slow-cooker to gently simmer the pork all day (or night).

Simply put all the ingredients in your slow-cooker, then slow cook for 8 to 10 hours on low (or 4 to 6 on high), and get ready for amazing carnitas.

Watch us show you how easy it is to make these amazing Carnitas Tacos!


HOW TO MAKE AUTHENTIC CARNITAS…WELL, ALMOST

Carnitas are believed to have their origins in the Mexican state of Michoacán. Traditionally, small pieces of pork are cooked slowly in pork lard until very tender.

When developing our version of carnitas, we opted to bypass the lard and instead slow-cook a pork shoulder in our 6-qt slow-cooker in a medley of amazing aromatics.

The addition of citrus, soda (with sugar) and Mexican beer helps round out the flavors perfectly. Some folks also add whole milk, which is delicious, as well.

pork shoulder with citrus, herbs, Dr. Pepper and beer are used to slow cook the pork.

If you don’t have a slow cooker, you can certainly braise the pork in your oven.

If braising in the oven, pre-heat to 350°F, place the pork in a large Dutch oven, then add the remaining ingredients, cover, and roast for about 2 ½ hours.

We find that the slow-cooker, on low for 10 hours, produces the most shreddable pork imaginable, but braising in the oven is good, too.

Place the pork shoulder into the slow cooker with aromatics, citrus and liquids.

HOW TO SHRED THE CARNITAS

After the pork shoulder has slow cooked (preferably on low for 10 hours), carefully remove the meat from the vessel and place on a large baking sheet.

Save about 1 to 1 & ½ cups of the cooking liquid. This stuff is loaded with flavor.

At this point, all you need is a couple of forks to start pulling apart the meat. The meat will be so fall-apart tender, that you will have no problem at all shredding the meat. And the smell? Oh, it’s insanely delicious. But just wait.

Use two forks to shred the cooked pork apart for carnitas tacos.

In the traditional way of preparing carnitas, once the meat has become fall apart tender from cooking in the lard for hours, it’s time to crisp the meat up.

We achieve this at home by placing the meat under the broiler for about 5 to 10 minutes, until nice and crisp.

But before we do this, we pour the reserved cooking liquid all over the meat. Since broilers drastically vary from one to another, keep an eye on the meat! Once the meat has reached a nice brown, crispy exterior, get a large wooden spoon, stir around the meat, and stick back under the broiler for a few more minutes. We want the carnitas to be crispy all over on the outside, but still super tender on the inside!

Place the pork on a large baking sheet and crisp under a broiler for about 8 minutes.

SERVE CARNITAS TACOS WITH TRADITIONAL GARNISHES

First of all, you need a tortilla to place the amazing carnitas into. You can use corn or flour (we love corn, but that’s up to you). Gently heat the tortillas before serving. TRICK: Turn on your grill or gas burner, and quickly heat them over the heat. You’ll get a little char and warm them just enough, but don’t over do it, or they will dry out!

Other traditional garnishes include:

  • Pico de Gallo
  • Fresh cilantro
  • Guacamole
  • Fresh lime

Pork carnitas tacos with traditional garnishes and a glass of beer.

There is just something magical and extraordinary about homemade carnitas tacos. And if you love these tacos, you will absolutely flip for our homemade birria tacos!

We love to invite friends over for a festive taco party and let everyone build their own tacos!

The shredded pork also freezes beautifully for up to months. But good luck not eating all these amazing tacos in one sitting! They’re that incredibly delicious!

Stack three carnitas tacos on a taco stand.

A white platter with three Carnitas Tacos
Print Recipe
5 from 2 votes

Carnitas Tacos

Carnitas Tacos are Mexican-style shredded pork tacos that are bursting with amazing flavor and texture. Slow-cooked with incredible aromatics, citrus, soda and Mexican beer. Finished off under the broiler for a quick crisping. Taco perfection!
Prep Time15 minutes mins
Cook Time10 hours hrs
Under the broiler8 minutes mins
Total Time10 hours hrs 23 minutes mins
Course: Entree / Slow Cooker
Cuisine: Tex-Mex, Mexican
Servings: 8 people
Calories: 368kcal
Author: Kris Longwell

Equipment

  • 6-qt Slow-Cooker or Large Dutch Oven

Ingredients

FOR THE SPICE RUB

  • 3 teaspoon Kosher salt
  • 2 teaspoon Mexican oregano
  • 1 teaspoon dried cumin
  • 1 tablespoon ancho chile powder or regular chile powder
  • 1 teaspoon ground cinnamon

EVERYTHING ELSE

  • 1 4 to 5 lb boneless pork shoulder such as a Boston butt, can also use bone-in
  • 1 large white onion sliced
  • 4 garlic cloves roughly chopped
  • 2 bay leaves
  • Juice of 1 lime don't discard the squeezed lime
  • Juice of 2 oranges don't discard the squeezed oranges
  • 1 cup Mexican beer lager is good
  • 1 cup Dr. Pepper of Coca-Cola with real sugar, if available (if not, just regular soda will work)
  • Coarse sea salt (optional) for finishing the cooked meat

SERVED WITH

  • 8 to 12 corn or flour tortillas warmed
  • chopped onion
  • pico de gallo
  • fresh cilantro
  • fresh guacamole
  • fresh lime wedges

Instructions

  • Mix all the spice ingredients together in a small bowl.
  • Rub enough of the spice mixture over the pork to cover. Save the extra spice mixture.
  • Place a layer of onions on the bottom of the slow cooker and then place the meat on top. Add the remaining ingredients, incluing the squeezed lime and oranges, as well as the remaining spice mixture.
  • Cook on low for 8 to 10 hours (or on high for 4 to 6 hours)
  • Use two large spatulas to remove the pork to a large baking sheet. The meat will be extremely tender. Save 1 to 1 & ½ cups of the liquid from the slow cooker.
  • Use two forks to shred the meat. Pour the reserved liquid all over the pulled meat.
  • Place under a broiler on high for 4 to 8 minutes, keeping an eye on it as it cooks...don't let it burn! Turn the meat half-way through to ensure meat is gets crispy all over. Taste and sprinkle with more coarse sea salt, if desired.
  • Served at once with warmed tortillas and garnishes.

Video

Notes

To braise the pork in the oven, simply rub the pork with the spice mixture, then add all ingredients into a large roasting pan, with lid (a large Dutch oven works well) and place in a pre-heated oven at 350°F for 2 & ½ hours, or until very tender. 

Nutrition

Calories: 368kcal

Easy Pesto Sauce

July 9, 2019 by Kris Longwell 6 Comments

A bowl of easy pesto sauce in a small white bowl next to scattered pine nuts, a head of garlic, and fresh basil leaves.

Easy Pesto Sauce is incredibly fresh and bursting with vibrant flavors, making it an easy way to elevate your pasta, sandwiches, and more. Just a spoonful adds a delicious, herbaceous boost that transforms everyday dishes into something extraordinary.

A bowl of easy pesto sauce in a small white bowl next to scattered pine nuts, a head of garlic, and fresh basil leaves.
[feast_advanced_jump_to]

🌿 The Ingredients

With just a handful of simple ingredients, pesto sauce comes together to create a deeply flavorful and aromatic addition to any dish.

An arrangement of ingredients on a white wooden background including pine nuts, lemon juice, Parmesan cheese, fresh basil, olive oil, salt, pepper, and garlic.

👩🏼‍🍳 How To Make Easy Pesto Sauce

A person transferring toasted pine nuts from a small white bowl into the bowl of a food-processor that is filled with fresh basil, garlic, and grated Parmesan cheese.
  1. Step 1: In the bowl of your food processor, add the basil, garlic, Parmesan cheese, and toasted pine nuts.
A person holding a spoonful of chopped basil, pine nuts, and garlic over a food processor.
  1. Step 2: Process until uniformly chopped.
A person pouring extra-virgin olive oil through the tube of a food processor into the bowl that is processing pesto sauce.
  1. Step 3: With the motor on LOW, slowly add the EVOO through the tube of the food processor.
A person holding a heaping spoonful of easy pesto sauce over a small glass jar that is partially filled with the rest of the sauce.
  1. Step 4: Transfer to a jar with a tight-fitting lid. Keep in the fridge for up to 1 week.

🍽️ How To Serve

  • This sauce is very versatile. It’s best served at room temperature.
  • Remove the sauce from the fridge for 1 to 2 hours before serving.
  • This is wonderful when tossed with pasta for a great, simple pasta salad.
  • It makes a wonderful sauce for pizza. We use it in our BLT Pizza.
  • The sauce makes a wonderful condiment for most sandwiches. We use it on our Italian-Style Panini. Amazing!

Expert Tip

If you want to serve pesto with pasta, such as our Spaghetti with Pasta, we recommend blanching the basil first by simmering the fresh leaves for about 1 minute in boiling water, then transferring them to an ice bath. The blanching gives the pesto a milder basil flavor, which we feel works best for the dish.

🙋🏽‍♂️ Frequently Asked Questions

Can I make pesto sauce in a blender instead of a food processor?

You’ll get much better consistency with a food processor. We don’t recommend using a blender.

How do I prevent easy pesto sauce from turning brown after making it?

To keep pesto bright green, store it in an airtight container and drizzle a thin layer of olive oil on top before refrigerating.

Can I freeze easy pesto sauce made in a food processor?

Absolutely! Pesto freezes well—portion it into ice cube trays or small containers for easy use later without losing flavor.

A person using a spoon to spread easy pesto sauce over toasted French bread on a cutting board with a jar of the sauce nearby.

😋 Other Easy Delicious Sauces

  • A wooden spoon holding up a large spoonful of homemade marinara sauce over a pot filled with the simmering sauce.
    Homemade Marinara Sauce
  • A person holding up a spoonful of homemade romesco sauce from a food processor.
    Easy Romesco Sauce
  • A small white bowl filled with authentic chimichurri sauce with a spoon with some of the sauce nearby all on a white background.
    Easy Chimichurri Sauce
  • A hand using a small spoon to drizzle homemade tzatziki sauce over the end of a chicken gyro that is sitting next to a small jar of the sauce on a white platter.
    Homemade Tzatziki Sauce

Ready to make the freshest, tastiest pesto sauce in town? Go for it!

And when you do, be sure to take a photo of it, post it on Instagram, and tag @HowToFeedaLoon and hashtag #HowToFeedaLoon

A bowl of easy pesto sauce in a small white bowl next to scattered pine nuts, a head of garlic, and fresh basil leaves.
Print Recipe
5 from 3 votes

Easy Pesto Sauce

Easy Pesto Sauce really is easy. Perfect for pasta or sandwiches, or on a pizza! So packed with flavor and so easy!
Prep Time15 minutes mins
Total Time15 minutes mins
Course: Sauce
Cuisine: Italian
Servings: 6 people
Calories: 143kcal
Author: Kris Longwell

Equipment

  • Food processor

Ingredients

  • 5 teaspoon pine nuts toasted
  • 2 cups fresh basil
  • 3 cloves garlic roughly chopped
  • 1 tablespoon fresh lemon juice from one medium lemon
  • ⅓ cup Parmesan cheese grated
  • Kosher salt and black pepper
  • ⅓ cup extra-virgin olive oil

Instructions

  • Toast the pine nuts. Keep an eye on them, they burn easily! Set aside until ready to make the pesto.
    5 teaspoon pine nuts
  • In a food processor, add the basil, pine nuts, garlic, lemon juice, Parmesan cheese, and a pinch of salt and pepper. Process until thoroughly chopped. Remove the lid and scrape the sides of the mixture back down into the base of the processor, or blender.
    2 cups fresh basil, 3 cloves garlic, 1 tablespoon fresh lemon juice, ⅓ cup Parmesan cheese, Kosher salt and black pepper
  • Place the lid back on, and with the motor running, slowly add the olive oil through the feed tube. Process until smooth, about 1 minute. Turn off the motor.
    ⅓ cup extra-virgin olive oil
  • Keep in an air-tight container in the fridge for up to 1 week, or freeze for up to 3 months.

Video

Notes

NOTE: Watch the video near the top of the recipe for visual guidance.
Add the oil slowly, keeping an eye on the consistency. The pesto should be ‘runny.’ Depending on how tightly you packed the basil when measuring it, you may need less (or more) of the oil called for. 
The pesto will thicken in the fridge. Allow it to come to room temperature (on the counter for an hour or two) until ready to serve. Give it a good stir first. 
It will keep in a jar with a lid in the fridge for up to 10 to 14 days. 

Nutrition

Calories: 143kcal | Carbohydrates: 1g | Protein: 3g | Fat: 11g | Saturated Fat: 3g | Polyunsaturated Fat: 2g | Monounsaturated Fat: 6g | Cholesterol: 4mg | Sodium: 90mg | Potassium: 45mg | Fiber: 0.2g | Sugar: 0.1g | Vitamin A: 466IU | Vitamin C: 2mg | Calcium: 83mg | Iron: 0.5mg

Arancini (Italian Rice Balls)

July 3, 2019 by Kris Longwell 25 Comments

Split the arancini open and see the melted cheese and prosciutto

Arancini, also known as Italian Rice Balls, is one of our all-time favorites.

There is just something so tantalizingly delicious about these little balls of yumminess.

These are quickly deep-fried to golden crispy perfection.  The risotto delivers superior flavor.

Split the arancini open and see the melted cheese and prosciutto

ARANCINI IS EASY TO MAKE AT HOME

There are few simple tricks to making perfect risotto, which we show you step-by-step.

The rest is a snap!

Watch us show you how to make perfect Arancini in your own kitchen!

Arancini means ‘little oranges’ in Italian because they sort of look like little oranges once they come out of the fryer. All we know is they are nothing but pure deliciousness. These are very popular in Sicily and throughout Italian restaurants throughout the world.

Once you have made the risotto, it is important to let the rice mixture cool completely before rolling into balls.

If the risotto is too wet, then you can add more binding ingredients, such as more parmesan cheese or bread crumbs.

Arancini

Wet your hands when rolling the balls. Or, you might find that dusting your hands with flour will help. The risotto will be sticky, but once you dredge the arancini in the flour, egg and bread crumbs, they will hold together.

You can choose whatever filling you like for your Arancini. Sweet baby peas are popular along with a rich meat sauce. We love the simplicity of good-quality prosciutto and mozzarella. Ooey gooey, and oh so amazing!

They only take a few minutes to fry up to a golden perfection. If you are making a large batch of arancini, fry them in batches and keep the finished rice balls in a low-temp oven until ready to serve.

These are delicious served with homemade marinara. But honestly, they are so scrumptious as they are…you won’t even probably take the time to dip them in a sauce.

Arancini

Ready to make these incredible balls of Italian deliciousness? They are easier than you’d think. Go for it and ENJOY!!

A white platter with Arancini
Print Recipe
5 from 7 votes

Arancini (Italian Rice Balls)

This Arancini (Italian Rice Balls) recipe is pure appetizer perfection. Lightly fried to golden perfection. We love filling them with good-quality prosciutto and mozzarella. Small peas and meat sauce are a popular filling, too. These are perfect by themselves, but they are great with marinara for dipping, too. Pure deliciousness! Be sure to read the NOTE below!
Prep Time20 minutes mins
Cook Time45 minutes mins
Total Time1 hour hr 5 minutes mins
Course: Appetizer
Cuisine: Italian
Servings: 8 people
Calories: 436kcal
Author: Kris Longwell

Ingredients

  • 3 oz. prosciutto chopped
  • 3 oz. mozzarella shredded
  • 3 to 5 cups chicken stock
  • 1 tablespoon unsalted butter
  • ¼ cup shallots chopped
  • 1 cup Arborio rice
  • ¼ cup dry white wine
  • Kosher salt
  • ½ cup Parmesan cheese grated
  • 4 eggs divided
  • 1 cup all-purpose flour
  • 2 cups bread crumbs fine crumbs are best
  • Canola or vegetable oil for frying

Instructions

  • Combine the proscuitto and mozzarella in a bowl and set aside. (This will be the filling)
  • In a medium pot, heat the stock to a simmer.
  • Meanwhile, in a large heavy skillet or pot (preferably a Dutch oven), melt the butter over medium-high heat.
  • Add the shallots and cook until translucent, about 4 minutes.
  • Add the rice and cook until lightly toasted, about 8 minutes.
  • Add the wine and cook until almost evaporated, about 4 minutes.
  • Ladle over enough of the hot stock to cover the rice.
  • Stir frequently with a wooden spoon until almost all liquid is absorbed, about 8 minutes.
  • Add more stock and continue stirring until absorbed.
  • Add stock again, until absorbed and creamy and rice is soft (about 25 minutes total). Taste rice, if still not soft, continue adding hot stock and stirring until rice is soft and creamy. Don't let the risotto be too wet! Remove from the heat.
  • Add ¾ teaspoon salt, Parmesan cheese and 2 eggs and gently mix to incorporate. Set aside and let cool completely.
  • Heat the oil over medium-high heat until it reaches 365°F.
  • Spread the flour on a plate and the bread crumbs in a separate plate.
  • Add the remaining eggs and 2 tablespoons of water in a medium bowl.
  • In another bowl, mix together prosciutto and mozzarella.
  • At this point, the risotto will be sticky. However, if the mixture is too wet to roll a ball, then gradually add in more parmesan cheese and bread crumbs until you can just form a ball. The balls will stay together after you dredge them. Wet hands (or lightly floured hands) help when dredging.
  • Scoop about ¼ cup of the risotto (rice mixture) into the palm of your hand and place 1 portion of the prosciutto/mozzarella cheese mixture on top. Shape the rice into a ball and add more risotto, if necessary.
  • Roll the ball in flour, and then dip into the egg mixture to coat completely, shaking off excess.
  • Finally, roll the ball in the bread crumbs and place on a rack.
  • Repeat this process with remaining ingredients. Depending on the size of the rice balls, you wil have between 8 to 12 balls.
  • Using a slotted spoon, transfer the balls (a few at a time) to the hot oil and fry until golden, about 2 to 3 minutes.
  • Remove with slotted spoon and place on a rack. (Keep finished arancini in a warm oven).

Video

Notes

This bears repeating: The cooked risotto will be sticky. However, if the mixture is too wet to roll into individual balls, then gradually add in more parmesan cheese and bread crumbs until you can just form a ball. The balls will stay together after you dredge them. Wet hands (or lightly floured hands) help when dredging.  Moist is good...it makes the arancini very creamy on the inside and crispy on the outside. 

Nutrition

Calories: 436kcal
  • « Previous Page
  • 1
  • …
  • 14
  • 15
  • 16
  • 17
  • 18
  • …
  • 21
  • Next Page »

Welcome!

Kris & Wesley (The Loon) live for fun, food, and fabulousness. "How to Feed a Loon" is a celebration of just that. Come join us on this joyous culinary ride.

More about us

Thanksgiving Favorites

  • A straight-on view of a glazed Cornish hen sitting on a bed of wild rice pilaf all on a white dinner plate with a fork nearby and another plate of the same in the background.
    Glazed Cornish Hens with Wild Rice Stuffing
  • A large oval platter holding five twice baked sweet potatoes that are topped with toasted marshmallows
    Twice Baked Sweet Potatoes
  • A Roast Turkey Breast with Herbs resting on a white platter garnished fresh sage leaves and lemon wedges and a large carving knife nearby.
    Roast Turkey Breast with Herbs
  • A square white baking dish filled with corn casserole next to a plate filled with the same.
    Corn Casserole
  • A large white platter of cooked and carved spatchcocked turkey with cranberries next to it.
    Spatchcocked Turkey
  • An overhead view of a square white baking dish filled with cornbread dressing and sausage and cranberries.
    Cornbread Dressing with Sausage and Cranberries

Popular Recipes

  • best-ever chicken salad recipe
    Best-Ever Chicken Salad
  • Mahi Mahi tacos on a wooden table in a taco holder
    Amazing Mahi Mahi Tacos
  • A lemon wedge being squeezed onto a platter of chicken francese
    Chicken Francese
  • Southern Shrimp and Cheesy Grits recipe
    Southern Shrimp and Cheesy Grits
  • Slow Roasted Pork Shoulder on a platter with a side of gravy
    Slow Roasted Pork Shoulder
  • this is a baked jumbo crab au gratin in mini cast iron skillets
    Jumbo Lump Crab Au Gratin

Footer

↑ back to top

Explore

  • Recipe Index
  • About Us
  • Subscribe

About

  • Privacy Policy
  • Contact

Copyright © 2025 How to Feed a Loon • This website contains affiliate links, which means that if you click on a product link, we may receive a commission in return. How To Feed a Loon is a participant in the Amazon Services LLC Associates Program, an affiliate advertising program designed to provide a means for sites to earn advertising fees by advertising and linking to Amazon.com.

Rate This Recipe

Your vote:


A rating is required
A name is required
An email is required